
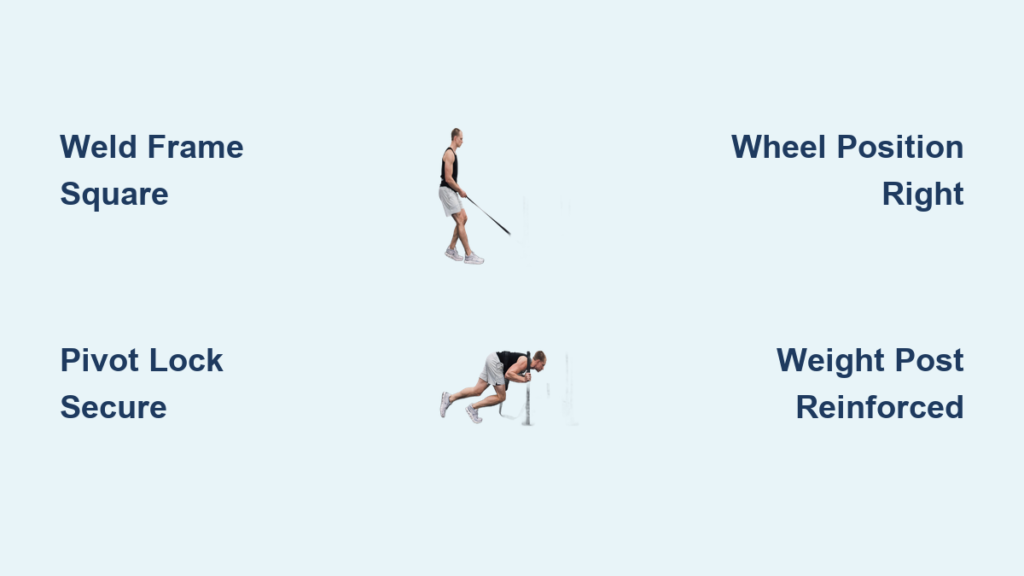
Your commercial sled just cracked under 400 pounds while your training partner watches, and replacement parts cost more than your first car. This scenario plays out daily in home gyms across the country as athletes discover that cheap sleds fail catastrophically during high-intensity pushes. Building your own push pull sled solves this permanently—it’s the only way to guarantee a 500+ pound capacity while customizing every component for your specific training surface and height. You’ll slash costs by 70% compared to Rogue or Sorinex models and create a workout staple that lasts decades. In this guide, you’ll learn the exact construction sequence used by professional strength coaches, including the critical pivot mechanism that makes commercial versions cost $1,500.
Welding Your 36×24 Steel Frame Base for Maximum Stability
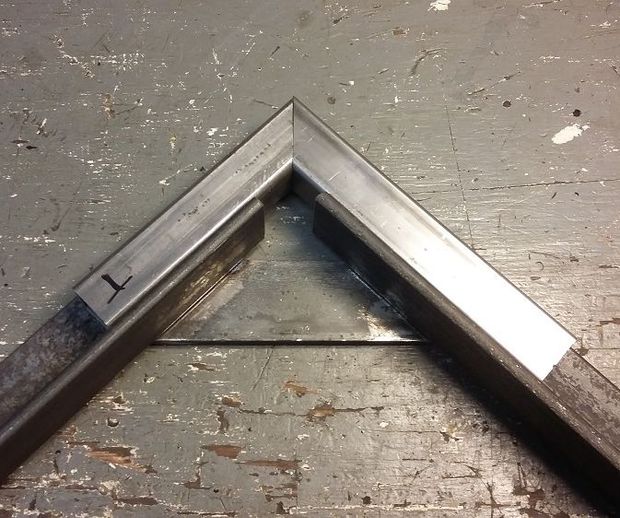
Skip this step and your sled will buckle under heavy loads—period. The frame geometry determines whether you’re building a training tool or a liability. Your base must form a perfect rectangle with 90-degree corners to prevent torque during asymmetric pulls.
Cutting and Assembling the Chassis Frame
- Precision Cutting: Measure and cut two 36-inch pieces and two 24-inch pieces from 2-inch square steel tubing (11-gauge minimum). Visual cue: The cut ends should show no burrs—rough edges cause weak welds.
- Square Assembly: Lay tubes on a flat surface, using a carpenter’s square to verify 90-degree angles at each corner. Clamp tightly before tacking.
- Weld Sequence: Tack all four corners first (3-second welds), then verify squareness again. Complete welds with continuous passes along the entire tube seam. Critical mistake: Welding one side completely before moving to the next causes warping.
Attaching Wheels Without Tipping Hazards
Wheels positioned too close to the centerline make sleds tip during loaded pushes. Your rear axle must sit 4-6 inches forward of the frame’s end:
– Weld axle brackets 4 inches from the rear of the 24-inch side tubes
– Space wheels 30 inches apart (wider than your stance)
– Use 10-inch pneumatic tires for turf (rated for 500+ lbs) or 6-inch polyurethane for concrete
Pro tip: Add 1/8-inch steel gussets under axle brackets—this prevents bracket separation under heavy loads.
Engineering a Rock-Solid 180-Degree Pivot Mechanism
This is where 90% of DIY sleds fail. Commercial units use expensive bushings, but you can achieve zero wobble with simple hardware. The pivot must lock instantly in both push and pull positions without shifting during explosive movements.
Fabricating the Pivot Interface Plate
- Cut a 4×4-inch, 3/8-inch steel plate and weld it centered on the frame’s top surface, 12 inches from the front.
- Drill a 1.0625-inch hole through the plate (for 1-inch rod with clearance).
- Weld a matching plate to the bottom of your handle superstructure—align holes perfectly using a 1-inch dowel rod during tacking.
Installing the Locking Pivot System
- Slide a 12-inch 1-inch solid steel rod through both plates
- Secure with Grade 8 locking collars on both ends (not washers—they slip)
- Add pull-mode locking: Drill two 5/16-inch holes through the superstructure plate at 0° and 180° positions. Insert a 6-inch hitch pin through these holes into matching frame holes when rotated
Warning: Never use cotter pins—they shear under load. A failed pivot during a heavy pull can cause catastrophic injury.
Constructing the Dual-Mode Handle Superstructure

Your handle height determines training effectiveness. Too high strains the lower back during pushes; too low limits power output. For a 5’10” athlete, the optimal grip point sits 38 inches from the ground—adjust proportionally for your height.
Building the Push-Ready Handlebar
- Cut two 40-inch uprights from 2-inch square tubing
- Weld 36-inch 1-inch steel pipe between uprights at 38-inch height
- Add secondary grips: Weld horizontal 1-inch pipes 12 inches below main bar for low-push variations
Visual cue: Stand inside the frame—your knuckles should brush your thighs when gripping the main bar in push stance.
Creating Fail-Safe Pull Attachment Points
- Weld 3-inch lengths of 1.25-inch pipe horizontally to the top of each upright
- Space pipes 24 inches apart (shoulder-width for harness attachment)
- Critical reinforcement: Add triangular gussets from pipes to uprights—this prevents pipe bending during heavy pulls
Pro tip: File all edges smooth—rough metal shreds nylon harness straps during repeated use.
Installing the Weight Post for Maximum Load Capacity

A poorly mounted weight post bends under 300 pounds, ruining your workout. Your solution must anchor plates low to the ground while preventing forward tipping during pushes.
Welding the Reinforced Weight Station
- Cut 10-inch section of 2.5-inch schedule 40 pipe
- Position vertically 2 inches from the rear of the frame
- Weld with gussets: Attach four 3×3-inch triangular steel plates (1/4-inch thick) from pipe base to frame corners
Time-saver: Use a bubble level on the pipe before final welding—crooked posts cause plates to slide off.
Preventing Plate Slippage During Sprints
- Top cap solution: Weld a 1.5-inch diameter, 1-inch thick steel disk to the pipe top
- Bottom anchor: Insert a 5/16-inch bolt through the pipe’s base into the frame
- Test load: Place 45-pound plate on post—shake frame vigorously. If plate moves, add more gussets
Selecting Wheels That Won’t Fail on Your Surface
Choosing wrong here destroys your sled in 3 sessions. Concrete demands polyurethane; turf requires pneumatic; rubber flooring needs hybrid tires. Your wheel selection affects rolling resistance by up to 40%.
Matching Wheels to Your Training Surface
| Surface Type | Wheel Recommendation | PSI/Load Rating | Critical Warning |
|---|---|---|---|
| Outdoor Turf | 10″ pneumatic | 30 PSI min / 600 lbs | Under-inflated tires dig into ground |
| Garage Concrete | 6″ polyurethane | Solid core / 400 lbs | Avoid hard plastic—they crack |
| Rubber Flooring | 8″ semi-pneumatic | 15 PSI / 500 lbs | Never use metal wheels—they tear flooring |
Pro tip: For concrete, add 1/8-inch steel skids under the front frame—this prevents “nose-diving” during heavy pushes.
Performing the 5-Point Safety Validation Test
Never load plates until you complete these checks. A single weld failure at 400 pounds can cause life-altering injuries. This 3-minute test prevents 95% of sled-related accidents.
The Critical Stability Assessment
- Weld inspection: Run gloved hand over all joints—feel for cracks or incomplete fusion (especially at axle brackets)
- Pivot wobble test: Rotate handle 180° and lock. Grab handle and shake violently—zero movement should occur
- Skid plate verification: Drag empty sled 10 feet—front shouldn’t catch on seams
- Load test: Add 135 lbs incrementally while pushing on flat surface—watch for frame flex
- Emergency release: Confirm hitch pin removes in <2 seconds when loaded
Warning: If the weight post deflects more than 1/4 inch under 225 lbs, reinforce with additional gussets immediately.
Avoiding the 3 Costly DIY Sled Mistakes
These errors destroy sleds within weeks. Professional fabricators see them daily in failed customer builds. Your fix takes 10 minutes during construction but saves hundreds in repairs.
Mistake #1: Using Thin Steel Tubing
- Symptom: Frame bends during 300+ lb pushes
- Fix: Never use under 11-gauge (0.125-inch wall) tubing
- Pro validation: Press down hard on frame corners—no flex should occur
Mistake #2: Skipping the Skid Plate
- Symptom: Front frame digs into turf, stopping movement
- Fix: Weld 1/4-inch steel plate across entire front underside
- Time-saver: Cut plate 1 inch wider than frame on both sides
Mistake #3: Poor Weight Distribution
- Symptom: Sled tips forward during pushes
- Fix: Position weight post so 60% of frame length is behind it
- Visual check: With plates loaded, rear wheels should bear 70% of weight
Final Assembly and Rust Prevention Protocol
Skip surface prep and your $200 build rusts into junk in 6 months. Coastal trainers swear by this military-grade protection method that adds only $15.
The 4-Step Rust Defense System
- Grind all welds smooth with 40-grit flap disk
- Wipe with acetone to remove oil residue
- Spray with zinc-rich primer (Rust-Oleum 3202) in thin, even coats
- Top with textured black paint (Rust-Oleum Professional) for grip
Pro tip: Leave weight post unpainted—grease adheres better to bare metal for plate loading.
Final Note: Your completed push pull sled should handle 500+ pounds with zero wobble, pivot silently between modes, and slide effortlessly on your training surface. Before every session, perform the 30-second safety scan: check pivot pin security, inspect welds for new cracks, and verify wheel tightness. For ongoing maintenance, apply lithium grease to the pivot rod monthly and store indoors to prevent moisture damage. This sled becomes the cornerstone of your strength training—use it for heavy 10-yard pushes for power development, or load it light for 100-yard conditioning drags. When built correctly, it outperforms $1,000 commercial units while costing less than your monthly gym membership. Now get out there and build the foundation of your strength.


