
You’re standing in front of a prowler sled, ready to transform your strength and conditioning, but something feels off. Maybe your back aches after pushing, or the sled keeps tipping forward, or you’re just not seeing the explosive power gains you expected. The prowler sled is one of the most effective conditioning tools available, yet most athletes miss out on its full potential by using improper technique. When you learn how to use a prowler sled correctly, you’ll build raw leg drive, develop explosive acceleration, and create the kind of work capacity that separates elite performers from the rest. This guide cuts through the confusion and gives you the exact techniques, programming protocols, and troubleshooting fixes you need to maximize results while staying injury-free.
The Forward Lean Method: Best Practice for Maximum Power
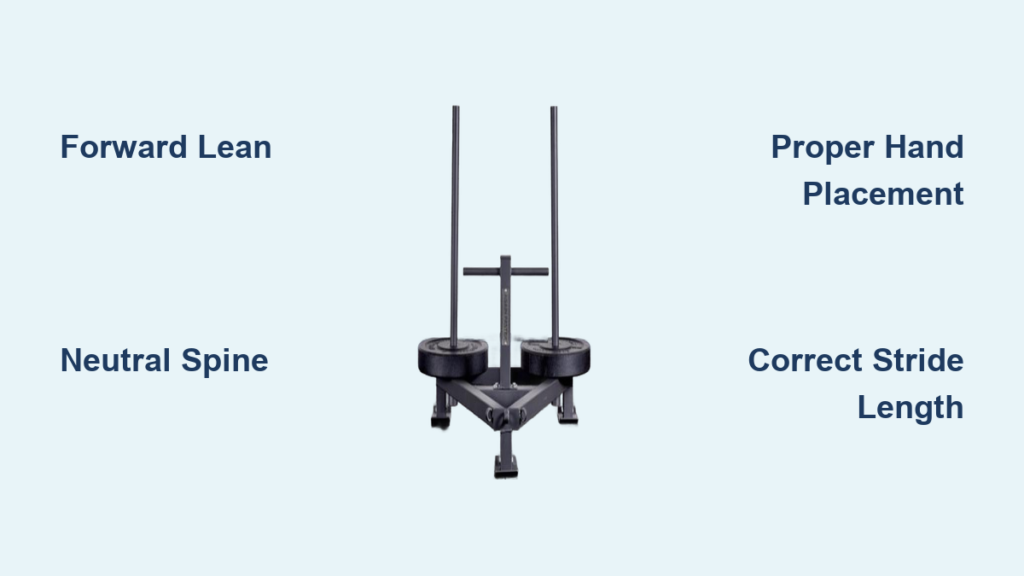
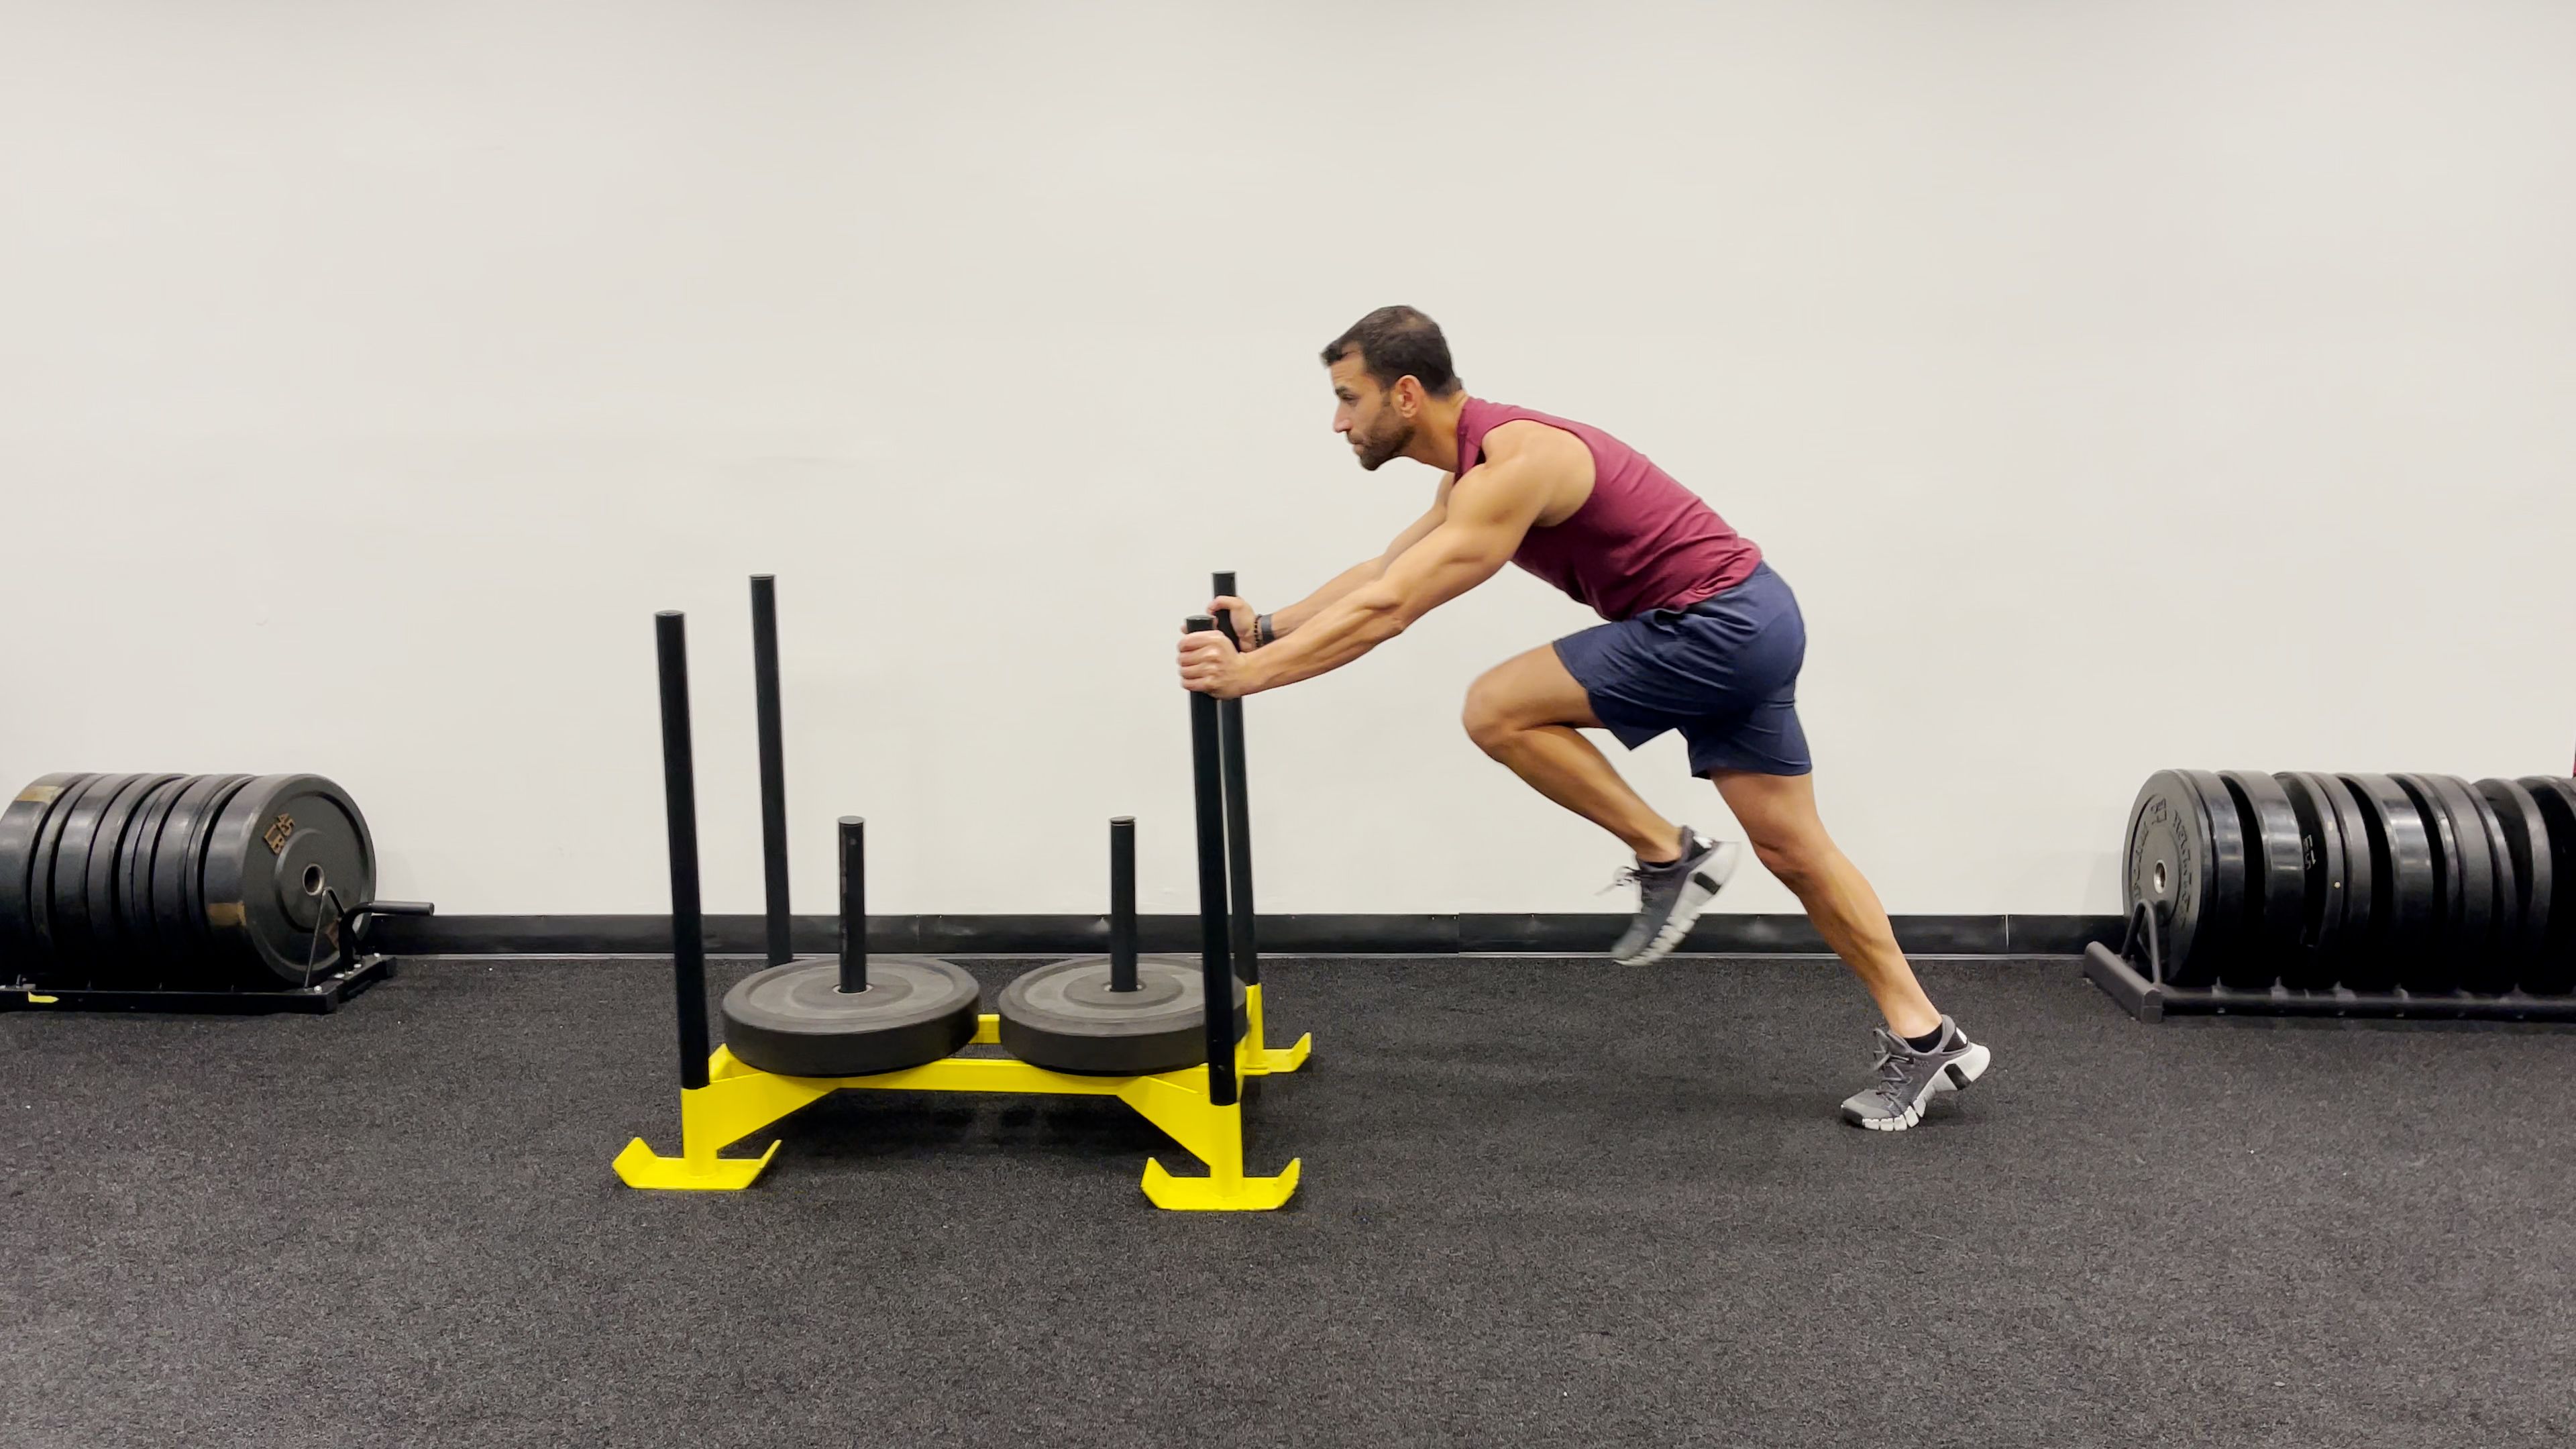
Your starting position makes or breaks your entire push. While some coaches advocate for a more vertical torso position, the forward lean method delivers superior power transfer and reduces injury risk for most athletes.
Why Your Starting Position Determines Your Push Success
Stand behind the prowler with your feet in an athletic stance, slightly staggered for better balance. Place your hands firmly on the posts, arms extended but not locked. The critical element is your body angle—lean forward approximately 45 degrees from your hips, keeping your spine neutral and core tight. This position engages your entire posterior chain rather than isolating your quads. Your head should stay in line with your spine, eyes looking 10-15 feet ahead, not down at the ground. This forward lean creates the optimal angle to transfer force from your legs through your core and into the sled.
How to Achieve the Perfect 45-Degree Angle
Finding your ideal angle depends on your height and limb proportions. Shorter athletes (5’4″ and under) may need to adjust their hand placement higher on the posts to maintain proper alignment. Taller athletes often benefit from a slightly more aggressive lean. The telltale sign you’ve got it right: when you push, the sled moves smoothly without tipping, and your power comes primarily from your legs and hips, not your arms. If you find yourself hunched over with a rounded back, you’re compromising spinal safety and reducing power output.
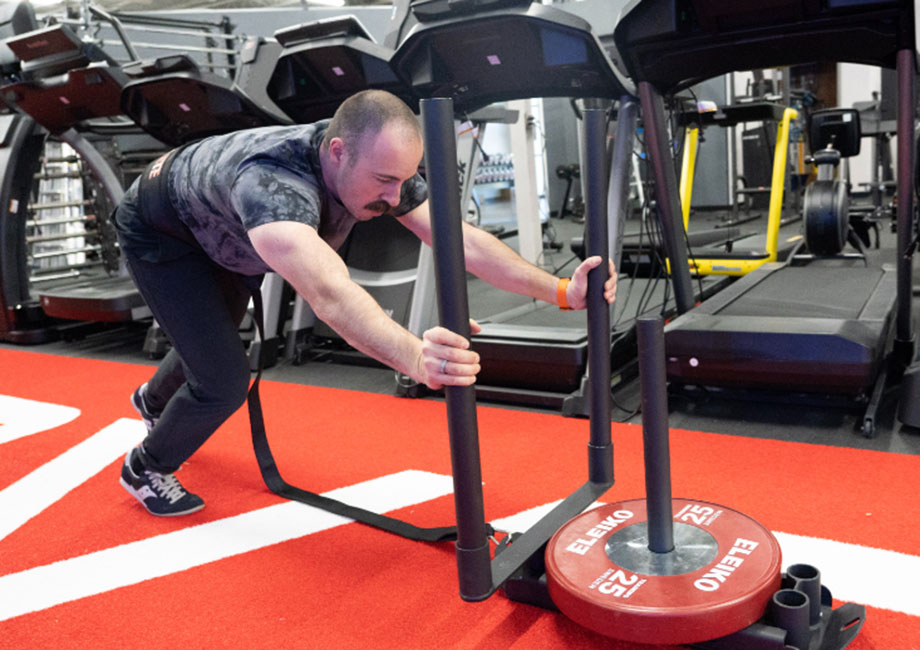
Hand Placement Mistakes That Kill Your Momentum
Your hands should grip the posts firmly but without excessive tension—your arms are conduits for force, not the primary drivers. Avoid tucking your elbows at your ribs, which restricts power transfer. Instead, extend your arms forward in line with your shoulders. If the sled tips forward during your push, raise your hand placement on the posts. If you struggle to maintain forward momentum, lower your hands slightly. Experiment with different positions during your warm-up sets to find what works best for your biomechanics.
Correcting the Most Common Prowler Push Errors
Even experienced athletes make critical mistakes that undermine their prowler training. Fix these issues immediately to prevent injury and maximize results.
Why Your Sled Keeps Tipping (And How to Fix It)
When the prowler’s front edge lifts off the ground, you’re either leaning too low or pushing through the wrong part of your foot. Correct this by increasing your forward body angle while focusing on driving through your entire foot—not just your toes. Shorten your initial stride to maintain control. If you’re on turf, you may need slightly more weight to counteract the lower friction. On concrete, ensure your path is completely flat, as even minor imperfections can cause tipping.
The Rounded Back Danger Every Beginner Makes
Many athletes bend at the waist with a rounded spine, putting dangerous stress on their lumbar discs. This happens when you try to “walk” with long strides instead of driving powerfully from your hips. Keep your spine neutral by thinking “chest up” while maintaining your forward lean from the hips. Engage your core as if bracing for a punch. If your lower back fatigues before your legs, stop immediately—this indicates dangerous form breakdown.
Overstriding vs. Power Strides: Finding Your Goldilocks Zone
Taking too large a step reduces power transfer and destabilizes your position. Your feet should stay directly beneath your center of mass. For heavy loads, use short, rapid steps—almost a “pawing” motion with your feet. For speed work, take longer strides but maintain that powerful hip drive. The sweet spot: steps where your front knee stays behind your toes during the push-off phase. If you’re stumbling or losing balance, shorten your stride immediately.
Setting Up Your Prowler for Different Training Goals

Proper setup transforms the prowler from a generic conditioning tool into a precision instrument for your specific goals.
Weight Configuration: From Beginner to Advanced Loads
Start with lighter loads than you think—you’ll be surprised how challenging even 50% of your body weight can be. Beginners should use 50-75% of body weight for technique development. Intermediate athletes progress to 75-100% for power work. Advanced users can push 100-150% of body weight for maximal strength development. Always load weight plates evenly on both sides—nothing sabotages your form like an unbalanced sled pulling you off course. Secure plates with collars to prevent shifting during your push.
Surface Matters: Turf vs. Concrete vs. Grass Adjustments
Each surface requires different technique and loading. On artificial turf, you’ll need more weight due to lower friction—start with 25% more than you’d use on grass. Concrete demands perfect form to avoid surface damage; consider rubberized wheels if training indoors. Grass provides natural resistance but varies with moisture and length—wet grass significantly increases difficulty. Always inspect your path for debris, divots, or obstacles before pushing.
Safety Checks You Must Complete Before Every Push
Never skip these critical safety steps: Verify weight plates are securely fastened with collars. Ensure your path is clear for at least 15 meters with no obstacles. Check that the sled posts are properly secured to the frame. Wear flat-soled training shoes with good grip—running shoes with cushioned heels compromise stability. For beginners, have a spotter watch your first few pushes to catch form breakdown you might miss.
Power-Building Prowler Protocols That Actually Work
How you program your prowler work determines whether you build explosive power or just exhaustion.
Heavy Load Training for Explosive Strength (75-100% Body Weight)
For pure strength development, load the sled heavily enough that 10-20 meters is your limit. Perform 3-5 sets of 3-5 pushes with 2-5 minutes rest between sets. Focus on maximal force production with each step—your goal is quality over quantity. If your speed drops more than 10% from push to push, the load is too heavy or your rest is insufficient. This protocol builds the kind of leg drive that translates directly to explosive sports movements.
Speed Development with Light Loads (25-50% Body Weight)
For acceleration and speed work, use lighter loads that allow you to maintain near-maximal running mechanics. Push 20-50 meters with 30-60 seconds rest between sets. Aim for 6-12 total pushes per session. The work-to-rest ratio is critical here—use a 1:3 or 1:4 ratio (e.g., 15 seconds pushing followed by 45-60 seconds rest). This develops your ability to produce force rapidly, directly improving sprint performance.
The Anaerobic Conditioning Workout That Leaves You Gasping
For brutal conditioning, try this protocol: 8 x 40m pushes with moderate load, 30 seconds work followed by 30 seconds rest. Complete 4 rounds with 2 minutes rest between rounds. This 12-minute workout will challenge even the fittest athletes. Focus on maintaining consistent speed across all pushes—if your time slows more than 15%, reduce the load slightly for your next session. This builds the kind of work capacity that keeps you performing when others fade.
The Complete Beginner’s First Prowler Session
Your first session should focus entirely on technique mastery, not intensity.
Your Step-by-Step 4-Week Progression Plan
Week 1: Practice starting position and body angle with no weight. Complete 5 x 10m pushes focusing solely on form. Week 2: Add 25-50% body weight. Complete 4 x 15m pushes with 90 seconds rest. Week 3: Increase to 50-75% body weight. Complete 3 x 20m pushes with 2 minutes rest. Week 4: Introduce varied loads—2 heavy pushes (75%), 2 moderate (50%), 2 light (25%) for 3 sets each.
When to Add Weight (And When to Back Off)
Only increase weight when you can complete all sets with perfect form and consistent speed. If your time slows more than 10% across a set, the load is too heavy. If your form breaks down before completing the distance, reduce the weight by 10-15%. Listen to your body—delayed onset muscle soreness is normal, but sharp pain or joint discomfort means you’ve pushed too hard.
Recognizing Proper Form vs. Dangerous Form Breakdown
Good form indicators: Smooth sled movement without tipping, consistent stride pattern, power coming from legs/hips, neutral spine. Danger signs: Sled tipping repeatedly, rounded back, excessive arm movement, stumbling or loss of balance, facial grimacing from strain. If you notice any danger signs, stop the set immediately—pushing through bad form defeats the purpose and risks injury.
The prowler sled rewards perfect technique with incredible results but punishes sloppy form with frustration and potential injury. Start light, master the forward lean position, and gradually build intensity as your technique improves. Within weeks, you’ll notice explosive power gains in your sprints, jumps, and sport-specific movements that other training simply can’t match. Remember: it’s not about how much weight you can move, but how powerfully and efficiently you can move it. Push with purpose, not just effort, and the prowler will transform your athletic performance.


