
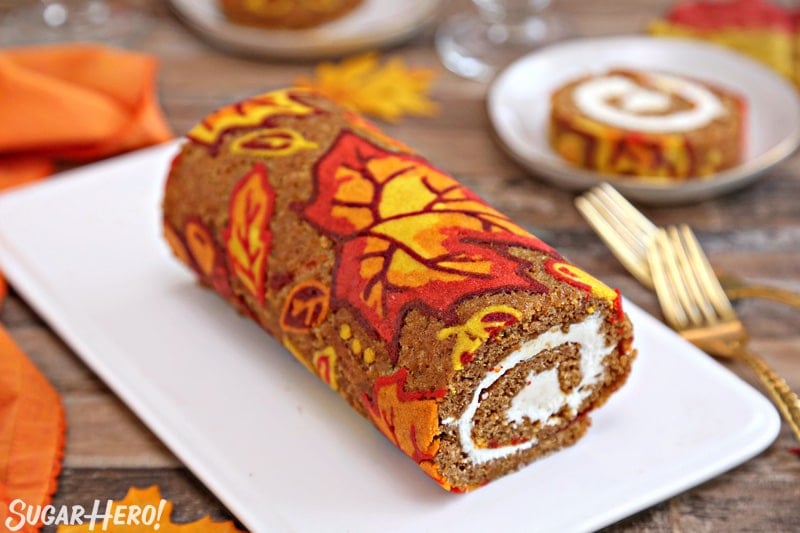
Nothing ruins the excitement of baking a beautiful pumpkin roll faster than watching it crack and crumble when you try to roll it. This delicate dessert demands precision at every stage, but none is more critical than understanding exactly how long a pumpkin roll needs to cool before rolling and filling. Getting the cooling process wrong transforms what should be a showstopper dessert into a frustrating mess of broken cake layers and smeared filling.
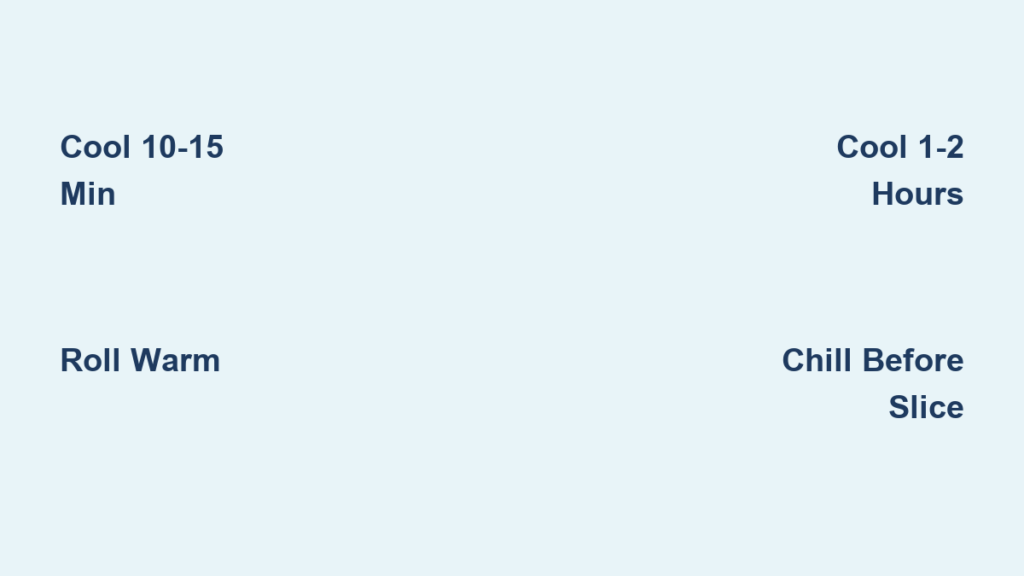
The truth is, pumpkin roll cooling isn’t just about waiting—it’s a strategic two-stage process that makes or breaks your final result. Most home bakers make the critical mistake of either cooling too long or not long enough, leading to inevitable cracks. The perfect pumpkin roll requires cooling for exactly 10-15 minutes before the initial warm roll, followed by a complete 1-2 hour cool-down period while rolled. This precise timing allows the delicate sponge cake to set properly while maintaining the flexibility needed for that signature spiral shape.
The Critical First 15 Minutes: When to Roll Your Warm Pumpkin Cake
The moment your pumpkin roll comes out of the oven begins the most time-sensitive phase of the entire process. This initial cooling window determines whether your cake will roll smoothly or shatter into pieces. Many bakers mistakenly let their cake cool completely on the baking sheet, not realizing this is the primary cause of cracking.
Recognizing the Perfect Rolling Temperature
Your pumpkin roll needs to cool just enough to handle safely but remain warm enough to be pliable. Here’s exactly what to look for during this crucial 10-15 minute window:
- Surface Temperature Check: The cake surface should feel warm but not hot to the touch—about 110-120°F. If steam is still rising, it’s too hot. If it feels cool or room temperature, it’s too late.
- Edge Inspection: The edges should have pulled slightly away from the pan but still feel soft and flexible when gently pressed.
- Parchment Test: Carefully lift a corner of the parchment paper—if the cake releases easily without sticking, it’s ready. If it tears or sticks, give it another 2-3 minutes.
Step-by-Step: Rolling Your Pumpkin Cake While Warm
-
Prepare Your Workspace (Before Removing From Oven): Lay out a large, clean kitchen towel (flour-sack or thin tea towel) on your counter and dust generously with powdered sugar. Alternatively, use parchment paper for less mess—never paper towels or terry cloth towels that will stick to the cake.
-
Invert Immediately After Cooling: After precisely 10-15 minutes of cooling on the baking sheet (set a timer!), carefully invert the entire pan onto your prepared towel. Work quickly but gently to avoid breaking the warm cake.
-
Remove Baking Parchment: Peel away the parchment paper the cake was baked on. If any sticks, use a thin spatula to gently loosen it—this is why you don’t skip the powdered sugar coating.
-
Roll While Warm and Flexible: Starting at one short end, gently but firmly roll the cake up with the towel. This isn’t the final roll—it’s a “training roll” that sets the cake’s memory. Roll it tightly enough to create the spiral shape but not so tight that filling would squeeze out later.
Complete Cooling: Why Your Rolled Pumpkin Cake Needs 1-2 Hours
Once you’ve completed that critical warm roll, your pumpkin roll enters its second cooling phase—the stage most home bakers rush to completion. This complete cooling period is non-negotiable for achieving clean slices and preventing cracks when you finally add the filling.
The Science Behind Full Cooling
When you roll your pumpkin cake while warm and let it cool completely in that position, you’re allowing three critical processes to occur:
- Protein Setting: The egg proteins in the sponge cake fully set in the rolled position, creating permanent “memory” of the spiral shape
- Moisture Redistribution: The internal moisture evenly distributes throughout the cake, preventing dry spots that lead to cracking
- Structural Stabilization: The cake firms up just enough to handle filling while remaining flexible enough for the final re-roll
How to Know When Cooling Is Complete
Don’t guess—use these concrete indicators that your pumpkin roll has cooled sufficiently:
- Temperature Check: The roll should be completely cool to the touch all the way through (not just on the surface)
- Firmness Test: Gently press the roll—it should feel firm but yield slightly under pressure, like a memory foam pillow
- No Warm Spots: Run your hand along the entire roll to ensure no warm spots remain, especially near the center
Common Cooling Mistakes That Ruin Pumpkin Rolls
Even with the right timing, subtle errors during the cooling process can sabotage your efforts. Recognizing these pitfalls will save you from repeated failures.
Mistake #1: Cooling Completely Before First Roll
The single biggest error is letting the pumpkin cake cool entirely on the baking sheet. A completely cooled sponge loses its flexibility and will crack immediately when you attempt to roll it for the first time. The warm roll isn’t optional—it’s the foundation of success.
Mistake #2: Using the Wrong Surface Material
Paper towels, terry cloth towels, or insufficient powdered sugar cause the warm cake to stick permanently. When you try to unroll it later, large chunks tear away. Always use a lint-free flour-sack towel or parchment paper with adequate powdered sugar.
Mistake #3: Rushing the Filling Process
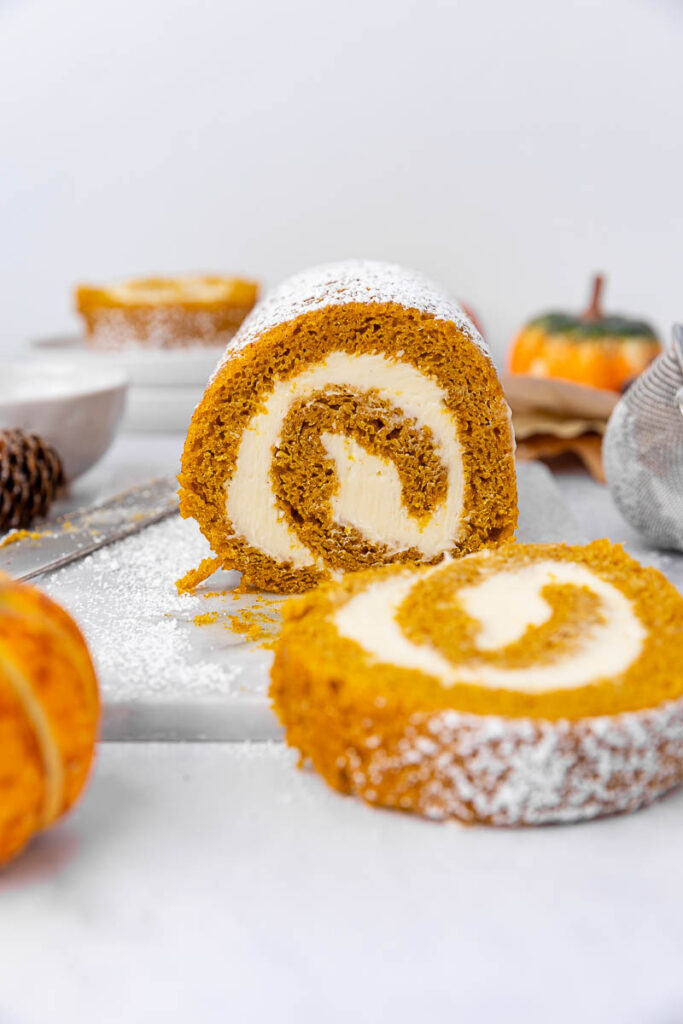
Adding cream cheese filling to a still-warm cake causes immediate melting and seepage. The filling becomes runny, making clean rolling impossible and creating a soggy mess. Always ensure the cake is completely cool before unrolling for filling.
The Complete Pumpkin Roll Cooling Timeline
For perfect results every time, follow this exact cooling schedule:
-
Baking Completion: Remove pumpkin roll from oven when a toothpick inserted in center comes out clean (typically 12-15 minutes)
-
Initial Cooling: Let cake cool on baking sheet for exactly 10-15 minutes—no more, no less. Set a visible timer!
-
First Roll: Invert onto prepared towel, remove parchment, and roll while still warm (this takes 2-3 minutes)
-
Complete Cooling: Let the rolled cake cool completely on a wire rack for 1-2 hours. Never cover it during this phase—trapped moisture makes the cake soggy.
-
Filling Preparation: While cake cools, prepare your cream cheese filling and chill it slightly.
-
Final Assembly: Once completely cool, unroll gently, spread filling evenly, re-roll, and wrap in plastic.
-
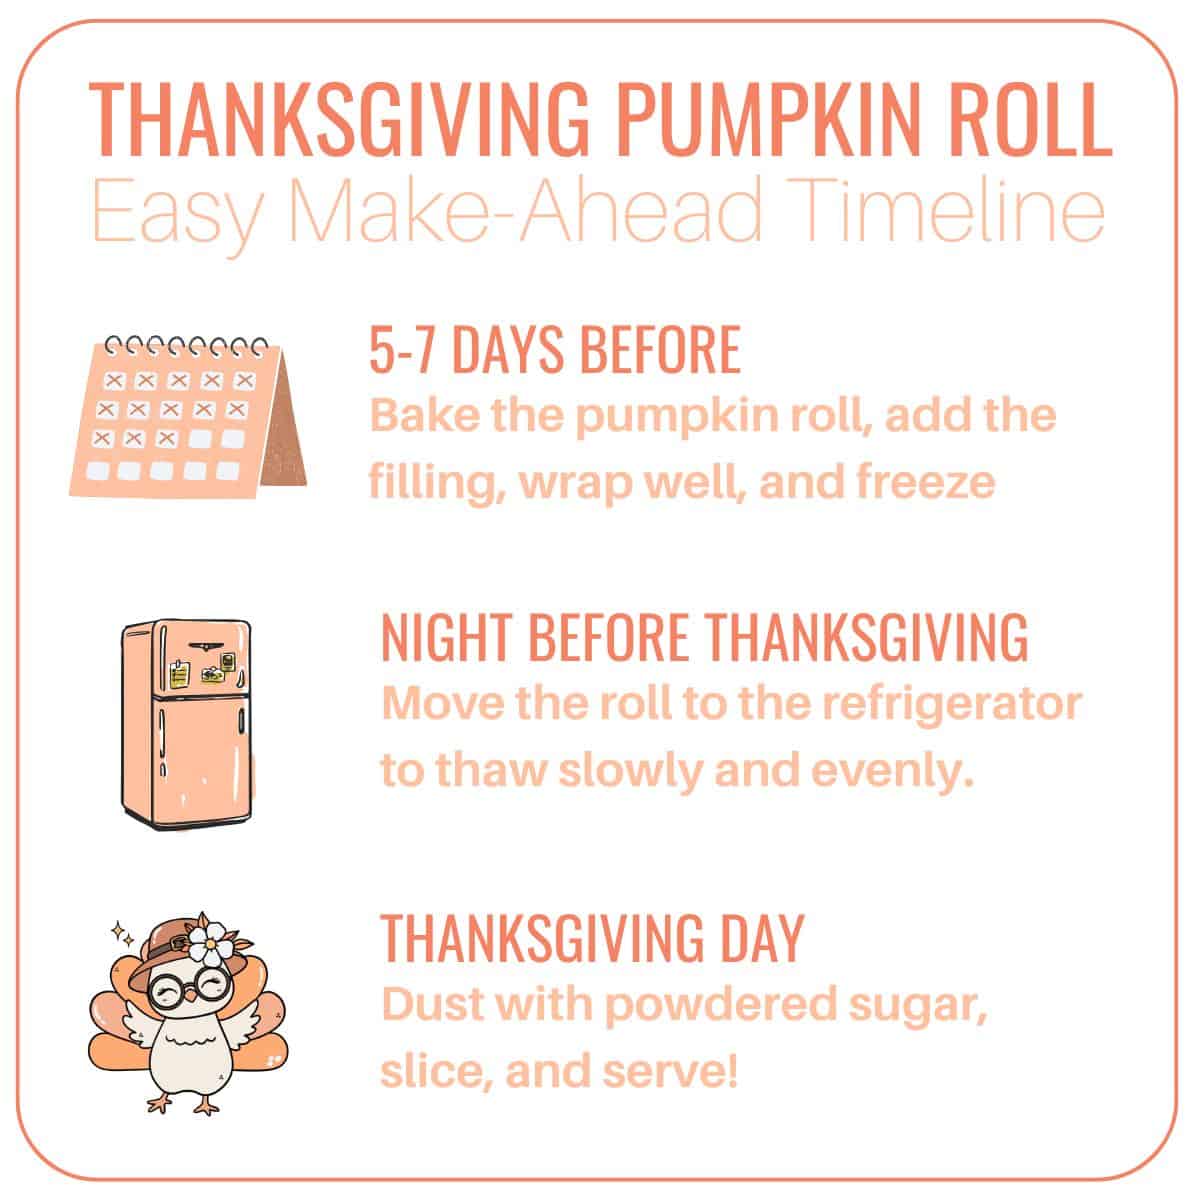
Chilling Period: Refrigerate filled roll for at least 1 hour (minimum) or 3-4 hours (ideal) before slicing.
Why the 1-2 Hour Cooling Period Can’t Be Rushed
Many bakers try to shortcut the complete cooling phase, not realizing that insufficient cooling causes structural failures during final assembly. When your pumpkin roll hasn’t cooled completely:
- Filling Melts: Even slightly warm cake transfers heat to cream cheese filling, causing separation and weeping
- Cracks Reappear: The cake hasn’t fully set in its spiral shape, so unrolling creates new stress points
- Poor Slicing: Warm cake doesn’t hold clean edges, resulting in ragged, misshapen slices
The ideal cooling environment is a draft-free counter at normal room temperature (68-72°F). Avoid refrigerating the roll during this phase—rapid cooling causes condensation that makes the cake soggy.
Pro Tips for Perfect Pumpkin Roll Cooling Every Time
Seasoned bakers know these insider techniques that guarantee success:
- The Finger Test: Press lightly on the cake surface during initial cooling—if your fingerprint remains but slowly rebounds, it’s perfect rolling temperature
- Towel Technique: Roll the cake in the towel but leave the ends exposed during cooling to prevent steaming and sogginess
- Cooling Rack Matters: Always cool on a wire rack, never directly on the counter—the air circulation prevents bottom sogginess
- Humidity Adjustment: In humid environments, add 5-10 minutes to your cooling time; in dry climates, reduce by 5 minutes
Troubleshooting Cooling Problems
Problem: My pumpkin roll cracked despite following the timing
Solution: You likely rolled too tightly during the warm roll phase. The cake needs gentle pressure—think “hugging” not “squeezing”
Problem: The cake stuck to my towel
Solution: Use more powdered sugar next time, or switch to parchment paper exclusively. Flour-sack towels work best for this application
Problem: My roll developed condensation during cooling
Solution: You wrapped it too soon or cooled in a humid environment. Always cool completely uncovered before wrapping
Final Chilling: The Last Step Before Serving
After filling and re-rolling your pumpkin roll, proper chilling completes the process:
- Minimum Chill: 1 hour for set filling and cleaner slicing
- Ideal Chill: 3-4 hours for optimal texture and flavor integration
- Best Results: Overnight refrigeration—the cake flavors meld beautifully, and slicing becomes effortless
Never skip this final chill—even if your filling seems set. The brief refrigeration period allows the filling to stabilize and creates those picture-perfect spiral slices everyone admires.
The perfect pumpkin roll isn’t about fancy ingredients or complicated techniques—it’s about respecting the precise cooling timeline. By following the exact 10-15 minute warm roll window followed by the complete 1-2 hour cooling period, you’ll consistently create stunning, crack-free pumpkin rolls that impress every time. Remember: patience during cooling pays off with professional results at serving time. When someone asks how long your pumpkin roll needs to cool, you’ll know the exact answer that makes all the difference.


