
Tired of paying premium prices for store-bought crinkle paper when wrapping gifts or packing delicate items? Your paper shredder holds the secret to creating beautiful, eco-friendly crinkle paper in minutes—no special equipment required. This simple DIY method turns ordinary scrap paper into vibrant, textured filler that elevates any gift presentation while reducing waste. Whether you’re preparing holiday packages, crafting party decorations, or running a small business that needs affordable packaging solutions, learning how to make crinkle paper with a shredder saves money and resources.
Most people don’t realize their everyday paper shredder can double as a crinkle paper maker with just one extra step after shredding. Instead of throwing away colorful magazines, construction paper scraps, or unused wrapping paper, you can transform them into professional-looking packaging material. The best part? You control the colors, texture, and volume—perfect for themed events or business branding. In this guide, you’ll discover the exact shredding techniques, paper selections, and hand-finishing methods that create perfect crinkle paper every time.
Why Your Standard Shredded Paper Isn’t Crinkle Paper (And How to Fix It)
When you shred paper normally, you get flat strips that lack the signature bounce and texture of commercial crinkle paper. The difference lies in the finishing process—real crinkle paper has broken fibers that create volume and springiness. Standard shredded strips lie flat and compressed, providing minimal cushioning and visual appeal for packaging.
The key to transforming shredded paper into proper crinkle paper happens after it exits your shredder. You need to manually disrupt the paper fibers through scrunching and fluffing. This simple action breaks down the rigid structure of the paper strips, creating air pockets that give crinkle paper its distinctive springy texture and volume. Without this crucial step, your shredded paper remains flat and ineffective as packaging material.
How Paper Fiber Structure Creates the Perfect Crinkle
Paper consists of interlocking fibers that give it strength and structure. When paper is freshly shredded, these fibers remain aligned, creating stiff strips. The scrunching process deliberately misaligns these fibers, weakening their bonds just enough to create flexibility while maintaining integrity. This is why crinkle paper bounces back when compressed—it’s all about controlled fiber disruption.
Different paper types respond uniquely to this process. Construction paper with its thicker fibers creates dramatic, long-lasting crinkles, while glossy magazine paper produces a subtler effect due to its coated surface. Understanding these material differences helps you select the right paper for your specific crinkle paper needs.
Essential Tools for Creating Perfect Crinkle Paper with Your Shredder
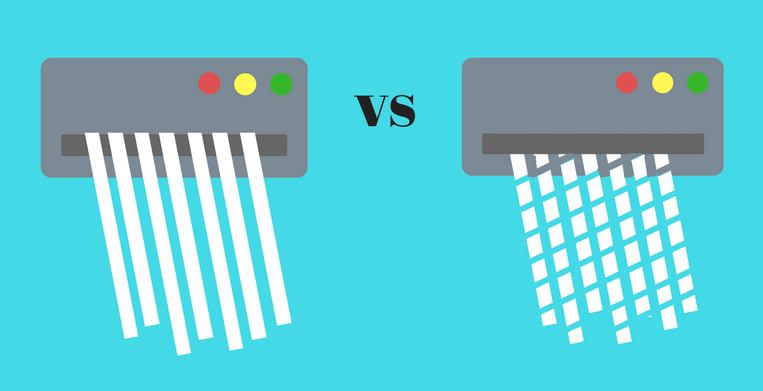
Your standard office shredder is the star of this operation, but selecting the right model makes a significant difference in your final product. Cross-cut shredders create shorter, confetti-like pieces ideal for delicate items, while straight-cut shredders produce longer strips perfect for dramatic crinkle effects. Micro-cut shredders work but often create pieces too small for effective crinkling—aim for a shredder with 1/4-inch to 3/8-inch strip width for optimal results.
Choosing the Right Paper for Maximum Crinkle Effect
Not all paper creates equally impressive crinkle paper. For best results, select papers with these characteristics:
- Medium-weight construction paper (65-80 lb) creates the most dramatic crinkle effect with excellent spring-back
- Matte-finish scrapbook paper provides vibrant colors without glare
- Newsprint or recycled paper bags offer an eco-friendly option with natural texture
- Avoid high-gloss magazine pages which can be slippery and difficult to crinkle effectively
Pro Tip: Test different paper types by shredding small samples first. The ideal paper should hold its crinkle shape for at least 24 hours without flattening.
Step-by-Step Process: From Shredding to Flawless Crinkle Paper
Preparing Your Paper for Optimal Shredding Results
Before feeding paper into your shredder, consider these preparation techniques that dramatically improve your crinkle paper quality. For construction paper, cut sheets into vertical strips matching your shredder’s width—this prevents curling as paper feeds through. When using thinner papers like magazine pages, layer 2-3 sheets together to create more substantial shreds that hold crinkle better.
Never overload your shredder—this is the #1 cause of poor crinkle paper results. For most standard shredders, feed only 3-5 sheets at a time regardless of paper thickness. Overfeeding creates compressed shreds that lack the necessary air pockets for proper crinkling. If your shredder struggles with even single sheets, check for dull blades or apply shredder oil according to manufacturer instructions.
The Critical Post-Shredding Crinkling Technique
This is where most DIYers fail—simply shredding paper isn’t enough. Immediately after shredding, gather small handfuls (about 1/4 cup) of shreds and follow this exact technique:
- Squeeze firmly for 5-7 seconds, applying enough pressure to break paper fibers but not so much that strips tear
- Rotate your hand while maintaining pressure to create multidirectional crinkles
- Release slowly and immediately fluff with fingers to lock in the texture
For larger batches, spread shredded paper on a flat surface and use a dinner fork to vigorously rake through the material. The tines separate and twist individual strips, creating professional-grade volume. This fork method works especially well for cross-cut shredder output that tends to clump together.
Troubleshooting Common Crinkle Paper Problems

Fixing Shredder Jams During Crinkle Paper Production
Shredder jams typically occur when using thicker papers or overloading the machine. If your shredder stops during crinkle paper production, immediately reverse the mechanism to clear the jam. For persistent jams, unplug the shredder and carefully remove paper using long tweezers—never insert fingers into the shredder mechanism.
Prevent future jams by:
* Using paper no thicker than standard construction paper
* Feeding paper vertically rather than at an angle
* Applying shredder oil after every 10-15 sheets
* Avoiding paper with staples, tape, or plastic coatings
Solving Poor Crinkle Retention Issues
If your crinkle paper flattens within minutes, you’re likely using the wrong paper type or insufficient crinkling technique. Glossy papers and thin newsprint lack the fiber strength to maintain crinkles. Switch to medium-weight construction paper for best results.
Also check your crinkling technique—many people don’t apply enough pressure during the scrunching phase. The paper should feel slightly stiff and resist compression when properly crinkled. If needed, lightly mist paper strips with water before crinkling (use only 1-2 sprays per handful) to temporarily soften fibers for better texture retention.
Creative Applications Beyond Basic Packaging
Transforming Crinkle Paper into Decorative Event Elements
Your homemade crinkle paper isn’t just for packaging—use it to create stunning event decorations. Fill clear vases with alternating colored crinkle paper layers for instant table centerpieces. Weave strips through chair backs for wedding or party seating decorations. For children’s parties, create “crinkle paper confetti” by shredding extra-fine with a cross-cut shredder, then filling biodegradable balloon inserts.
Pro Tip: For outdoor events, spray finished crinkle paper creations with hairspray to prevent wind from scattering your decorations while maintaining flexibility.
Cost Comparison: DIY vs. Store-Bought Crinkle Paper
Creating crinkle paper with your shredder costs virtually nothing when using scrap materials, while commercial crinkle paper averages $8-15 per 50-foot roll. For a small business shipping 20 packages weekly, DIY crinkle paper saves over $500 annually. Even when purchasing paper specifically for crinkling, construction paper costs about $0.25 per sheet—enough to create crinkle paper for 4-5 medium boxes.
Consider this real-world example: A craft business shipping 50 orders monthly spends approximately $60 on commercial crinkle paper. Using their existing shredder and $10 worth of construction paper, they produce the same volume of higher-quality crinkle paper with custom colors matching their brand.
Safety Considerations When Making Crinkle Paper
Always unplug your shredder when clearing jams or performing maintenance—many injuries occur when users reach into active shredders. Keep long hair and loose clothing away from the shredder mechanism, and never leave the machine running unattended. For households with children, store shredded paper out of reach as small pieces can pose choking hazards.
When using water to soften paper for better crinkling, apply only minimal moisture and allow paper to dry completely before packaging moisture-sensitive items. Excess moisture can promote mold growth inside packages during shipping.
Maintaining Your Shredder for Long-Term Crinkle Paper Production
Regular maintenance ensures your shredder continues producing quality crinkle paper. After every crinkle paper session, empty the waste bin completely and wipe the cutting mechanism with a soft, dry cloth. Every 3-4 crinkle paper projects, apply 2-3 drops of shredder oil to the blades while running the machine on reverse.
For heavy users, schedule professional blade sharpening annually. Dull blades create ragged paper edges that don’t crinkle well and increase jamming. Most office supply stores offer this service for $15-25, extending your shredder’s lifespan by several years.
Why Your Business Needs Custom Crinkle Paper

Branded crinkle paper creates instant recognition and perceived value in your packages. Customers remember the unboxing experience long after they’ve used your product. By making your own crinkle paper with your business colors, you turn a functional element into marketing collateral that costs pennies per package.
Eco-conscious consumers increasingly value sustainable packaging. Homemade crinkle paper from recycled materials demonstrates your commitment to reducing waste—78% of shoppers say sustainable packaging influences their purchasing decisions. Highlight your DIY crinkle paper in marketing materials to strengthen your brand’s environmental story.
Final Note: Creating professional-quality crinkle paper with your shredder takes just minutes but delivers significant value for gifts, events, and business packaging. By mastering the proper shredding techniques and post-shredding crinkling process, you transform ordinary scrap paper into beautiful, functional packaging material that saves money and reduces waste. Start small with your next gift wrapping project, then scale up as you perfect your technique—soon you’ll wonder why you ever paid for commercial crinkle paper. For best results, keep a dedicated container of your favorite colored paper scraps near your shredder so you’re always ready to create custom crinkle paper whenever inspiration (or packaging needs) strike.


