You’ve searched “how to make lash shampoo” hoping for a natural, budget-friendly solution to clean your lash extensions or delicate natural lashes. Maybe you’ve seen viral TikTok recipes using baby shampoo or baking soda, convinced they’re safer than store-bought options. But here’s the hard truth: creating DIY lash shampoo puts your eye health at serious risk. Professional lash technicians and ophthalmologists unanimously warn that homemade formulas lack the precise pH balance, sterility, and ingredient safety required for the fragile eye area. One careless mixture could trigger painful infections, damage your lash extensions, or even threaten your vision. In this guide, you’ll discover exactly why DIY lash cleansers are dangerous, what actually works for safe lash hygiene, and a step-by-step professional cleansing routine that protects your eyes while extending lash life.
Why Your Search for “How to Make Lash Shampoo” Should Stop Immediately
The moment you consider mixing ingredients near your eyes, you’re gambling with sensitive tissue that lacks natural protective barriers. Unlike skin on your face, your lash line has thinner skin, higher absorption rates, and zero sweat glands to flush out irritants. Homemade lash shampoo recipes—no matter how “natural” they claim to be—introduce three non-negotiable risks that commercial products solve through sterile manufacturing and scientific formulation. Skipping professional cleansers isn’t saving money; it’s inviting avoidable emergencies like styes or corneal abrasions that cost far more in doctor visits and lost lash retention.
The Sterility Gap: Why Your Kitchen Isn’t a Clean Room
Commercial lash cleansers are produced in ISO-certified facilities where airborne particles and bacteria are filtered to medical standards. Your kitchen counter? It’s teeming with microbes invisible to the naked eye. Even distilled water used in DIY recipes becomes contaminated the second it hits your bowl or brush. Lash technician Maria Chen warns: “I’ve treated clients with blepharitis from homemade cleansers—red, swollen eyelids that required antibiotic ointment. Bacteria thrive in water-based mixtures within hours, and your eye’s warm, moist environment is a breeding ground.” If you’ve ever used a DIY lash shampoo and noticed itching or crusting, that’s bacterial overgrowth signaling infection.
pH Imbalance: The Silent Lash Killer in DIY Mixtures
Your eye area maintains a delicate pH between 4.5–5.5 to protect against pathogens and retain natural oils. Most DIY lash shampoo recipes—like diluted baby shampoo (pH 7–8.5) or baking soda solutions (pH 9)—are wildly alkaline. When you apply these, you strip the acid mantle that shields your lash follicles, causing immediate stinging and long-term damage. “I’ve seen clients’ natural lashes fall out in clumps after using baking soda cleansers,” says master technician Derek Lim. “The high pH breaks down keratin proteins, leaving lashes brittle and prone to breakage.” Commercial cleansers undergo rigorous pH testing to match your eye’s natural chemistry—something impossible to replicate with kitchen tools.
Baby Shampoo and Baking Soda: Viral Lash Shampoo Recipes That Destroy Extensions

That “gentle” baby shampoo you’re considering? It’s one of the worst offenders for lash extension wearers. Despite marketing claims, baby shampoos contain oils, moisturizers, and conditioning agents designed for scalp hair—not the cyanoacrylate adhesive bonding your extensions. These ingredients create a film that slowly dissolves the bond, causing premature shedding within days. Worse, baking soda—a staple in “natural” lash shampoo tutorials—is like rubbing sandpaper on your lash line. Its abrasive particles scratch the cornea and inflame follicles, leading to trichiasis (inward-growing lashes) that requires surgical correction.
Essential Oils: The Hidden Toxin in “Natural” Lash Cleansers
Pinterest boards overflow with recipes adding tea tree or lavender oil to DIY lash shampoos for “antibacterial benefits.” But ophthalmologist Dr. Aris Thorne confirms: “Essential oils are 10–100x more concentrated than the plant material. Even 1% dilution can cause chemical burns on eyelid skin.” These oils penetrate the cornea rapidly, triggering allergic reactions like giant papillary conjunctivitis—itchy bumps under the eyelids that force clients to remove extensions entirely. Skip the Pinterest hacks; your eyes aren’t a science experiment.
Step-by-Step: Choosing a Lash Extension-Safe Cleanser in 4 Critical Checks

Forget “how to make lash shampoo”—invest 90 seconds learning to pick a professional formula. Your cleanser must pass these non-negotiable tests:
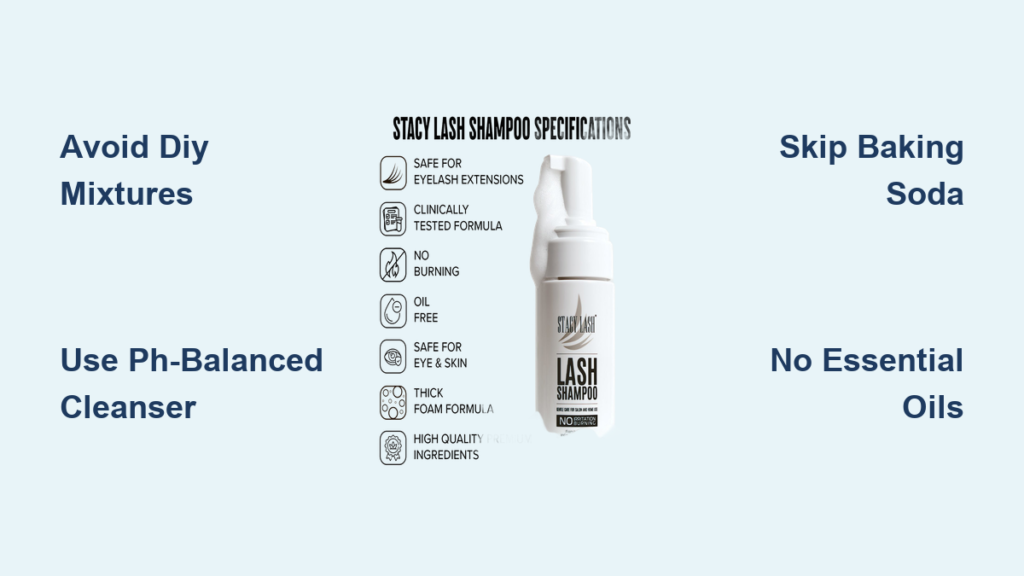
- “Lash Extension-Safe” Label Verification: Check the bottle for explicit wording like “safe for cyanoacrylate adhesives.” Generic “oil-free” claims aren’t enough—some contain silicone derivatives that degrade bonds.
- Foam or Gel Texture Requirement: Avoid liquid cleansers. Foams evenly coat lashes without dripping into eyes, and gels cling to the lash line during application. Both rinse residue-free.
- Triple-Ingredient Audit: Confirm it’s oil-free (no coconut, argan, or mineral oil), sulfate-free (no SLS/SLES), and alcohol-free (denatured alcohol dries delicate skin).
- Ophthalmologist Testing Proof: Look for “ophthalmologist-tested” and “hypoallergenic” certifications—these undergo patch testing on sensitive eyes.
Brands like Starfack Lash Foam or Lily Lolo Cleanser meet all criteria. For budget options, dilute professional concentrates (e.g., LashBase) with distilled water at 1:3 ratio—never tap water, which contains minerals that cloud extensions.
Your 5-Step Nightly Lash Cleansing Routine for Infection-Free Lashes
Using the right cleanser is pointless without proper technique. Follow this technician-approved method to avoid rubbing damage and residue buildup:
Essential Tools Checklist
- Lash-safe foam cleanser (shake well before use)
- Sterile spoolie or silicone lash wand
- Two lint-free microfiber pads
- Distilled water in spray bottle
Step 1: Pre-Cleanse Makeup Removal (60 Seconds)
Spritz distilled water on a microfiber pad. Gently wipe away mascara and eyeliner with downward strokes—never rub horizontally. Residual makeup traps bacteria against your lash line.
Step 2: Cleanser Application Without Water Contact (20 Seconds)
Pump foam cleanser onto dry spoolie. Close eyes and roll the wand along your lash line from corner to corner, focusing on the base where oil accumulates. Critical: Keep eyes sealed to prevent cleanser seepage.
Step 3: Targeted Debris Removal (30 Seconds)
For stubborn debris (like mascara flakes), hold the spoolie vertically against the lash line and make tiny back-and-forth motions—like flossing teeth. Never pull lashes upward.
Step 4: Rinsing Protocol to Prevent Irritation (45 Seconds)
Tilt head forward over sink. Use distilled water spray to rinse away from eyes (not toward them). Pat dry with second microfiber pad—no rubbing. Air-dry completely before sleeping.
Step 5: Post-Cleansing Lash Health Boost (Optional)
Apply a pea-sized amount of peptide lash serum (like GrandeLASH) to upper lash line. Avoid oil-based serums—they degrade extensions.
Emergency Protocol: What to Do If You’ve Used Homemade Lash Shampoo
If you’ve already tried DIY lash shampoo and notice redness, swelling, or excessive shedding, act within 24 hours:
1. Immediately discontinue use and discard the mixture
2. Rinse eyes with sterile saline solution (not tap water) for 10 minutes
3. Apply cool compresses for 5 minutes to reduce inflammation
4. Call your lash technician or ophthalmologist—do NOT wait for symptoms to worsen
5. Document reactions with photos for professional assessment
Ignoring early symptoms risks chronic conditions like meibomian gland dysfunction, where oil glands permanently clog, requiring costly in-office treatments.
Cost Analysis: DIY Lash Shampoo vs. Professional Cleansers (Spoiler: DIY Costs More)

Let’s debunk the myth that “how to make lash shampoo” saves money. A DIY recipe using baby shampoo ($5) and baking soda ($2) seems cheap—until your extensions shed prematurely. At $85–$150 per fill, losing half your extensions means $40–$75 in wasted costs. Meanwhile, a 100ml professional cleanser ($18) lasts 3 months with nightly use. Factor in potential doctor visits for infections ($150+), and DIY becomes a money pit. As technician Lena Rodriguez puts it: “Clients who use commercial cleansers get 3-week fills; DIY users need weekly fixes. Who’s really saving?”
Natural Lash Care: Safe Cleansing for Non-Extension Wearers
Even without extensions, your natural lashes need specialized care. Skip DIY “lash shampoos” and use the same professional-grade foam cleanser as above—but modify the routine:
– Cleanse every 2–3 days (not nightly) to preserve natural oils
– Replace the spoolie with clean fingertips for application
– Never use baking soda or vinegar “rinses”—they disrupt follicle pH
– Apply castor oil only to lash tips (not roots) 2x/week to avoid follicle clogging
This prevents madarosis (lash loss) while keeping follicles healthy. Remember: 60% of natural lash damage comes from improper cleansing—not makeup.
Final Note: The quest for “how to make lash shampoo” ends with one undeniable truth: your eyes deserve scientifically validated safety, not kitchen experiments. Professional cleansers cost less than a coffee per use while preventing infections, preserving lash health, and extending extension life. Tonight, swap that DIY mixture for a pH-balanced foam cleanser and follow the 5-step routine—it’s the only “recipe” that truly works. For personalized recommendations, consult your lash technician; they’ll match products to your lash type and sensitivity. Your vision is priceless—treat it that way.


