
Your horse comes in caked with dried mud after a trail ride, sweat-streaked from competition, or simply overdue for deep cleaning. Knowing how to shampoo a horse properly transforms this chore into a health-boosting ritual that prevents skin infections, removes allergens, and strengthens your bond. Skip the prep work or use harsh products, and you risk leaving residue that causes itching, stripping natural oils that protect against rain rot, or triggering panic in a nervous animal. This guide delivers field-tested techniques for stress-free shampooing—from selecting the right equine-specific formula to the critical rinsing step 90% of owners rush. You’ll learn exactly how to lather stubborn stains without irritating sensitive skin and dry your horse efficiently in any weather.
Most riders shampoo only when visible dirt appears, but embedded sweat and bacteria can cause dermatitis long before it’s noticeable. Proper shampooing isn’t about vanity; it’s a frontline defense against painful skin conditions. Yet a single mistake—like spraying cold water on a hot horse—can spike cortisol levels, making future baths a battle. By following these vet-approved steps, you’ll turn resistance into cooperation while ensuring every strand of coat shines.
Choosing the Right Shampoo to Prevent Skin Damage
Human shampoos and dish soaps destroy your horse’s pH balance, causing flaking, itching, and cracked skin. How to shampoo a horse safely starts with selecting an equine-specific formula:
- For normal coats: Use a gentle, oatmeal-based shampoo that preserves natural oils
- For sensitive skin: Opt for hypoallergenic, fragrance-free options with aloe vera
- For medical needs: Apply vet-prescribed medicated shampoos targeting fungal infections or sweet itch
Critical mistake to avoid: Never dilute shampoo in a spray bottle—this creates uneven concentration that leaves irritating residue. Instead, mix one capful per gallon of warm water in a bucket for consistent lathering. Test any new product on a small patch behind the ear first; redness or swelling means discontinue use immediately.
Securing Your Horse on Non-Slip Surfaces Before Wetting
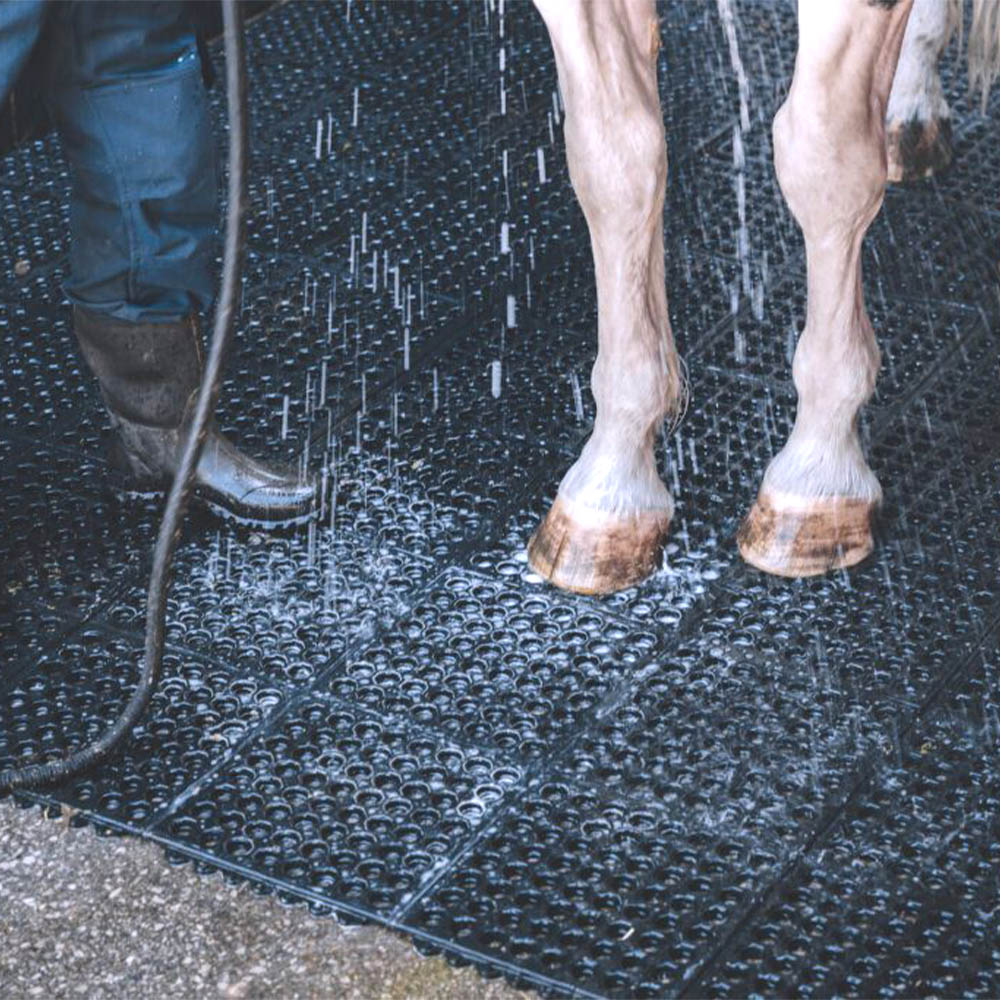
A slippery surface turns bathing into an injury risk within seconds. How to shampoo a horse without accidents requires this setup:
- Tie your horse with a quick-release knot at waist height (never above shoulder level)
- Use rubber mats or packed dirt—never concrete or grass that turns muddy
- Position yourself slightly behind the shoulder for safety, never directly in front of hooves
Visual cue: If you see your horse’s legs splaying or head jerking, stop immediately. This signals anxiety that could escalate to rearing. Cross-tying works best for experienced horses, but always have a second person hold the lead rope for skittish animals.
Dry Grooming: Removing Mud Before Shampoo Application
Skipping this step forces shampoo to work through packed debris, reducing cleaning power by 70%. Use a rubber curry comb in tight circles to lift dried mud from the neck and barrel, then follow with a stiff brush downward toward the hooves. Pay special attention to:
- Leg feathers: Separate clumps gently to expose skin
- Under the mane: Lift sections to remove sweat-caked hair
- Girth area: Check for saddle rubs that shampoo could irritate
Pro tip: For caked-on mud, mist areas lightly with water first—never hose vigorously. This softens dirt without shocking the skin. Always inspect for cuts or swelling during grooming; avoid shampooing open wounds.
Step-by-Step Shampoo Application to Avoid Eye and Ear Damage
Starting From the Hooves: Safe Wet-Down Techniques
Begin spraying at the fetlocks with low-pressure water (test on your arm first—it should feel warm, not hot). Work upward in sections, never saturating the entire body at once. For the face:
- Use a damp sponge dipped in plain water only
- Wipe from poll to muzzle, avoiding nostrils and eyelids
- Keep the hose nozzle pointed downward to prevent accidental spraying
Why this matters: Cold water on a hot horse causes thermal shock, while direct spray in ears triggers head-shyness.
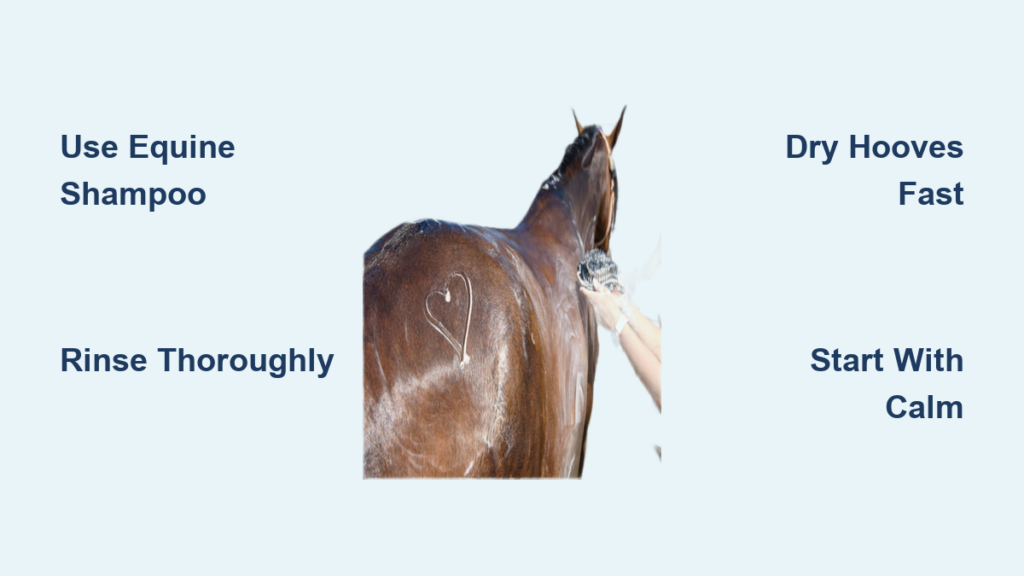
Creating Lather for Maximum Dirt Removal
Dip a sponge in your pre-mixed shampoo solution (never apply straight from the bottle). Starting at the shoulder, use firm circular motions to work lather into the coat:
- Apply product in 12×12 inch sections
- Follow hair growth direction with overlapping strokes
- Re-dip sponge frequently for consistent coverage
For the tail and mane, squeeze shampoo through roots first, then glide downward toward ends. Never scrub—this causes breakage. Use separate sponges for face and body to prevent soap transfer.
Handling Stubborn Stains on Legs and Belly
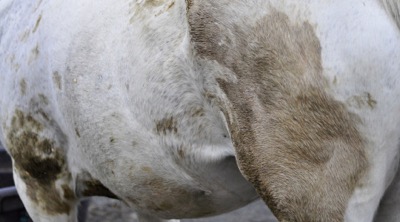
Dry mud or manure stains need extra attention:
- Apply undiluted shampoo directly to the spot
- Let it dwell for 2–3 minutes (check product instructions)
- Gently loosen with a soft-bristled body brush
Critical warning: Avoid wire brushes or excessive scrubbing on thin-skinned areas like the belly. If stains persist, repeat lathering instead of increasing pressure.
Why Incomplete Rinsing Causes Itchy Skin (and the Fix)
Leftover shampoo residue is the #1 cause of post-bath itching. Rinsing correctly requires:
- Starting at the neck and working backward
- Lifting the mane to rinse skin underneath
- Running fingers through the tail to check for slipperiness
Visual test: After rinsing, squeeze a handful of coat. If water runs clear with no bubbles, you’re done. If it’s cloudy, repeat. This step takes twice as long as lathering—don’t rush it.
Top-Down Rinsing Method for Zero Soap Residue
Hold the hose vertically 6 inches from the coat. Use sweeping motions from spine to belly, overlapping each pass by 50%. For the legs:
- Rinse from knee downward in one motion
- Rotate the leg to access all angles
- Scrape water off immediately with a sweat scraper
Pro shortcut: Keep a second bucket of clean water for final face rinsing—this avoids accidental hose contact near eyes.
Hoof Care After Shampooing to Prevent Thrush
Wet hooves trap bacteria in the frog grooves, creating perfect thrush conditions. Within 5 minutes of finishing:
- Pick each hoof thoroughly with a metal tool
- Dry the sole and frog with a clean towel
- Apply a thin layer of hoof oil to the wall (avoid frog)
Never let your horse stand in puddles post-bath. Lead them to dry ground immediately—concrete or rubber mats work best.
Speed Drying Techniques for Cold Weather Bathing
Chills after bathing weaken immunity. On cool days:
- Use a sweat scraper in firm, overlapping strokes from poll to tail
- Rub vigorously with wool coolers (not cotton towels—they absorb moisture poorly)
- Walk your horse in hand for 10 minutes to generate body heat
Critical mistake: Never blanket a damp horse. This traps moisture against the skin. Always confirm dryness by pressing your palm against the shoulder—if it feels cool, continue drying.
How Often Should You Shampoo? Avoiding Over-Bathing Damage
Shampooing more than once every 2–3 weeks strips essential oils, leading to:
- Dull, brittle hair
- Increased dandruff
- Higher risk of rain rot
Exception: Competition horses may need weekly baths, but always follow with a moisturizing conditioner. Between shampoos, use waterless grooming sprays for spot cleaning.
Positive Reinforcement Strategies for Nervous Horses
Turn bath time into a calm routine:
- Offer hay during grooming to associate the area with comfort
- Rub shampoo into the neck (a self-grooming zone) first to build trust
- Reward stillness with small treats after each section
Pro tip: End sessions early if your horse tenses up—never force completion. Five calm minutes today beats an hour of trauma.
Mastering how to shampoo a horse transforms a stressful chore into a health-enhancing ritual that prevents skin issues and builds trust. Remember the non-negotiables: always use equine-specific shampoo, rinse until water runs crystal clear, and dry hooves immediately to avoid thrush. For your next bath, start 30 minutes earlier than needed—rushing causes mistakes. Within weeks, you’ll see fewer itches, a gleaming coat, and a horse that walks willingly to the wash rack. If you’re prepping for show season, pair this with our guide on detangling horse manes without breakage for competition-ready results. Your horse’s comfort—and your peace of mind—starts with these simple, science-backed steps.


