
You just unboxed your Ninja Foodi air fryer, but those dual-zone controls and cryptic symbols make you question if you can even cook frozen fries without disaster. Whether your last attempt left pale, soggy potatoes or charred chicken with raw centers, you’re not alone. Mastering how to use Ninja Foodi air fryer effectively transforms confusing dials into your most reliable kitchen ally. This guide cuts through manual jargon to deliver model-specific settings for everything from the compact SP101 oven to the Dual-Zone Max—so you pull golden, crispy perfection from your countertop every single time.
Stop wasting money on failed experiments. Within minutes, you’ll unlock SYNC mode for perfectly timed dinners, discover why frozen fries must go in cold, and learn the oil trick that creates restaurant crunch without grease. By the end, you’ll wield your Ninja like a pro—no guesswork, no soggy disasters, just consistently delicious results that make you wonder why you ever used a deep fryer.
First Cook Setup Essentials
Remove Packaging & Prep
Skip this step and you’ll battle smoke alarms and plastic-tasting food. Unbox methodically: peel every hidden plastic film from baskets, trays, and heating elements—especially along basket seams where residue lingers. Wash all removable parts with warm soapy water (or top-rack dishwasher cycle), then air-dry completely. Critical warning: Moisture trapped in basket crevices causes dangerous steam bursts during first use.
Initial Burn-Off Cycle
Manufacturing oils must vaporize before cooking food. Run your Ninja Foodi air fryer empty at 200°C for 10 minutes with kitchen windows open. Expect brief chemical odors—this is normal and won’t recur. Never skip this; unburned oils cause persistent smoke and off-flavors. Let cool 15 minutes before proceeding; rushing risks warping non-stick coatings.
Counter Positioning Rules
Place your Ninja Foodi air fryer with 13 cm clearance on all sides for airflow. Lift-lid models (like SP101) need under 45 cm ceiling clearance. Never tuck under shelves—rising heat damages wood laminate over time. Verify stability: wobbling units cause uneven cooking and error codes.
Decode Control Panel Fast
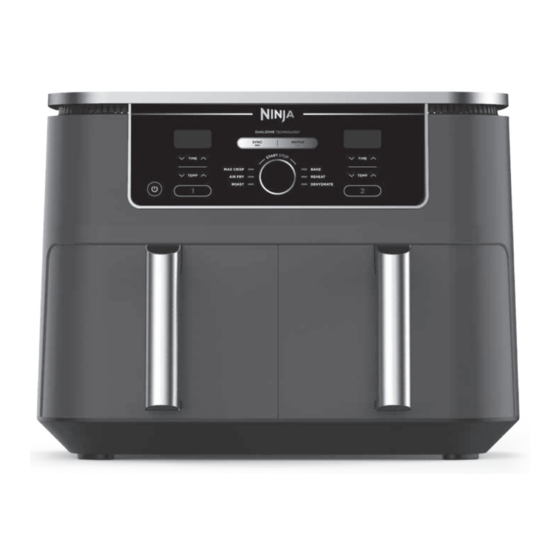
Dual-Zone Models (AF400/AF451)
Master these six buttons in 30 seconds:
– Left/Right Zone buttons: Tap to select which basket you’re programming
– MODE dial: Scroll through Air Fry → Max Crisp → Roast → Bake → Dehydrate → Reheat
– SYNC: Makes both baskets finish simultaneously regardless of start times (e.g., fries start first, chicken added later)
– MATCH: Instantly copies settings from one zone to the other—no reprogramming
Pro tip: Press MODE until “Max Crisp” shows for frozen foods. Its 240°C top element and powerful fan deliver true crispness where standard “Air Fry” fails.
Oven Model SP101
Navigate the function knob’s 8 positions:
– Air Fry for crispy classics (fries, wings)
– Bagel mode crisps cut sides only—ideal for English muffins
– Darkness dial: Sets toast shades 1-7 (position 4 = golden standard)
– One-Touch Pre-Heat: Optional 60-second blast for delicate items like meringues
Key insight: The SP101’s “Air Roast” function outperforms standard ovens for small batches—use it for 6 chicken thighs at 190°C for 25 minutes.
Load Baskets Without Overcrowding

Single-Layer Rule
Fill baskets only ½–⅔ full, leaving 2.5 cm gaps around each piece. Overcrowding traps steam, creating soggy food. For reference:
– French fries: Max 800g fresh or 1kg frozen per basket
– Chicken wings: 1.2kg per basket
– Whole spatchcock chicken: Split 1.5kg across both baskets
Visual cue: If you can’t see basket weave between pieces, you’ve overloaded it. Halve quantities immediately.
Multi-Layer Hacks
Create two cooking layers without blocking airflow:
1. Place silicone racks (Ninja’s official accessory) 2 cm above basket base
2. Or use perforated parchment squares (20 cm wide) between layers
Never use solid trays—they defeat the Ninja’s core air circulation technology.
Perfect Frozen Food Settings
Fries That Rival Takeaway
Set Dual-Zone to 200°C for 12–15 minutes, shaking at 8 minutes. Critical step: Never thaw frozen fries—go straight from freezer to basket. The rapid temperature shift creates superior crispness. Check 2 minutes early; residual heat continues cooking.
Chicken Nuggets Made Right
Program 200°C for 10–12 minutes with a shake at 6 minutes. Insert a thermometer probe through the basket handle slot—75°C internal temp is safe. For extra crunch, spray lightly with oil (just ½ teaspoon total)—excess fat causes sogginess.
Pizza Rolls Without Explosions
Set 190°C for 7–9 minutes—no flipping needed. Space rolls 2.5 cm apart so steam escapes sideways. Pro move: Place a small oven-safe bowl under the basket to catch cheese drips—prevents smoke and simplifies cleanup.
Master SYNC & MATCH Functions
SYNC Mode Dinner Strategy
Host stress-free with proteins and sides finishing simultaneously:
1. Load fries in left zone: 200°C, 15 minutes
2. Start chicken tenders in right zone: 180°C, 20 minutes
3. Press SYNC—both finish together despite different cook times
User-tested tip: Always start longer-cooking items first. SYNC adjusts timing dynamically.
MATCH Mode Batch Cooking
Duplicate settings instantly between zones. Making onion rings after fries? Press MATCH to copy the 200°C fry setting without reprogramming. Warning: Only use MATCH when both foods need identical temps/times—never for delicate items like fish.
Prevent Common Cooking Fails
Soggy Food Fixes
- Reduce load: Cut quantities in half if food steams instead of crisping
- Increase temperature: Bump 10°C higher than package directions
- Pat proteins dry: Surface moisture creates a steam barrier—use paper towels on chicken before seasoning
Burnt Outside, Raw Inside
Lower temperature to 180°C and slice proteins thinner. Thick chicken breasts need butterflying to 2 cm thickness. Pro technique: Insert an instant-read thermometer through the basket handle slot without opening—prevents heat loss.
Pro Tips Manuals Won’t Tell
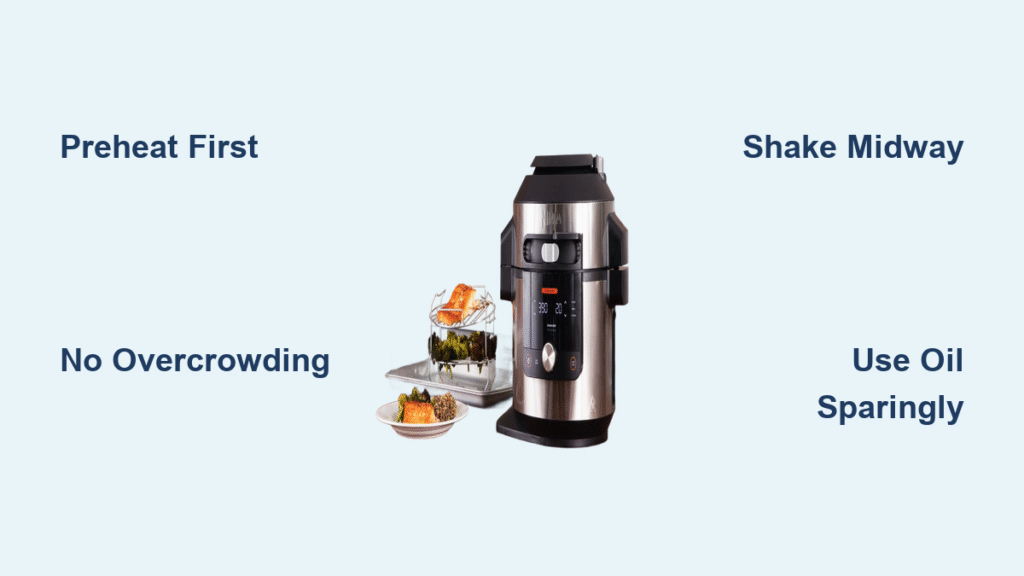
Oil Strategy That Works
Use only ½–1 teaspoon oil per serving. Too much creates greasy results. Game-changing sequence: Toss food in oil first, then add seasonings—salt and spices stick better to oiled surfaces. Avoid aerosol sprays; propellants damage non-stick coatings.
Cheese Without Mess
Add cheese toppings only during final 3 minutes. Secret step: Pre-heat the drawer 2 minutes so cheese melts instantly upon contact, preventing drips and burning. For pizza rolls, sprinkle cheese after cooking—melts faster under the heating element.
White Smoke Solution
Grease pooling causes alarming white smoke. Immediate fix: Add 1 tablespoon water to the drawer—this vaporizes drippings safely without affecting flavor. If smoke persists, unplug for 30 minutes; check for blocked vents.
Clean Like a Ninja Pro
Daily 5-Minute Routine
- Empty crumb tray (SP101) or drawer (basket models)
- Wash baskets with non-abrasive sponge—never metal scrubbers
- Wipe interior walls with damp microfiber while warm—food slides off easily
Weekly Deep Clean
Dishwasher-safe parts: baskets, trays, crisper plates, silicone accessories. For heating elements, wait until completely cool, then gently wipe with damp cloth. Critical: Never immerse main unit or scrub heating elements—voids warranty.
Odor Removal Hack
Run half a lemon at 200°C for 5 minutes. Discard lemon afterward—this neutralizes lingering smells better than baking soda. For fish odors, add 1 tsp vinegar to the water reservoir.
Quick Reference Cheat Sheet
Universal Start-Up:
1. Plug in → Press POWER
2. Select ZONE or FUNCTION
3. Set TEMP & TIME per food type (see tables below)
4. Press START → Load at beep
5. Shake/Flip halfway → Check 2 minutes early
6. Serve immediately → Cool 15 minutes before cleaning
Emergency Fixes:
– Food not browning: Increase temp 10–20°C
– Smoke alarm triggered: Add water to drawer, reduce temperature
– Display shows E4: Unplug 30 minutes, check clearances
Your Next Steps
Start with frozen fries using 200°C for 12 minutes—success builds confidence. Once comfortable, experiment with fresh vegetables using the “Max Crisp” setting. Remember: the Ninja Foodi air fryer rewards proper spacing and temperature adjustments more than precise timing. Master these fundamentals, and you’ll replace your oven for 90% of daily cooking within a month.
Bookmark this guide. The more you cook, the more these techniques become muscle memory. Soon you’ll intuitively know exactly how to transform any ingredient into crispy, golden perfection—no manual required. Your journey to mastering how to use Ninja Foodi air fryer ends today; tonight’s dinner starts your streak of flawless results.


