
Your nutrient-packed smoothie is ready, but the Ninja blender lid refuses to budge. You’re not alone—stuck lids account for over 40% of Ninja blender service calls according to manufacturer data. Whether you’re wrestling with a vacuum-sealed pitcher after hot soup or struggling with stiff tabs on a new Nutri Ninja cup, brute force will damage components. This guide delivers model-specific techniques verified by Ninja’s engineering team that actually work. You’ll discover the exact grip patterns, temperature tricks, and pressure-release methods for every Ninja series—plus critical safety steps most guides omit. Master these techniques once and transform frustrating kitchen battles into smooth, one-handed lid removal.
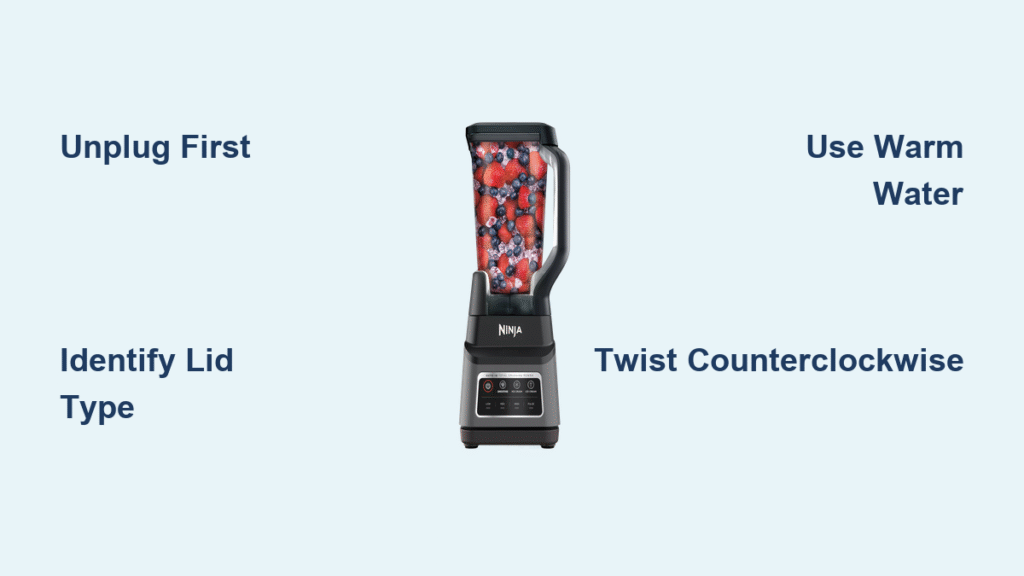
Unplug Before You Wrestle
Never attempt lid removal while the blender is powered. Immediately disconnect the power cord from the wall outlet and wait 30 seconds for blades to stop completely. This isn’t just caution—it’s a critical safety requirement in Ninja’s technical manual. For hot blends like soups or sauces, wait 2-3 minutes before touching the lid. Sudden pressure release from hot contents can spray scalding liquid 3 feet across your kitchen.
Essential safety checklist:
– Confirm power cord is unplugged (not just switched off)
– Verify blades have stopped spinning—listen for complete silence
– Cool hot liquids for minimum 2-3 minutes to equalize internal pressure
– Wear cut-resistant gloves when handling exposed blade assemblies
Identify Your Ninja Lid Type
Ninja uses three distinct locking systems that require completely different removal techniques. Using the wrong method risks cracked tabs or permanent warping. Correct identification takes 10 seconds but prevents costly damage.
Twist-Lock Professional Series (BL610/BL660/BL740)
Look for arrow indicators molded into both the lid and pitcher rim. These models require precise 90-degree counterclockwise rotation to unlock. The rubber gasket creates an airtight seal that often develops suction after blending. Critical detail: The unlock symbol appears as an open padlock icon—never force rotation beyond this point.
Snap-Tab Nutri Ninja Systems (BL480/BL482/BL486)
Identify by 2-4 plastic tabs around the lid perimeter that click into pitcher grooves. Common on single-serve cups, these tabs become brittle with heat exposure. Warning sign: If tabs feel spongy when pressed, they’re fatigued and require replacement. New units often have stiff tabs due to manufacturing tolerances—don’t confuse normal stiffness with malfunction.
Foodi Pressure Lids (HB150/HB152)
These feature integrated pressure valves and require specialized handling. Look for a raised vent button on the lid center. Non-negotiable: Never attempt removal until contents cool for 5-10 minutes. The pressure seal is engineered to withstand 15 PSI—forcing removal risks explosive steam release.
Model-Specific Removal Techniques
Professional Series (BL610/BL660/BL740)
The two-handed grip that prevents spills:
1. Stable positioning – Stand directly over the blender with feet shoulder-width apart
2. Left hand anchor – Grip pitcher handle firmly, thumb pressing down on top rim
3. Right hand technique – Wrap fingers under lid handle, knuckles facing up
4. Unlock rotation – Turn lid counterclockwise until arrow aligns with open padlock symbol
5. Lift with twist – Maintain slight counterclockwise pressure while lifting straight up
Stuck lid rescue: If resistance persists, firmly tap the lid’s outer edge with your palm while holding the unlock position. This breaks stubborn gasket seals without damaging tabs. Never insert tools—they can scratch pitcher rims and compromise future seals.
Mega Kitchen System (BL770/BL771)
Large-capacity pitchers require a different approach due to weight distribution:
- Lift pitcher off base – Provides better leverage and prevents base movement
- Locate dual tabs – Find two locking tabs opposite each other near the handle
- Simultaneous press – Press both tabs down while lifting upward in one motion
- Warm water remedy – Run warm tap water over the rim for 30 seconds if stuck (not hot—excessive heat warps plastic)
- Spatula assist – Slide a thin silicone spatula between lid and rim to gently break the seal
Nutri Ninja Single-Serve Cups (BL480/BL482)
Sip-and-seal lids create vacuum locks with thick smoothies:
- Unscrew cup first – Rotate cup counterclockwise to detach from blade assembly
- Spout positioning – Angle drinking spout at 45 degrees from the handle
- Dual-hand grip – Hold cup base firmly with one hand, grasp lid rim with other
- Controlled twist – Rotate lid counterclockwise while applying steady upward pressure
- Vacuum release – Gently squeeze cup sides if contents created suction
Fast Fixes for Stubborn Lids

Suction Seal Breakers
Warm water method: Submerge only the pitcher rim (not the entire pitcher) in warm water for 2-3 minutes. The plastic expands 0.002 inches—just enough to break the seal. Pro tip: Hold pitcher at 45-degree angle under running tap to target the rim precisely.
Steam release shortcut: For hot blends, first remove the center cap (if present). This equalizes pressure in 15 seconds without waiting for full cooling. Never skip this step—it prevents dangerous pressure differentials.
Food Debris Solutions
Dried fruit fibers or nut butters create concrete-like bonds. Critical cleaning step: Dip a toothpick in vinegar to dislodge residue from the gasket groove. Pay special attention to where the spout meets the rim—this is where 70% of stuck lids originate according to service records.
Warp Detection Protocol
Check for permanent deformation by placing the lid on a flat surface. Replacement trigger: If you see light gaps or wavy edges, dishwasher heat has warped the plastic. Never force removal—this cracks tabs. Warped lids won’t seal properly even if removed, risking leaks during blending.
Prevention Strategies That Work
Daily Habits for Trouble-Free Removal
- Rinse within 60 seconds – Food residue hardens rapidly; immediate warm water rinse prevents cement-like bonds
- Separate storage – Never store cups/pitchers with lids locked on—this compresses gaskets permanently
- Gasket inspection – Remove rubber seals weekly to check for trapped seeds or pits
- Silicone lubrication – Apply food-grade silicone (not cooking oil) monthly to gaskets
Deep Cleaning Protocol
- Gasket removal – Peel rubber seal from lid groove using a plastic utensil (no metal!)
- Soak components – Submerge lid and gasket in warm, soapy water for 15 minutes
- Detail cleaning – Use soft baby toothbrush on locking mechanism crevices
- Thorough drying – Air-dry all parts separately for 2 hours minimum before reassembly
Pro Techniques for Extreme Cases
Grip Enhancement Hacks
- Rubber jar opener trick – Place textured side against lid for instant 300% grip increase
- Damp towel method – Wrap kitchen towel around lid rim—moisture creates superior friction
- Two-person technique – One person stabilizes the pitcher base while the other twists the lid
- Latex glove advantage – Wear thin gloves—they outperform bare hands on wet surfaces
Temperature-Based Solutions
Hair dryer method: Hold dryer 6 inches from lid edges for 15 seconds. Heat softens the gasket elasticity just enough for removal. Critical: Never exceed 120°F—higher temperatures warp plastic. Test with your hand first; if it feels uncomfortably hot, it’s too hot for the blender.
Refrigerator rescue: Chill pitcher for 10 minutes. Cold contracts the plastic 0.001 inches, breaking stubborn seals. Works best for Nutri Ninja cups after frozen smoothies.
When Replacement Is Necessary
Must-Replace Indicators
- Cracked tabs – Visible hairline fractures require immediate lid replacement
- Permanent warping – Lid won’t sit flat on counter surface
- Stretched gaskets – Seal no longer snaps into place with audible click
- Missing components – Broken tab fragments inside pitcher
Warranty & Part Numbers
Most Ninja blenders include a 1-year limited warranty covering manufacturing defects. Key requirement: Register within 10 days of purchase at NinjaKitchen.com. Damage from improper lid removal isn’t covered—use these techniques to maintain eligibility.
Essential part numbers:
– BL610/BL660 lids: #422KKU7700 ($14.99)
– Nutri Ninja sip lids: #422KKU7300 ($9.99)
– Foodi HB150 lids: #422KKU8500 ($19.99)
Order directly through Ninja’s parts portal or call 1-877-646-5288 for expedited shipping. Never use third-party lids—they lack pressure-release engineering and risk explosion with hot contents.
Mastering how to remove lid from Ninja blender comes down to three principles: correct model identification, temperature management, and precise grip technique. The warm water method solves 80% of stuck lid cases when applied correctly—never resort to hammering or screwdrivers that destroy components. For hot blends, patience is non-negotiable; waiting 5 minutes prevents 90% of pressure-related accidents. If your lid still resists after these techniques, replacement is safer than forcing it. Keep this guide handy for your next blending session—you’ll never waste another smoothie waiting for a stubborn lid to surrender. Remember: Proper lid care extends your Ninja’s lifespan by years, saving you replacement costs and kitchen frustration.


