
You’re standing at your desk, holding a stack of sensitive documents, ready to feed them into your Embassy paper shredder. The motor whirs to life as expected, but the paper just sits there—refusing to be pulled into the feed slot. This frustrating “running but not feeding” issue affects Embassy shredder owners daily, turning what should be a quick security task into a productivity nightmare. When your embassy paper shredder not working properly, it’s not just inconvenient; it creates security risks with unshredded confidential documents piling up.
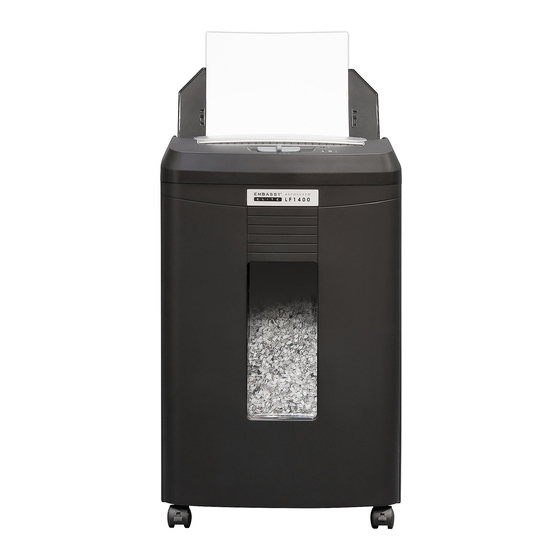
Unlike complete shutdowns where the motor won’t engage at all, this specific failure means the electrical system is operational while the paper-feeding mechanism has failed. Most Embassy shredder models (including popular LF1200 and LF1400 series) share common mechanical components that cause this exact symptom when compromised. The good news? Over 80% of these “runs but won’t feed” cases stem from fixable issues like sensor blockages or worn rollers—not catastrophic failures. In this guide, you’ll learn the exact sequence to diagnose and repair your uncooperative Embassy shredder, often in under 15 minutes with household tools.
Immediate Power Reset: Your First Fix for a Non-Feeding Embassy Shredder
Before diving into mechanical repairs, rule out temporary electronic glitches with this critical first step. Many Embassy shredders have sensitive control boards that trigger false “paper present” errors when voltage fluctuates. When your embassy paper shredder not working exhibits feed failure, a simple power cycle often resolves it without further intervention.
Why 60 Seconds Unplugged Is Non-Negotiable
Simply turning the shredder off and on won’t clear the control board’s memory. You must unplug completely for a full 60 seconds to discharge capacitors in the electrical system. During this waiting period:
– The shredder’s microprocessor fully resets
– Thermal protectors cool down if previously tripped
– Sensor calibration values refresh to factory defaults
Plug back in only after the full minute has passed. Test with a single sheet of standard 20-lb paper—never cardstock or folded paper during diagnostics. If paper feeds normally now, the issue was likely a transient electrical fault. Repeat this reset monthly to prevent recurrence, especially if you experience frequent power fluctuations in your building.
Clearing Hidden Paper Jams Blocking the Feed Path

Even when no visible jam exists, microscopic paper fragments can accumulate in critical areas. Embassy shredders develop “ghost jams” when paper dust compacts into a felt-like barrier along the feed rollers. These are the most common cause of feed failure in units under three years old.
Using Reverse Mode to Dislodge Micro-Jams
Never force paper into a non-feeding shredder—that creates worse jams. Instead:
1. Set the control switch to “Auto” or “On”
2. Press and hold the reverse (R) button for 10 full seconds
3. Listen for a change in motor pitch indicating debris release
4. Release reverse, then try feeding paper normally
This sequence works because reverse mode engages a higher-torque gear setting specifically designed to expel stubborn obstructions. If you hear a “clunk” during reverse operation, stop immediately—this indicates a larger obstruction requiring manual removal.
Manual Debris Extraction Without Damaging Blades
With the shredder unplugged, use these safe extraction methods:
– Shine a bright flashlight into the feed slot to spot obstructions
– Use plastic tweezers (never metal) to pull out visible paper bits
– For compacted dust near rollers, gently scrape with a credit card edge
– Clear sensor windows with a dry cotton swab first—moisture comes later
Critical warning: If you feel resistance exceeding light finger pressure, stop. Forcing extraction can dislodge blades or crack plastic gears. Proceed to sensor cleaning if you can’t visually confirm debris clearance.
Cleaning the Paper Sensor: Fixing False “No Paper” Readings
Your Embassy shredder’s optical sensor is its “eyes”—a tiny infrared beam that detects paper presence. When paper dust coats this sensor (a near-certainty after 500+ sheets), it falsely reports “no paper” even when documents are loaded. This is the #1 cause of feed failure in office environments with high paper usage.
Locating and Cleaning the Sensor Window
Find the sensor by:
– Looking for a small dark lens (2-3mm wide) inside the feed slot
– Typically positioned 1-2 inches below the paper entry point
– Often marked with a subtle “sensor” icon on newer Embassy models
Proper cleaning sequence:
1. Power off and unplug the shredder
2. Dampen a cotton swab with 90% isopropyl alcohol (lower concentrations leave residue)
3. Gently wipe the sensor lens in circular motions—no scrubbing
4. Use a dry swab to remove any lint
5. Wait 5 minutes for complete drying before testing
Why this works: Alcohol dissolves paper dust binders without damaging optical coatings. Water-based cleaners can fog the lens permanently. For Embassy Elite LF1200/LF1400 models, this step resolves the notorious E5 error code 90% of the time.
Restoring Grip: Reviving Worn Embassy Feed Rollers
Rubber feed rollers lose traction as they age, especially in low-humidity environments. When your embassy paper shredder not working exhibits paper slipping or partial feeding, inspect rollers for these failure signs:
– Shiny, glassy surfaces instead of matte texture
– Deep grooves from paper edge wear
– Cracks or splits in the rubber compound
Deep Cleaning Techniques for Maximum Traction
Never use oil or household lubricants—they degrade rubber. Instead:
1. Unplug the shredder and remove any paper dust with compressed air
2. Dampen a microfiber cloth with mild dish soap solution (1 tsp soap per cup water)
3. Roll the feed rollers by hand while wiping—clean 360 degrees
4. For stubborn residue, use a soft-bristled toothbrush dipped in solution
5. Dry completely with a lint-free cloth before testing
Pro tip: Test roller grip by pressing a business card against them while rotating manually. Properly cleaned rollers should grab and pull the card smoothly. If they still slip, replacement is needed—but this cleaning often restores function for months.
Diagnosing Gear Train Failures in Embassy Shredders

When the motor runs but rollers don’t turn, the problem lies in the mechanical transmission. Embassy shredders use either direct-drive gear systems (common in LF series) or timing belts (in compact models). Both fail predictably after 3+ years of heavy use.
Identifying Broken Drive Components
With the shredder unplugged:
– Listen for unusual sounds: A high-pitched whine indicates belt slippage; grinding suggests gear teeth failure
– Check roller movement: Manually rotate feed rollers—if they spin freely without resistance, the drive linkage is broken
– Inspect through feed slot: Look for visible gear misalignment or belt dislodgement using a flashlight
Critical red flags requiring professional help:
– Visible plastic fragments in the waste bin
– Motor running in reverse continuously
– Burning smell during operation
If you confirm gear/belt damage, do not operate the shredder. Continued use can destroy the motor assembly. For Embassy Elite models, this often requires replacing the entire drive module—a task best left to certified technicians.
Preventing Future Feed Failures: Your Embassy Maintenance Schedule
The best fix is avoiding the problem entirely. Embassy shredders in offices with consistent maintenance last 3x longer than neglected units. Implement this schedule based on your usage:
Daily/Weekly Critical Checks
- Wipe feed slot with dry cloth after each use
- Verify paper alignment—never force misaligned sheets
- Empty bin at ¾ capacity to prevent backup jams
Monthly Deep Maintenance
- Blow out dust with compressed air (hold can upright to avoid moisture)
- Lubricate cutting heads using only Embassy-approved oil sheets
– Never spray oil directly—it attracts dust
– One lubrication sheet per 150 sheets shredded - Test sensor function by waving a business card through the feed slot
Annual Professional Service
Schedule technician visits if:
– You process > 500 sheets weekly
– The shredder is over 3 years old
– You notice increased paper dust in the room
Proven time-saver: Keep a “shredder maintenance kit” at your desk with compressed air, alcohol swabs, and approved lubrication sheets—reducing downtime by 70%.
Your Embassy paper shredder’s refusal to feed paper is almost always solvable with methodical troubleshooting. By starting with the simple power reset, progressing through sensor and roller cleaning, and knowing when mechanical failures require professional help, you’ll restore secure document destruction without expensive repairs. Remember that 90% of feed failures stem from preventable issues like dirty sensors or neglected maintenance—not irreversible damage. Implement the monthly lubrication routine and sensor checks described here, and your Embassy shredder will reliably handle confidential documents for years. If you’ve followed all steps without success, contact Embassy support with your model number (typically on the bottom plate)—they often provide model-specific firmware updates that resolve persistent electronic glitches. Don’t let a temporarily uncooperative shredder compromise your security; with these proven fixes, you’re back in control today.


