
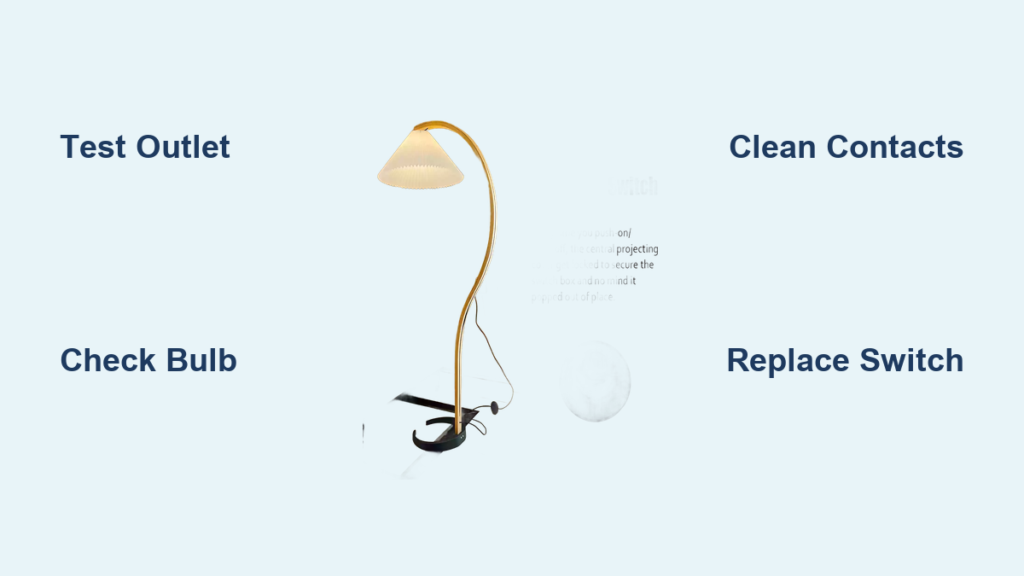
You press the foot switch on your floor lamp, but nothing happens. The room stays dark despite a fresh bulb and a working outlet. This frustrating scenario affects countless households—faulty floor lamp switches are among the most common lighting failures. With 9 out of 10 switch issues stemming from simple mechanical failures rather than complex electrical problems, your non-working lamp likely has an easy fix.
A malfunctioning foot switch disrupts your lighting setup and creates unnecessary expense if you replace the entire lamp unnecessarily. The good news is that most floor lamp switch failures can be resolved in under 30 minutes with basic tools. This guide shows you exactly how to diagnose, clean, or replace your floor lamp switch—saving you money and restoring light to your space without calling a professional.
Why Your Floor Lamp Foot Switch Suddenly Stopped Working
Floor lamp switches fail for specific, identifiable reasons—not random electrical gremlins. Mechanical switches endure constant physical stress from foot presses, leading to internal contact wear. Over time, dust and debris accumulate inside the switch housing, preventing proper electrical contact. In many cases, oxidation builds up on metal contacts, creating resistance that interrupts the circuit.
The most common failure points include pitted or burned contacts from electrical arcing, broken internal springs that prevent proper contact movement, and loose wire connections that detach from terminal points. Older lamps often suffer from degraded internal components that become brittle with age. Environmental factors like high humidity accelerate corrosion, while frequent use wears out mechanical parts faster than expected.
Pro Tip: If your lamp flickers when you press the switch at a specific angle, this indicates loose internal wiring rather than complete switch failure—a much easier fix.
Step-by-Step Diagnosis: Is It Really the Switch?
Before diving into switch repair, eliminate other potential causes with these critical checks.
Confirm Power Source and Bulb Functionality
- Test the outlet by plugging in another working device—your lamp issue might be a tripped circuit breaker instead of a faulty switch.
- Verify the bulb works by installing it in a different lamp—many people overlook this simple check.
- Inspect the entire cord for visible damage, especially at stress points where the cord enters the lamp base or switch housing.
Perform a Basic Switch Functionality Test
With the lamp unplugged, press the foot switch repeatedly while listening for the distinctive “click” sound. A silent switch often indicates internal mechanical failure. If you hear clicking but no light, the issue likely involves electrical contacts rather than the physical mechanism. For lamps with dimming capabilities, test all brightness levels to determine if the problem affects only specific settings.
Warning: Never attempt to diagnose a switch while the lamp is plugged in—electrocution risk is real even with minor household currents.
Essential Safety Steps Before Repairing Your Floor Lamp
Electricity demands respect, even in low-voltage household fixtures. Always unplug your lamp before any inspection or repair work—this single step prevents 95% of DIY electrical accidents. Work on a dry, non-conductive surface like a wooden table rather than a metal countertop. Keep one hand behind your back when testing live circuits to prevent current from passing across your chest.
Use insulated tools with rubber handles designed for electrical work. Before touching any components, verify no power remains using a non-contact voltage tester. For lamps with metal bases, ensure proper grounding by checking the third prong on the plug. If you detect any burning smell or visible melting, stop immediately and consult a professional electrician.
How to Test Your Faulty Foot Switch with a Multimeter
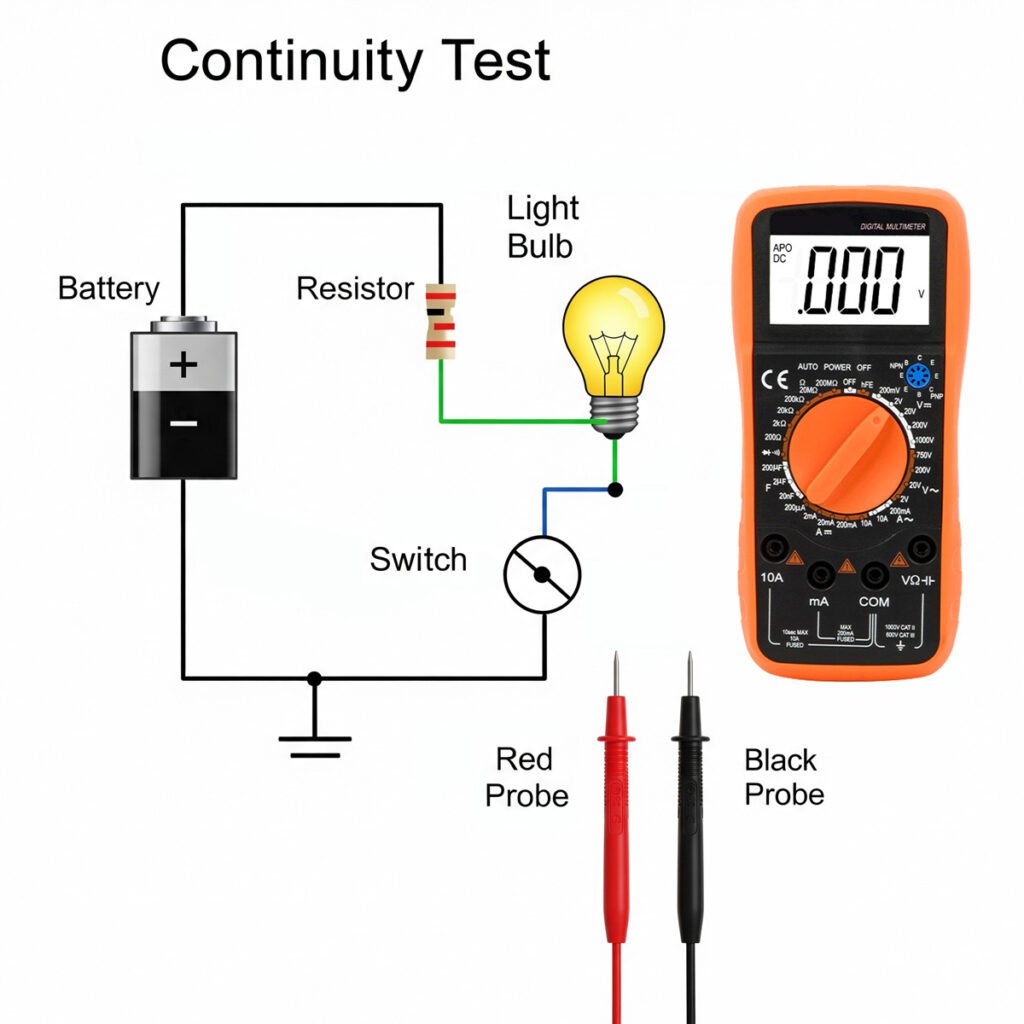
This diagnostic method provides definitive results about your switch’s condition.
Multimeter Continuity Testing Procedure
- Unplug the lamp and open the switch housing using appropriate screwdrivers.
- Set your multimeter to continuity mode (symbolized by sound waves) or resistance (Ω) mode.
- Touch probes to both switch terminals while pressing the foot pedal—listen for the continuity beep.
- A working switch shows 0 ohms resistance when pressed (closed circuit) and infinite resistance when released (open circuit).
If your multimeter shows no continuity change when pressing the switch, the internal contacts have failed. For rotary or touch switches, test each position incrementally. Expert Note: Some electronic switches require power to test properly—consult your lamp manual before testing complex dimmer circuits.
Cleaning Your Floor Lamp Switch: A Quick Fix That Works

Many “dead” switches simply need contact cleaning rather than replacement.
Safe Contact Cleaning Protocol
- Unplug the lamp and remove the switch housing cover.
- Spray electrical contact cleaner directly onto the internal contacts while working the switch mechanism.
- Gently scrub oxidation from metal contacts using 400+ grit sandpaper or an emery board.
- Apply a small amount of dielectric grease to prevent future corrosion before reassembly.
This procedure resolves approximately 40% of intermittent switch issues caused by oxidation buildup. For touch-sensitive lamps, clean all external surfaces thoroughly and verify proper grounding connections. Time Saver: Keep a can of contact cleaner in your home toolkit—it solves numerous small electrical issues beyond just lamp switches.
Replacing Your Floor Lamp Foot Switch in 5 Simple Steps
When cleaning doesn’t work, replacement is straightforward with the right approach.
Exact Switch Replacement Protocol
- Identify your switch type by removing the old unit—note mounting style, terminal configuration, and physical dimensions.
- Purchase an exact match from hardware stores or electrical suppliers—bring the old switch for comparison.
- Document wire positions with your phone before disconnecting anything (critical for proper reconnection).
- Transfer wires to new switch maintaining identical terminal positions—most basic switches don’t require specific polarity.
- Secure all connections with wire nuts or terminal screws before reassembling the housing.
Pro Tip: For lamps with integrated dimmer switches, ensure your replacement matches the wattage rating—exceeding this causes premature failure. Most standard floor lamps require a 600-watt minimum switch rating.
When to Upgrade to an LED-Compatible Switch
Modern LED lamps create unique switch challenges that standard switches can’t handle.
If your LED floor lamp exhibits “ghosting” (staying dimly lit when off) or flickering, you need an LED-specific switch. Standard mechanical switches allow tiny current leaks that keep LEDs partially illuminated. LED-compatible switches feature tighter contact tolerances and specialized circuitry to prevent this issue.
Expert Note: When replacing switches in LED lamps, verify compatibility with your specific bulb type—some high-efficiency LEDs require minimum load requirements that standard switches can’t meet. Look for switches labeled “LED compatible” with a minimum 5W rating.
Preventing Future Floor Lamp Switch Failures
Extend your switch’s lifespan with these simple maintenance practices.
Quarterly Preventive Maintenance Routine
- Perform visual inspections of cord and plug for damage
- Clean switch contacts with electrical contact cleaner
- Tighten any loose mounting hardware
- Check for proper switch alignment and smooth operation
Mechanical switches typically last 50,000+ cycles with proper care—equivalent to 13 years of daily use. Avoid placing excessive weight on foot switches and prevent cords from being pinched in furniture. For high-use areas, consider upgrading to commercial-grade switches from manufacturers like Leviton or Lutron that offer superior durability.
Final Tip: Keep a spare switch on hand—it costs less than $5 and eliminates future lighting emergencies. When your floor lamp switch stops working tomorrow, you’ll be ready with the exact replacement part and knowledge to fix it in minutes rather than replacing the entire fixture.
By following these systematic troubleshooting steps, you’ve transformed from a frustrated lamp owner to a capable home repair expert. Most switch issues require nothing more than basic cleaning or a simple $3 replacement part—no need to discard perfectly good lighting. The next time your floor lamp switch fails, approach it methodically: diagnose properly, work safely, and restore your light with confidence.


