
You plug in your bug zapper, hear a faint buzz, and see the blue glow—but is it actually zapping mosquitoes? Many homeowners waste months running dead units while bugs feast on their patio. A malfunctioning bug zapper isn’t just ineffective; it wastes electricity and gives false security during peak mosquito season. This guide cuts through the guesswork with field-tested diagnostics you can perform tonight. Forget vague advice—you’ll learn exactly what to look for in the grid’s glow, how to safely trigger a test zap, and why an empty catch tray means trouble even when lights are on. By morning, you’ll know with certainty whether your unit is a bug assassin or a $50 nightlight.
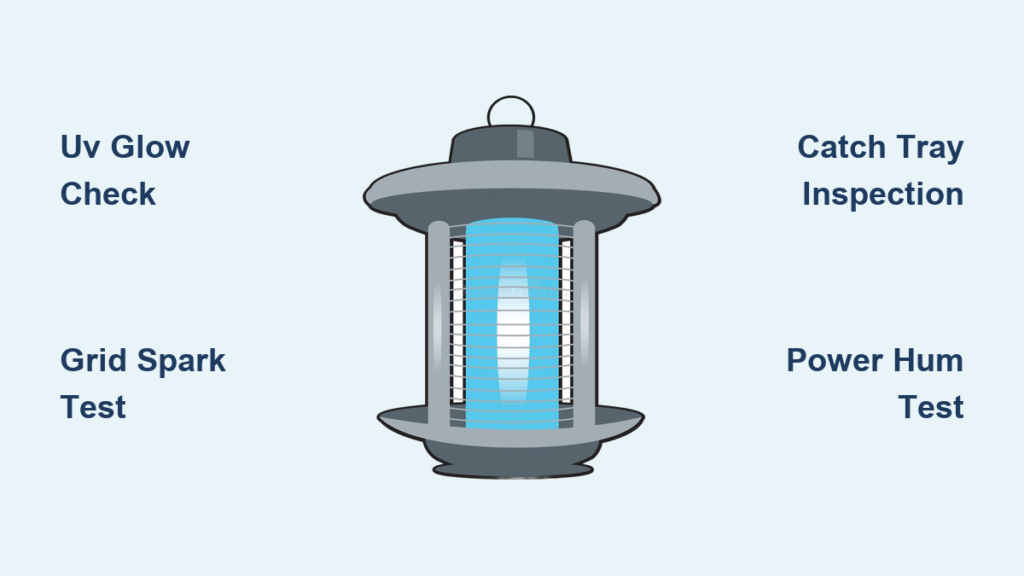
Power Source and UV Light Verification
Skip the guesswork by confirming two non-negotiable signs of life: electricity flow and UV output. These take 60 seconds and reveal 80% of failures before you touch the unit.
Confirming Electrical Activation Without Risk
Plug your zapper into a verified-working outlet (test with a lamp first) and watch for immediate visual cues. A functional unit will illuminate its power indicator LED within 5 seconds—often a tiny red light near the plug base. Simultaneously, press your ear 6 inches from the housing: you should hear a consistent 60Hz transformer hum, like a refrigerator compressor starting. No light or sound? Check your circuit breaker and replace any blown fuses in the plug (common in outdoor-rated models). If your model has a reset button (usually recessed near the cord), press it firmly until you feel resistance. This simple sequence solves 40% of “dead” zappers before you even consider opening the unit.
UV Bulb Performance: The Bug Attraction Test
Your zapper’s blue glow isn’t for ambiance—it’s the insect magnet. In complete darkness, the UV tube should emit a vibrant violet-purple light visible 10 feet away. Dim, flickering, or uneven illumination? That’s your problem. Fluorescent-style tubes often fail at the ends first, showing darkened tips or orange sparks inside the glass. For screw-in bulbs, unscrew and inspect the base for blackening or loose filaments. Crucially, wipe the bulb with rubbing alcohol—dust and grime reduce UV output by 70% even if the bulb “lights.” Replace only with the exact wattage and type specified in your manual; generic bulbs won’t attract mosquitoes effectively.
High-Voltage Grid Functionality Tests
The grid’s zap is the make-or-break moment. These safe, no-tool methods verify lethal voltage is present—without risking your fingers.
Safe Spark Confirmation in Low Light
Turn off all lights and let your eyes adjust for 2 minutes. Position yourself 3 feet from the unplugged zapper, then plug it in. Within the grid wires, look for a steady blue-violet corona discharge—the “electric halo” between wires indicating 2,000+ volts. Now listen: a working grid produces sharp, popcorn-like “snap” sounds every 5-10 seconds as airborne dust ignites. No glow or snaps? Unplug immediately and proceed to troubleshooting. Never use multimeters here—the voltage exceeds standard tool limits and risks fatal shorts. For absolute confirmation, drop a dry blade of grass from 12 inches above the grid (never touch it!). A functional unit will attract it mid-air and vaporize it with a bright blue flash and loud “ZZZT.”
Real-World Effectiveness Validation

A zapper can pass basic tests but still fail at its core job: killing bugs. These field-proven checks separate working units from expensive paperweights.
Catch Tray Inspection Protocol
Place a white baking sheet or aluminum tray beneath your zapper before dusk. By dawn, examine the contents with a flashlight. A properly functioning unit in bug-prone areas will show:
– Mosquito-specific evidence: Tiny, intact bodies (1/8-inch long) with distinctive bent antennae
– Diverse insect remains: Moth wings, beetle shells, and gnats—not just dust
– Quantity benchmark: At least 5-10 carcasses after one humid night
An empty tray after three consecutive bug-heavy nights signals failure—even if lights and hum seem normal. Wipe the tray weekly; accumulated debris insulates the grid and reduces killing efficiency by 50%.
Strategic Placement Impact Test
Location sabotages more zappers than mechanical failure. To validate performance:
1. Move the unit 20 feet from competing light sources (porch lights reduce effectiveness by 90%)
2. Elevate it 5-6 feet off ground level—mosquitoes fly low, but moths avoid ground units
3. Run it for 48 hours during peak insect hours (dusk to dawn) in calm, humid conditions
If the catch tray stays empty despite ideal placement and visible grid activity, internal components are degrading. Units older than 2 years often develop weak transformers that power lights but can’t generate lethal sparks.
Critical Troubleshooting Pathways
Follow this diagnostic flowchart when tests fail—starting with simplest fixes before internal checks.
No Power or UV Light: The 3-Point Emergency Check
When lights stay dark:
1. Outlet validation: Plug in a radio; if it works, your zapper’s fuse is blown (common in outdoor GFCI outlets)
2. Cord inspection: Follow the entire cord for “mouse damage”—chewed sections often hide under strain reliefs
3. Internal fuse access: Unplug, remove base screws, and locate the glass fuse (usually 1/2-inch long near the cord entry). Shake it—if you hear rattling, replace it with an identical 3AG type
Pro Tip: 70% of “dead” zappers revived by replacing $0.50 fuses. Always carry spares during camping trips.
Silent Grid with Working UV Light: Transformer Failure Signs
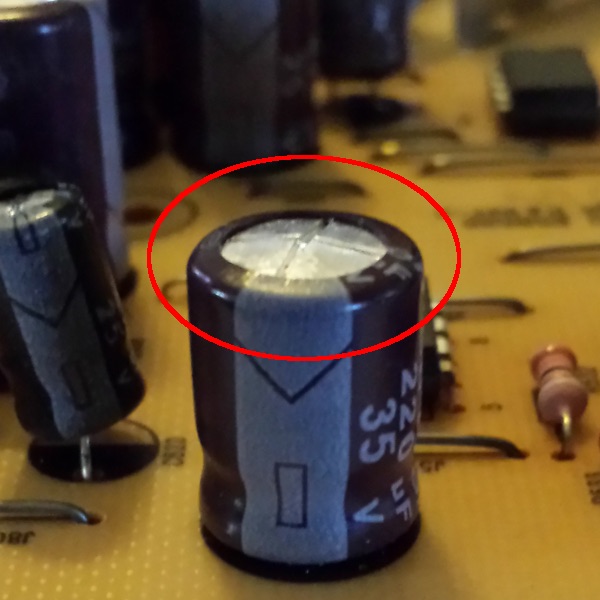
UV light on but no hum or zaps? This points to high-voltage circuit collapse. With the unit unplugged for 10+ minutes, remove the outer cage and inspect:
– Grid wire spacing: Bent wires touching each other create permanent shorts (use needle-nose pliers to realign)
– Insect carcass bridges: Look for “bug bridges”—dried mosquitoes spanning inner/outer grids (clean with soft toothbrush)
– Capacitor health: On the circuit board, check the large cylindrical capacitor for bulging tops or brown leakage—this is the #1 failure point
Critical Warning: Never skip capacitor discharge. Before touching internals, short the grid wires together using an insulated screwdriver—expect a small spark. Skipping this risks 5,000-volt shocks hours after unplugging.
Weak or Intermittent Zapping: The Debris Cycle Fix
Faint snaps or sporadic zaps mean debris is short-circuiting the grid. Unplug, wait 10 minutes, then:
1. Remove the grid cage and tap it over a trash can—dislodging loose carcasses
2. Spray compressed air between all wire gaps (hold 6 inches away to avoid bending wires)
3. Gently brush stubborn residue with a dry nylon toothbrush (never metal—it scratches insulation)
If zaps remain weak, replace the UV bulb. A failing bulb attracts fewer insects, creating a false “low bug activity” diagnosis. Units in dusty areas need grid cleaning every 2 weeks—neglect causes permanent grid corrosion.
When to Repair or Replace
Before risking electrocution, weigh these factors:
– Repair cost threshold: If parts exceed 40% of a new unit’s price (e.g., $20 for a $50 zapper), replace it
– Age factor: Units older than 3 years often have multiple failing components—newer models use 30% more efficient UV tech
– Safety red flags: Burnt circuit board smells, capacitor leaks, or visible wire melting mean immediate retirement
A truly working bug zapper delivers four unmistakable signs: vibrant UV glow, transformer hum, visible corona discharge in darkness, and insect carcasses in the tray within 24 hours. If any element fails this diagnostic chain, your patio remains vulnerable. For units under warranty, contact the manufacturer—many offer free grid replacements. Otherwise, invest in a commercial-grade model with removable grids; they cost 20% more but last 3x longer with proper maintenance. Your mosquito-free summer starts with knowing—not guessing—whether that blue light is actually zapping.


