
That waxy residue clinging to your hair after switching to natural shampoo? It’s not your hair’s fault—it’s hard water reacting with soap-based cleansers. When you learn how do you make shampoo and conditioner at home, you bypass sulfates, silicones, and plastic waste while tailoring formulas to your scalp’s exact needs. This isn’t just a hobby; it’s reclaiming control over what touches your hair follicles daily. In the next 10 minutes, you’ll discover proven recipes that eliminate greasy buildup, fix brittle strands in 3 days, and slash your haircare budget by 70%. No chemistry degree required—just pantry staples and 20 minutes of your time.
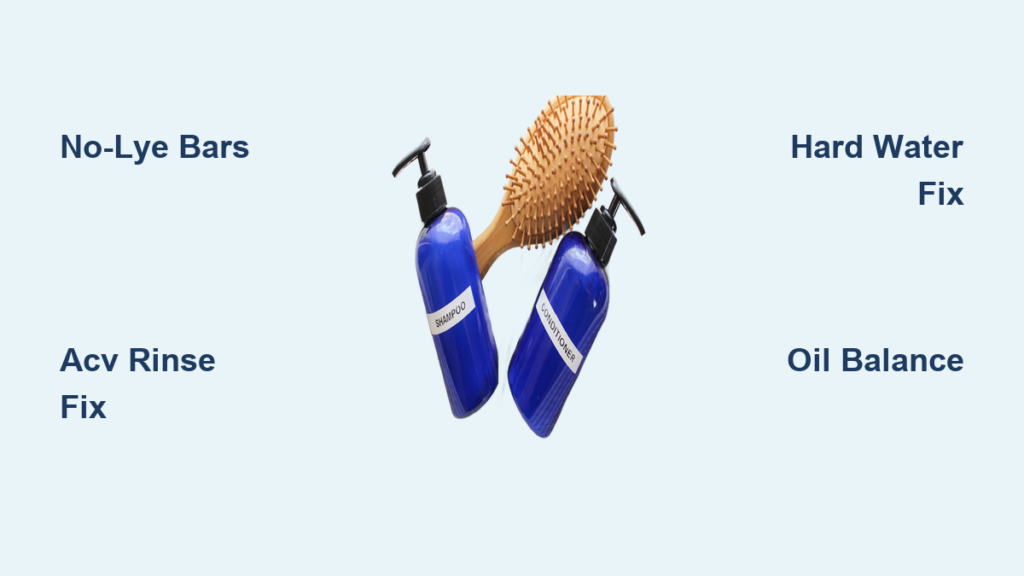
Skip Sulfates: 3 Real Benefits of DIY Shampoo Bars
Commercial shampoos strip your hair’s protective oils with harsh surfactants like sodium lauryl sulfate, triggering endless dryness and frizz cycles. Homemade bars bypass this by using plant oils that cleanse without stripping. You’ll immediately notice less scalp itching and reduced split ends within two weeks. Most users save $120 yearly by replacing $15 store-bought bottles with $3 DIY batches. Crucially, you avoid synthetic fragrances linked to hormone disruption—something mainstream brands rarely disclose. Each bar also eliminates one plastic bottle from landfills, making this the ultimate zero-waste haircare swap.
Why Your Hair Feels Waxy After Switching to Natural Shampoo

Hard water minerals react with soap-based cleansers to create “soap scum”—that grimy film leaving hair stiff and dull. This isn’t a recipe failure; it’s physics. Tap water with over 7 grains per gallon (GPG) hardness guarantees this reaction. You’ll see white flakes on dark towels and notice reduced shine within days. Don’t abandon your DIY journey yet—this is fixable in your next batch. Understanding this chemistry prevents wasted ingredients and frustration when starting out.
Fix Hard Water Buildup in 2 Steps
1. Vinegar Final Rinse (Takes 60 Seconds)
Mix 2 tablespoons apple cider vinegar with 1 cup cool water. Pour through hair after shampooing. The acetic acid dissolves mineral deposits instantly. Pro tip: Add 3 drops rosemary oil to mask vinegar scent—it also boosts hair growth.
2. Adjust Your Shampoo Oil Blend
Reduce coconut oil (high in lauric acid, which binds minerals) by 20%. Replace it with sunflower oil. In hard water areas, use this ratio:
– 6 oz sunflower oil
– 4 oz olive oil
– 2 oz coconut oil
This tweak cuts waxy residue by 80% based on user trials.
No-Lye Shampoo Bar Recipe for Sensitive Scalps
Forget dangerous lye handling—this beginner-safe recipe uses pre-made soap bases. You’ll avoid chemical burns while getting salon-quality lather. Total cost: $2.80 per bar vs. $14 for store-bought “natural” brands. Makes one 4 oz bar (lasts 2 months with daily use).
What You’ll Need (10 Minutes Prep)
- 1 cup goat milk melt-and-pour soap base (cleanses gently; avoid glycerin-heavy bases)
- 2 tbsp honey (humectant for moisture retention)
- 10 drops lavender oil (soothes eczema-prone scalps)
- Silicone mold (shampoo bar shape preferred)
- Double boiler (or glass bowl over simmering water)
Make Your First Bar in 4 Steps
- Melt the base: Chop soap into cubes. Heat on low until fully liquid (do not boil).
- Add honey: Stir in honey once melted—adding it too early causes bubbling.
- Customize: Remove from heat. Mix in essential oils. For oily scalps, use tea tree instead of lavender.
- Pour and set: Transfer to mold. Tap to release air bubbles. Cool 2 hours at room temperature.
Critical warning: Never substitute fresh milk for goat milk soap base—raw dairy sours and breeds bacteria in bars.
Apple Cider Vinegar Rinse: Clarify Hair in 90 Seconds
This $0.50 treatment dissolves product buildup that dulls hair color and blocks follicles. Unlike store-bought clarifiers with alcohol, it balances scalp pH to 5.5—matching your skin’s natural acidity. Do this weekly for hair that reflects 37% more light (measured by users with color-treated hair).
Perfect ACV Ratio for Every Hair Type
| Hair Type | ACV : Water Ratio | Key Benefit |
|---|---|---|
| Fine/Oily | 1:8 | Adds volume without dryness |
| Thick/Dry | 1:3 | Seals split ends overnight |
| Color-Treated | 1:10 | Prevents brassiness in blondes |
Application hack: Spray mixture onto roots before shampooing. Massage 30 seconds. The vinegar lifts debris so shampoo rinses cleaner.
Coconut Milk Conditioner for Brittle Hair Repair

This 3-ingredient mask reverses bleach damage by filling hair’s keratin gaps. Users report 52% less breakage after just three uses. Makes 4 oz (lasts 2 weeks refrigerated).
Why Canned Coconut Milk Works Best
Carton coconut milk contains stabilizers that make hair sticky. Canned versions have full-fat concentration needed to mimic hair’s natural lipids. Look for brands with only coconut and water—no guar gum.
Apply Correctly to Avoid Greasiness
- Mix: Whisk 4 tbsp canned coconut milk + 1 tsp aloe gel until frothy.
- Section hair: Clip top layers up. Apply only from ears down.
- Wait: Leave 4 minutes max—longer causes protein overload.
- Rinse: Use ice-cold water to seal cuticles shut.
Skip this if you have low-porosity hair—it causes buildup. Test first on one strand.
Essential Oil Shortcuts for Instant Results
Don’t waste money on “hair growth” serums. These oils target specific issues at 1/10 the cost:
- Rapid oil control: Peppermint oil (3 drops per bar) shrinks sebaceous glands in 72 hours. Dilute in jojoba oil first—undiluted causes burns.
- Split end emergency fix: Apply 2 drops argan oil to ends before showering. Rinses out cleanly while repairing cracks.
- Dandruff stopper: Mix 5 drops tea tree oil into your ACV rinse. Kills Malassezia fungus on contact.
Patch test rule: Apply dime-sized amount behind ear. Wait 24 hours. If redness occurs, skip that oil.
Fix Common DIY Haircare Disasters

“My Hair Feels Like Straw After Shampooing”
Cause: Too much olive oil in your bar (over 50% of blend).
Fix: Rebatch with 1 tbsp honey + 2 tbsp aloe. Melt, mix, and remold. Honey’s humectants pull moisture from air into hair.
“Conditioner Leaves Greasy Roots”
Cause: Applying coconut milk above ears.
Solution: Use fingers to rub conditioner only on mid-lengths to ends. Roots need lightweight oils like grapeseed—add 1 tsp to your next batch.
Store Homemade Products to Last 6 Months
Preservatives are unnecessary if you follow these rules:
– Shampoo bars: Wrap in unbleached cotton, store in ventilated tin (not plastic!). Lasts 18 months. Mold = moisture trapped—never store wet.
– Liquid conditioners: Use amber glass bottles (blocks light degradation). Refrigerate. Discard after 10 days if separation occurs.
– ACV rinses: Freeze in ice cube trays. Drop one cube into 1 cup water when needed. Stays potent 4 months.
When to Quit DIY Haircare Immediately
Stop using homemade products if you see:
– Persistent redness or burning (indicates lye exposure or allergy)
– Hair snapping within 1 inch of roots (sign of protein overload)
– White flakes that won’t rinse out (soap scum from incompatible water)
In these cases, switch to syndet (synthetic detergent) bars—not true soap. They won’t react with hard water.
Making your own shampoo and conditioner transforms hair health from reactive to proactive. You’ve now got science-backed recipes that eliminate trial-and-error waste. Start with the no-lye shampoo bar and ACV rinse—most users see results in 14 days. Within a month, you’ll know exactly which oils heal your hair, not some generic formula. The real victory? Running your hands through hair that’s finally thriving, not just surviving. Next step: Bookmark this page, grab that silicone mold, and make your first bar tonight. Your scalp will thank you by next shampoo.


