
That box sitting in your living room holds the potential to transform your space, but staring at disassembled parts and mysterious hardware can make floor lamp assembly feel overwhelming. The good news is that with the right approach, you can have your new lighting fixture standing tall and illuminating your room in less than half an hour. Most floor lamps follow similar assembly patterns regardless of style or brand, and knowing the proper sequence prevents frustration and ensures your lamp remains stable and safe. By following this practical guide, you’ll learn exactly how to assemble your floor lamp correctly the first time—avoiding common mistakes that lead to wobbling fixtures or electrical hazards.
Many people rush through lamp assembly only to discover problems later—crooked shades, unstable bases, or even electrical issues. Taking just a few extra minutes to verify parts, use proper techniques, and perform safety checks saves you from having to disassemble everything later. Whether you’ve just unboxed a sleek modern design or a classic reading lamp, this step-by-step process works for nearly all floor lamp types. Let’s get your new lighting fixture standing strong and ready to brighten your space.
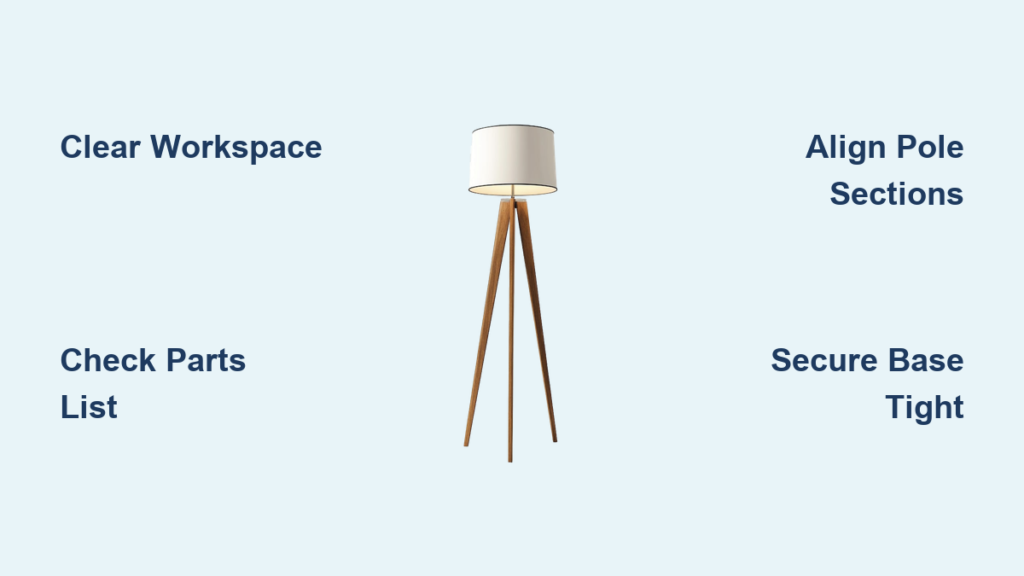
Why Proper Workspace Setup Prevents Floor Lamp Assembly Mistakes
Before touching any components, create an optimal assembly environment that prevents lost parts and surface damage. Clear a large, flat area—your dining table works better than the floor, giving you comfortable working height and reducing the chance of misplacing small hardware. Cover the surface with a soft towel or blanket to protect delicate finishes on metal or wood components. Working on a hard surface without padding risks scratching finishes and makes small parts like washers difficult to locate if they roll away.
Ensure you have adequate lighting—ironic but essential when assembling a light fixture. Natural daylight or a bright task lamp helps you distinguish between similar-looking screws and spot threading issues. Keep a small container or magnetic tray nearby to organize hardware; those tiny washers and bolts disappear quickly on carpeted floors. This preparation might seem excessive for what appears to be a simple task, but taking five minutes to set up properly prevents the frustration of searching for a missing screw halfway through assembly.
Identifying Every Floor Lamp Component Before Assembly Begins
Don’t discard packaging until you’ve verified all parts—this is the single most important step many DIYers skip. Carefully unpack each component and lay them out systematically. Your typical floor lamp kit contains:
- The base (either a weighted disc or tripod legs)
- Pole sections (one or multiple telescoping tubes)
- Socket assembly (housing the electrical components)
- Harp (the curved wire frame supporting the shade)
- Finial (decorative knob securing the shade)
- Lamp shade (fabric, glass, or metal)
- Hardware pack (screws, washers, bolts specific to your model)
Cross-reference each piece with the instruction manual’s parts diagram. If anything’s missing, contact the retailer immediately while packaging is still intact as proof of purchase. Pay special attention to similar-looking screws—many lamps include multiple lengths for different assembly stages. Group identical hardware together on your workspace to prevent confusion later. This systematic approach prevents mid-assembly discoveries of missing components that would force you to disassemble partially completed sections.
Essential Tools for Flawless Floor Lamp Assembly
Most floor lamps require minimal tools, but having the right ones prevents stripped screws and damaged finishes. Forget complicated toolkits—your basic household items suffice:
- Phillips-head screwdriver (medium size)—never use a flathead as it damages screw heads
- Adjustable wrench (for base connections on heavier lamps)
- Soft cloth or rubber grip pad (protects finishes while tightening)
- Needle-nose pliers (helpful for stubborn harp assembly)
The instruction manual specifies required tools, but most lamps need only hand-tightening for final assembly. Power tools risk over-tightening and damaging delicate threads—reserve them only for initial finger-tightening on stubborn connections. Keep a small mirror nearby to check hard-to-see connections beneath bases. If your lamp includes specialty hardware like allen wrenches, store them inside the base after assembly for future adjustments.
Connecting Pole Sections Without Damaging Threads
This is where most assembly errors occur—forcing misaligned sections damages threads and creates wobble. Start with the bottom pole section facing upward on your padded workspace. Remove protective caps covering threaded ends. Apply firm, straight pressure while gently twisting the next section clockwise—never at an angle. If resistance occurs after 2-3 turns, disassemble and realign; cross-threading causes permanent damage.
For metal-on-metal connections, wrap a cloth around the upper section for better grip without scratching. Listen for the subtle “click” indicating proper alignment before applying significant force. Telescoping poles should slide together smoothly—excessive force suggests misalignment. After connecting all sections, hold the top and bottom firmly while giving a gentle twist to verify stability. A properly assembled pole shouldn’t separate under moderate pressure but should allow height adjustment if designed as such.
Securing the Base for Maximum Stability
Your lamp’s stability depends entirely on this critical connection. Place the base upside down on your padded surface. For weighted disc bases, align the pole’s threaded end with the central hole. Apply firm downward pressure while turning clockwise—use your palm, not fingers, for better torque control. When hand-tightening becomes difficult, use an adjustable wrench wrapped in cloth to avoid marring the finish.
Tripod bases require additional attention: attach each leg to the central hub before connecting to the pole. Ensure all leg bolts are equally tight—uneven tension creates wobble. After assembly, perform the “shake test”: grasp the top of the pole and gently shake side-to-side. Any movement at the base means insufficient tightening. Properly secured, the base should feel like a single solid unit with the pole. Remember—over-tightening can strip threads, but under-tightening creates dangerous instability.
Installing the Socket and Harp Assembly Correctly
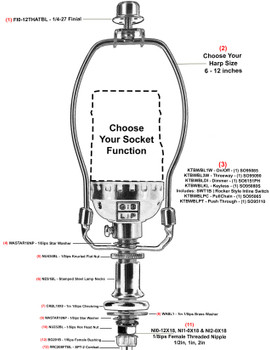
Never skip this electrical safety step: keep the lamp unplugged throughout assembly. Start by threading the power cord through the pole from top to bottom—you’ll feed it through each section as you assemble. At the top, connect the socket housing to the pole’s upper collar. Most designs use a setscrew tightened with a small allen wrench—don’t overtighten as this cracks plastic housings.
The harp installation often confuses beginners. Position the saddle (flat base) over the socket’s protruding nipple, then snap the curved wire frame into the saddle’s slots. The harp should stand perpendicular to the socket with even tension on both sides. Test by gently squeezing the harp wires—they should spring back symmetrically. Misaligned harps cause crooked shades that no amount of finial tightening can fix. If your lamp includes a switch mechanism, verify it operates smoothly before proceeding to the shade.
Attaching Different Types of Lamp Shades Properly
:max_bytes(150000):strip_icc()/types-of-lampshade-fittings-6742943-final-2-53530431336341488a799406cb5c33a5.png)
Your shade type determines the correct installation method—forcing the wrong technique damages both shade and fixture. Spider fitters (most common) have three arms that rest on top of the harp. Center the shade over the harp, then lower until the arms seat evenly. Uno fitters slide directly onto the socket and require no harp—tighten the bottom ring against the socket. Clip-on shades attach directly to the bulb with metal clips—only use with recommended bulb types.
After positioning, secure with the finial. Hand-tighten only until resistance is felt—excessive force cracks glass or ceramic shades. The finial should sit straight, not tilted. Check alignment by viewing the shade from multiple angles; it should appear perfectly centered over the base. If crooked, loosen the finial slightly, adjust the shade position, then re-tighten. Proper shade installation isn’t just cosmetic—misaligned shades create uneven light distribution and safety hazards.
Final Safety Checks Before Plugging In Your New Lamp
Don’t skip these critical verification steps—electrical safety isn’t worth risking:
- Cord inspection: Run your fingers along the entire cord length checking for nicks or exposed wires
- Strain relief: Verify the cord has proper slack at entry points to prevent pulling on internal connections
- Bulb verification: Install only the manufacturer-specified wattage—LED bulbs reduce heat risks
- Stability test: Apply gentle pressure to the top—you shouldn’t be able to tip the lamp over
- Switch function: Move the switch through all positions to ensure smooth operation
Plug in the lamp away from flammable materials and observe for unusual sounds, smells, or sparks during the first five minutes of operation. If anything seems amiss, unplug immediately and recheck connections. A properly assembled lamp operates silently with consistent brightness—flickering indicates loose wiring that needs professional attention.
Troubleshooting Common Floor Lamp Assembly Problems
Wobbly base despite tight connections: Check if your floor has an uneven surface—place a thin cardboard shim under the high leg. For weighted bases, ensure no packaging material remains inside.
Harp won’t stay in position: The saddle might be installed backward—flip it and reattach. Some harps have directional tabs that must align with socket notches.
Shade slips down the harp: The harp wire may be too narrow for your shade’s fitter—replace with a wider harp available at hardware stores.
Socket switch doesn’t work: Verify the pull chain hasn’t gotten tangled inside the pole during assembly—disassemble just enough to free it.
Maintaining Your Assembled Floor Lamp for Long-Term Use
Proper care extends your lamp’s life significantly. Dust weekly with a microfiber cloth—never spray cleaners directly on the fixture. Every six months, gently tighten all connections as normal use causes gradual loosening. Check the cord for wear annually, especially at stress points near the plug and where it enters the base.
For lamps with fabric shades, use a handheld vacuum with brush attachment to remove embedded dust. Glass shades benefit from a vinegar-water solution (1:1 ratio) applied with a soft cloth—never spray liquid near electrical components. If your lamp develops a slight wobble over time, focus tightening efforts on the base-to-pole connection rather than forcing other joints.
Final Note: Your newly assembled floor lamp should stand firmly, operate smoothly, and enhance your space with beautiful lighting. By following these precise assembly techniques, you’ve created more than just a functional light—you’ve built a stable, safe fixture that will serve your home for years. Remember to periodically check connections and never exceed recommended bulb wattages. With proper assembly and maintenance, your floor lamp will remain a reliable and stylish addition to your living space, providing perfect illumination exactly where you need it.


