
Dragging a standard plastic sled across snow-covered ice feels like wrestling a stubborn mule—every step drains energy you should be saving for drilling holes and setting lines. When your sled belly scrapes through crusty snow or catches on pressure ridges, you’re wasting precious fishing time on exhausting hauls. But here’s the game-changer: properly attaching skis to ice fishing sled converts that grueling chore into a smooth glide that conserves your stamina for the real work. This isn’t just about comfort; it’s physics. Skis reduce friction by 70% compared to plastic bases, letting you pull heavier loads with less effort while protecting your sled from abrasion. In this guide, you’ll discover exactly how to mount skis using the two most reliable methods—plus critical camber tricks most anglers miss that prevent cracked skis and failed trips. Whether you’re prepping for your first ice season or upgrading last year’s rig, these steps will have you gliding efficiently by sunset.
Why Ski Camber Management Makes or Breaks Your Mount
Ignoring ski camber is the #1 reason DIY ice sleds fail mid-trip. That upward arch in unloaded skis? It’s designed to flatten under a skier’s weight—but when you mount skis without simulating load, the gap collapses under your sled’s weight, creating dangerous stress points. This mistake cracks ski bases or rips out bolts when you hit uneven ice.
How to Flatten Skis for Perfect Hole Alignment
Stand firmly on each ski while marking drill points—your body weight mimics the sled’s load. For solo work, stack cinder blocks across the binding zone until the ski lies flat against the ground. Check alignment with a straightedge: no light should pass between ski and surface. Critical warning: Mounting skis while unloaded leaves 1-2 inches of gap under the center. When your loaded sled flattens them, that force concentrates on your mounting hardware, often shearing bolts during the first hard pull.
Choosing Skis That Won’t Sabotage Your Setup
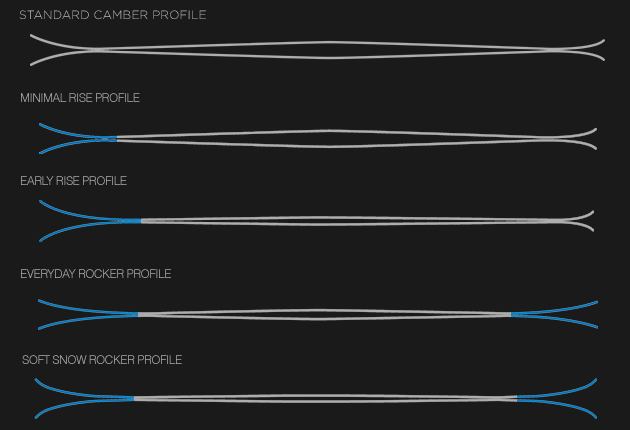
Skip expensive modern skis with aggressive rocker profiles—they’ll catch snow like a plow. Instead, hunt garage sales for:
– Youth downhill skis (flat camber, under $20)
– Old cross-country skis with minimal sidecut
– Broken skis with intact bases (bindings already removed)
Pro tip: Avoid skis longer than 1.5m (5 ft). Oversized skis make tight turns impossible on crowded lakes. Cut excess length with a hacksaw, sealing the cut edge with marine epoxy.
Mounting Method 1: The 2×4 Crossbar System (Field-Tested for Heavy Loads)
This method creates essential ground clearance—keeping your sled 4-6 inches above snow—while distributing weight evenly across the ski surface. It’s the only approach recommended for hauling augers, shelters, or multiple anglers’ gear.
Essential Hardware Checklist
- Pressure-treated 2x4s (cut 8″ wider than sled)
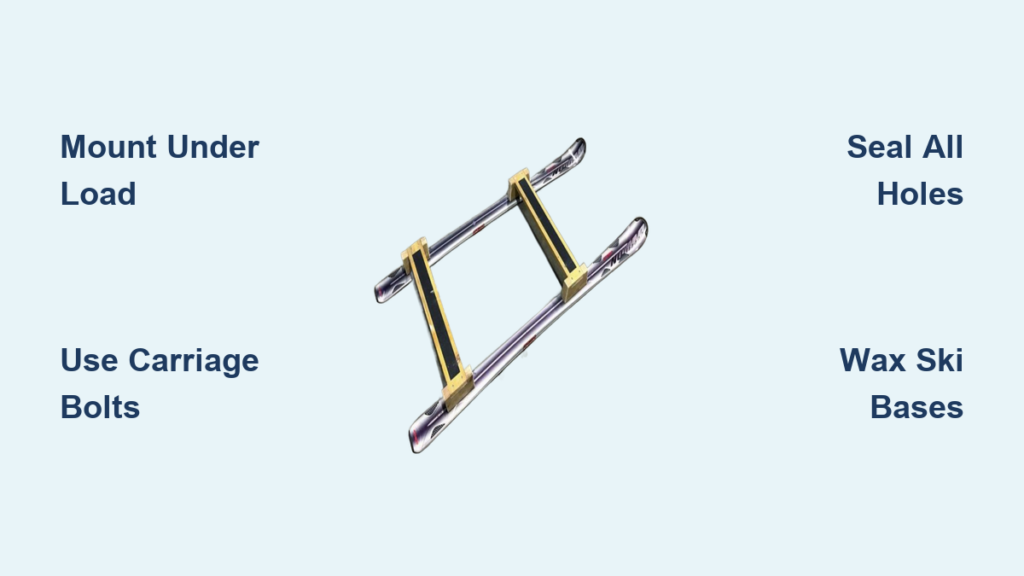
- 3/8″ stainless carriage bolts (4 per ski)
- Large fender washers (1/2″ thick, 2″ diameter)
- Lock nuts (stainless steel)
- Marine-grade polyurethane sealant
- 1/2″ spade drill bit (for countersinking)
Step-by-Step Frame Assembly
-
Build the crossbar frame: Cut two 2x4s to match your sled’s width plus 8″. Sand edges smooth. Apply outdoor wood sealer to all surfaces—this prevents snowmelt from warping the frame mid-season.
-
Mount skis under load: Place skis base-up on sawhorses. Stand on them to flatten camber. Position crossbars perpendicular across ski binding zones (where original bindings sat). Mark drill points through ski’s existing mounting holes—these penetrate the ski’s strongest core layer.
-
Drill and secure with zero stress: Drill 3/8″ holes through wood first. Apply sealant to ski base holes, then insert carriage bolts from bottom up. Slide fender washers over bolts on top sheet, add lock nuts, and tighten until washer slightly compresses ski laminate—never until ski flexes. This creates a smooth, drag-free base.
-
Attach frame to sled: For permanent mounts, drill through sled’s top lip using 1/4″ pilot holes. Insert bolts with oversized washers inside/outside to prevent plastic tearing. For removable setups, drill 3/8″ holes in crossbar ends and lash to sled with 550-lb paracord.
Time estimate: 35 minutes. Difficulty: Moderate (requires basic woodworking tools).
Mounting Method 2: Direct Bolt-On (Quick Fix for Light Gear)

Use this only for small sleds carrying rods and tackle boxes on packed trails. It skips the crossbar but demands perfect hole sealing to prevent ski delamination.
Direct Mounting Without Delamination Risks
-
Prep the ski: Sand top sheet where bolts will sit. Locate original binding screw holes—they’re drilled into the ski’s thickest structural zone.
-
Drill under compression: Stand on ski while marking holes. Use a step drill bit to countersink the base side: this creates a recess for the bolt head to sit flush. Drill from base to top sheet to avoid splintering.
-
Seal before bolting: Inject marine sealant into each hole. Insert carriage bolt from base upward. On top sheet, add fender washer then lock nut. Tighten until washer bites slightly into laminate—stop immediately if you see white stress marks.
Critical shortcut: Wax bolt heads before insertion. This creates a temporary seal while the polyurethane cures, preventing immediate water intrusion.
Pro Performance Upgrades You Can’t Skip

Seal Every Hole Like Your Trip Depends On It (Because It Does)
One unsealed bolt hole lets moisture into the ski core, causing delamination within weeks. After tightening each bolt:
– Inject polyurethane sealant around the bolt head
– Wipe excess with acetone-dampened rag
– Let cure 24 hours before first use
Wax Bases for Ice-Cold Efficiency
Unwaxed skis develop “snow glue” below 15°F—snow sticks like wet paper. Before your first trip:
1. Iron glide wax (yellow or clear) onto entire base
2. Let cool completely
3. Scrape excess with plastic scraper
4. Brush with nylon brush
Pro tip: Carry candle wax for field repairs. Melt onto base with hand warmer—works in a pinch when commercial wax isn’t available.
Position Crossbars for Perfect Tracking
Mount crossbars so 60% of sled weight sits ahead of ski center points. Test by lifting rear: front should dip slightly. This prevents fishtailing on hard-packed trails. If your sled still veers, shift heavy gear (like your auger) 2-3 inches forward.
4 Costly Mistakes That Ruin Ice Sleds
Mistake #1: Mounting Skis Without Simulated Load
Consequence: Cracked ski bases when camber collapses under load
Fix: Always compress skis with 150+ lbs weight during drilling. Test by lifting ski ends—if center gap exceeds 1/4″, remount.
Mistake #2: Using Drywall Screws or Sheet Metal Screws
Consequence: Hardware tears out during first hard pull
Fix: Only use carriage bolts with lock nuts. Never substitute—vibration loosens standard nuts within 500 yards.
Mistake #3: Ignoring Top Sheet Reinforcement
Consequence: Bolt heads rip through thin ski laminate
Fix: Always use fender washers (minimum 2″ diameter) on top sheet side. Drill pilot holes slightly smaller than bolt shank to create grip.
Mistake #4: Mounting Skis Too Narrow
Consequence: Sled tips over on side slopes
Fix: Space skis 2-3 inches wider than sled base. Test stability by tilting loaded sled 15 degrees—no tipping allowed.
Final Note: Attaching skis to ice fishing sled transforms exhausting hauls into effortless glides by leveraging snow physics—reducing drag while protecting your gear. The 2×4 crossbar method delivers unmatched durability for heavy loads, but even direct mounting works if you seal every hole and manage camber correctly. Remember the golden rule: Always mount skis under load to prevent catastrophic failures mid-lake. Wax bases monthly for consistent performance, and position weight slightly forward for straight tracking. In under an hour, you’ll convert that stubborn plastic sled into a nimble ice cruiser that conserves your energy where it counts—on the fishing. Now lace up your boots and hit the ice; your gear deserves a smooth ride.


