
Your woodworking journey deserves a proper foundation, and building a Moravian workbench delivers the perfect blend of historical craftsmanship and practical functionality. Unlike massive European benches that anchor your workshop permanently, this 18th-century American design offers remarkable stability while remaining portable enough to tuck away when not in use. Whether you’re a hand tool enthusiast or power tool user, learning how to build a Moravian workbench gives you a versatile work surface that grows with your skills. In this guide, I’ll walk you through every critical step to construct a durable, functional workbench that becomes the centerpiece of your shop.
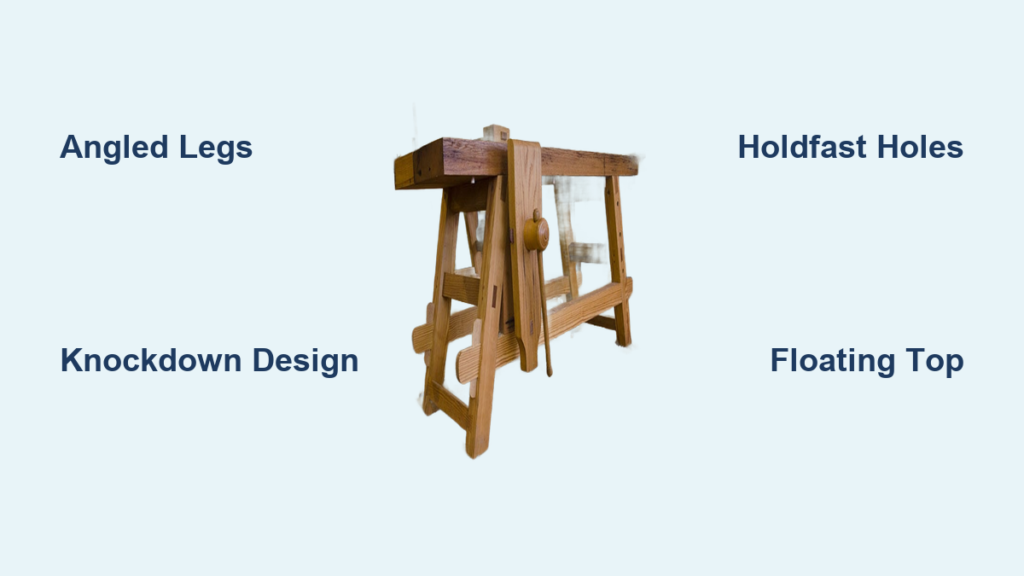
The Moravian workbench’s genius lies in its angled legs, split-top design, and knockdown construction—features that solve common workshop problems without requiring massive amounts of lumber. As you learn how to build a Moravian workbench, you’ll discover why this historically inspired design has experienced such a resurgence among modern woodworkers. You’ll end up with a work surface that handles hand planing, chisel work, and assembly tasks with ease, all while fitting perfectly in smaller shop spaces.
Essential Tools for the Build
The right tools make building a Moravian workbench manageable whether you’re a hand tool purist or prefer power tool assistance. Don’t let limited equipment stop you—this project scales beautifully to your available tools while maintaining structural integrity.
Essential Hand Tool Core Kit
For a traditional hand tool build, gather these critical implements before cutting your first board:
- Sawing Tools: A panel saw for crosscuts, a rip saw (4-5 teeth per inch), a tenon saw for precise joinery, and a coping saw for any curved cuts
- Planes: A #5 jack plane handles most dimensioning, while a #4 smoother provides the final surface (a #7 jointer is helpful but not essential)
- Chisels: A 1/4″, 3/8″, 3/4″, and 1″ chisel set covers most mortising and cleanup needs
- Layout Essentials: Combination square, marking gauge, marking knife, tape measure, and sliding bevel gauge for the signature leg angles
- Boring Equipment: A brace with #6, #10, and #12 bits for creating the 1-1/4″ holdfast holes
- Clamping System: Minimum of 4-6 24″+ bar clamps plus several F-clamps for glue-ups
Pro Tip: Tune your planes before starting—flattening the sole on sandpaper attached to glass ensures perfect performance when flattening your bench top.
Alternative Tooling Strategies
You can build a Moravian workbench with minimal tools without sacrificing quality:
- Bare Minimum Setup: Panel saw, #5 jack plane (sharpened aggressively as a scrub plane), 1/2″ and 1″ chisels, brace and bits, combination square, and 4 clamps
- Power Tool Approach: Circular saw with track, cordless drill with Forstner bits, router for grooves, and handheld power planer for rough dimensioning
Critical Warning: Never skip sharpening—dull tools create dangerous kickback situations and poor joinery. Spend time honing your chisels and plane irons to a slicing edge before cutting critical joints.
Selecting and Preparing Your Lumber
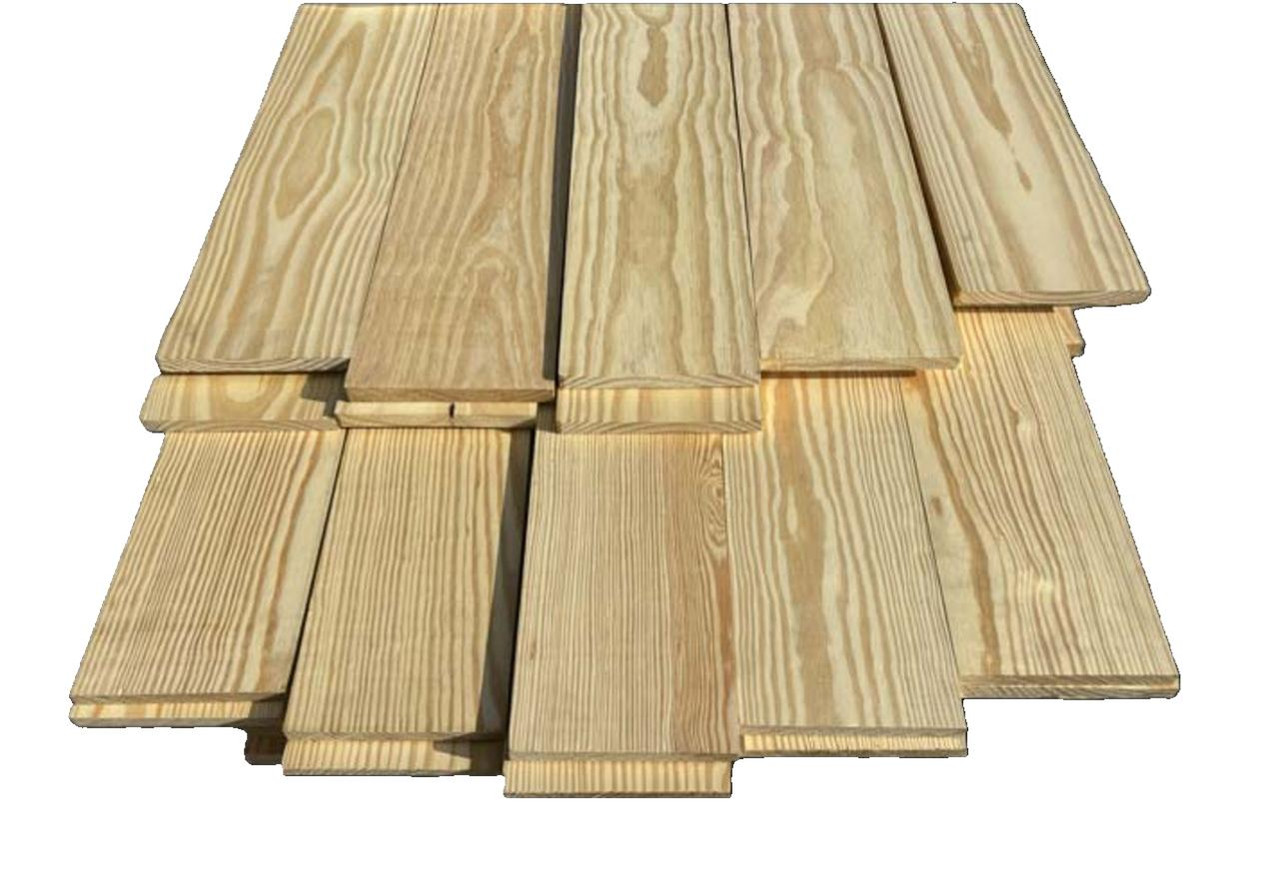
Choosing the right wood and preparing it properly prevents warping and ensures your Moravian workbench remains flat and functional for decades. This isn’t the project to use bargain bin lumber—your bench’s performance depends on material quality.
Wood Selection and Preparation
Southern yellow pine offers the best balance of affordability, stability, and workability for your first Moravian workbench. For a 6-foot bench, calculate 20-25 board feet of 8/4 (2″) stock for the top and legs, plus 10-15 board feet of 4/4 or 5/4 for stretchers and aprons. Hard maple or beech provide superior durability but cost more and require sharper tools.
Crucial Acclimation Process:
– Mill rough lumber to slightly oversized dimensions
– Stack with stickers and allow 1-2 weeks in your shop
– Target 8-10% moisture content for interior use
– Quartersawn stock for legs and top minimizes seasonal movement
Pro Tip: Alternate growth ring orientation when laminating your bench top—this counteracts cupping forces and creates a naturally stable surface that requires less maintenance.
A Step-by-Step Construction Guide
Building a Moravian workbench follows a logical sequence that ensures structural integrity while accommodating wood movement. Follow these steps precisely to avoid common pitfalls that compromise your bench’s performance.
Constructing the Bench Top
Your bench’s functionality starts with a dead-flat top. Mill 3-4″ wide strips from 8/4 stock, alternating growth rings for stability. During glue-up, use cauls above and below the assembly to distribute clamp pressure evenly—this prevents gaps and ensures perfect alignment. After the glue cures, flatten the surface working diagonally across the grain with your jack plane, then finish with the smoothing plane. Check for twist using winding sticks across the width and length.
Crafting the Legs and Stretchers
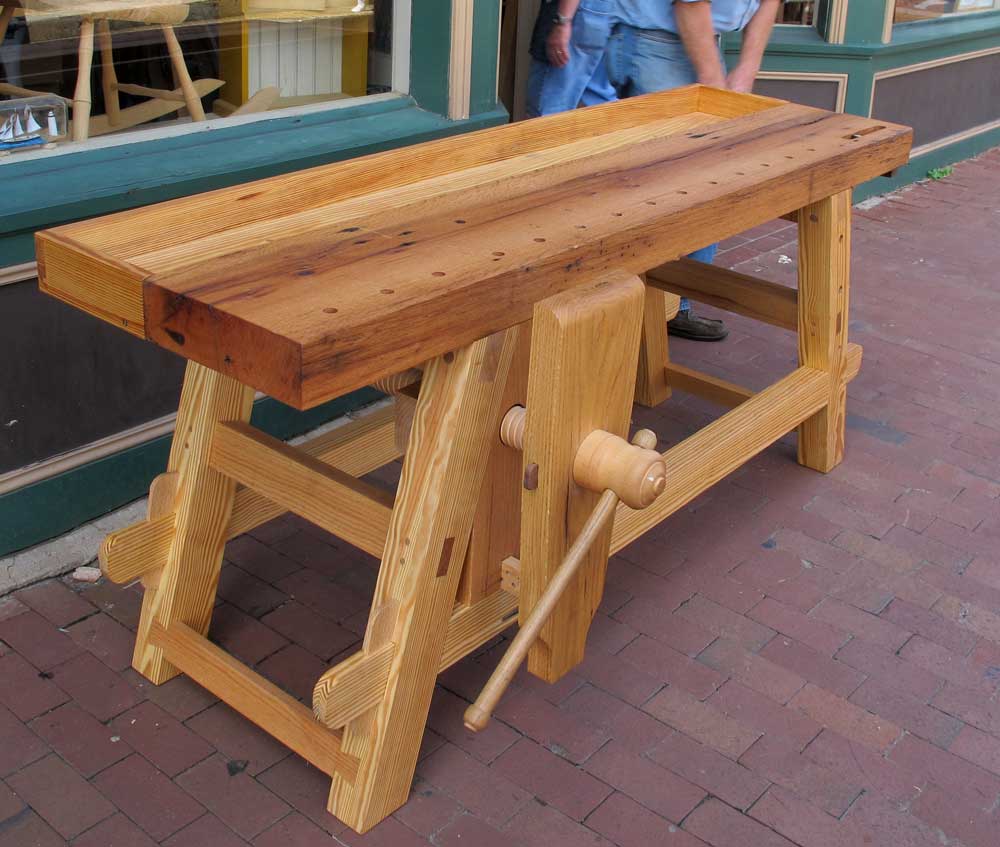
The Moravian’s signature stability comes from its angled legs. Create a story stick to ensure all four legs match identically—this prevents wobble in the finished bench. Cut the compound angles at the top (for the vise attachment) and bottom (for the long stretchers) using your sliding bevel gauge set to 85 degrees. For maximum strength, cut through-tenons on your stretchers that extend slightly beyond the leg faces for wedging.
Cutting the Joinery

Precision joinery makes your Moravian workbench rock-solid. Cut tenons to 1/3 the thickness of your stretchers, then layout matching mortises in the legs. The mortises should be slightly deeper than the tenon length but never glue the bottom—this prevents hydraulic pressure from forcing joints apart during seasonal movement. Dry-fit all components before applying glue, checking for square with your combination square.
Creating the Knockdown Feature
This is where the Moravian design shines for small shops. Instead of permanent glue joints, secure leg tenons with bed bolts or draw-bored pins that allow disassembly. Attach the top to the base using buttons or screws in oversized holes—this accommodates seasonal wood movement while maintaining stability during use. Test the knockdown system before final assembly to ensure smooth reassembly.
Installing the Workholding Features
Your bench becomes truly functional with proper workholding. Install the leg vise with a parallel guide system and pin mechanism to keep the chop aligned. Drill 3/4″ holdfast holes spaced 6-8″ apart across the top, angling them slightly outward for better grip. Add a row of square holes near the front apron for bench dogs, making them exactly the same size as your dogs for secure holding.
Advanced Workholding and Tuning
Beyond basic construction, fine-tuning your Moravian workbench transforms it from a simple platform to a versatile woodworking system that adapts to any task.
Optimize Your Workholding
Create a simple but effective planing stop that fits into your round dog holes—this prevents tear-out when planing end grain. Add a “pinch dog” by notching the vise chop for better grip on thin stock. For edge planing, fashion a board jack from scrap wood that fits into your dog holes, elevating workpieces to comfortable height.
Addressing Common Build Challenges
Wood Movement Management: Always design joints with seasonal movement in mind—the top should float on the base, and tenons need slight clearance in mortises. Glue-Up Errors: Prevent gaps by using even clamp pressure and sufficient cauls during top lamination. Vise Problems: If your leg vise binds, check that the chop remains parallel to the bench front throughout its travel—adjust the guide pins as needed.
Final Assembly and Tuning
Your Moravian workbench comes together in this critical phase where precision meets patience. Before applying glue, complete a full dry-fit to identify any alignment issues. Apply glue only to the tenon cheeks and mortise walls—not the bottom—to prevent hydraulic pressure buildup. Clamp firmly while checking for square at all corners.
After assembly, flatten the top one last time with your smoothing plane, working from the center outward. Apply a simple oil/varnish blend finish to protect the surface without making it slippery for workholding. Install all vise hardware and test your holdfasts with various workpieces. Pro Tip: Wax the wooden surfaces annually with paste wax to reduce friction when moving workpieces across the bench.
Now that you’ve successfully built your Moravian workbench, you’ve created more than just a work surface—you’ve crafted a woodworking companion that will serve you for decades. The process of learning how to build a Moravian workbench teaches fundamental skills that improve every future project. As you use your new bench, you’ll appreciate how its thoughtful design handles planing, chiseling, and assembly tasks with remarkable stability. Keep your tools sharp, check for stability regularly, and enjoy the satisfaction of working at a bench you built yourself—a true woodworker’s milestone.


