
Struggling with warped slabs that won’t feed through your planer? You’re not alone. Flattening large, heavy, or live-edge wood pieces is one of the most frustrating challenges in woodworking, especially when your standard equipment hits its limits. Learning how to build a router planer sled transforms your workshop capabilities, allowing you to tackle massive slabs that would otherwise be impossible to process. This weekend project delivers professional results without the $10,000 price tag of industrial machinery. In this guide, you’ll discover exactly how to construct a reliable router sled that produces glass-smooth surfaces on even the most challenging wood pieces.
Most woodworkers quickly realize their thickness planer’s limitations when faced with a beautiful live-edge walnut slab for a dining table. Standard planers max out around 12-13 inches in width, leaving you with no practical solution for wider pieces. A properly built router planer sled solves this problem completely, turning your handheld router into a stationary planing powerhouse. You’ll learn to flatten surfaces with precision rivaling commercial equipment, all while working within your existing workshop space. The best part? You can build an effective sled for under $200 using basic shop tools.
Why Your Standard Planer Fails With Large Slabs and What Works Instead
Commercial planers choke on slabs wider than 13 inches and struggle with irregular live edges that prevent consistent feed. When your beautiful 24-inch wide slab won’t fit through your machine, you face expensive outsourcing or abandoning the project. A router planer sled eliminates these constraints by working directly on stationary material. Unlike planers that require feeding wood through rollers, your sled moves the router across the fixed workpiece, accommodating virtually any size. This approach maintains consistent cutting depth across the entire surface, eliminating the tear-out and snipe common with conventional planers on difficult grain.
Mobile vs. Fixed Bridge Router Sleds: Which Design Fits Your Needs

The Weekend Warrior Mobile Sled Design
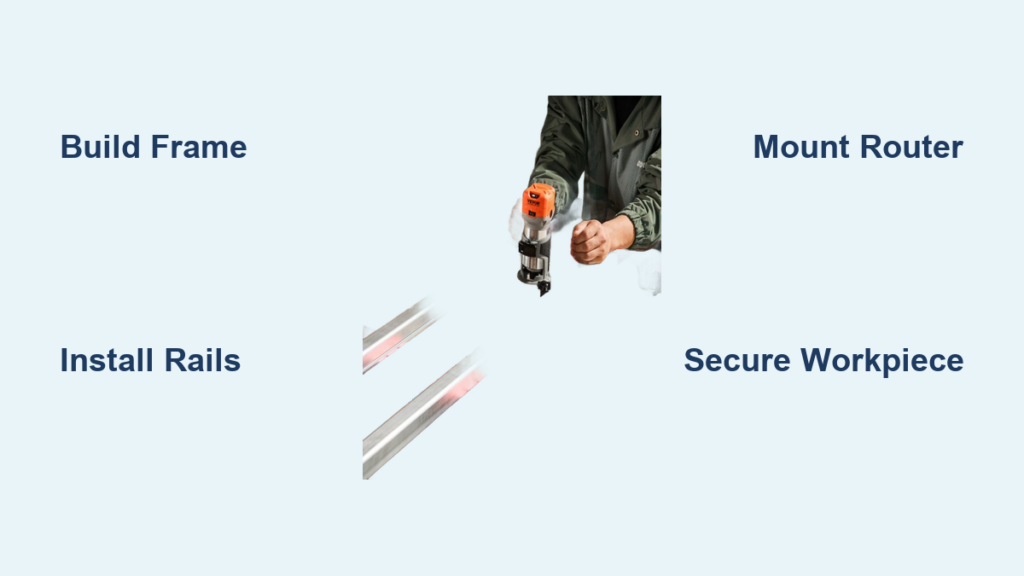
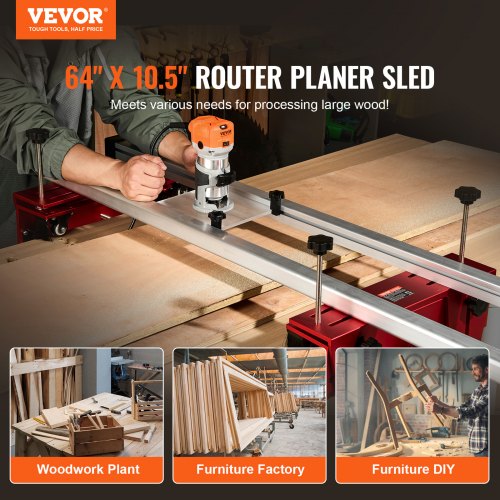
Perfect for hobbyists building their first sled, the mobile design features a simple frame that moves across your workpiece with the router fixed inside. This approach requires minimal materials—typically 3/4″ MDO plywood for the frame and straight aluminum extrusion for rails. Construction takes 6-8 hours and costs under $150. The entire sled glides on parallel rails positioned alongside your workpiece, with the router bit protruding through the bottom. When building your mobile sled, ensure your frame is at least 2 inches wider than your largest intended workpiece to allow full router travel.
The Precision Fixed Bridge Sled for Serious Woodworkers
For those tackling frequent large-scale projects, the fixed bridge design offers superior results. Here, the router moves along a stationary bridge while the workpiece remains fixed. This configuration demands more complex construction using 80/20 aluminum extrusion and linear bearings, but delivers exceptional rigidity and repeatable accuracy. The fixed bridge design handles heavier materials with less vibration, producing noticeably smoother surfaces. Expect to invest 12-15 hours building this version, but the precision payoff makes it worthwhile for professional woodworkers.
Essential Materials for Your Router Planer Sled Build

Must-Have Construction Materials
- MDO or Baltic Birch Plywood (3/4″) – Superior stability prevents warping during use
- Aluminum Extrusion or Steel Square Tubing – For perfectly straight rails (avoid wood rails that can warp)
- UHMW Plastic Strips – Creates smooth, low-friction contact surfaces for your rails
- Threaded Rods with Nuts – Enables micro-adjustments for perfect leveling
- T-Track System – Allows secure router mounting and easy height adjustments
Critical Router and Bit Requirements
A 2.5-3 HP router is the minimum requirement for flattening hardwood slabs. Your bit selection makes or breaks the results—invest in a 2-inch diameter flat-bottom surfacing bit with bottom cleaning flutes. Smaller 1-inch bits leave visible scallops requiring excessive sanding. Always use sharp, high-quality bits; dull bits cause chatter and burning. For best results, choose a bit with a 1/2-inch shank to minimize vibration.
Step-by-Step: Building Your Mobile Router Planer Sled in One Weekend
Constructing the Sled Frame and Rails
Cut your MDO plywood into a rectangular frame measuring 24″ x 36″ for standard 4×8 sheet goods. Reinforce corners with pocket screws and wood glue for maximum rigidity. Attach two parallel aluminum extrusion rails to the bottom using countersunk screws, ensuring they’re perfectly straight and parallel (use a 4-foot level to verify). Space rails to match your workpiece width plus 4 inches. Install UHMW strips along the rail contact points to reduce friction and prevent binding during movement.
Mounting Your Router for Vibration-Free Operation
Create a router mounting plate from 1/2″ plywood cut to match your router base. Drill precise mounting holes, then attach this plate to your sled frame using T-track hardware. The critical step: ensure your router base sits perfectly perpendicular to the sled plane. Use a machinist’s square to verify 90-degree alignment before final tightening. This prevents uneven cuts and router wobble that cause surface imperfections.
Securing Your Workpiece for Flawless, Shift-Free Planing
Your sled is only as good as your workpiece setup. Place your slab on a flat reference surface (like your table saw top) and secure it with hot melt glue dots at strategic points—not clamps that create pressure points. Shim high areas with playing cards until the entire surface contacts your reference plane. Test stability by attempting to slide the slab; if it moves, add more glue points. Proper workpiece securing prevents the most common cause of failed flattening attempts: material shifting during operation.
Making Your First Test Cuts: Depth Settings and Pass Techniques
Start with a conservative 1/32″ depth setting for your initial passes. Move the sled steadily from left to right across your workpiece, overlapping each pass by 50%. After completing one direction, rotate the workpiece 90 degrees and make perpendicular passes to eliminate directional milling marks. After three shallow passes, lower the bit by another 1/32″ and repeat. Never exceed 1/16″ per pass—even with hardwoods—as deeper cuts cause chatter and router strain. Watch for consistent chip ejection; uneven chips indicate depth or alignment issues.
Troubleshooting Common Router Sled Problems in Real Time
Fixing Chatter and Vibration Issues Immediately
Chatter appears as regular waves across your surface and stems from three causes: insufficient rigidity, excessive depth of cut, or loose components. First, tighten all fasteners on your router mount and sled frame. Next, reduce your depth of cut to 1/64″. If vibration persists, check your bit for dullness or damage—replace if necessary. For persistent chatter, add diagonal bracing to your sled frame to eliminate flex.
Eliminating Ridges Between Passes
Ridges form when adjacent passes don’t blend smoothly. Increase your pass overlap to 75% and ensure consistent sled movement speed. If ridges remain, verify your rails are perfectly parallel using a dial indicator. Even 1/64″ variance across your rails creates visible steps. For stubborn ridges, make a final “scim” pass with the bit lowered just enough to barely contact the surface while moving extremely slowly.
Non-Negotiable Safety Practices for Router Sled Operation
Wear a full-face shield with hearing protection and a P100 respirator—flattening produces dangerous fine dust at deafening volumes. Always connect a 4″ dust collector directly to your router’s port; shop vacs lack sufficient CFM. Before powering on, verify your workpiece is completely immovable by attempting to shift it with moderate force. Keep both hands on the sled at all times during operation, and never reach near the bit path. Unplug your router when making depth adjustments.
When to Build a Fixed Bridge Sled Instead of a Mobile Design
If you regularly work with slabs wider than 36 inches or hardwoods thicker than 3 inches, invest in a fixed bridge design. This system supports heavier routers and handles larger materials with less vibration. While requiring more initial construction time, the fixed bridge design delivers noticeably smoother surfaces with less sanding required. The stationary bridge eliminates the weight of the entire sled moving across your workpiece, reducing strain on your arms during extended flattening sessions. For professional woodworkers processing multiple large slabs monthly, the fixed bridge’s superior results justify the extra build time.
Building how to build a router planer sled properly unlocks woodworking possibilities previously limited to well-funded shops. By following these precise construction techniques and operational methods, you’ll transform rough slabs into perfectly flat surfaces ready for finishing. Start with the mobile sled design to gain experience, then consider upgrading to a fixed bridge system as your projects grow in scale. Remember that patience with shallow passes and meticulous setup delivers the best results—rushing the process creates more work in sanding later. With your new router sled, no slab is too large, too heavy, or too irregular to achieve professional-quality flatness.


