
Nothing ruins the refreshing experience of a cold drink more than water that tastes stale or has an odd odor. If your office or home water cooler isn’t delivering that crisp, clean taste you expect, mineral deposits and bacteria buildup are likely to blame. Learning how to clean 5 gallon water cooler properly is essential for maintaining water quality and preventing health hazards. Most people don’t realize that even filtered water can become contaminated when sitting in an unclean reservoir, making regular maintenance non-negotiable for any water dispenser owner.
When was the last time you gave your water cooler more than a quick wipe-down? Many households and offices operate under the misconception that because they’re using purified water, their cooler stays automatically clean. The reality is quite different—stagnant water, combined with warm ambient temperatures, creates the perfect breeding ground for bacteria, mold, and algae. In fact, studies show that improperly maintained water coolers can harbor more bacteria than a typical kitchen sponge. This guide provides the exact steps you need to follow to restore your cooler to like-new condition, ensuring every sip is as pure as it should be.
Whether you have a traditional top-loading model or a modern bottom-loading 5-gallon water cooler, the cleaning process remains fundamentally the same. By dedicating just 45 minutes to this essential maintenance task every few months, you’ll extend your cooler’s lifespan, improve water taste, and protect everyone who drinks from it. Let’s dive into the specific steps that will transform your water cooler from potentially hazardous to perfectly pristine.
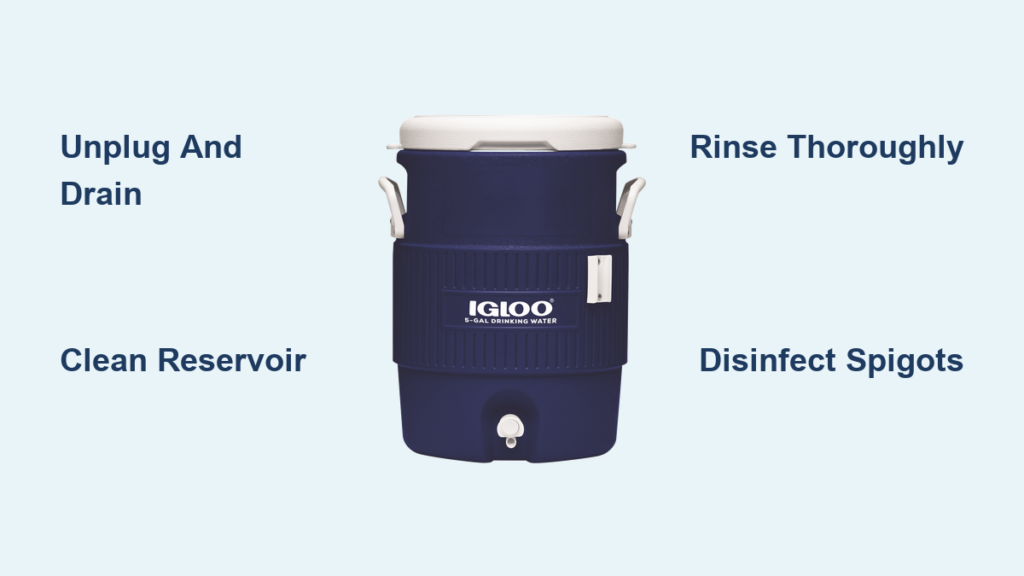
Disconnect Power and Drain All Water Completely
Before touching any cleaning solution, safety must come first when you tackle how to clean 5 gallon water cooler systems. Begin by unplugging the unit from the wall socket—this simple step prevents electrical hazards, especially important since you’ll be working with liquids near electrical components. If your cooler has separate switches for hot and cold functions, turn these off as well to ensure no accidental activation during cleaning.
To empty the reservoir efficiently, place a large bucket beneath both the hot and cold spigots. Slowly dispense water from each tap until no more flows out. For coolers with a drain plug (typically located on the back panel near the base), unscrew this plug and position your bucket underneath to catch the remaining water. Allow all water to drain completely—this usually takes 5-10 minutes depending on your model. Check manufacturer instructions if you’re unsure about your specific drain plug location.
Remove and Clean Accessory Components First
While the main reservoir drains, remove all detachable parts that need attention. Take out the drip tray and its protective grill, which often harbor mold and mineral deposits from daily use. Wash these components in warm, soapy water using a soft sponge—avoid abrasive cleaners that could scratch surfaces where bacteria might hide. Pay special attention to the corners of the drip tray where moisture collects. Rinse thoroughly and set aside to dry completely before reassembly.
Don’t overlook the bottle cradle area where the 5-gallon jug sits. Use a damp cloth with mild detergent to wipe down the bottle alignment posts and the water well entrance. This area collects dust and can transfer contaminants to your new water bottle during installation. A quick clean here prevents immediate recontamination after your deep cleaning process.
Prepare and Apply the Cleaning Solution Properly
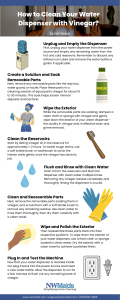
For effective how to clean 5 gallon water cooler maintenance, you’ll need the right cleaning mixture. Combine 2 cups of white vinegar with 6 cups of warm water in a large container—this 1:3 vinegar-to-water ratio provides optimal cleaning power without leaving a strong aftertaste. Vinegar works exceptionally well because its acetic acid content dissolves mineral scale (common in hard water areas) while killing 99% of household bacteria and mold. If you prefer an alternative, a food-safe sanitizer solution (1 teaspoon unscented bleach per gallon of water) works well for sanitizing but requires more thorough rinsing.
Pour this solution directly into the empty reservoir until it reaches the fill line. Using a long-handled bottle brush (available at hardware stores for $3-$5), gently scrub the interior walls, paying special attention to corners and the bottom where deposits accumulate. Rotate the brush in circular motions to cover all surfaces. For hard-to-reach areas near the spigot connections, wrap a cloth around the brush end for better contact.
Allow Sufficient Dwell Time for Maximum Effectiveness
After filling and initial scrubbing, let the cleaning solution sit for exactly 30 minutes—this dwell time is non-negotiable for thorough cleaning. During this period, the vinegar or sanitizer penetrates stubborn deposits and eliminates microbial growth. Every 10 minutes, gently rock the cooler side-to-side to ensure the solution contacts all interior surfaces, especially near the spigot connections where water flow is minimal.
Check for visible scale reduction after 30 minutes. If you notice persistent white or greenish deposits (indicating hard water scale or algae), extend the soak time by another 15 minutes but don’t exceed 45 minutes total to avoid potential damage to rubber seals. Never use this solution in hot water dispensers while the heating element is active—always ensure power remains disconnected during cleaning.
Execute a Thorough Rinse Cycle
Drain the cleaning solution completely using the same method as initial emptying. Now begins the critical rinsing phase—insufficient rinsing is the #1 mistake people make when learning how to clean 5 gallon water cooler units. Fill the reservoir with fresh, cool water and swish it vigorously to contact all interior surfaces. Drain completely, then repeat this process 3-5 times until the vinegar smell disappears entirely (or until bleach test strips show no residual sanitizer).
For the final verification test, fill the reservoir with clean water and let it sit for 10 minutes. Smell the water—if you detect any vinegar or chemical odor, perform 2-3 additional rinse cycles. This step ensures no cleaning residue remains that could affect water taste or safety. While rinsing, simultaneously run water through both hot and cold spigots for 1-2 minutes each to flush the internal lines.
Deep Clean Critical Touch Points
The spigots require special attention as they’re high-contact areas that transfer bacteria directly to your cup. Disassemble removable spigot components according to your model’s instructions (consult the manual if unsure). Soak these parts in your cleaning solution for 15 minutes, then use a small pipe cleaner or cotton swab to scrub inside the spout openings where deposits commonly form.
For the exterior surfaces, create a paste of baking soda and water to gently polish stainless steel components without scratching. Wipe down all control panels with a microfiber cloth slightly dampened with the vinegar solution—never spray cleaners directly onto electronic components. Pay special attention to the area around the bottle seal where dust and mold accumulate between jug changes.
Reassemble and Perform Final Testing

Before reinstalling the 5-gallon bottle, inspect the rubber gasket around the bottle opening for cracks or mold growth. Replace this inexpensive part ($2-$5) if damaged—it’s a common source of contamination people overlook when learning how to clean 5 gallon water cooler systems properly. Wipe the interior one final time with a clean, dry microfiber cloth to prevent water spots.
Reinstall the drip tray and grill once completely dry to prevent mold regrowth. Position a new, sealed water bottle onto the cooler, ensuring proper alignment with the bottle posts. Plug in the unit and allow 4-6 hours for the cooling system to reach optimal temperature before using. During this initial run, dispense 2-3 full cups of water to flush any remaining particles from the lines.
Create a Foolproof Maintenance Schedule
To maintain optimal performance between deep cleans, implement this simple routine: Wipe exterior surfaces daily with a disinfectant wipe, clean the drip tray weekly with soapy water, and replace the bottle seal every 6 months. In hard water areas (recognizable by white crusty deposits), increase deep cleaning frequency to every 2 months instead of the standard 3-6 month recommendation.
Set calendar reminders for maintenance tasks—many modern coolers have indicator lights for filter changes, but none alert you to reservoir cleaning needs. Keep a log of your cleaning dates to track patterns in scale buildup. If you notice cloudy water, unpleasant odors, or reduced flow rate between scheduled cleanings, perform an immediate maintenance session rather than waiting.
By following this precise how to clean 5 gallon water cooler protocol, you’ll ensure every glass delivers pure, refreshing water while extending your cooler’s lifespan by years. Remember that consistent maintenance takes less time than dealing with contaminated water or replacing a damaged unit. Your health and taste buds will thank you every time you pour that perfectly clean, crisp glass of water.


