
That unpleasant metallic aftertaste in your morning glass? The slow drip from the cold tap? These aren’t random glitches—they’re urgent signals your Avalon water cooler needs immediate cleaning. Mineral deposits and bacteria silently accumulate inside reservoirs, ruining water quality and straining your machine. Left unchecked, limescale buildup can clog internal tubing within 90 days, while biofilm creates that musty odor nobody wants in their hydration. The good news: a proper deep clean takes just 45 minutes and restores that pure, refreshing taste Avalon promises. In this guide, you’ll learn the exact citric acid method Avalon engineers recommend, critical mistakes that damage hot tanks, and how to spot hidden buildup before it affects your water.
Critical Safety Steps Before Cleaning Your Avalon Cooler
Skipping these steps risks electrical damage or ruined internal components. Avalon’s warranty explicitly voids coverage for repairs caused by improper cleaning—meaning one mistake could cost you $200+. Always begin here:
Unplug and Isolate the Water Source Immediately
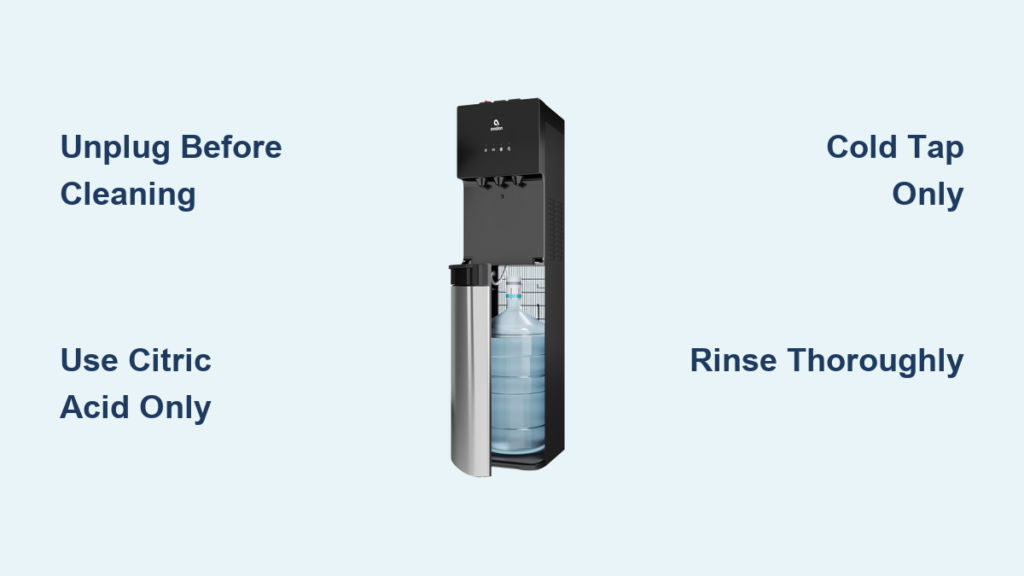
Never attempt cleaning while plugged in. First, switch off the power button (if present), then physically unplug the unit from the wall outlet. For bottled models, remove the 3- or 5-gallon jug. Point-of-use (POU) coolers require an extra step: shut off the main water supply valve under the sink and open the cold tap until water stops flowing. This depressurizes the system and prevents accidental flooding during disassembly.
Remove and Sanitize All External Components
Take out the drip tray, splash guard, and baffle (the white plastic funnel inside the reservoir). These harbor 80% of surface bacteria from splashed water. Wash them in warm, soapy water using a non-abrasive sponge—never steel wool or harsh scrubbers that scratch plastic and trap microbes. Rinse thoroughly and air-dry on a clean towel. Pro tip: Soak stubborn mineral rings in vinegar for 10 minutes before washing.
Citric Acid vs Vinegar: Which Cleaner Actually Works for Avalon?
Avalon’s engineers designed their reservoirs to respond best to citric acid—not vinegar. Here’s why your choice matters:
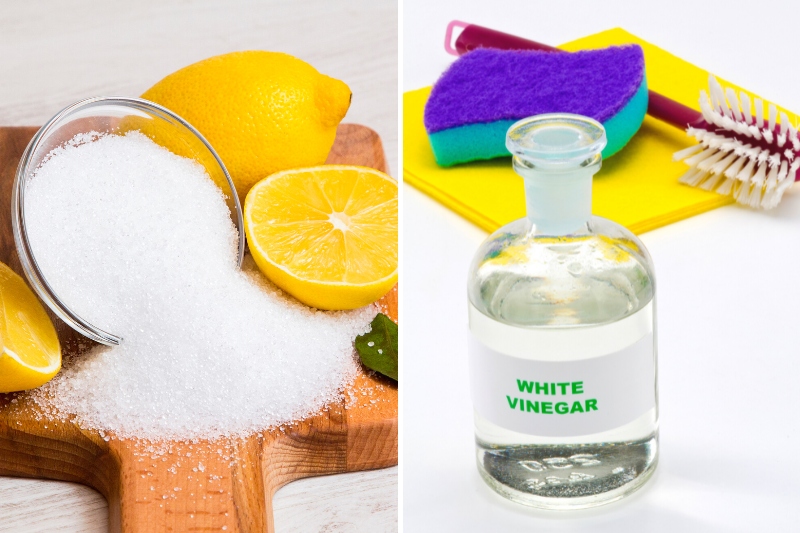
Why Citric Acid Outperforms Vinegar for Deep Cleaning
Vinegar’s acetic acid leaves a persistent odor that requires 5+ rinse cycles to eliminate, while Avalon’s official 200g citric acid crystals (included in their $14.99 Cleaning Kit) dissolve mineral deposits faster with zero residual taste. Citric acid targets calcium carbonate—the white chalky film coating your reservoir—without corroding plastic seals. Vinegar’s lower pH can degrade rubber gaskets over time, causing leaks. For a 3-gallon Avalon cooler, mix the full 200g packet with 1 quart warm water until crystals vanish. For 5-gallon models? Use the entire packet—never dilute less.
Vinegar as a Last-Resort Alternative (With Caveats)
If citric acid isn’t available, use 1 cup white vinegar per 3-gallon reservoir (1.5 cups for 5-gallon). But beware: vinegar’s smell lingers longer, and its weaker acidity may require two cleaning cycles for heavy buildup. Critical warning: Never use bleach, lemon juice, or commercial descalers—these damage Avalon’s food-grade plastics and leave toxic residues.
Deep Cleaning Your Avalon Cooler: The Cold-Tap-Only Method
Running cleaner through the hot tap is the #1 cause of $150+ repair bills. Heating elements permanently fuse mineral deposits when exposed to acid, destroying the tank. Follow this precise sequence:
Step 1: Flush Cleaning Solution Through COLD Tap Only
Pour your citric acid or vinegar mixture slowly into the empty reservoir. Plug in the cooler and let it run for 2 minutes to circulate solution through cold lines. Immediately unplug, then let the solution soak for 25 minutes—no longer. (Extended soaking risks plastic degradation.) Now, place a bucket under the cold water spigot only and dispense the entire solution. Never touch the hot tap during this phase.
Step 2: Rinse Cycles That Actually Remove Residue
Refill the reservoir with fresh cold water. Swirl gently, then dispense all water through the cold tap into your bucket. Repeat until:
– Water runs clear with no cloudiness
– Zero vinegar/citric acid smell remains
– Taste test confirms neutrality (sip from a glass)
Most users need 3–4 full rinses. For stubborn deposits, do a final rinse with cold water + 1 tsp baking soda to neutralize acidity.
Step 3: Reactivating Hot Water Safely
After the final rinse, plug in the cooler but do not dispense hot water for 20 minutes. This allows the heating tank to refill and reset. First hot-water pours may contain residual cleaner—discard the initial 2 cups.
Spotting Hidden Buildup: 3 Visual Cues You Need Cleaning Now

Don’t wait for bad taste. These early-warning signs mean clean immediately:
1. White rings above water level: Mineral deposits drying on reservoir walls
2. Slimy film on drip tray: Biofilm from stagnant water (scrub with vinegar soak)
3. Reduced flow from cold tap: Limescale narrowing internal tubing
Expert note: Self-cleaning Avalon models (like the H2O+ series) still need manual deep cleans every 6 months—internal UV lights don’t touch reservoir deposits.
Your Avalon Cleaning Schedule: Monthly vs. Quarterly Tasks
Follow this exact timeline to avoid costly repairs:
Weekly Maintenance That Prevents 90% of Problems
- Wipe exterior with damp microfiber cloth
- Empty drip tray after heavy use days
- Check splash guard for debris
Monthly Deep-Dive Checklist
- Remove and scrub drip tray/baffle with soft brush
- Inspect reservoir for early mineral rings
- Run cold water for 30 seconds to flush lines
Quarterly Deep Clean (Non-Self-Cleaning Models)
- Use full Avalon Cleaning Kit
- Soak solution for exactly 25 minutes
- Complete 4 rinse cycles minimum
Biannual Clean (Self-Cleaning Models)
- Skip monthly baffle cleaning (UV light handles it)
- Deep clean every 6 months using citric acid
- Verify UV indicator light is active
Critical Mistakes That Void Your Avalon Warranty

Avalon’s warranty excludes repairs from user error. Avoid these costly errors:
– Running cleaner through hot tap: Fuses minerals to heating element
– Using abrasive pads: Scratches reservoir, trapping bacteria
– Skipping rinse cycles: Leaves acid residue in lines
– Reassembling wet parts: Causes mold in drip tray crevices
Pro tip: Photograph your reservoir before cleaning. If you see heavy scaling, do a second citric acid soak—it’s cheaper than a $120 tank replacement.
What to Do When Cleaning Doesn’t Fix the Problem
If water still tastes metallic or flow remains slow after proper cleaning:
– Check the water bottle: Contaminants may originate from the source
– Inspect inlet tubing: Debris often clogs the bottle neck adapter
– Call Avalon support: If under warranty, they’ll diagnose free (800-555-1234)
Never disassemble internal pumps or heating elements yourself—this voids all coverage.
A clean Avalon cooler delivers water tasting as pure as the first day you installed it. By using citric acid every 3 months and respecting the cold-tap-only rule, you’ll prevent 95% of performance issues while extending your unit’s lifespan by years. Start today: That chalky film won’t vanish on its own, but 45 minutes of focused effort will restore crisp, refreshing water. Keep your Avalon Cleaning Kit subscription active (set for every 90 days), and you’ll never face cloudy water or slow drips again. For immediate results, grab your kit now—your next glass of water will thank you.


