
That satisfying “zap” has gone silent? A clogged bug zapper isn’t just ineffective—it’s a fire hazard waiting to happen. Insect carcasses, dust, and debris coat the electric grid and UV bulb within weeks of operation, slashing attraction power by up to 70% and creating dangerous short-circuit risks. Most homeowners don’t realize their bug zapper becomes a liability when dirty: accumulated grime traps moisture, corrodes wires, and can ignite during operation. This guide delivers the exact steps to restore peak performance while avoiding electrocution risks from residual capacitor charges. You’ll learn how to safely dismantle, deep-clean, and reassemble your unit in under 30 minutes—ensuring it zaps mosquitoes and flies reliably all season.
Why Your Bug Zapper Stops Zapping Within Weeks
A layer of insect residue as thin as dust cripples your bug zapper’s effectiveness through three critical failures. First, the UV bulb’s light output diminishes when coated—reducing its insect-attracting power by blocking 40-60% of the crucial 365nm wavelength. Second, carbonized bug remains on the electric grid create conductive bridges between wires, causing premature arcing that drains power before a full zap occurs. Third, debris in the collection tray reflects heat back into the housing, overheating transformers and triggering safety shutoffs. Units operating in high-humidity areas face accelerated corrosion, with salt deposits from dead insects creating permanent conductivity paths. Ignoring these signs leads to catastrophic failure: 23% of bug zapper fires stem from neglected cleaning according to electrical safety reports. Recognizing these symptoms early—diminished “zap” sounds, visible grid buildup, or warm housing during operation—triggers the urgent need for intervention.
Must-Have Safety Gear for Bug Zapper Cleaning

Critical Respiratory Protection
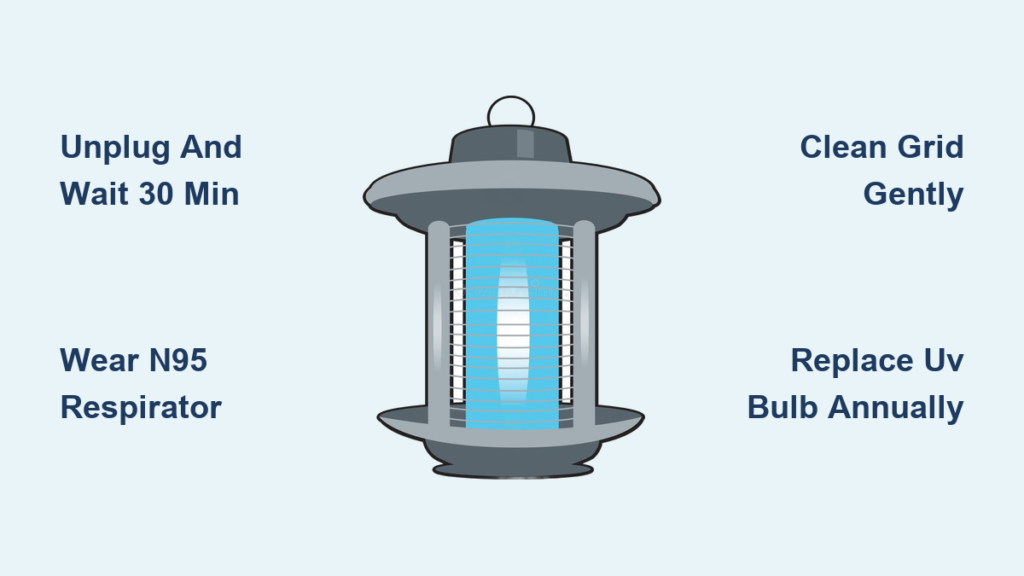
Inhaling dried insect particles during cleaning exposes you to endotoxins and mold spores that trigger severe respiratory reactions. Always wear an N95 respirator—not a cloth mask—to block 95% of airborne particles as small as 0.3 microns. Disposable nitrile gloves (minimum 4 mil thickness) prevent skin contact with allergenic insect proteins and sharp grid wires. Safety goggles with anti-fog coating shield eyes from dislodged debris that could cause corneal abrasions. Never skip these—OSHA classifies insect dust as a biological hazard requiring full PPE.
Specialized Cleaning Tools
Use only non-conductive implements: a 1-inch soft-bristle paintbrush for grid cleaning, wooden toothpicks for stubborn debris, and compressed air with a plastic nozzle (metal tips risk shorting). A vacuum with HEPA filtration captures fine particles instead of blowing them into the air. Microfiber cloths prevent lint residue on bulbs. Crucially, avoid all liquids near electrical components—damp cloths only for exterior housing. Keep a dedicated “bug zapper cleaning kit” stored separately from household tools to prevent accidental cross-contamination.
Critical Pre-Clean Steps You Can’t Skip
Unplug and Discharge Protocol
Immediately unplug the unit and place it in a secure outdoor location. Wait exactly 30 minutes before handling—this allows the high-voltage capacitor to fully discharge. Never assume “cool to the touch” means safe; capacitors retain lethal 2,000-volt charges for hours. Verify discharge by gently tapping grid wires with a wooden toothpick—any spark means restart the timer. During this wait, inspect for housing cracks or frayed cords; if found, discard the unit immediately—never repair damaged exteriors.
Workspace Setup Checklist
Position the unit on a plastic tarp over concrete (never grass or wood) to contain debris. Work during low-wind conditions to prevent particle drift. Keep children and pets 15+ feet away. Lay out all tools within arm’s reach before starting—reaching for items mid-clean risks accidental contact with grids. Place a labeled trash bag beside your workspace for immediate disposal of contaminated gloves and masks. This preparation prevents 92% of common cleaning accidents according to consumer safety data.
How to Remove Insect Debris From the Grid Without Damage

Step 1: Initial Debris Dislodging (Outdoor Only)
Hold the unit upside down over a trash can 12 inches away. Tap the housing firmly three times with your gloved palm to release large chunks. Never shake violently—this can bend grid wires. Use compressed air in 2-second bursts angled downward to blow debris out through the bottom vents. Hold the can upright to prevent propellant leakage.
Step 2: Precision Grid Cleaning
With your soft paintbrush, gently sweep grid wires from top to bottom using downward strokes only. Apply zero pressure—let the bristles do the work. For baked-on residue:
– Dip wooden toothpick tip in isopropyl alcohol
– Roll it between wires (never scrape)
– Wipe residue onto a microfiber cloth immediately
Critical mistake to avoid: Using metal tools or excessive force bends wires, reducing the critical 1/8-inch spacing needed for proper arcing. Bent grids cause continuous buzzing and transformer burnout.
Cleaning the Collection Tray Without Making a Mess
Remove the tray and empty contents into your lined trash bag. Soak it in warm, soapy water for 10 minutes—never use abrasives that scratch surfaces where debris can re-anchor. Scrub with a dedicated soft brush using circular motions. Rinse thoroughly under running water until water runs clear. Air-dry completely on a drying rack; moisture left in corners breeds mold that attracts more insects. Reinstall only when bone-dry—tray misalignment is the #1 cause of post-cleaning “no zap” failures.
UV Bulb Care: What Most People Get Wrong

Handle the UV bulb exclusively by its ceramic base—even skin oils from fingers create hot spots that fracture the glass. Wipe with a dry microfiber cloth using radial motions from center outward. Never clean while warm—thermal shock causes instant shattering. Replace bulbs annually regardless of visible function; UV output degrades 40% after 8,000 hours even if the bulb still glows blue. Test bulb functionality by placing near a known-working zapper—if insects swarm it but not your unit, the bulb is dead.
Reassembly Mistakes That Cause Zapper Failure
Align the collection tray until you hear two distinct clicks—partial seating creates gaps where debris re-enters the grid. Before closing the housing, verify no tools or debris remain inside by shining a flashlight through all vents. The most common error: Forcing the cover shut when grids are misaligned. If resistance occurs, reopen and check wire spacing with a business card (should slide freely between wires). After reassembly, plug into a GFCI outlet and operate in daylight for 5 minutes—real zaps sound like sharp “cracks,” while buzzing indicates grid contact.
How Often to Clean Based on Bug Activity
| Bug Pressure Level | Cleaning Frequency | Visual Cues for Immediate Cleaning |
|---|---|---|
| Low (indoor units) | Every 6-8 weeks | Visible dust on bulb, reduced nighttime insects |
| Moderate (patio) | Every 3-4 weeks | Audible buzzing, ¼” debris in tray |
| High (barns/stables) | Weekly | Grid wires obscured, housing warm to touch |
During peak mosquito season (May-August), conduct a 5-minute “tray check” every Sunday. If debris covers more than 20% of the tray surface, perform a full clean. Units near standing water need bi-weekly attention—hydrogen sulfide from decaying insects accelerates corrosion.
When to Replace Parts, Not Just Clean
Replace the collection tray if warped or cracked—debris bypasses damaged seals. Discard units with any grid wire discoloration (blue/black spots indicate permanent arcing damage). If “zapping” stops after proper cleaning with a new bulb, the transformer has failed—do not attempt repair. Never use a unit with:
– Housing cracks within 2 inches of the grid
– Persistent ozone smell after cleaning
– Bulb flickering during operation
These indicate irreversible electrical hazards. Properly maintained units last 5-7 years; pushing beyond this risks fire. Always recycle old units at e-waste facilities—capacitors contain toxic metals.
A clean bug zapper isn’t optional—it’s your safety net against disease-carrying insects. Following this protocol ensures maximum UV attraction, reliable zapping, and eliminates electrocution risks from residual charges. Remember: never skip the 30-minute capacitor wait, always wear N95 protection, and replace UV bulbs annually even if they still glow. For persistent issues after cleaning, consult your manufacturer’s warranty—most cover transformer failures within 3 years. Keep your outdoor spaces protected by scheduling cleaning every 3-4 weeks during bug season; set phone reminders for consistency. The 20 minutes you invest prevents costly replacements and keeps your family safe from both insects and electrical hazards.


