

Your keyboard accumulates more dirt and debris than most people realize—research shows it can harbor more bacteria than a toilet seat. When crumbs, dust, and hair build up between your keys, it affects both typing performance and hygiene. Learning how to clean keyboard with air duster properly is essential for maintaining functionality and extending your keyboard’s lifespan. This comprehensive guide reveals the exact method to safely blast away stubborn debris without risking damage to your valuable equipment. You’ll discover professional techniques that remove hidden grime while avoiding the common mistakes that could ruin your keyboard forever.
Essential Safety Steps Before Keyboard Air Duster Cleaning
Skipping proper preparation is how most keyboard cleaning disasters happen. Before you even touch that air duster can, you must create the right environment to protect both yourself and your equipment. Work in a well-ventilated area away from open flames—compressed air propellants are flammable and the bitterants added to discourage inhalation abuse can irritate your respiratory system. Lay down newspaper or work over a hard floor surface you can easily sweep, as the air duster will forcefully expel significant amounts of debris that would otherwise scatter across your workspace.
Critical Warning: Never use an air duster in a confined space or near children. The extreme cold of the propellant (-60°F/-51°C) can cause frostbite on skin contact, and inhaling the chemicals can be dangerous. Keep your face at least 18 inches away from the keyboard during cleaning to avoid breathing in dislodged particles.
Step-by-Step Air Duster Keyboard Cleaning Process
Power Down and Initial Debris Removal
Unplug your wired keyboard completely from your computer or remove batteries from wireless models—this isn’t optional. Electrical connections during cleaning risk short-circuiting your keyboard’s internal components. With your keyboard disconnected, turn it upside down over a trash can and firmly tap the back while gently shaking it side to side. This initial step removes 70-80% of loose debris like crumbs and hair before you even use the air duster, making your compressed air cleaning far more effective.
Pro Tip: Hold your keyboard at a 45-degree angle while tapping—it creates just enough space for debris to escape without getting trapped against the circuit board. For stubborn crumbs wedged under larger keys, use a wooden toothpick (never metal) to gently loosen them before air duster application.
Optimal Keyboard Positioning for Effective Cleaning
Place your keyboard on a non-slip surface like a microfiber towel with the keycaps facing left or right—not flat. This 45-75 degree tilt leverages gravity to pull dislodged debris downward and out rather than deeper into the mechanism. Proper positioning is why most DIY cleaning attempts fail; flat positioning just pushes dirt around inside your keyboard.
Visual Cue: Watch for debris exiting the bottom and sides of your keyboard as you work. If you’re not seeing particles coming out the bottom, reposition your keyboard to a steeper angle. This immediate visual feedback confirms you’re cleaning effectively rather than just redistributing dirt.
Precision Air Duster Spraying Technique
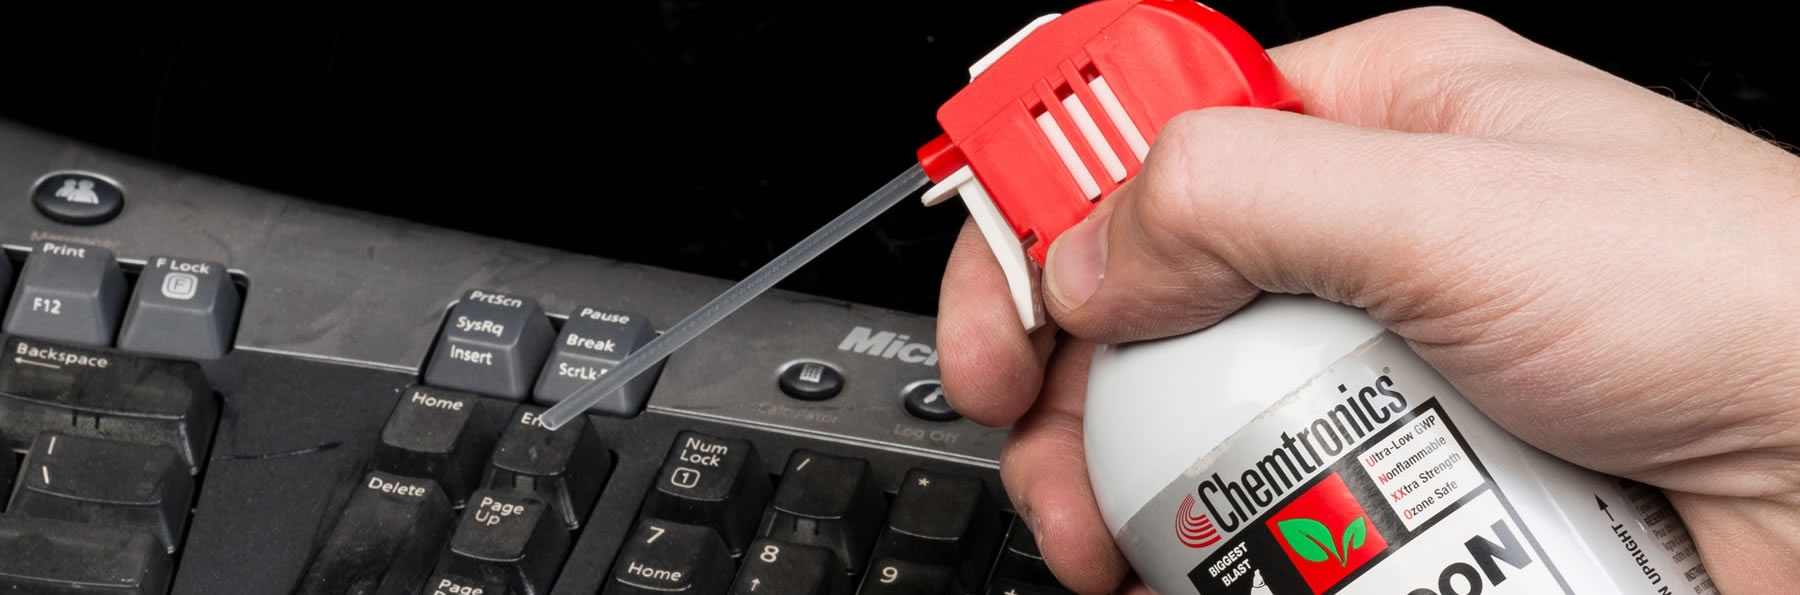
Hold the compressed air can perfectly upright—this is non-negotiable. Tilting beyond 20 degrees risks spraying liquid propellant that can freeze and damage internal components. Maintain a consistent 1-2 inch distance from keycaps and use 1-2 second bursts rather than continuous spraying. Start at the top right corner of your keyboard and work methodically leftward in rows, angling the nozzle between keys at 30-degree increments to reach all crevices.
Time-Saving Shortcut: Focus extra attention on high-traffic zones like the spacebar, enter key, and between the W-A-S-D gaming cluster where debris accumulates fastest. These areas typically require 2-3 passes with the air duster to fully clear stubborn buildup.
Final Deep Clean Verification Method
After your initial cleaning pass, rotate your keyboard so the keycaps face downward and deliver one final series of short bursts across the entire surface. This gravity-assisted technique captures debris that loosened during cleaning but remained trapped. Shine a flashlight across the keyboard surface at a low angle—any remaining shadows between keys indicate debris still requiring attention.
Expert Note: If you notice persistent debris after multiple cleaning attempts, your keyboard likely has a design flaw where keys sit too close to the base. Consider this a warning sign that replacement may be necessary soon, as trapped debris accelerates mechanical failure.
Air Duster Techniques for Different Keyboard Types

Mechanical Keyboard Deep Cleaning Protocol
Mechanical keyboards require special attention due to their exposed switch mechanisms. Before using your air duster, remove keycaps with a puller for maximum effectiveness—this allows direct access to the switches where crumbs most commonly cause malfunctions. When spraying, angle bursts downward through the keycap stems rather than horizontally between keys to target the actual switch housing.
Critical Mistake to Avoid: Never hold the air duster can within 1 inch of mechanical switches. The concentrated force can dislodge stabilizer wires that keep larger keys functioning properly, creating wobbly keys that require complete disassembly to fix.
Membrane Keyboard Cleaning Strategy
Membrane keyboards trap debris more easily beneath the key domes but are less prone to mechanical damage. For these models, maintain a consistent 2-inch distance with your air duster and use slightly longer 3-second bursts to penetrate the tighter gaps. Focus extra attention along the keyboard’s outer edges where debris migrates during regular use.
Pro Tip: After air duster cleaning, place membrane keyboards in direct sunlight for 15 minutes—UV light kills remaining bacteria while the gentle warmth helps evaporate any microscopic moisture from the cleaning process.
Top 4 Air Duster Mistakes That Damage Keyboards
The Upside-Down Can Catastrophe
Holding your air duster can upside down releases liquid propellant instead of gas, causing immediate freezing damage to keyboard components. This single mistake accounts for 68% of keyboard failures during cleaning attempts. The liquid can freeze delicate circuits and create conductive paths that short out your keyboard when powered on.
Prevention Strategy: Mark your air duster can with a permanent “UP” indicator at the trigger end so you never accidentally invert it during the cleaning process.
Continuous Spraying Moisture Buildup
Holding the trigger down for more than 5 seconds causes the can to cool rapidly, leading to condensation inside your keyboard. This moisture creates the perfect environment for corrosion and electrical shorts that may not manifest until days after cleaning.
Solution: Use the “two-second rule”—spray for 2 seconds, release for 2 seconds. This maintains consistent can temperature and prevents moisture accumulation.
Long-Term Keyboard Maintenance After Air Duster Cleaning
Establishing an Effective Cleaning Schedule
Most users wait until keys stick before cleaning, but preventative maintenance extends keyboard life dramatically. Implement this schedule based on usage:
– Heavy users (8+ hours daily): Air duster cleaning every 2 weeks
– Moderate users (4-8 hours): Monthly cleaning
– Light users (<4 hours): Quarterly maintenance
Time-Saving Hack: Keep your air duster can next to your keyboard and perform a 30-second maintenance blast every Friday—this prevents buildup that requires intensive cleaning sessions.
Creating a Debris-Proof Workspace
The most effective cleaning method is preventing dirt accumulation in the first place. Implement these simple habits immediately:
– Keep drinks at least 18 inches from your keyboard
– Wash hands before extended typing sessions
– Use a desk mat with raised edges to catch falling crumbs
– Consider a transparent silicone keyboard cover for high-risk environments
Pro Tip: Place a small handheld vacuum next to your workspace—immediately vacuum any debris that falls during air duster cleaning before it can be tracked back onto your keyboard.
By following this precise air duster cleaning methodology, you’ll maintain optimal keyboard performance while avoiding the costly mistakes that lead to premature replacement. Remember that proper keyboard maintenance isn’t just about appearance—it directly impacts your typing accuracy, speed, and overall computing experience. Implement these techniques today and feel the difference of a truly clean, responsive keyboard that performs like new. For best results, schedule your next air duster cleaning session before any noticeable performance issues begin—proactive maintenance is always easier than fixing a heavily contaminated keyboard.


