
Sweat beads on your forehead as you finish your workout, muscles burning with exertion. You reach for your massage gun, eager to relieve the tension—but when you grab the ball attachment, you notice a faint odor and sticky residue. This common scenario highlights why knowing how to clean massage gun ball attachments properly is essential for both hygiene and optimal performance. These versatile tools penetrate deep into muscle tissue, but their textured surfaces become breeding grounds for bacteria when sweat, skin cells, and oils accumulate. Without regular cleaning, your recovery tool can actually compromise your health and reduce effectiveness. In this guide, you’ll discover the exact steps to sanitize your massage gun ball attachment safely while preserving its material integrity—ensuring every session delivers maximum therapeutic benefits without risking skin irritation or infection.
Most users don’t realize that neglecting proper cleaning can degrade the silicone or TPE rubber material faster than normal wear and tear. Harsh chemicals, improper drying techniques, or skipping disinfection between users creates a perfect storm for bacterial growth that even vigorous workouts can’t eliminate. The good news? Cleaning your massage gun ball attachment takes less than 10 minutes when you follow the right protocol. Whether you’re a professional athlete, weekend warrior, or someone managing chronic pain, maintaining a hygienic massage tool is non-negotiable for effective recovery. By the end of this guide, you’ll have a crystal-clear routine that keeps your attachment fresh, functional, and ready for action after every use.
Why Your Massage Gun Ball Becomes a Bacterial Hotspot
The unique design that makes ball attachments so effective for targeting large muscle groups also creates hidden traps for contaminants. Those dimpled textures and curved surfaces that deliver perfect percussive therapy become perfect hiding spots for sweat, dead skin cells, and bacteria. After just one intense session, your ball attachment can harbor thousands of microorganisms that multiply rapidly in warm, moist environments. This isn’t just about unpleasant odors—studies show that shared fitness equipment can transmit skin infections like staph if not properly sanitized. The porous nature of TPE rubber and silicone means contaminants penetrate deeper than you can see, gradually degrading material quality while compromising hygiene. Skipping regular cleaning leads to sticky residue that actually reduces the attachment’s glide, forcing you to press harder during use and potentially causing bruising or discomfort.
How Sweat Composition Damages Attachment Material
Sweat contains salts, proteins, and fatty acids that react with silicone and TPE rubber over time. The sodium chloride in perspiration accelerates material breakdown, causing premature hardening and cracking. When these microscopic cracks develop, they create even more surface area for bacteria to colonize—making future cleaning efforts less effective. You’ll notice this degradation as increased stickiness during use or visible cloudiness in transparent attachments. The solution isn’t just wiping with water; you need targeted cleaning that neutralizes these compounds without introducing new damaging agents. Understanding this chemical interaction explains why proper cleaning technique matters more than frequency alone.
Critical Safety Steps Before Cleaning Your Ball Attachment

Never attempt to clean your massage gun ball attachment while the device remains powered. Start by completely powering down your unit and unplugging from any power source. For cordless models—which represent 95% of modern massage guns—remove the battery pack entirely. This dual safety measure prevents accidental activation that could cause serious finger injuries during cleaning. Water and electrical components make a dangerous combination, so treat every step with the same caution as handling kitchen appliances. If you skip this step, you risk short-circuiting internal electronics or suffering painful pinching injuries from sudden activation. Always verify the power indicator shows “off” before proceeding—don’t rely solely on the power button position.
Why Submerging the Main Unit Causes Permanent Damage
Many users make the critical mistake of trying to clean the entire massage gun unit in their sink. The motor housing contains precision electronics that water will permanently damage within seconds. Only the detachable ball attachment should ever contact cleaning solutions. Attempting to clean the main body with wet cloths also risks liquid seeping through ventilation slots. If your model has textured grip areas, use a slightly damp microfiber cloth for spot cleaning only—never saturate these surfaces. Remember: if water enters the motor housing, your entire device could become unusable, turning a $50 cleaning session into a $200 replacement cost.
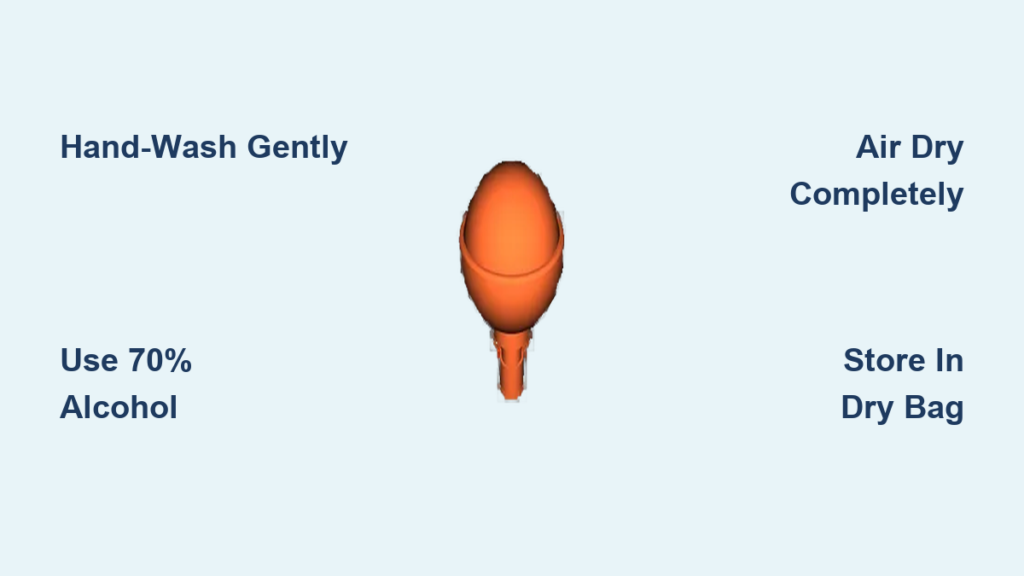
Hand-Washing Your Ball Attachment: The Gold Standard Method
Hand-washing remains the safest and most effective technique for maintaining your massage gun ball attachment’s longevity. This method gives you complete control over water temperature, pressure, and cleaning duration—critical factors for preserving delicate materials. Unlike machine washing, you can immediately address stubborn spots without exposing the entire attachment to potentially damaging cycles. The hands-on approach lets you feel for texture changes that indicate material degradation, allowing early detection of cracks or warping. Most manufacturers specifically recommend hand-washing because it eliminates the risk of attachments getting caught in dishwasher mechanisms or exposed to excessive heat.
Prepare the Perfect Cleaning Solution
Start by filling a small bowl with lukewarm water—never hot, as extreme temperatures can warp TPE materials. Add just one teaspoon of unscented, dye-free dish soap per cup of water. This precise ratio creates enough suds for effective cleaning without leaving residue that attracts more dirt. Avoid antibacterial soaps containing triclosan, which degrades rubber compounds over time. For sensitive skin users, substitute with a hypoallergenic hand soap formulated for medical use. The ideal solution should produce minimal bubbles—excessive suds indicate too much soap, which requires more rinsing and increases material stress.
Target Problem Areas with Precision Tools
Focus your cleaning efforts on the attachment’s textured zones where bacteria hide. Use a dedicated toothbrush with ultra-soft bristles to gently agitate dimples and grooves—never standard hard-bristled brushes that scratch surfaces. For attachments with deep channels, wrap a cotton swab around the brush tip to reach narrow spaces. Pay special attention to the connection point where the attachment meets the massage gun shaft; this area traps the most oils from your hands. Apply light pressure in circular motions for 15-20 seconds per zone, watching for visible dirt release. If stubborn residue remains, create a paste of baking soda and water for spot treatment—leave on for no more than 30 seconds before gentle brushing.
When and How to Disinfect Your Massage Gun Ball Attachment

Disinfection becomes critical when multiple users share the device or after recovering from skin infections. Standard cleaning removes visible grime but doesn’t eliminate pathogens that cause athlete’s foot or staph infections. The difference between cleaning and disinfecting is crucial: cleaning removes surface contaminants while disinfecting kills microorganisms. For personal use, disinfect weekly; for shared equipment in gyms or physical therapy offices, sanitize after every use. Never skip the cleaning step before disinfecting—organic matter like sweat neutralizes many disinfectants, rendering them ineffective.
Alcohol Wipe Protocol for Quick Sanitization
After thorough cleaning and rinsing, dampen a microfiber cloth with 70% isopropyl alcohol—never pour directly onto the attachment. The 70% concentration penetrates bacterial cell walls more effectively than higher percentages. Wipe all surfaces methodically, maintaining contact for at least 30 seconds per zone to ensure pathogen kill time. Immediately follow with a second cloth dampened with distilled water to remove alcohol residue that could dry out materials. Allow to air dry completely before storage—alcohol accelerates material degradation if left sitting on surfaces. Never use hand sanitizers for this purpose; their thick gels leave sticky residues that attract more dirt.
Proper Drying Techniques That Prevent Mold Growth

Air drying on a clean surface remains the only safe method for moisture removal. Place the attachment on a fresh microfiber towel with the textured side facing up to maximize airflow. Rotate the ball every 15 minutes to expose all surfaces—neglecting this step leaves moisture trapped in dimples where mold develops within hours. Never use hair dryers or heating vents; temperatures above 100°F cause TPE materials to soften and warp. Complete drying typically takes 2-4 hours depending on humidity levels. Before storage, perform the “touch test”: all surfaces should feel completely dry with no coolness or tackiness. Any residual moisture creates ideal conditions for microbial growth that standard cleaning won’t eliminate.
Storage Solutions That Maintain Cleanliness
Store your completely dry attachment in a breathable cotton bag—not plastic containers that trap residual moisture. If using the original case, leave the lid slightly ajar for the first 24 hours after cleaning. For shared equipment environments, assign color-coded storage containers to each user to prevent cross-contamination. Never store attachments in gym bags with damp towels or clothing; the enclosed space creates a humid microclimate perfect for bacterial growth. Consider adding silica gel packets to storage containers to absorb ambient moisture, replacing them monthly for maximum effectiveness.
Maintenance Schedule for Long-Term Attachment Performance
Create a cleaning routine based on usage frequency: after every session for shared equipment, every 3-4 uses for personal devices. Incorporate quick wipe-downs with a damp microfiber cloth immediately post-session to prevent sweat crystallization. Monthly, inspect for hairline cracks using a magnifying glass—these invisible fissures harbor bacteria that survive standard cleaning. When discoloration appears or the surface feels consistently sticky despite cleaning, replace the attachment. Most manufacturers recommend replacement every 6-12 months with regular use; continuing with damaged attachments risks skin irritation and reduced therapeutic effectiveness.
Pro Tip: Keep a dedicated cleaning kit in your gym bag containing travel-sized unscented soap, microfiber cloths, and alcohol wipes. This eliminates excuses for skipping post-workout cleaning and ensures you always have the right tools. For frequent travelers, silicone-based attachments clean more easily than TPE models—consider this when purchasing your next massage gun.
By following these precise techniques, you’ll extend your massage gun ball attachment’s lifespan while ensuring every session delivers hygienic, effective muscle therapy. Proper cleaning isn’t just about appearance—it directly impacts performance and your health. Implement this routine consistently, and you’ll notice smoother operation, better glide, and complete peace of mind knowing your recovery tool supports rather than hinders your wellness journey. Remember: a well-maintained attachment performs like new, while a neglected one becomes a liability to your health goals. Take control of your recovery equipment today—the difference shows in every therapeutic pulse.


