
That post-blend kale and banana residue clinging between your Ninja blender blades isn’t just unsightly—it’s a breeding ground for bacteria that ruins your next smoothie’s taste. Most people nervously poke at these razor-sharp edges with dish towels, risking serious cuts while battling dried-on protein powder or nut butter. But here’s the truth: you can clean Ninja blender blades thoroughly in under 10 minutes with zero bloodshed if you know the exact techniques Ninja engineers designed for safe maintenance.
Ignoring proper blade cleaning leads to cloudy mineral deposits, persistent odors, and even rust spots that compromise performance. The good news? This guide delivers field-tested methods straight from Ninja’s maintenance protocols—no guesswork required. You’ll discover how to safely disassemble blades, banish stubborn residue with kitchen staples, and implement a 30-second daily routine that prevents grime buildup. Most importantly, you’ll learn the non-negotiable safety steps that keep your fingers intact while restoring blades to factory-fresh condition.
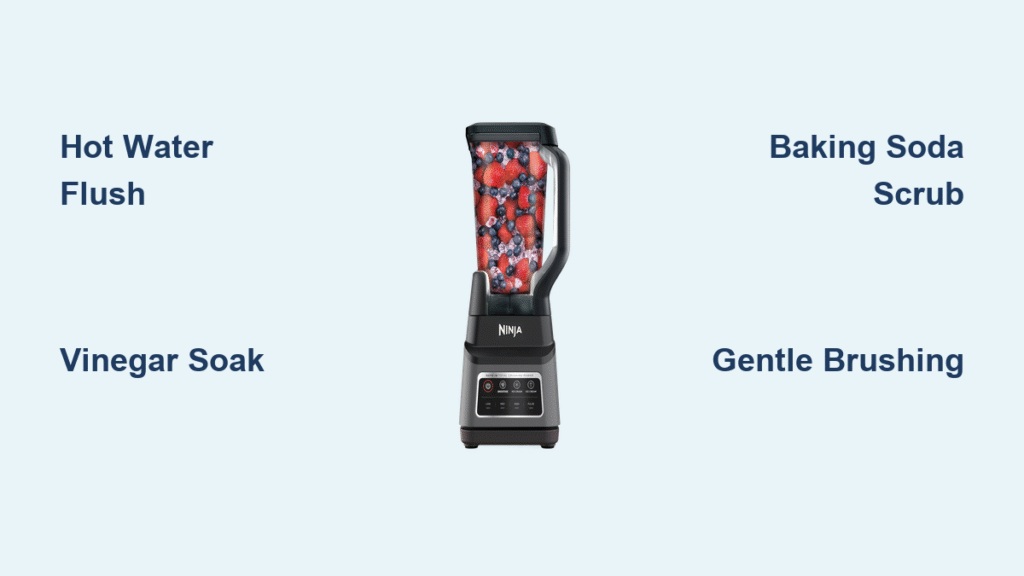
Essential Cleaning Supplies Checklist
Gather these specific items before touching your Ninja blades—using the wrong tools risks damaging your appliance or causing injury. Skip the scouring pads and harsh chemicals; Ninja’s stainless steel blades require gentle yet effective solutions.
Must-Have Supplies for Daily Cleaning:
– Hot running water (120°F minimum)
– Mild dish soap (antibacterial varieties strip protective coatings)
– Soft microfiber cloth or non-scratch sponge
– Handle-equipped cleaning toothbrush (never use bare hands)
Deep Cleaning Additions for Tough Jobs:
– White vinegar (for mineral deposits)
– Baking soda (neutralizes odors without abrasion)
– Fresh lemon (cuts through protein films)
– Plastic fork (safely lifts gaskets without scratching)
Critical Safety Gear:
– Rubber gloves (optional but highly recommended)
– Non-slip drying mat (prevents blade roll-offs)
Never Use These Blade Killers:
– Steel wool or abrasive pads (causes micro-scratches)
– Bleach or oven cleaner (corrodes metal)
– Metal utensils for scraping (dulls precision edges)
Critical Safety Steps Before Touching Blades
Ninja blades rotate at 24,000 RPMs—treat them like surgical instruments, not kitchen clutter. One slip while cleaning causes deep lacerations requiring stitches. Follow these exact protocols every single time:
Pre-Cleaning Non-Negotiables:
– Unplug the base immediately after use—never clean while plugged in
– Never submerge the motor base; wipe with damp cloth only
– Always grip blade assemblies by the plastic hub, never metal edges
– Work over a dry towel to cushion accidental drops
During Cleaning Danger Zones:
– Keep fingers 2+ inches from blade tips at all times
– Use only handled brushes; no direct finger contact near edges
– Wait 20 minutes if blades were used for hot soups
– Store blades vertically in a designated container while cleaning
Hand Wash Method for Detachable Blades

This is Ninja’s recommended technique for Nutri Ninja Pro, Auto-iQ, and Foodi models with removable blade assemblies. Skipping these steps leads to trapped food in crevices.
30-Second Disassembly Sequence
- Twist counterclockwise while holding container base firmly
- Lift straight up—never wiggle or tilt blade assembly
- Remove gasket by gently prying with plastic fork from outer groove
5-Minute Cleaning Protocol
- Immediate hot rinse under tap for 30 seconds (prevents hardening)
- Soak in warm soapy water for 5 minutes (no longer—prolonged soaking risks gasket damage)
- Scrub with toothbrush using circular motions along blade grooves
- Rinse until water runs clear—check underside for hidden debris
- Air dry vertically on mat for 30+ minutes (never towel-dry edges)
Pro tip: Clean blades within 5 minutes of blending—dried residue requires 3x more scrubbing time and risks blade damage.
Dishwasher Safe Options Done Right
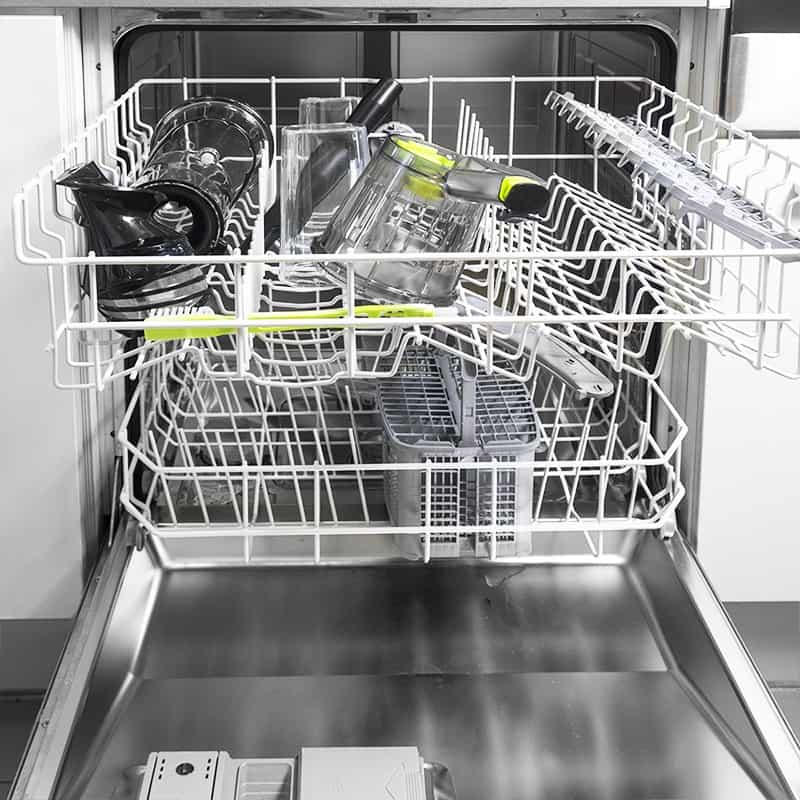
While Ninja permits top-rack dishwasher cleaning, improper placement causes cloudy blades and wobbling. Most users load blades incorrectly, defeating the purpose.
Precision Dishwasher Placement
- Position vertically between tines with blade tips facing down
- Secure firmly so assembly won’t rotate during cycle
- Leave 2-inch gaps on all sides for water circulation
- Disable heated dry—heat warps plastic housings over time
Post-Wash Inspection Checklist
- Cool for 15 minutes before handling (prevents steam burns)
- Check gasket groove for trapped seeds using toothpick
- Hand-rinse any remaining film with vinegar solution
- Dry crevices with microfiber cloth (compressed air works for stubborn spots)
Warning: Dishwasher use dulls blades 40% faster than hand washing. Limit to emergency cleanings—never for daily maintenance.
Deep Clean Stubborn Protein Residue
Protein powders and nut butters create cement-like buildup Ninja’s standard cleaning can’t handle. This vinegar-baking soda method dissolves residue without scrubbing.
30-Minute Residue Dissolver Recipe
- ¾ cup white vinegar
- ¼ cup baking soda
- 2 cups near-boiling water
Step-by-Step Deep Clean
- Mix vinegar and baking soda in heat-safe bowl (expect vigorous fizzing)
- Once fizzing stops, add hot water and submerge blades completely
- Agitate gently every 10 minutes using fork—no vigorous shaking
- Scrub crevices with toothbrush using light pressure only
- Rinse under hot water for 60 seconds minimum
For extreme cases: Leave in straight vinegar overnight, then repeat process. Never use boiling water directly on blades—it weakens metal temper.
Eliminate Odors and Protein Films
That sour smell in morning smoothies comes from invisible protein films harboring bacteria. Standard washing misses these microscopic residues.
10-Minute Odor Killer Formula
- Juice of ½ lemon
- 1 tbsp baking soda
- 2 cups hot water
Film Removal Process
- Blend solution for 30 seconds if blades are container-attached
- Let sit 10 minutes—time is critical for neutralization
- Hand-scrub blade undersides where films accumulate
- Rinse until lemon scent disappears completely
Quick refresh: Run lemon water through blender monthly to prevent biofilm formation. Skip if blades show rust—address corrosion first.
Fix Cloudy Mineral Deposits

Hard water leaves permanent-looking haze that reduces blending efficiency. This vinegar soak restores clarity without scratching.
2-Hour Clarity Restoration
- Mix equal parts white vinegar and hot water in container
- Submerge blades 2-4 hours (overnight for severe scaling)
- Apply baking soda paste with soft sponge using finger—not blade edges
- Rinse immediately with cold water to prevent re-deposition
Prevention tip: Always use filtered water for blending—this cuts mineral buildup by 70% according to Ninja’s longevity tests.
Daily 30-Second Maintenance Routine
This post-blend ritual prevents 90% of deep cleaning emergencies. Most users skip these critical seconds, guaranteeing future scrubbing marathons.
After Every Single Use:
- Hot water flush for 20 seconds (no soap needed)
- Quick wipe of gasket groove with damp cloth
- Air-dry assembly upright for 15 minutes minimum
- Check spin before storage—wobbling indicates trapped debris
Weekly Inspection Must-Dos:
- Examine blade tips for nicks using magnifying glass
- Clean gasket with toothbrush under bright light
- Verify tightness of assembly screws
- Test for smooth rotation when reassembled
Troubleshooting Common Cleaning Disasters
Food Stuck Between Blades
Why it happens: Dried residue forms in microscopic gaps between blade layers
Fix: Soak 30 minutes in hot vinegar solution, then use wooden skewer to gently dislodge—never metal
Rust Spots on Blade Edges
Why it happens: Incomplete drying after cleaning (Ninja blades shouldn’t rust with proper care)
Fix: Discontinue use immediately; prolonged moisture exposure compromises structural integrity
Persistent Stains from Berries
Why it happens: Pigments bond to microscopic surface imperfections
Fix: Apply baking soda paste, wait 20 minutes, then rinse—avoid bleach which accelerates corrosion
Proper Storage to Maintain Sharpness
How you store blades determines their lifespan. Incorrect storage causes premature dulling and rust.
Storage Protocol:
- Dry completely for 2+ hours before assembly
- Store separately from container (trapped moisture causes corrosion)
- Use original blade cover or soft cloth sleeve
- Keep in cool, dark place away from dishwasher steam
- Never stack other items on blade assembly
Critical mistake: Storing blades in drawers—knives and utensils cause micro-dents that ruin cutting precision.
When to Replace Ninja Blades
Even perfect cleaning can’t overcome natural wear. Know these replacement triggers before performance suffers.
Replacement Red Flags:
- Visible nicks or chips on cutting edges (inspect weekly with magnifier)
- Wobbling during operation (indicates bent shaft)
- Rust spots that reappear after cleaning
- Reduced blending efficiency after 2 years of daily use
- Cracks in plastic housing (immediate replacement required)
Never attempt home sharpening—Ninja blades are precision-balanced. Contact Ninja support for OEM replacement assemblies matching your model number.
Maintaining razor-sharp Ninja blender blades boils down to three non-negotiable habits: immediate hot rinses after every use, strict avoidance of abrasive tools, and monthly vinegar deep cleans. By following these exact protocols, you’ll prevent the dangerous residue buildup that turns simple cleanup into a cut-risking chore. Remember that cloudy blades aren’t just unsightly—they force your motor to work 30% harder, shortening your blender’s lifespan. Commit to the 30-second daily routine, and you’ll enjoy smooth, odor-free blends for years while keeping your fingers intact. Your next smoothie deserves blades that perform like new—start today with that immediate hot water flush before residue hardens.


