
That stubborn protein powder film clinging to your Ninja blender pitcher or the lingering garlic scent from yesterday’s pesto can ruin your morning smoothie routine. You’ve scrubbed repeatedly, yet the once-clear plastic now looks cloudy and worn. Many users don’t realize that improper cleaning techniques actually accelerate wear while failing to remove deep-set stains and odors. The right cleaning approach takes just minutes but preserves your pitcher’s clarity and prevents flavor transfer between blends.
This guide reveals the exact cleaning protocols Ninja owners use to maintain crystal-clear pitchers that perform like new. You’ll discover which parts can safely go in the dishwasher, how to properly clean around the blade assembly without injury, and simple household ingredients that dissolve stubborn residue. Most importantly, you’ll learn the daily habit that prevents 90% of cleaning headaches before they start.
Prevent Permanent Stains With Proper Daily Cleaning
Skipping immediate cleaning transforms simple residue into permanent stains that require intensive treatment. A consistent post-blend routine takes less than two minutes but saves you from hours of scrubbing later when dried ingredients bond to the plastic surface.
Rinse While Residue Is Still Wet
Immediately after pouring your blend, fill the pitcher halfway with warm water and add a single drop of dish soap. Run the blender on low for 30 seconds to loosen any clinging ingredients. This critical step prevents dried-on residue that causes cloudy film and stubborn stains. Empty the soapy water and rinse thoroughly under running water before particles have time to harden.
Disassemble Components Before Washing
Never clean the pitcher while fully assembled. Twist off the blade assembly counter-clockwise (gripping with a towel for protection against sharp edges) and remove both the lid and rubber gasket. These components require separate cleaning methods to reach hidden crevices where bacteria and odors accumulate. Keeping them assembled traps moisture and food particles between layers.
Hand Wash Each Component Thoroughly
Use a soft sponge with mild detergent on all disassembled parts. Pay special attention to the underside of the blade assembly where the rubber gasket sits—this area traps microscopic food particles that cause persistent odors. Rinse each component under running water until droplets sheet cleanly without beading, indicating all soap residue is gone. Never use abrasive pads that create micro-scratches where future stains can grab hold.
Eliminate Cloudiness With Targeted Deep Cleaning Methods

When regular washing fails to remove mineral deposits and protein buildup, your pitcher develops that frustrating cloudy appearance that makes it look permanently dirty. These specialized treatments penetrate deep into plastic surfaces to dissolve the compounds causing opacity without damaging the material.
Baking Soda Paste for Protein Film Removal
Mix two tablespoons of baking soda with just enough water to form a thick paste. Apply this paste to stained areas using a soft cloth, gently rubbing in small circular motions for 30 seconds. The mild abrasiveness lifts protein powder film and berry stains without scratching. Let the paste sit for five minutes to break down stubborn residue, then rinse thoroughly with warm water. This method safely restores clarity to areas that regular washing can’t reach.
Vinegar Soak for Mineral Deposit Breakdown
Combine equal parts white vinegar and warm water in the pitcher, adding one tablespoon of baking soda for enhanced cleaning power. The chemical reaction creates gentle bubbling action that penetrates microscopic pits in the plastic. Let the mixture soak for 30 minutes, then run the blender on low for 15 seconds to circulate the solution through hard-to-reach areas. The acetic acid in vinegar dissolves mineral deposits causing cloudiness. Rinse three times to eliminate any vinegar taste.
Lemon Steam Treatment for Lid Crevices
Quarter one lemon and add to two cups of water in the pitcher. Blend on high for 60 seconds, creating steam that penetrates the tiniest crevices in the lid and blade housing. The citric acid cuts through grease while the heat loosens trapped particles. Let the mixture cool completely before handling—hot plastic can warp. This natural method cleans areas inaccessible to sponges while leaving a fresh scent.
Avoid Dishwasher Damage With Proper Placement Techniques
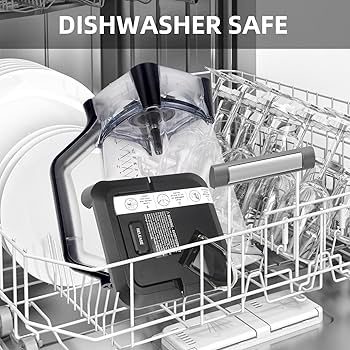
Many users unknowingly damage their Ninja pitchers by improper dishwasher placement. While some models are technically dishwasher-safe, incorrect positioning exposes components to excessive heat that causes warping and cloudiness over time.
Top Rack Placement Prevents Warping
If your pitcher is labeled dishwasher-safe, place it upside-down on the top rack only—never the bottom. The heating element on the lower rack emits concentrated heat that gradually warps plastic components. Always remove the blade assembly before loading, as dishwasher heat dulls blades and damages the gasket. The intense heat cycles compromise the plastic’s integrity, leading to premature cloudiness.
Moderate Temperature Settings Preserve Clarity
Select normal or eco wash cycles only—avoid high-heat sanitize options that accelerate plastic degradation. Skip the heated dry feature entirely; instead, air-dry all components upright to prevent water spots. The repeated exposure to extreme temperatures from sanitize cycles causes microscopic cracks that trap stains and odors, making future cleaning more difficult.
Special Handling for Gasket and Lid Components
Place the rubber gasket and plastic lid in the utensil basket to prevent them from getting lodged against heating elements. Check your specific model’s manual for confirmation, as some newer Ninja models have components that shouldn’t go in the dishwasher at all. The constant heat exposure causes rubber components to become brittle and lose their sealing ability over time.
Safely Clean Around Blades Without Injury
The blade assembly harbors hidden food particles that affect both hygiene and blending performance. Many users avoid proper cleaning due to fear of cuts, but these techniques let you clean thoroughly while protecting your hands.
Protective Handling for Blade Removal
Always wear cut-resistant gloves or grip the blade base firmly with a thick, dry towel when removing the assembly. Never attempt to clean blades while attached to the motor base—this creates dangerous leverage points. Hold the pitcher steady with your non-dominant hand while twisting the blade assembly counter-clockwise with your protected dominant hand.
Detail Cleaning With Old Toothbrush
An old soft-bristled toothbrush reaches between blade crevices where sponges can’t penetrate. Dip the brush in hot, soapy water and scrub each blade individually, paying special attention to the area where the blade meets the housing. Rinse under running water while gently rotating the assembly until no particles remain visible. This prevents the cross-contamination of flavors between blends.
Gasket Inspection and Cleaning Protocol
Pop out the rubber gasket by gently prying from one edge—it should release easily. Scrub both sides thoroughly with the toothbrush, as food particles trapped here cause persistent odors and affect the seal’s effectiveness. Hold the gasket up to light to check for cracks or tears. Replace if it shows signs of wear, as compromised gaskets lead to leaks during operation.
Banish Lingering Odors With Natural Absorption Methods

Garlic, onion, and strong spices can leave odors that regular washing doesn’t eliminate. These techniques use natural absorption properties to draw out embedded smells without harsh chemicals that could affect taste.
Overnight Coffee Ground Treatment
Fill the pitcher with used coffee grounds and enough warm water to cover them. Seal with the lid and let sit overnight—the porous structure of coffee grounds naturally absorbs odor molecules. Discard the grounds in the morning and rinse thoroughly with warm water. This method works particularly well for persistent garlic and onion smells that regular washing can’t remove.
Activated Charcoal for Deep Odor Elimination
Place two tablespoons of food-grade activated charcoal in the pitcher with one cup of water. Seal tightly and shake gently for 30 seconds to distribute the charcoal. Let the mixture sit for 4-6 hours—the charcoal’s massive surface area binds to odor compounds at a molecular level. Discard the solution and wash normally. This professional-grade technique eliminates even the most stubborn protein powder smells.
Sunlight Exposure for Bacterial Elimination
After washing, place the pitcher in direct sunlight for 2-3 hours. UV rays naturally destroy odor-causing bacteria that thrive in moist environments. This works especially well for plastic lids where moisture often gets trapped. Rotate the pitcher periodically to ensure all surfaces receive equal exposure for maximum effectiveness.
Prevent Future Buildup With Simple Daily Habits
The most effective cleaning strategy requires just 30 seconds after each use but prevents 90% of future cleaning challenges. These small habits maintain your pitcher’s clarity and performance between deep cleaning sessions.
Immediate Post-Blend Rinse Protocol
Never let ingredients dry inside the pitcher—even if you’re in a rush, run the quick soap-and-water blend immediately after use. This simple step prevents proteins from bonding to the plastic surface. Set a reminder on your phone if needed until this becomes automatic. The few seconds invested now save you from intensive cleaning sessions later.
Weekly Maintenance Schedule
Every Sunday, perform the lemon steam cleaning method to prevent mineral deposits and maintain freshness. This weekly habit keeps your pitcher performing like new while preventing the gradual buildup that leads to cloudiness. Consistent maintenance means deep cleaning becomes necessary only every few months rather than weekly.
Proper Storage Techniques
Store the pitcher disassembled with the lid off to prevent moisture trapping. Keep the blade assembly separate in a designated container to avoid accidental cuts. Never stack items inside the pitcher during storage—this creates pressure points that can cause micro-fractures over time. Proper storage extends your pitcher’s lifespan significantly.
Clean your Ninja blender pitcher properly after each use and it will maintain crystal clarity for years, blending smoothly without transferring yesterday’s flavors into today’s creations. Make the immediate rinse your non-negotiable habit, and those intensive deep cleaning sessions will become rare exceptions rather than weekly necessities. Your taste buds—and your next smoothie—will thank you for the extra 30 seconds of care.


