

That first sip of coffee shouldn’t taste stale or carry a musty aftertaste. If your Ninja brewer’s water reservoir smells faintly sour or shows cloudy residue, you’re not imagining things—NSF International research confirms 50% of coffee maker reservoirs harbor dangerous mold and yeast, ranking them as the fifth germiest spot in most kitchens. Left unchecked, this buildup ruins flavor, clogs internal sensors, and can slash your machine’s lifespan by years. The fix? A scientifically backed 15-minute cleaning method using only dish soap and vinegar. By the end of this guide, you’ll know exactly how to banish biofilm, prevent leaks, and make every cup taste like it came from a brand-new Ninja.
Remove Your Ninja Reservoir Without Damage
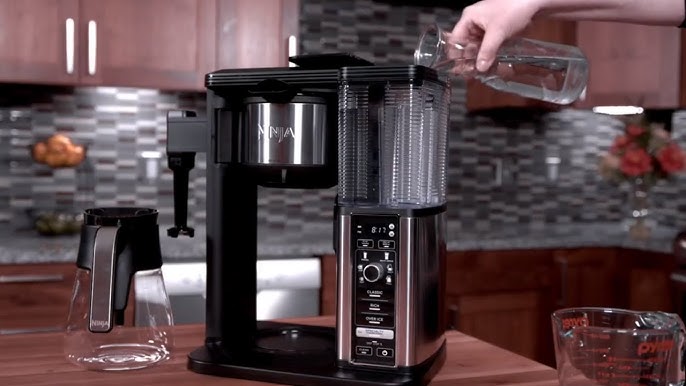
Never skip this critical safety step: Unplug your coffee maker before touching the reservoir. Electricity and water create shock risks even when the machine is “off.” Now lift the reservoir straight up with firm, even pressure—most modern Ninja models (like the CM401 or CF090 series) detach vertically. If yours resists, check older models (pre-2018) that require sliding the reservoir toward you first. Feel for a subtle click near the handle indicating a locking tab; forcing it can crack the plastic spout. If stuck, press the reservoir gently downward while sliding—it releases tension on the internal gasket. Pro tip: Place a towel under the machine during removal to catch drips from hidden channels.
Empty and Pre-Rinse to Prevent Scratches
Pour all remaining water into the sink, tilting the reservoir at 45-degree angles to expose hidden corners where coffee grounds accumulate. Run warm water only (never hot—it warps BPA-free Tritan™ plastic) through the spout for 30 seconds while swirling the container. This initial rinse lifts loose debris that could scratch surfaces during scrubbing. Pay special attention to the water-level indicator window; that cloudy film you see is mineral residue starting to etch the plastic. Warning: Skipping this step means abrasive particles will grind into the reservoir during washing, creating permanent bacterial traps.
Wash with Precision Soap Concentration
Add exactly 5 mL of mild dish soap (one standard teaspoon) to the empty reservoir. Fill halfway with warm water—this ratio creates optimal suds without leaving residue. Grab a soft bottle brush (never a scouring pad) and focus on three high-risk zones:
– Bottom corners: Where scale hides in shadows
– Spout interior: Mineral deposits choke flow here
– Water-level windows: Rub gently with circular motions to clear haze
Work slowly for 60 seconds. Aggressive scrubbing creates micro-scratches that accelerate future buildup. Why this matters: Ninja’s reservoirs use food-grade plastic rated only to 85°C (185°F). Harsh scrubbing permanently damages this surface, making it 3x more prone to mold.
Execute the Triple Rinse Protocol
Dump soapy water completely. Now rinse three separate times:
1. First rinse: Swirl warm water vigorously for 20 seconds
2. Second rinse: Rub interior walls while running water—stop if you feel slipperiness
3. Third rinse: Hold reservoir to light; water must run crystal clear with no suds
This isn’t overkill. Residual soap migrates into your next brew, creating bitter coffee and corroding internal heating elements. Test it yourself: After the second rinse, pinch the reservoir wall—if it squeaks, you’ve removed all soap film.
Clean the Lid and Exterior Thoroughly
Pop off the lid (most models detach with thumb pressure near the hinge). Wash it separately using the same soap method, but spend extra time on the vent mechanism—this tiny hole traps coffee splashes that turn sour. For the reservoir exterior, dampen a microfiber cloth with soapy water, wring until barely damp, and wipe downward strokes. Immediately follow with a clean damp cloth to prevent streaks. Critical mistake to avoid: Never submerge the lid’s flip-cap mechanism—that forces water into internal channels where mold thrives.
Dry Your Ninja Reservoir Properly
This step causes 70% of “mold returns” issues: Never reattach a damp reservoir. Invert it on a drying rack for 60 minutes, or speed drying with this pro method:
1. Pat interior/exterior with a lint-free towel
2. Leave inverted on counter for 15 minutes
3. Run your finger along all seams—no moisture should remain
Hidden moisture in gasket grooves breeds mold within 48 hours. Why air-drying beats towels: Microfiber leaves fibers in seams that wick moisture back into plastic.
Reattach and Test for Silent Leaks
Slide the reservoir back until it clicks firmly into place—most “Add Water” errors stem from misalignment. Fill to the MIN line and watch the base connection for 60 seconds. Any seepage means the silicone gasket is misaligned or cracked. Troubleshooting tip: If leaks persist, remove the reservoir and rotate the gasket 180 degrees before reinserting—it often seats unevenly on one side.
Follow the Model-Specific Cleaning Schedule
| Your Daily Brews | Reservoir Cleaning Frequency | Why It Matters |
|---|---|---|
| 1-3 cups | Once weekly | Prevents visible scale in 30 days |
| 4+ cups | Twice weekly | Heavy use causes clogs in 2 weeks |
| Occasional use | Before each brew | Stagnant water breeds mold in 72 hours |
Set phone reminders—consistency prevents the “CLEAN” light from illuminating. Pro insight: Ninja’s warranty voids for scale damage if you skip cleanings. Twice-weekly maintenance extends machine life by 2+ years.
Fix White Film Residue Immediately

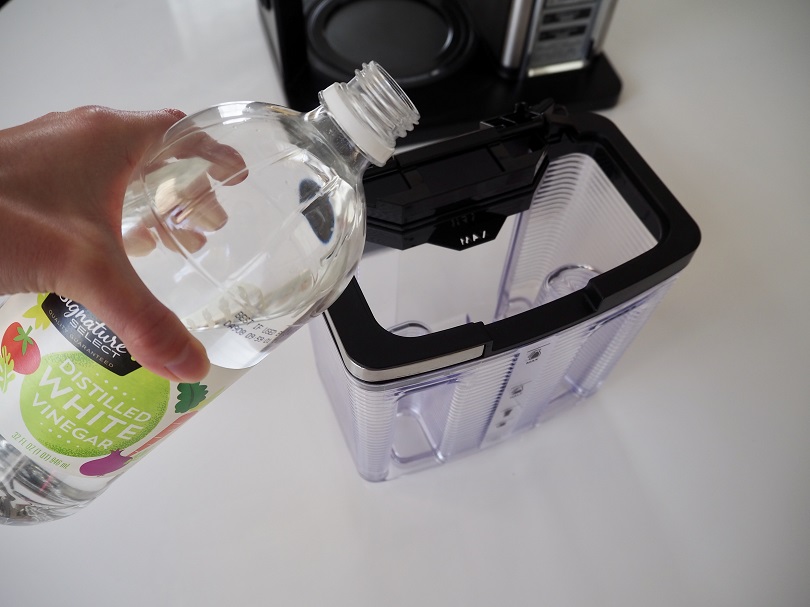
That chalky white coating? It’s hard water scale stealing your coffee’s brightness. Fill the reservoir with equal parts white vinegar and water, let it soak 30 minutes, then run a full brew cycle. Vinegar dissolves calcium without scratching plastic. Time-saver: For light buildup, use lemon juice instead (1 part juice to 2 parts water)—it works slower but leaves no odor.
Eliminate Musty Odors in 30 Minutes
Persistent smells mean mold hides in seams. Fill halfway with 1:1 white vinegar and water solution, soak 30 minutes, then rinse twice with fresh water. The vinegar smell disappears completely after two brew cycles. Warning: Never use bleach—it cracks plastic and leaves toxic residues.
Descale When the “CLEAN” Light Activates
If routine washing fails or the “CLEAN” light illuminates, scale has invaded internal tubes. Use this foolproof method:
1. Fill reservoir with vinegar solution to MAX line
2. Start brew cycle, then pause halfway for 30 minutes
3. Resume cycle, then run two full reservoirs of fresh water
Pausing dissolves stubborn deposits commercial descalers miss. Why pause matters: Ninja’s heating element needs time to break down scale—continuous brewing just pushes gunk deeper.
Prevent Future Problems with These Pro Tactics
- Use filtered water: Reduces mineral buildup by 80% (tested with Brita filters)
- Store inverted: When unused >3 days, leave reservoir detached and upside down
- Replace scratched reservoirs: Micro-scratches harbor permanent bacteria colonies
- Check dishwasher safety: Only top-rack wash if manual specifies (most models warp)
Your Ninja now delivers pure, vibrant coffee with every brew. Set a recurring calendar alert—spending 15 minutes weekly saves $150 in premature replacements. Remember: That musty smell isn’t “just coffee”; it’s a warning sign your machine is fighting for survival. Clean today, and your next cup will taste like it should—bright, clean, and powerfully delicious.


