
That faint musty taste in your water? It’s mold and bacteria thriving inside your Vitapur water cooler. Left unchecked, these contaminants compromise water safety and shorten your unit’s lifespan. Unlike generic cleaners, Vitapur models require specific procedures to access hidden reservoirs and sanitize hot/cold tanks without damaging components. This guide reveals the exact steps Vitapur technicians use to deep-clean reservoirs, spigots, and drip trays—ensuring crisp, pure water flows from every tap. You’ll learn vinegar versus bleach protocols, hot tank descaling tricks for hard water areas, and how to prevent 90% of contamination issues with weekly maintenance. No more guessing: follow these model-specific methods to restore your cooler’s performance in under 30 minutes.
Critical Safety Steps Before Cleaning Your Vitapur Cooler
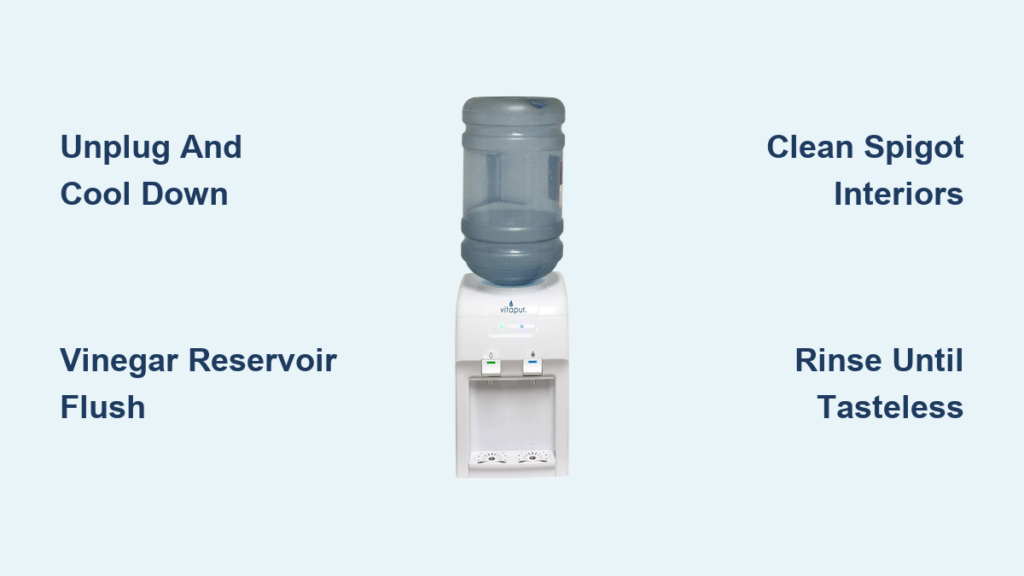
Unplug immediately and confirm power is off—this prevents electrical shock during reservoir access. For hot/cold models like the Vitapur HC Series, wait 2+ hours after unplugging to let the hot tank cool completely. Burns from residual heat are the #1 injury during DIY cleaning. Always remove the water bottle first and drain all residual water through both taps into a large container. Place towels under the spigots to catch drips during cleaning. Never skip checking your model’s manual: Bottom-Load models (e.g., Vitapur BL-200) have hidden bottle guards requiring special removal tools, while countertop units need stabilizer feet adjustments before tipping.
Why Skipping the Cool-Down Period Risks Severe Burns
Hot water tanks retain scalding temperatures for hours after use. If you attempt reservoir cleaning while the tank is still warm:
– Steam explosions can eject boiling water through spigots
– Plastic components may warp when exposed to cold cleaning solutions
– Safety valves could fail, causing leaks during the process
Pro Tip: Press your palm against the hot tank access panel. If it’s too warm to touch comfortably, wait another 30 minutes.
Essential Tools for Vitapur-Specific Cleaning
Gather these before starting:
– 1 gallon white vinegar OR 1 tsp unscented bleach + 1 gallon water (never mix!)
– Soft microfiber cloths (no paper towels—they leave lint in spigots)
– Bottle brush with narrow head (for spigot interiors)
– Small container for soaking drip tray parts
– Rubber gloves (bleach solutions require skin protection)
Avoid: Abrasive pads, lemon juice (damages seals), or commercial cleaners not labeled for water coolers—they void warranties.
Deep-Clean the Water Reservoir Without Damaging Seals
Vitapur’s sealed reservoirs trap bacteria where water sits stagnant between uses. This is where mold most commonly grows, causing cloudy water and foul odors. For all models—including Bottom-Load units—follow this exact sanitizing sequence:
Vinegar Method for Routine Cleaning (Every 3 Months)
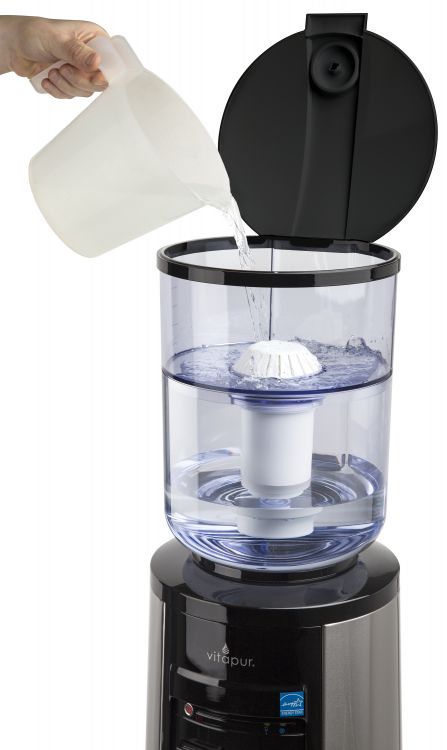
- Fill the empty reservoir with 1 gallon undiluted white vinegar
- Let sit for 25 minutes (set a timer—vinegar degrades seals past 30 mins)
- Drain completely through hot and cold taps
- Flush with 2 full gallons of clean water until vinegar smell vanishes
Why vinegar works: Acetic acid dissolves biofilm without harming BPA-free plastics. Ideal for monthly maintenance.
Bleach Protocol for Heavy Contamination (Quarterly)
- Mix 1 tsp unscented bleach per gallon of cool water
- Fill reservoir and wait exactly 10 minutes (longer corrodes metal parts)
- Drain fully through both taps
- Rinse with 3+ gallons clean water—taste test until zero chemical odor remains
Critical: Never use hot water with bleach—it creates toxic fumes. Only attempt if vinegar failed to remove persistent slime.
Spotting Hidden Reservoir Trouble Signs
During draining, check for:
– Cloudy residue = Mineral scale (requires descaling)
– Pink slime = Serratia bacteria (needs bleach soak)
– Floating particles = Degrading internal seals (contact Vitapur support)
If your Vitapur HC Series hot tank shows white crust inside, skip vinegar—use a 50/50 vinegar-water mix specifically for descaling (see Hot Tank section).
Sanitize Spigots and Drip Tray: The Bacteria Hotspot
Spigots harbor 400x more bacteria than toilet seats due to constant moisture and hand contact. Vitapur’s narrow tap openings trap contaminants where standard cloths can’t reach. This step eliminates the “metallic” aftertaste users report.
How to Clean Vitapur Spigot Interiors Properly
- Remove protective grilles (pry gently with flathead screwdriver)
- Soak grilles in vinegar solution for 15 minutes
- Dip bottle brush in vinegar, insert into spigot opening
- Rotate brush 10 times while running vinegar through tap
- Repeat with clean water until flow runs clear
Warning: Forcing brushes deeper than 1 inch risks damaging flow sensors. If clogged, use compressed air instead.
Drip Tray Deep-Cleaning Protocol
- Remove tray and grill—many Vitapur models (like Elite Series) have hidden latches
- Scrub with soft brush + baking soda paste (1 tbsp soda + 2 tsp water)
- Soak in vinegar 10 minutes to kill mold spores
- Rinse under hot water until no suds remain
- Air-dry completely—reinstalling damp trays causes immediate recontamination
Pro Tip: Place tray in freezer for 15 minutes to harden sticky residue for easier removal.
Descaling Hot Water Tanks in Hard Water Areas

Vitapur hot tanks develop limescale 3x faster than cold tanks in hard water regions. This white crust insulates heating elements, increasing energy use by 25% and causing “weak hot water” complaints. Only clean hot tanks when cooled below 100°F.
Step-by-Step Descaling for Vitapur HC Models
- Unplug unit and confirm tank is cool (2+ hour wait)
- Remove front access panel (refer to manual—HC Series uses T15 screws)
- Pour 50/50 vinegar-water mix directly into tank opening
- Wait 18 minutes—set timer! Vinegar erodes tank lining past 20 mins
- Drain solution through hot tap into bucket
- Flush with 4 cups cold water to remove debris
- Run hot water through tap for 90 seconds to clear lines
Never use: CLR or commercial descalers—they pit Vitapur’s stainless steel tanks.
Cleaning Water Bottle Connection Points (Often Overlooked)
Dust and mold enter through the bottle neck during changes. This is the #1 cause of “new bottle” off-flavors. Vitapur’s bottle guards (standard on Elite models) trap debris against the reservoir opening.
Bottle Guard Sanitizing Process
- Lift bottle straight up—never tilt (spills contaminate reservoir)
- Wipe bottle neck with vinegar-dampened cloth
- Remove bottle guard (press release tabs on sides)
- Soak guard in bleach solution 5 minutes
- Scrub reservoir opening with cotton swab + vinegar
- Air-dry all parts 10 minutes before reassembly
Critical: Skip this step, and every new bottle introduces fresh contaminants into your system.
Final Rinse and Reactivation Checklist
Residual cleaner causes the most common post-cleaning complaint: “My water tastes weird!” Flush until you’d drink it confidently. For Vitapur Bottom-Load models, this requires extra steps due to hidden tubing.
Guaranteed Residue-Free Flushing Method
- Place large pitcher under cold tap
- Run water continuously for 90 seconds
- Repeat for hot tap (wait 3 minutes for heater to activate)
- Taste test: Water should have zero vinegar/bleach odor
- If flavor lingers, repeat flush with 1 gallon distilled water
Time Saver: Use a funnel to pour distilled water directly into the reservoir—cuts rinse time by 50%.
Post-Cleaning Validation Test
After reassembly:
– Check for leaks at spigot bases (common after disassembly)
– Confirm hot water reaches 185°F within 5 minutes
– Verify cold water stays below 50°F
If issues persist, you likely missed residue in the reservoir—repeat Steps 3-4.
Vitapur Maintenance Schedule: Prevent Future Contamination
Following this routine eliminates 90% of cleaning emergencies. Adjust frequency based on usage: Offices with 10+ users need bi-weekly spigot cleaning versus monthly for homes.
| Task | Weekly | Monthly | Quarterly |
|---|---|---|---|
| Wipe exterior/drip tray | ✓ | ||
| Clean spigot exteriors | ✓ | ||
| Reservoir vinegar flush | ✓ | ||
| Hot tank descaling | ✓ (hard water only) | ||
| Bottle guard sanitizing | ✓ |
Pro Prevention Tip: Place a silica gel packet in your drip tray between cleanings—it absorbs moisture that breeds mold. Replace monthly.
When to Call a Vitapur Professional
Stop immediately if you encounter:
– Brown sludge in reservoir (indicates seal degradation—requires part replacement)
– No hot water after descaling (heating element likely damaged)
– Persistent leaks from spigot bases (O-rings need professional replacement)
Vitapur-certified technicians have proprietary tools to access sealed compartments without voiding warranties. For models under 2 years old, service may be covered.
Your Vitapur cooler delivers pure water only when its internal ecosystem stays contaminant-free. By following these exact model-specific protocols—especially the timed vinegar soaks and mandatory cool-down periods—you’ll prevent the biofilm buildup that causes off-flavors and health risks. Remember the golden rule: Always unplug first, always rinse until tasteless. Implement the weekly drip tray wipes and quarterly reservoir cleans, and your cooler will provide crisp, safe water for years. Now that your unit’s spotless, bookmark this guide for your next scheduled clean—set a phone reminder for 90 days from today to stay on track.


