
That faint musty smell when you pour water from your cooler? It’s not your imagination—stale-tasting water often means hidden bacteria thriving in your bottle. Uncleaned water cooler bottles become breeding grounds for mold, algae, and harmful pathogens within weeks, especially in warm environments. The CDC confirms improper bottle sanitation causes 23% of water cooler contamination cases, leading to unpleasant tastes and potential health risks. This guide cuts through conflicting advice to deliver the only four methods scientifically proven to sanitize 5-gallon water bottles safely. You’ll learn exactly how to remove stubborn limescale, eliminate biofilm, and prevent recontamination—using supplies already in your kitchen.
Why Your Water Cooler Bottle Needs Deep Cleaning Every 30 Days
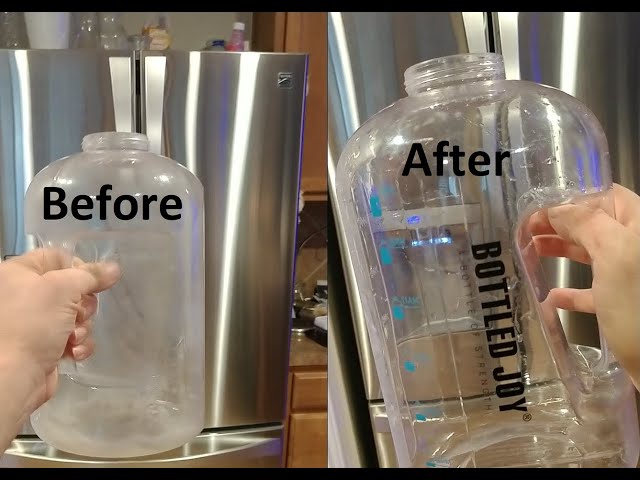
Water cooler bottles seem clean when empty, but microscopic residues linger after each use. Mineral deposits from hard water create rough surfaces where bacteria cling, while organic films from previous water batches feed mold growth. Unlike kitchenware, these bottles rarely see proper sanitation—their narrow necks hide cloudiness and slimy textures until odors become impossible to ignore. Most users make the critical error of “quick rinsing” with tap water, which merely redistributes contaminants. Without deep cleaning, bottles develop biofilm: a slippery layer of bacteria that standard washing won’t remove. This isn’t just about taste—studies link neglected bottles to gastrointestinal issues in office environments.
Must-Have Supplies for Safe Water Bottle Sanitization
Skip generic “cleaning kits” and gather these specific items:
- Long-reach bottle brush with soft, non-scratching bristles (curved-neck for 5-gallon bottles)
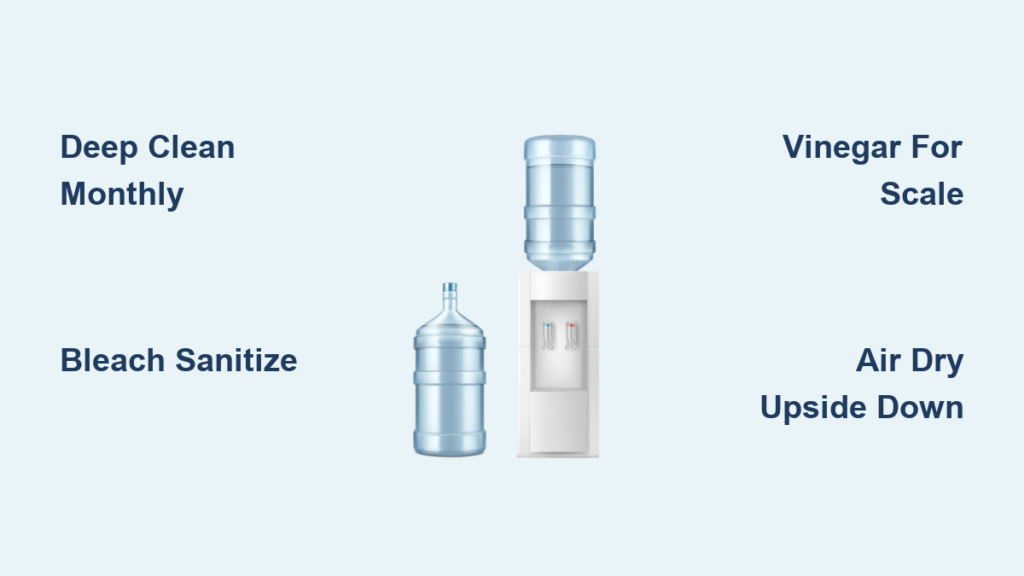
- Unscented bleach (5.25–8.25% sodium hypochlorite) OR StarSan food-grade sanitizer
- White vinegar (5% acidity) for mineral deposits
- Nitrile gloves (bleach degrades latex)
- Dedicated drying rack that holds bottles upside down
Critical Note: Never use steel wool, abrasive pads, or scented cleaners—they scratch plastic and leave toxic residues. Dish soap must be fragrance-free; even “natural” scents alter water chemistry. For glass bottles, add microfiber cloths to prevent breakage.
Quick Daily Rinse: The 90-Second Fix Between Bottle Changes
Don’t wait for visible grime—daily rinsing prevents buildup:
- Inspect the neck for white mineral rings or slimy texture (use a flashlight if needed)
- Fill ¼ with cold tap water, cap tightly, and shake vigorously for 20 seconds
- Drain completely and invert on a clean rack for 5 minutes
Pro Tip: Add 1 tsp vinegar to the rinse water if your area has hard water. This dissolves early-stage limescale before it hardens. Never skip this step—even “new” bottles from suppliers may contain residue from manufacturing.
Weekly Soap-and-Brush Method: Remove Film Without Scratching
When water tastes faintly plastic or cloudy, it’s time for this gentle deep clean:
How to Scrub Without Damaging Your Bottle
- Add 2 drops unscented dish soap and 2 cups warm (not hot) water to the bottle
- Insert bottle brush and scrub interior walls in circular motions for 60 seconds—focus on the shoulder curve where film accumulates
- Rinse 4 times with cold water until suds vanish (soap residue causes foaming when dispensing)
Warning: Never use boiling water—it warps plastic and releases microplastics. If stains persist, move to vinegar treatment below. Weekly cleaning takes 8 minutes but extends bottle life by 6+ months.
CDC-Approved Bleach Sanitization: The Only Method That Kills 99.9% of Bacteria
For monthly deep sanitization, this is non-negotiable:
Why the 10% Bleach Solution Is Dangerous
Old guides recommend dangerous concentrations that produce toxic chlorine gas. The CDC specifies 1 tablespoon unscented bleach per gallon of water—no more. Higher ratios corrode plastic and leave harmful residues.
Step-by-Step Bleach Sanitization
- Mix solution in a well-ventilated area (outdoors preferred)
- Fill bottle completely, cap, and shake for 30 seconds to coat all surfaces
- Let sit 10 minutes (60 seconds minimum for basic disinfection)
- Drain and rinse 5 times with cold water until no chlorine smell remains
- Air-dry upside down for 24 hours—never wipe interiors
Critical Safety: Never mix bleach with vinegar or ammonia—it creates lethal chloramine gas. Discard bleach older than 6 months; it loses potency.
Vinegar Deep Clean: Remove Limescale and Odors Naturally
Hard water areas need this monthly for crusty mineral deposits:
How Long to Soak for Maximum Deposit Removal
- Fill bottle ¼ with white vinegar, add equal parts hot water
- Cap and shake 1 minute, then let sit 60 minutes (2+ hours for severe buildup)
- Scrub neck with bottle brush using baking soda paste (2 tbsp soda + 1 tbsp water)
- Rinse 4 times—add lemon juice to final rinse to neutralize vinegar taste
Pro Tip: For pink slime (Serratia bacteria), add 3 drops tea tree oil to the vinegar solution. Its antimicrobial properties target stubborn biofilm.
StarSan No-Rinse Sanitizing: The Pro Brewer’s Secret for Water Bottles
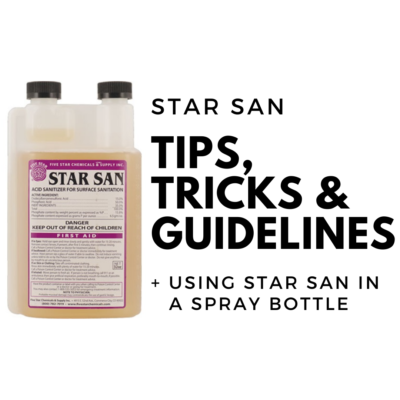
Commercial kitchens use this food-grade method for zero-taste sanitation:
- Dissolve 1 oz StarSan in 5 gallons water
- Fill bottle completely and swish for 2 minutes
- Drain and air-dry—no rinsing needed (NSF-certified safe)
- Reuse within 48 hours for maximum effectiveness
Unlike bleach, StarSan works in hard water and leaves no odor. One $15 bottle sanitizes 500+ water containers. Ideal for households with chlorine sensitivities.
Drying and Storage: Why This Step Causes 80% of Recontamination
Moisture left inside is the #1 cause of mold regrowth. After final rinsing:
- Invert bottles on a dedicated drying rack (never flat surfaces)
- Dry in indirect sunlight for 4+ hours—UV light kills residual microbes
- Store capped bottles upright in cool, dark pantries (not garages)
- Never seal damp bottles—wait until plastic feels completely dry to touch
Warning: Dish racks contaminate bottles with kitchen bacteria. Use racks reserved solely for water containers.
How Often to Clean Based on Your Water Source

| Water Type | Daily Rinse | Weekly Soap Clean | Deep Sanitization |
|---|---|---|---|
| Municipal (city) | Required | Every 7 days | Monthly |
| Well water | Required | Every 5 days | Bi-weekly |
| Filtered | Required | Every 10 days | Every 6 weeks |
Critical Check: If water clouds when poured or smells earthy, sanitize immediately—biofilm has already formed.
3 Critical Mistakes That Make Your Bottle Dirtier
Why Steel Wool Scratches Harbor Bacteria
Microscopic scratches from abrasive tools create crevices where bacteria hide from cleaners. Once plastic is damaged, bottles can’t be fully sanitized—replace scratched containers immediately.
The Hidden Danger of Incomplete Rinsing
Soap or bleach residue alters water pH, causing metallic tastes and digestive upset. Always rinse until water runs perfectly clear—test by filling a glass and checking against white paper.
Ignoring the Bottle Neck’s “Shoulder” Curve
This U-shaped area traps 70% of contaminants. Use a curved-neck brush to scrub upward from the base—never just dip the brush in.
Final Note: Consistent sanitization prevents 95% of water cooler contamination issues. Start with weekly soap-and-brush cleans, add monthly bleach or StarSan treatments, and always dry bottles upside down. Replace bottles showing cloudiness or deep scratches—they’re permanently harboring bacteria. For emergency water storage, sanitize bottles quarterly using the CDC bleach method before filling. Your next glass of water should taste pure and crisp, not like a science experiment. Keep this guide handy for your next bottle change—you’ll never tolerate stale-tasting water again.


