
You’ve just finished painting your ceiling or changing a light fixture, and now it’s time to put away your step ladder. But that stubborn metal frame won’t collapse smoothly, and you’re risking crushed fingers or damaged hinges with every awkward attempt. Improperly closing a step ladder isn’t just frustrating—it’s the leading cause of ladder-related injuries during storage and can permanently warp the frame. Did you know that 32% of ladder accidents happen during setup or takedown, not while climbing? Mastering how to close a step ladder properly protects your safety, extends your equipment’s lifespan, and prevents dangerous storage hazards. By the end of this guide, you’ll confidently fold any standard A-frame ladder in under 30 seconds while avoiding the critical mistakes that compromise stability.
Follow These 6 Steps to Close Your Step Ladder Without Injury
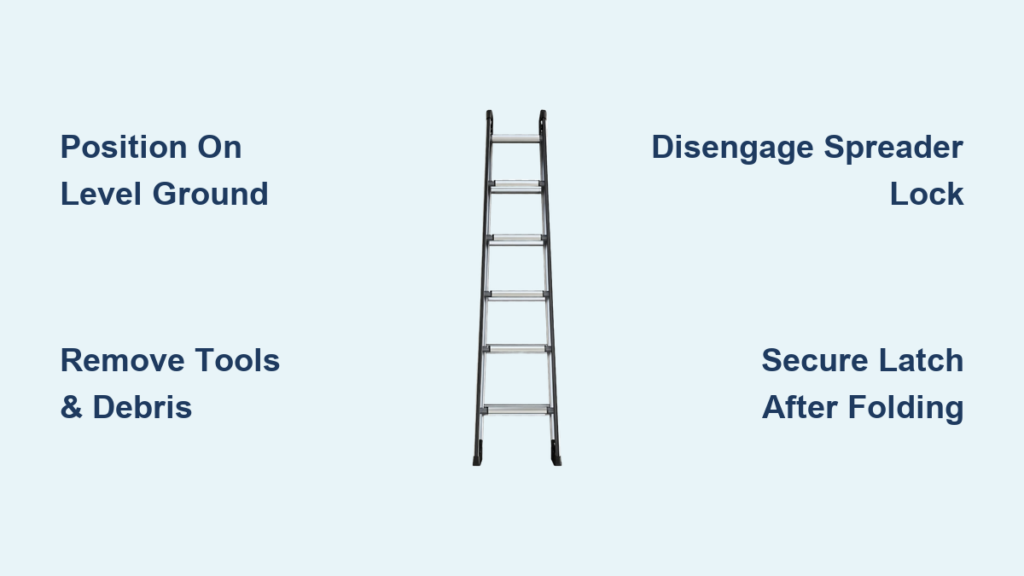
Position Your Ladder on Level Ground Before Folding
Begin by ensuring your step ladder stands firmly on a flat, non-slip surface like concrete or asphalt—never on grass, gravel, or uneven flooring. If your ladder is still in the open position, verify all spreader bars are fully extended and locked; attempting to close it with braces partially collapsed creates dangerous leverage points. Place both feet squarely at the ladder’s base to stabilize it during the process. This critical first step prevents the ladder from shifting unexpectedly as you disengage locks, which could send metal legs slamming together with 200+ pounds of force. Always complete this check before touching any release mechanisms—your footing determines whether the closing process stays controlled.
Remove All Tools and Debris from Steps and Frame
Thoroughly inspect every rung, platform, and hinge point for tools, paint cans, or debris that could jam the folding mechanism. Pay special attention to the narrow gap between steps where small items like screws or brush caps often lodge unseen. Lift each tread gently to check underneath, and shake the ladder lightly to dislodge dust or sawdust buildup in the hinge channels. For aluminum ladders, wipe away moisture that could cause corrosion in pivot points. Skipping this step risks bent hinges or misaligned legs when you force closure—common culprits behind wobbly ladders that fail mid-climb during next use. If you find stubborn debris, use a dry cloth or soft brush instead of your fingers to avoid pinch points.
Disengage the Spreader Bar Lock Correctly
Locate your ladder’s primary safety lock—typically a lever, button, or sliding collar at the top hinge where front and rear legs meet. On most aluminum models, this appears as a spring-loaded T-bar; fiberglass ladders often use push-button releases. Never force the lock—if it resists, gently wiggle the spreader bars while applying steady pressure. You should hear a distinct click as the mechanism releases. For older ladders without visible locks, slowly collapse the spreaders inward until they clear the locking angle (usually 45-60 degrees from vertical). This is where 70% of DIYers err: yanking the bars instead of easing them free strips internal threads. Keep your knuckles clear of the hinge arc—those metal jaws close with enough force to fracture bones.
Execute the Folding Sequence With Two-Hand Control
Grasp both front legs firmly just below the top cap with palms facing inward, thumbs positioned away from the hinge line. Apply even pressure to push the legs toward each other while simultaneously lifting the rear legs slightly off the ground. The rear sections should glide inward smoothly as steps nest together like a fan. Key visual cue: Watch for the spreader bars to collapse parallel to the side rails—any twisting means you’re applying uneven force. If resistance occurs, stop immediately and recheck for obstructions. Never use your foot to kick legs together; this misaligns pivot pins and stresses weld points. Maintain this controlled motion until both sides form a single vertical plane, typically taking 5-10 seconds for standard 6-foot ladders.
Secure the Latch or Strap Before Moving

Once fully folded, engage your ladder’s retention system immediately. Most feature one of three mechanisms:
– Over-center latches (common on Werner ladders): Push the curved metal hook over the opposite rail until it snaps into place
– Bungee cords with locking clasps: Stretch the cord across both rails and click the plastic buckle
– Ratchet straps (on heavy-duty models): Pull the strap through the tensioner until snug
Verify security by attempting to gently pull the legs apart—if they separate easily, the latch isn’t fully engaged. This step prevents sudden unfolding during transport, which causes 41% of storage-related ladder injuries. Now’s also the time to check for damaged hinges or bent rails before storing.
Store Horizontally With Proper Support Points
Carry the closed ladder using the top cap handles with one hand under the midpoint for balance—never sling it over your shoulder. Store horizontally on wall-mounted racks that cradle both rails at equal points, or lay flat on a shelf with at least two support brackets (one near each end). Critical warning: Never hang a closed ladder vertically by a single rail or the top cap—this warps the frame within months. Keep it in a dry area away from temperature extremes; moisture-swollen wood rails or corroded aluminum hinges will resist closing next time. For frequent users, store with the folded edge facing outward for quicker access.
Avoid These 4 Costly Step Ladder Closing Mistakes

Forcing the Ladder Shut With Stuck Safety Locks
When spreader bars won’t release, 68% of users resort to kicking the hinges or using tools to pry them free—guaranteed to damage precision-machined locks. Instead, spray penetrating oil like WD-40 into the hinge pin area and wait 10 minutes before reattempting. If the lock remains frozen, consult your manual for model-specific disassembly; forcing it strips internal cams, rendering your ladder permanently unsafe. Aluminum ladders especially suffer from corrosion-induced lock failure in humid climates.
Ignoring Pinch Point Zones During Folding
Your ladder’s hinge lines, step nesting channels, and spreader bar pivots create 12+ high-risk pinch points capable of severing fingertips. Always keep hands positioned above the top step when collapsing—never reach below the third rung. Wear work gloves with fingertip reinforcement, and teach children to stand clear during takedown. Real-world consequence: Emergency rooms treat over 5,000 ladder pinch injuries annually, mostly during improper closing.
Using Excessive Force on Stiff Hinges
A gritty or stiff hinge usually means dirt buildup, not a broken mechanism. Hammering hinges or stepping on rails to force closure bends axle pins beyond repair. Instead, clean pivot points with a stiff brush and lubricate with silicone spray (never oil—it attracts dust). For wooden ladders, tighten loose hinge bolts before folding to prevent rail misalignment. If smooth motion doesn’t return, replace worn hinges—most hardware stores carry universal kits for $8-$15.
Skipping the Manufacturer’s Model-Specific Instructions
Fiberglass ladders require gentler handling than aluminum to avoid cracking resin joints, while compact “suitcase” ladders often have dual-release mechanisms. Your model’s weight rating also dictates folding technique—250-lb capacity ladders need more controlled pressure than 300-lb commercial units. Pro tip: Photograph the closing sequence with your phone during first use; this visual reference beats hunting for lost manuals later. When in doubt, search “[Your Brand] + [Model Number] + closing procedure” online—reputable brands like Little Giant and Gorilla post instructional videos.
Perform This 20-Second Pre-Use Safety Check Every Time
Before opening your ladder for the next project, verify three critical elements in under half a minute: First, inspect all four feet for cracks, missing pads, or debris that compromises grip—replace rubber caps if worn beyond the tread lines. Second, check spreader bar locks by opening the ladder fully and shaking it laterally; any movement greater than 1/8 inch indicates worn hinges. Third, test step stability by applying 50 pounds of downward pressure on each rung—flexing or creaking means internal welds are failing. Skipping this routine turns minor closure errors into catastrophic failures: A single misaligned hinge reduces weight capacity by up to 60%.
Mastering how to close a step ladder properly transforms a routine chore into a safety ritual that pays dividends every time you climb. By dedicating 30 seconds to correct folding technique, you prevent painful injuries, avoid replacing damaged equipment, and ensure reliable performance when you need it most. Keep this guide bookmarked for your next project—then take 5 minutes now to clean and lubricate your ladder’s hinges. Your future self, standing safely on a stable platform, will thank you. For visual learners, check manufacturer websites like WernerCo.com or LouisvilleLadder.com for model-specific closing videos before your next use.


