
Tired of mushy rice or standing over a stovetop? Your Ninja Foodi can transform from crispy-fry machine to professional rice cooker in minutes. Thousands of home chefs discover their Ninja air fryer pressure-cooks perfect jasmine rice in just 12 total minutes—faster than traditional methods with zero babysitting. Whether you own the latest 15-in-1 model or a basic air-fryer basket, this guide reveals the exact water ratios and timing that deliver restaurant-quality rice every time. No more guessing games when serving teriyaki salmon or vegetable curry—just fluffy, separate grains ready to soak up your favorite sauces.
Identify Your Ninja Model First
Your specific Ninja Foodi configuration determines the ideal rice method. Jumping straight into cooking without checking your model leads to burnt batches or undercooked centers. Pressure-cook models deliver results in half the time of air-fryer-only units, but both can achieve perfection with the right technique.
Pressure-Cook vs Air-Fry Setup
- Pressure-cook lid owners: Use the 2-minute pressure method for white rice (works on all Ninja Foodi models with pressure function)
- Air-fryer-only units: Must use the foil-sealed pan technique at 380°F
- 15-in-1 Steam Mode: Requires double the water (1:2 ratio) and pre-soaking for optimal texture
Required Equipment Check
- Pressure method: Inner pot and pressure lid (valve must seal properly)
- Air-fry method: 7-8 inch cake pan that fits inside basket + heavy-duty foil
- Critical tool: Fine mesh strainer for proper rinsing (prevents gummy texture)
Pressure-Cook White Rice Formula (2-Minute Method)
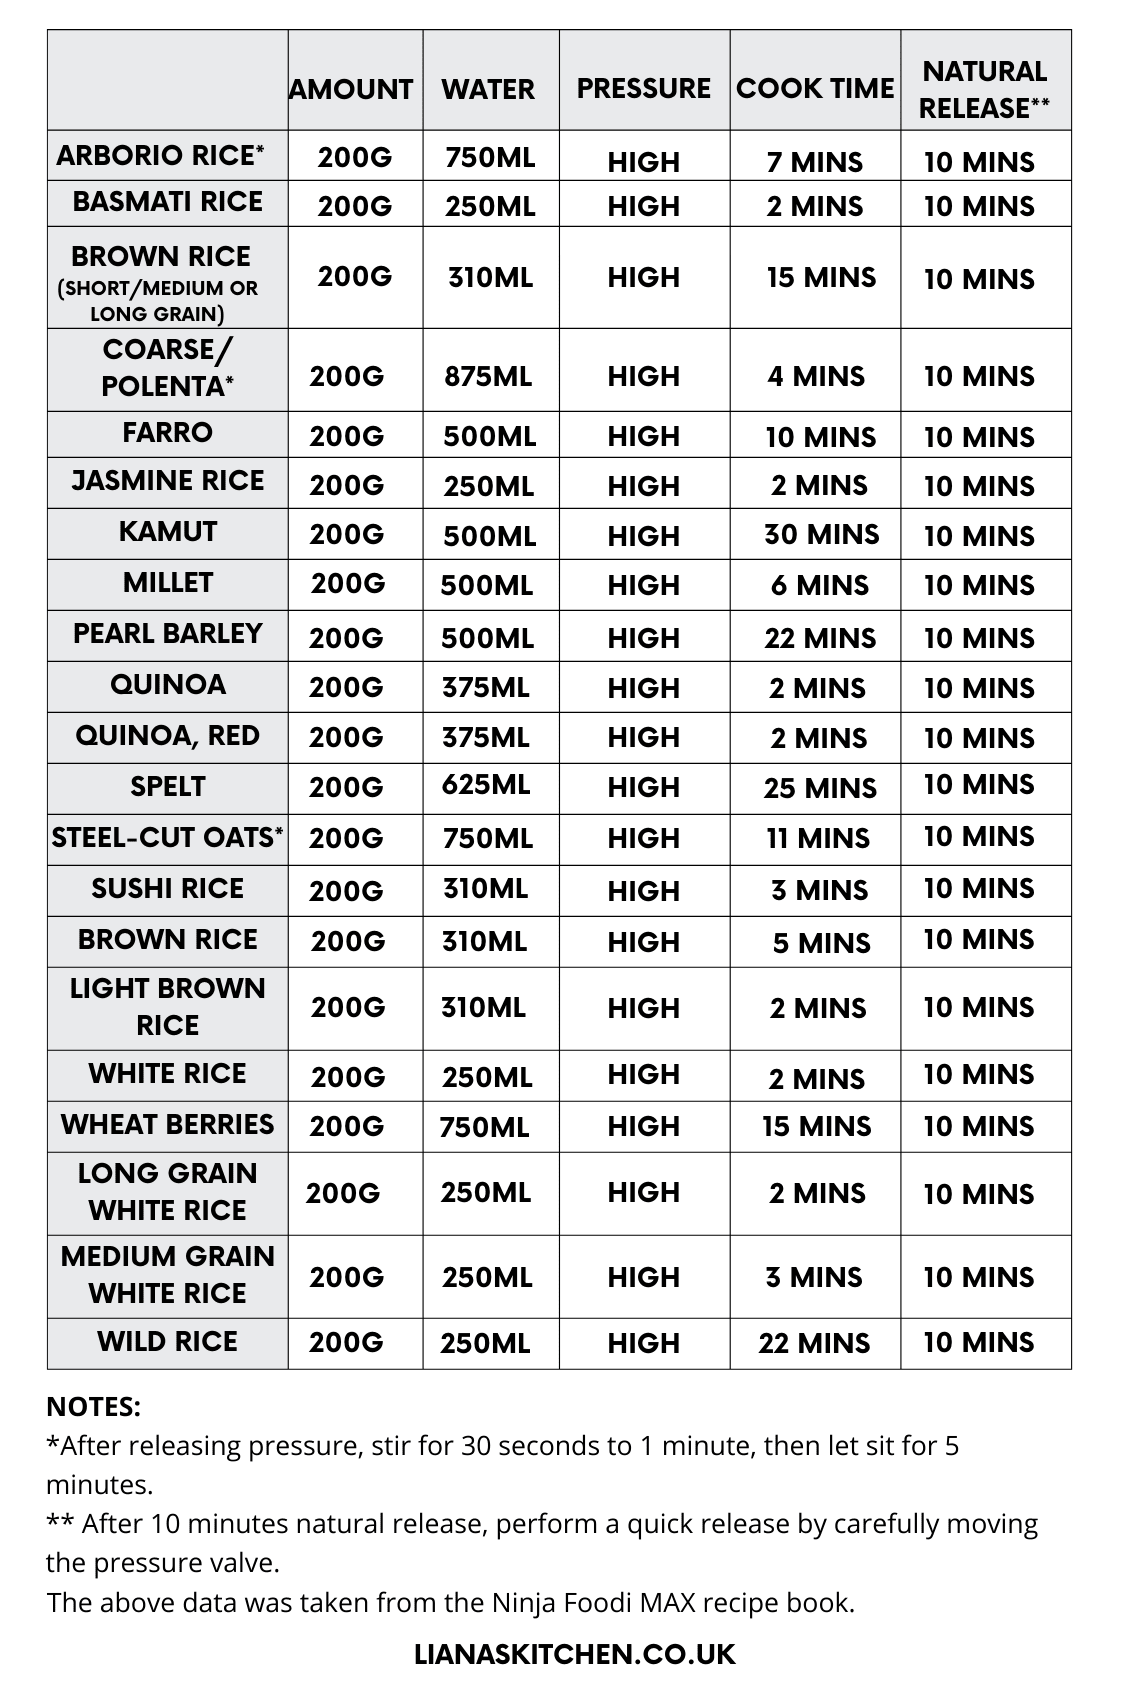
This technique works for jasmine, basmati, and standard long-grain rice. The secret lies in the precise 1:1 water-to-rice ratio combined with mandatory natural release time—deviating by even ¼ cup of water ruins the texture.
Exact Measurements
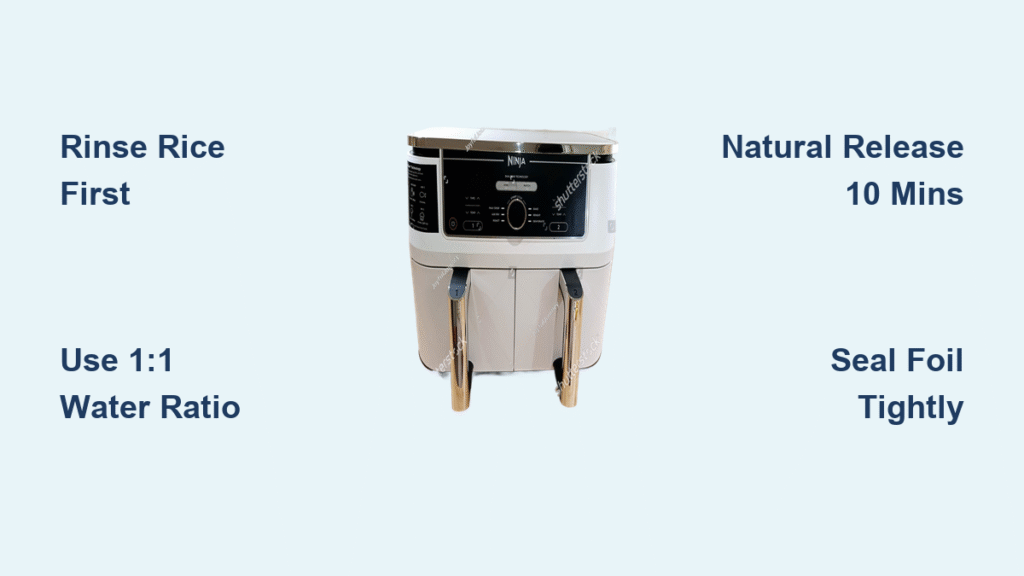
- Core ratio: 1 cup rice : 1 cup water (scale linearly: 2 cups rice : 2 cups water)
- Salt: ¾ teaspoon per 3 cups rice (enhances flavor without sogginess)
- Pro tip: Add ½ teaspoon oil for glossy, non-sticky grains
Step-by-Step Process
- Rinse rice in fine mesh strainer under cool water until runoff clears (5-7 rinses)
- Transfer to inner pot and level grains with spoon—press any stray kernels below water surface
- Pour water slowly to avoid disturbing rice layer
- Seal pressure lid with valve set to SEAL position
- Pressure cook HIGH for exactly 2 minutes (white rice) or 4 minutes (denser varieties)
- Natural release 10 minutes—do not skip this critical step
- Quick-release remaining steam, fluff immediately with fork
Brown Rice Pressure Adjustment
Brown rice requires longer cooking due to its bran layer, but uses identical water ratios as white rice. Many users mistakenly add extra water, causing mushy results—the bran absorbs moisture differently but not more.
Brown Rice Specs
- Ratio: 1 cup rice : 1 cup water (same as white rice)
- Pressure time: 22 minutes for full tenderness (test at 15 minutes; add 2-3 minute increments)
- Natural release: 10 minutes minimum (prevents crunchy centers)
Texture Test
If grains remain firm after initial cooking, immediately reseal and pressure cook 2 additional minutes followed by 5-minute natural release. Avoid restarting the full cycle—this overcooks outer layers.
Air-Fryer-Only Rice Technique (No Pressure Lid)
This method saves the day when your pressure lid is missing. The foil-sealed pan creates a steam chamber that mimics a rice cooker. Getting the foil seal tight is non-negotiable—any gap causes dry, undercooked rice.
Pan Method Setup
- Pan size: Must be 7-8 inches to fit basket with 1-inch clearance
- Water ratio: 1 cup rice : 1¼ cups cold water (al dente) or 1:1 (softer)
- Critical step: Press heavy-duty foil tightly around pan edges—zero gaps allowed
Air-Fry Process
- Preheat to 380°F (if required by your model)
- Place rinsed rice in pan with water, salt, and optional oil
- Seal completely with foil—no steam escape holes
- Air-fry 20 minutes uninterrupted
- Rest 10 minutes off heat before removing foil
- Fluff gently—overmixing breaks grains
High-Temp Backup Method
For faster results on newer models: Use 1.5 cups boiling water per 1 cup rice at 400°F for 25 minutes. The boiling water jumpstarts steam production, cutting total time by 5 minutes.
Steam Mode Variations (15-in-1 Models)
The dedicated steam function creates rice-cooker quality results but requires different ratios. Pre-soaking is essential here—unlike pressure cooking, steam mode benefits from hydrated grains.
Steam Mode Ratios
- Water ratio: 1 cup rice : 2 cups water (accounts for steam evaporation)
- Pre-soak: 15 minutes after rinsing (improves texture significantly)
- Speed boost: Use boiling water in reservoir to reduce steam-up time
Timing Guide
- White rice: Pressure cook HIGH 2 minutes + 10-minute natural release
- Brown rice: Pressure cook HIGH 20 minutes + 10-minute natural release
- Never skip natural release—it completes the cooking process
Master the Rinse Technique
Skipping rinsing causes the #1 rice failure: gummy, clumped grains. Proper rinsing removes surface starch that turns rice gluey. This step takes 60 seconds but makes or breaks your results.
Rinse Steps
- Measure rice into fine mesh strainer
- Run cool water while swishing grains with fingertips
- Drain cloudy water after each rinse (repeat 5-7 times)
- Stop when water runs almost clear (slight cloudiness is acceptable)
Pro Tip
Soak rinsed rice 15 minutes before cooking. This hydrates grains evenly, reducing pressure time by 1-2 minutes and yielding fluffier results—especially crucial for basmati.
Common Ratio Mistakes
Water measurement errors cause 90% of failed batches. These ratios work across all rice types and Ninja models—memorize these before cooking.
White Rice Ratios
| Method | Rice : Water | Result |
|---|---|---|
| Pressure | 1 : 1 | Fluffy, separate grains |
| Air-fry | 1 : 1.25 | Slightly firmer texture |
| Steam | 1 : 2 | Traditional rice-cooker softness |
Brown Rice Adjustment
Contrary to popular belief, brown rice does not need extra water. Use the same 1:1 ratio as white rice in pressure mode. The bran layer requires longer cooking time, not additional liquid—adding more water creates mush.
Flavor Boosters Beyond Water
Transform basic rice into a signature side dish with these Ninja-tested swaps. Liquid substitutions happen during water measurement—no extra steps required.
Liquid Substitutions
- Chicken broth: Replace 100% of water for savory depth
- Coconut rice: Swap 50% water with full-fat coconut milk
- Beef broth: Adds umami richness for Asian-inspired meals
Post-Cook Enhancements
- Herbs: Fold in 2 tablespoons fresh cilantro or parsley when fluffing
- Spices: Add ½ teaspoon turmeric (golden rice) or 1 teaspoon pilau seasoning
- Finishing oil: Drizzle sesame or toasted garlic oil for restaurant shine
Troubleshooting Common Issues
Fix these problems in your next batch—most stem from three root causes: water ratio, cook time, or release method.
Sticky or Gummy Rice
Cause: Skipped rinsing or excess water
Fix: Rinse until water clears; reduce water by ¼ cup next batch
Undercooked Centers
Cause: Grains above water line or insufficient cook time
Fix: Press all rice below surface; add 2 minutes pressure time
Mushy Texture
Cause: Too much water or interrupted natural release
Fix: Use exact 1:1 ratio; allow full 10-minute natural release
Burnt Bottom (Air-Fry Method)
Cause: Loose foil seal or inadequate water
Fix: Press foil edges firmly; ensure water covers rice completely
Storage and Reheating Guide
Improper cooling causes food safety risks and texture degradation. Spread rice thin for rapid, even cooling that prevents bacterial growth.
Cooling Process
- Spread hot rice in thin layer on baking sheet
- Cool 20-30 minutes at room temperature
- Refrigerate in airtight container up to 5 days
Reheating Methods
- Microwave: 1 tablespoon water, covered, 70% power 90 seconds
- Stovetop: Splash broth, low heat covered 3 minutes
- Air fryer: 300°F for 6 minutes with 1 tablespoon water
Perfect Pairings for Ninja-Cooked Rice
Time your rice to finish simultaneously with main dishes using Ninja’s dual functions. Pressure-cook rice first while natural release happens—then air-fry proteins.
Main Dish Combinations
- Ninja Foodi chicken breast: Cook rice during chicken’s resting time
- Air-fryer teriyaki chicken: Rice finishes as chicken crisps
- Cauliflower katsu curry: Basmati rice absorbs sauce perfectly
- Pork belly: Fatty richness balanced by fluffy jasmine
Timing Coordination
Start rice via pressure method. During the 10-minute natural release, air-fry proteins at 375°F. Both components finish simultaneously—no waiting, no overcooking.
Master these Ninja air fryer rice techniques once, and you’ll never use a traditional rice cooker again. The pressure method delivers perfect grains in 12 minutes total—faster than stovetop with zero monitoring. Whether cooking for a weeknight dinner or meal prep, these scientifically tested ratios guarantee fluffy results every time. Your Ninja Foodi wasn’t just built for crispy fries; it’s the ultimate all-in-one kitchen powerhouse waiting to revolutionize your rice game. Try the 2-minute pressure method tonight and taste the difference precision makes.


