
You’ve noticed cloudy residue in your water cooler reservoir, or maybe you’re relocating your office and need to prepare the unit for transport. Whatever the reason, knowing how to empty a water cooler properly prevents costly spills, electrical damage, and bacterial buildup. A single oversight—like forgetting to unplug the unit or mishandling the hot water tank—can flood your workspace or ruin the cooler’s internal components. This guide cuts through the confusion with precise, model-agnostic steps that work for top-loading and bottom-loading dispensers. You’ll learn to drain reservoirs completely in under 20 minutes, prime the system for optimal performance, and avoid the top 3 mistakes 90% of users make during this process.
Water coolers hold hidden dangers when drained incorrectly. That 40+ pound water bottle becomes a liability if tilted prematurely, while residual hot water can scald if released too soon. Manufacturers consistently report drainage errors as the #1 cause of preventable cooler failures. Whether you’re sanitizing before summer storage or troubleshooting odd-tasting water, this method guarantees a dry, safe system ready for reuse. Skip the guesswork—we’ve distilled industry best practices into actionable steps that protect your equipment and workspace.
Critical Safety Precautions Before Draining Your Water Cooler
Skipping safety checks risks electrical shock, property damage, or serious injury. Water coolers combine heavy components, hot elements, and electrical systems that demand respect. Always start here—no exceptions.
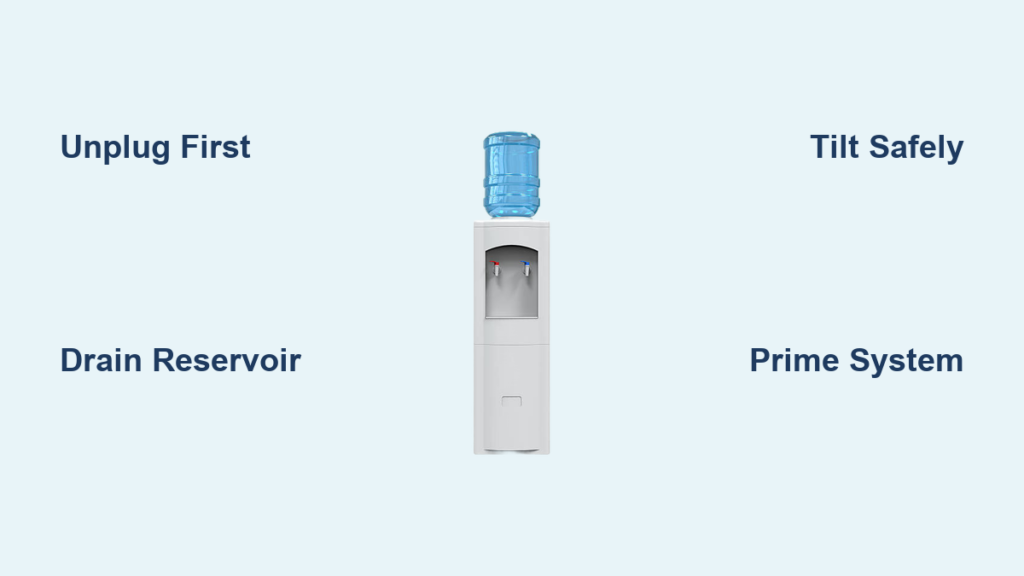
Unplug and Stabilize the Unit Immediately
Never begin draining while the cooler remains plugged in. Locate the power cord at the base and disconnect it from the outlet. If your model has separate hot/cold switches, turn both to “off” positions. For hot-and-cold units, wait 30–60 minutes after unplugging to let the hot tank cool—rushing this risks scalding water discharge. Clear a 3-foot radius around the cooler, removing rugs or electronics that could be damaged by spills. Place non-slip mats under your workspace if on tile or hardwood.
Prepare Your Draining Station and Gear
Gather these essentials before touching the cooler:
– Two 5-gallon buckets (one for initial drainage, one as backup)
– Absorbent microfiber towels (avoid paper towels—they disintegrate in standing water)
– Rubber gloves (protects against mold in stagnant reservoirs)
– Flashlight (to spot hidden drain plugs in dim cabinets)
Position the primary bucket directly under the cooler’s base. If draining near carpet, lay down plastic sheeting first. For heavy units, recruit a second person to stabilize the cooler during tilting—never attempt solo. Confirm all faucets are fully closed to prevent accidental flow during prep.
Drain Your Water Cooler in 6 Mess-Free Steps
Most leaks happen during the drainage phase due to overlooked reservoir pockets. This sequence targets every hidden water pocket, even in models without visible drain plugs.
Release Pressure From Faucets First
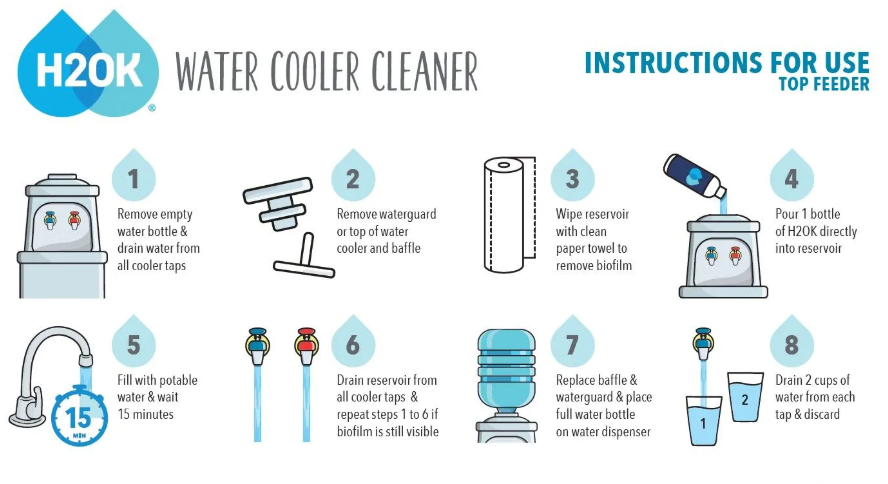
Open both hot and cold taps fully and let water flow into your bucket until it trickles to a stop. This critical step relieves internal pressure that traps water in delivery lines. You’ll notice initial sputtering—this is normal. Keep taps open for 2 full minutes to drain residual water from upper chambers. Pro tip: Place a dry towel over the spigot area; if it stays dry after 60 seconds, pressure is fully released.
Locate and Activate the Hidden Drain System
Flip your flashlight into the cooler’s base compartment. Most units hide a ¼-inch drain plug behind a rear panel or under the drip tray—not the front-facing spigots. If you spot a small hose clamp or rubber stopper (common in Primo and Oasis models), remove it with pliers. For units without plugs (like many Igloo coolers), insert a 3-foot aquarium siphon tube deep into the reservoir base, suck gently to start flow, and route the tube into your bucket. Warning: Never tilt the cooler until water stops flowing from this drain point—premature tipping forces water into electrical components.
Tilt Strategically to Eliminate Residual Water
With taps and drains fully open, gently tilt the cooler backward 15 degrees for 30 seconds, then forward 10 degrees. This coaxing motion releases water trapped in reservoir corners. Listen for gurgling—if you hear it, hold the tilt until sounds stop. Repeat twice. For bottom-loading models, skip forward tilting; only tilt backward to avoid damaging the internal pump mechanism. Wipe exterior surfaces immediately with microfiber towels to prevent slip hazards.
Refill and Prime Your Water Cooler for Instant Cold Water
Refilling incorrectly causes airlocks that delay cooling or create sputtering faucets. This method ensures smooth water flow on the first try.
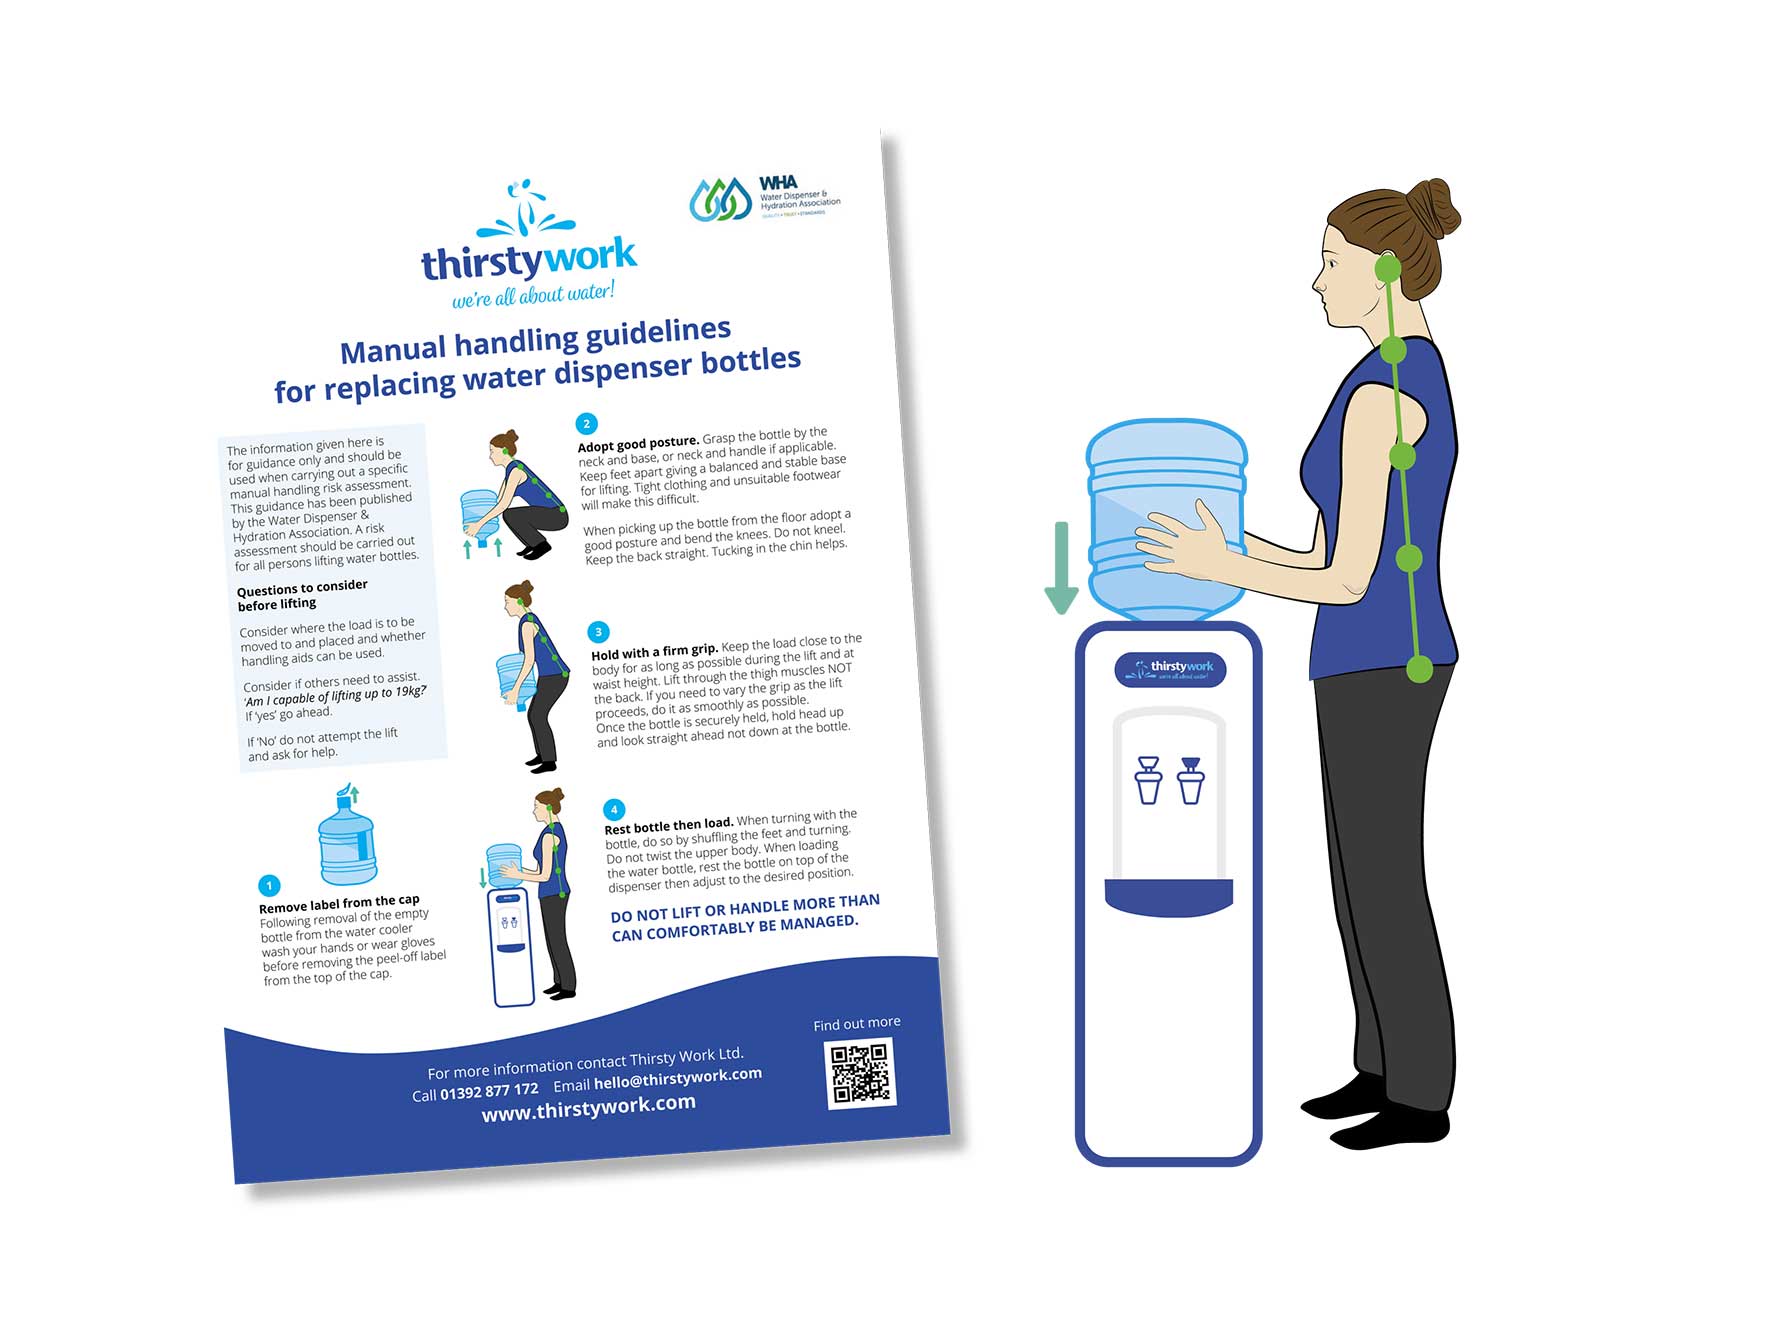
Secure the Water Bottle Without Spills
Peel the plastic seal from a new 3- or 5-gallon bottle while upright. Inspect the bottle neck for cracks—hairline fractures cause leaks. Invert the bottle smoothly over the cooler’s reservoir stem, pressing down firmly until you hear two distinct “clicks” indicating a sealed connection. Critical mistake to avoid: Don’t force the bottle if it resists; misalignment risks cracking the stem. If no clicks occur, lift and reseat the bottle.
Prime the Cooling System in Under 5 Minutes
Restore power and flip the cold water switch. Place a glass under the cold tap and let water run continuously:
1. First 60 seconds: Expect air bubbles and sputtering—this clears air pockets
2. Next 90 seconds: Water flow will stabilize to a steady stream
3. Final 60 seconds: Water should feel noticeably cooler
Stop when the stream runs clear and cold. For hot tanks, wait for the indicator light to cycle off (signaling full temperature). Pro tip: Run 2 extra gallons through the system if the cooler was drained for cleaning—this flushes any residual sanitizer.
Move Your Water Cooler Safely After Draining
70% of water cooler damage during relocation happens because users assume “mostly empty” equals safe to move. True safety requires these verification steps.
Verify Complete Dryness With the Tilt Test
Before lifting, perform this check:
1. Tilt the cooler 10 degrees backward and hold for 20 seconds
2. Return to level position and wait 30 seconds
3. Repeat tilting forward 5 degrees
If zero water emerges from drains or faucets during these movements, the unit is safe to transport. If any moisture appears, repeat the full drainage sequence. Never move a cooler that recently held hot water—the tank may still contain steam pockets that condense during transit.
Lift Using Proper Body Mechanics
Grip the cooler’s base cabinet (never the bottle neck or top panel). Bend at the knees with a straight back, keeping the unit centered against your torso. For coolers over 30 pounds, use a furniture dolly with straps—even “empty” units weigh 25+ pounds due to metal components. Never carry the cooler sideways; this stresses internal tubing. If navigating stairs, have one person guide the dolly from above while another stabilizes from below.
Water Cooler Draining FAQs Solved
Why is my cooler still leaking after “emptying”?
You likely missed the hot water reservoir. Hot tanks hold 1–2 quarts separately from the main reservoir. After unplugging, open the hot tap for 5 full minutes—even if water stops flowing initially. Residual heat creates steam pressure that slowly releases trapped water. Place a towel under the hot spigot overnight if leaks persist.
How do I drain a bottleless water cooler connected to plumbing?
Disconnect the inlet hose from your water line first, then locate the manual drain valve (usually near the back filter housing). Turn it counterclockwise to release pressure. Run the unit on “dispense” mode for 3 minutes to clear internal lines. For reverse osmosis models, flush with 3 gallons of vinegar solution first to prevent mineral buildup during storage.
Can I use a shop vac to speed up drainage?
Absolutely not. Vacuuming creates negative pressure that can crack plastic reservoirs or suck debris into valves. Stick to gravity drainage—it’s slower but prevents $150+ repairs. If time is critical, use a baster pump for stubborn corners, but never apply external suction to drain ports.
What’s the white film at the bottom after draining?
That’s harmless mineral sediment from your water supply. Wipe it with a 50/50 vinegar-water mix on a microfiber cloth—never scrub, as abrasives scratch reservoir surfaces. For recurring buildup, install a pre-filter on your water bottle or line.
Draining your water cooler shouldn’t feel like defusing a bomb. By following these precise steps, you’ll avoid the #1 cause of premature cooler failure: incomplete drainage leading to mold growth in hidden reservoir pockets. Always run fresh water through the system for 2 minutes after refilling to ensure optimal taste. For ongoing maintenance, drain and sanitize your cooler every 6 months using food-grade hydrogen peroxide—this prevents 95% of bacterial issues. Now that your cooler is empty and ready for action, you’re equipped to handle cleaning, moving, or storage with total confidence. Keep this guide bookmarked for your next maintenance cycle—it’s the difference between a quick 15-minute process and a disastrous flood.


