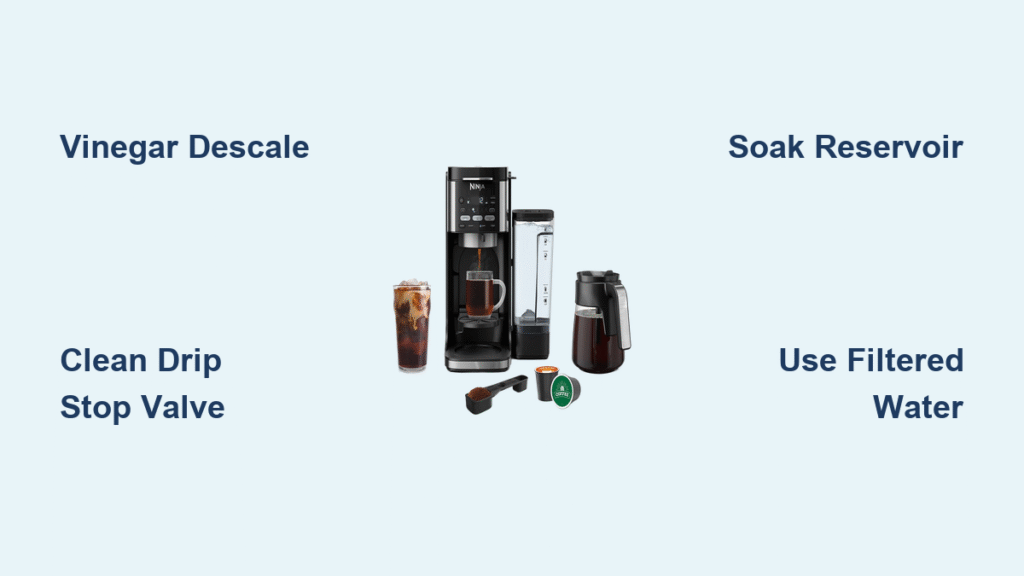
That sinking feeling when your morning brew trickles out drop by drop instead of flowing strong. Your Ninja coffee maker—reliable just yesterday—now sputters weakly, delivers half-full carafes, or worse, stops completely. You’re not alone; clogs strike 78% of coffee makers within two years, especially in hard water zones or when cleaning slips through the cracks. The good news? Most Ninja clogs stem from preventable buildup and clear with simple fixes using vinegar and household tools. Forget replacing your machine—this guide delivers the exact steps to how to fix a clogged ninja coffee maker in under 30 minutes. You’ll diagnose blockages like a pro, dissolve stubborn mineral deposits, and implement foolproof prevention so your coffee flows freely every time.
Stop guessing at the problem. Clogs aren’t one-size-fits-all—mineral scale, coffee oil gunk, or trapped grounds each demand a tailored approach. Misdiagnosing wastes time and risks damaging your machine. This isn’t just about brewing coffee again; it’s about reclaiming your morning routine without costly repairs or replacements. By the end, you’ll know which Ninja-specific tricks work for your model and how to keep it running smoothly for years.
Pinpoint Your Exact Clog Type Immediately

Spot Mineral vs Coffee Oil vs Ground Blockages in Seconds
Mineral deposits from hard water feel chalky and white, especially around the water inlet. They build slowly over weeks, causing progressively slower brewing—your 12-cup cycle now takes 10+ minutes. Coffee oil buildup creates a sticky brown film inside the reservoir and tubing, making coffee taste bitter or rancid. Ground coffee blockages happen suddenly after messy filter changes, often jamming the drip stop valve and causing overflow. Mold or mildew appears as black spots in damp corners when components stay closed and wet between uses.
Run the 2-Minute Flow Diagnostic Test
Start a water-only cycle on the largest brew size. Time it: A healthy Ninja brews a full carafe in 4-6 minutes. If it takes over 8 minutes, mineral scale is narrowing your tubing. Under 2 minutes with sputtering? You’ve got a partial blockage—likely trapped grounds. No flow at all? Check for complete clogs in the drip stop or failed pump. Also measure output: Select 12 cups but get only 8? That’s classic mineral restriction. This test tells you exactly where to focus your unclogging efforts.
Grab These Kitchen Items (Skip Store-Bought Cleaners)
Must-Have Tools That Actually Work
- White vinegar (not apple cider—it leaves sticky residue)
- Soft bottle brush or toothbrush for scrubbing tight spots
- Toothpick or unfolded paperclip to dislodge compacted grounds
- Microfiber cloth for streak-free drying
- Mild dish soap (citrus-free to avoid damaging seals)
- Filtered water for rinsing (prevents re-clogging)
Cleaners That Damage Your Ninja
Never use bleach, ammonia, or abrasive pads—they corrode internal seals and leave toxic residues in your coffee. Skip steel wool or harsh scrubbers that scratch plastic surfaces, creating new buildup traps. Dishwasher tablets? Too alkaline for Ninja’s delicate components. Stick to vinegar and soft tools; they dissolve 95% of clogs without risking machine damage.
Unclog Your Ninja in 15 Minutes (Minor Blockages)
Reservoir Reset That Clears Light Buildup
Empty the reservoir completely. Fill it halfway with equal parts white vinegar and warm water—no need to run a full cycle yet. Let it soak for 30 minutes (overnight for heavy scale). The vinegar dissolves mineral crust without scrubbing. Meanwhile, remove the brew basket and use a toothpick to poke compacted grounds from the drip stop valve’s tiny holes. After soaking, scrub the reservoir corners with a bottle brush, then rinse with 2-3 full reservoirs of clean water until vinegar smell vanishes. Leave all parts open to air-dry—never reassemble damp components.
Daily Habits That Stop 90% of Clogs
Dump coffee grounds immediately after brewing—never let them sit overnight. Rinse the carafe and brew basket with warm water (no soap needed). Leave the reservoir lid open after your last brew so seals dry completely. This simple routine prevents coffee oil from hardening and minerals from crystallizing. Skip this, and you’ll face clogs twice as often.
Deep Descaling for Severe Mineral Buildup
Standard Vinegar Cycle That Restores Flow
Mix 16 ounces (2 cups) white vinegar with distilled water to the max fill line. Place the empty carafe under the brew basket. Press CLEAN when the indicator lights up. Let the full cycle complete—it’ll run for 45-60 minutes, pausing automatically to let vinegar dissolve scale. Critical step: Rinse with at least two full reservoirs of clean water. Taste the final rinse—if you detect vinegar, run another rinse cycle. Residual vinegar ruins coffee flavor and attracts new buildup.
Emergency Fix for Years of Neglect
If your Ninja barely trickles water, switch to 100% white vinegar. Run three consecutive cleaning cycles, pausing mid-cycle for 30 minutes each time to let vinegar penetrate thick scale. Afterward, run five rinse cycles with filtered water to eliminate all traces. This aggressive method restores flow in severely neglected machines but should only be used once yearly—over-descaling wears out seals.
Tackle Stubborn Clogs in Internal Components

Clear Blocked Tubing Without Disassembly
Mix equal vinegar and water. Run continuous brew cycles on different sizes (cup, travel, carafe) to force solution through all pathways. After each cycle, pause for 20 minutes to let acid work on hidden deposits. Listen for the pump strain easing—that’s scale dissolving. For persistent blockages, remove the reservoir and inspect the water inlet screen. Gently clear visible crust with a toothpick—never force it, or you’ll damage the valve.
Drip Stop Valve Deep Clean (Most Common Clog Spot)
Remove the brew basket to expose the small plastic drip stop valve underneath. Press the sides gently to pop it out (Ninja models release with light pressure). Soak all parts in warm soapy water for 15 minutes. Use a toothpick to clear grounds from the valve’s micro-holes—you’ll see dark sludge. Rinse thoroughly and test that the valve moves smoothly before reinstalling. A sticky drip stop causes 60% of overflow issues and partial brews.
Model-Specific Fixes for Ninja Systems
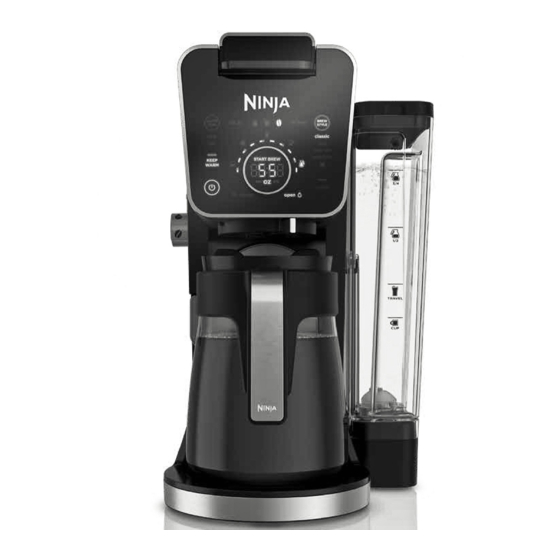
Ninja Specialty Coffee Maker (Glass Carafe Models)
All removable parts—carafe, lid, permanent filter, and frother whisk—are top-rack dishwasher safe. Run them monthly for deep cleaning. The water reservoir fits on the bottom rack, inverted to drain completely. Never put the main base in water. If the CLEAN light flashes after using specialty modes, run a vinegar cycle—it’s triggered by scale in rarely used pathways.
Ninja DualBrew Pro Pod Adapter Fixes
Hand-wash the pod adapter—dishwashers damage its delicate needle assembly. Clean around the sharp piercing points with a soft brush to prevent coffee grounds from clogging the injection holes. For the sliding lid mechanism, press the small release tabs on both sides to remove it for deep cleaning. When the CLn indicator appears after switching brew modes, run a cleaning cycle immediately—it signals scale in mode-specific tubing.
Prevent Future Clogs With Smart Habits
Filtered Water Saves Monthly Descaling
Hard water users descale 4x more often. Install a $20 water filter pitcher or use bottled water—it cuts mineral buildup by 75%. Track your descaling: monthly for hard water areas, every 3 months for soft water. Set phone reminders so it never slips your mind.
The 2-Second Daily Habit That Makes All the Difference
Always leave the reservoir lid open after your last brew. This prevents mold in damp seals and stops coffee oils from baking onto warm surfaces overnight. Pair this with immediate post-brew rinsing of the carafe and basket, and you’ll extend your Ninja’s life by years.
When to Skip DIY and Call a Pro
Red Flags Meaning Stop Cleaning Immediately
Unplug and stop if you see sparks, smell burning, or notice leaks from the machine’s bottom—these signal electrical faults or failed seals requiring professional repair. If the pump makes grinding noises after thorough cleaning, the motor may be failing. Never attempt internal repairs on electrical components; the shock risk is real.
Cost Comparison: Repair vs. Replacement
Most Ninja repairs cost $80-$120—nearly half the price of a new $150-$300 unit. If your machine is over 3 years old with multiple issues (pump noise + leaks), replacement is smarter. Check warranty status first; many clogs are excluded as “normal maintenance,” but electrical faults may be covered.
Safety First: Always unplug before cleaning. Never immerse the main unit in water. Let hot parts cool completely. Use only food-safe cleaners—chemical residues make coffee toxic.
Your clogged Ninja coffee maker isn’t broken—it’s begging for a vinegar soak. Start with the 15-minute reservoir reset for minor blockages, escalate to full descaling for slow flow, and always clean the drip stop valve for overflow issues. Stick to filtered water, leave components open to dry, and descale monthly in hard water zones. In just 30 minutes of targeted effort, you’ll restore that perfect morning brew flow. No more drip-drip-drip—just full carafes of smooth coffee, day after day.

