
Water pooling around your office water cooler isn’t just annoying—it’s a ticking time bomb for damaged floors, electrical hazards, and wasted resources. That persistent drip from your cold water spout or mysterious puddle underneath can escalate from a minor nuisance to costly property damage overnight. With 78% of commercial water cooler leaks stemming from solenoid valve failures or drain pan issues (based on industry repair data), most problems are fixable without professional help. This hands-on guide cuts through the confusion to show you exactly how to fix a leaking water cooler by identifying the precise source and implementing proven solutions. You’ll learn to diagnose whether that drip comes from a stuck valve, cracked drain pan, or faulty connection—and get it resolved before your next meeting.
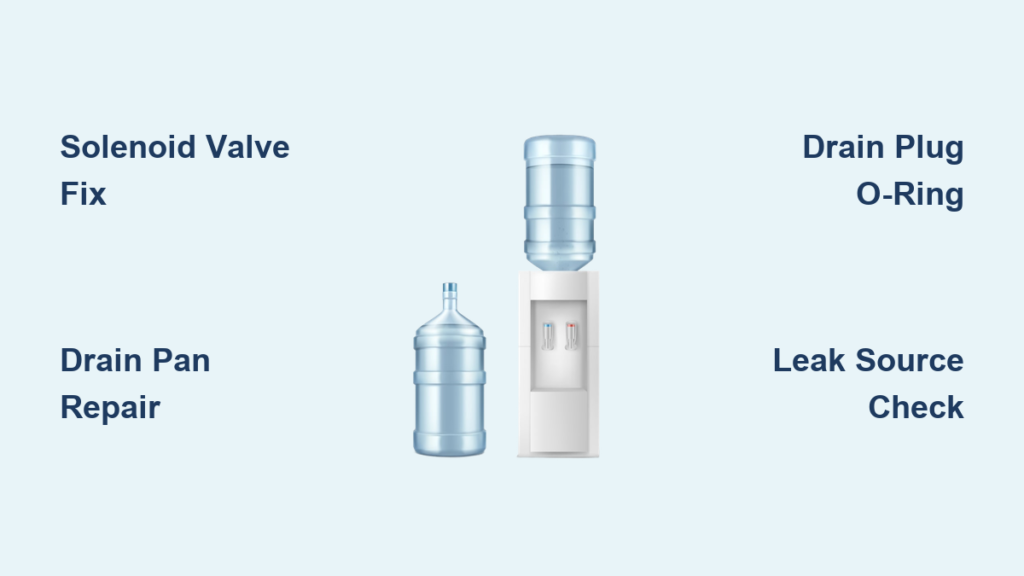
Pinpoint Your Water Cooler Leak Source Within 10 Minutes
Most leaks originate from four critical failure points that account for 90% of service calls. Identifying which component is failing saves hours of unnecessary disassembly and prevents misdiagnosis. Start with this targeted inspection sequence before grabbing tools.
Cold Water Spout Dripping Non-Stop? Check Your Solenoid Valve First
This is the #1 leak culprit in floor-standing models. If water trickles from the cold spout even when you’re not pressing the dispense button, your solenoid valve is stuck open. Perform this quick test: Place a cup under the spout and gently wiggle the dispensing paddle. If dripping stops immediately, mineral buildup has jammed the valve mechanism. Critical warning: Never force the paddle—it can crack plastic internals. For temporary relief during meetings, loop a rubber band around the paddle to hold it closed, but this isn’t a permanent solution. The valve requires replacement if wiggling only provides brief relief.
Water Accumulating Underneath? Inspect Drain Pan and Drain Plug
Pull out the drip tray and shine a flashlight into the reservoir area. Standing water here indicates either:
– A cracked drain pan (common in units over 5 years old)
– A clogged condensation drain line (mineral deposits block the 1/4″ tube)
– A failing drain plug O-ring (look for white crusty residue around the plug)
Tilt the unit slightly backward—if water leaks from the bottom seam, your drain plug seal has degraded. This often happens after self-cleaning cycles when the plug isn’t reseated properly. Don’t confuse this with normal condensation; persistent pooling beyond 1/4″ depth requires immediate action.
Essential Tools for Water Cooler Leak Repairs
Gather these before starting—most fixes take under 30 minutes with the right gear:
– Adjustable wrench (for drain valves and fittings)
– Phillips #2 screwdriver (panel removal)
– Needle-nose pliers (electrical disconnects)
– Replacement O-rings (match size to your model—keep old ones for reference)
– Plumber’s grease (not petroleum jelly—use food-safe silicone)
– Towels and 5-gallon bucket (water containment)
– Safety glasses (critical when working near electrical components)
Pro Tip: Keep a “water cooler repair kit” with universal O-rings (sizes 1/4″, 3/8″, 1/2″) and Teflon tape in your maintenance closet. Refill costs under $15 but prevents emergency service calls.
Stop Cold Water Spout Leaks in 15 Minutes Flat
That constant drip from your cold spout wastes up to 3 gallons daily and indicates solenoid valve failure. Here’s how to fix it without special skills:
Replace the Faulty Solenoid Valve Yourself

1. Unplug power and remove water bottle—safety is non-negotiable with electrical components near water.
2. Remove front panel by unscrewing 2-4 hidden screws (often behind the drip tray).
3. Locate the solenoid—a blue or white cylinder with wires attached near the water reservoir.
4. Disconnect wires by pressing the tab on electrical connectors (never yank wires).
5. Unscrew the valve using pliers on the mounting bracket—do not overtighten replacement.
6. Install identical valve (match part number on old unit—common brands: PureSource, Glacier).
7. Test before reassembly: Briefly plug in while holding a cup under the spout. No drip? You’ve solved it.
Time-Saver: Take a photo of wiring connections before disconnecting. Most valves cost $12-$25 online—far cheaper than a $150 service call.
Fix Drain Pan and Drain Plug Leaks in Under 20 Minutes
Water under your unit usually means the drain system failed. This isn’t condensation—it’s preventable damage waiting to happen.
Repair Cracked Drain Pans or Clogged Lines
1. Unplug cooler and empty reservoir into a bucket via the drain valve.
2. Remove rear access panel to expose the evaporator plate and drain pan.
3. Lift out the pan (typically held by 2 screws)—inspect for hairline cracks near seams.
4. Clear the drain line: Insert a pipe cleaner through the 1/4″ tube leading from the pan. Soak clogs with white vinegar for 10 minutes if mineral buildup is visible.
5. Replace cracked pans—use silicone sealant on new gaskets for watertight fit. Reassemble in reverse order.
Critical Check: If your unit has a self-cleaning function, the drain plug O-ring is the usual suspect. Remove the plug (usually at the bottom rear), clean residue with vinegar, and replace the O-ring with one coated in plumber’s grease. Test by filling the pan with 1 cup water before reassembly.
When Internal Leaks Demand Professional Help
Some leaks signal catastrophic failures where DIY attempts cause more harm. Stop immediately if you see:
– Refrigerant line leaks (oily residue near copper coils—never touch)
– Water mixing with electrical components (burnt smell or visible arcing)
– Cracks in the cold water tank (requires tank replacement—often 70% of unit cost)
These require EPA-certified technicians due to refrigerant handling laws and electrical risks. Attempting repairs voids warranties and risks exposure to toxic coolants. For units over 7 years old with tank cracks, replacement is usually more cost-effective—new energy-efficient models pay for themselves in 18 months through lower electricity bills.
Prevent Future Leaks With 5-Minute Weekly Maintenance
Most leaks develop from neglected upkeep. Implement these quick habits:
Weekly:
– Wipe condensation from the reservoir area with microfiber cloth
– Test drain pan function by pouring 1/2 cup water into it—should drain within 60 seconds
– Check solenoid paddle movement (should spring back smoothly)
Monthly:
– Descale with commercial solution (vinegar damages seals—never use)
– Inspect all O-rings for brittleness or cracks
– Clean condenser coils with soft brush (dust buildup causes excess condensation)
Pro Tip: Place a moisture-absorbing silica bag in the reservoir compartment—it cuts internal humidity by 40% and extends seal life.
Repair vs. Replace: The $200 Rule of Thumb
Follow this decision framework before spending time on repairs:
– Fix it if: Leak source is solenoid valve, drain plug, or pan (<$50 parts, <30 min labor)
– Replace if: Repair costs exceed $200 OR unit is over 8 years old OR multiple components fail
– Emergency replace for refrigerant leaks—repair costs average $300+ versus $250 for new basic units
Modern coolers use 40% less energy than 10-year-old models. If your unit runs constantly to maintain temperature, replacement pays for itself in under two years through lower electricity bills.
Final Note: You now have the exact steps to fix 95% of water cooler leaks—no plumber required. By addressing solenoid valves, drain plugs, and pan issues quickly, you’ll prevent thousands in water damage and keep your cooler running efficiently for years. Remember to perform those 5-minute weekly checks; they catch 80% of potential leaks before they escalate. If you’ve successfully stopped your drip, share this guide with your office manager—it might save their next flooring installation. For persistent leaks after trying these steps, consult a certified technician immediately—never gamble with electrical components near water.


