
Your Ninja blender suddenly stopped working mid-smoothie, leaving you with frozen fruit and frustration. Whether you’re facing a blinking power light, burning smells, or complete silence when you press start, motor issues are the most common culprit. The good news? Most Ninja blender motor problems have straightforward solutions you can tackle at home without professional help.
This guide walks you through diagnosing and fixing motor issues across popular Ninja models, from the Professional 1100-watt to the Nutri Ninja BL450. You’ll learn to identify symptoms quickly, perform safe repairs, and prevent future failures that could leave you stranded without your essential kitchen appliance.
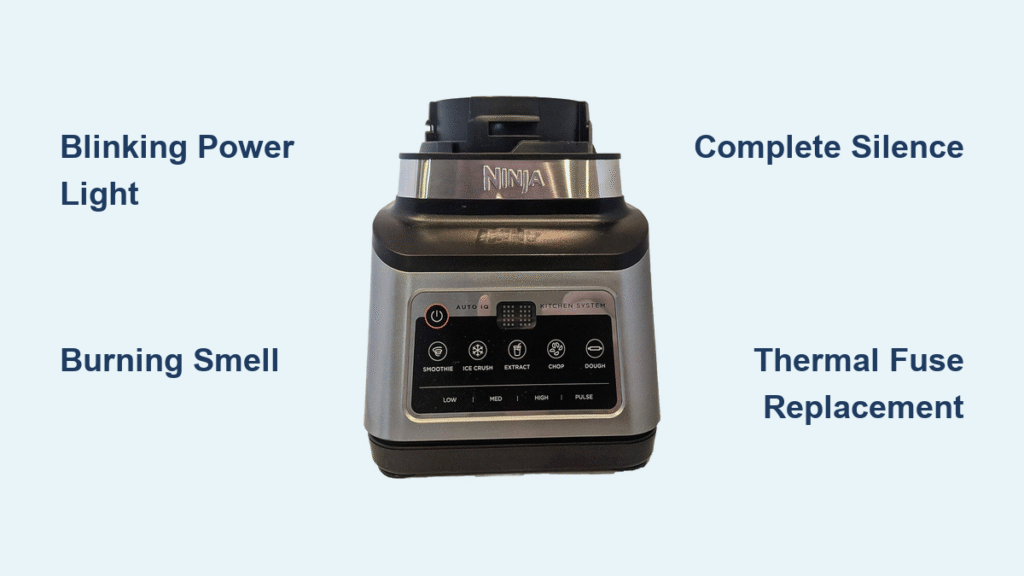
Decode Your Ninja Blender’s Motor Failure Symptoms
Blinking Power Light Causes and Fixes
When your Ninja Professional 1100-watt shows a flashing power indicator, this signals the safety system has activated. The blinking typically indicates your blender detected a potential hazard that requires immediate attention. This could mean the pitcher isn’t seated properly on the base, the lid safety switch isn’t engaged, the motor has overloaded, or the internal thermal fuse blew from overheating.
Quick diagnostic step: Remove the pitcher, rotate it 90 degrees, and reseat it firmly while applying downward pressure. If the blinking persists after this simple maneuver, the thermal fuse likely needs replacement. This small but critical component acts as your blender’s safety net, cutting power when temperatures get too high to prevent damage.
Burning Smell Solutions That Prevent Damage
That electrical odor from your Nutri Ninja BL450 means you need to take immediate action to prevent permanent damage. Unplug the unit immediately and move it to a well-ventilated area. Check for food debris trapped around the blade assembly that might be causing friction against the motor housing.
Critical warning signs: If you see smoke, sparks, or melted plastic, do not attempt DIY repair—these indicate serious electrical issues that require professional attention. For less severe cases, let the blender cool completely for at least 30 minutes before inspecting further. This burning smell often stems from motor brush degradation or electrical winding insulation breakdown that needs addressing before it worsens.
Complete Motor Silence Troubleshooting
When your Ninja blender offers no response when pressing the power button, this complete silence suggests several possible issues you can systematically eliminate. Start by verifying your power supply—test the outlet with another appliance to confirm it’s functioning properly.
Systematic approach: Check all safety mechanisms first, as Ninja’s interlock system prevents operation when components aren’t properly aligned. If those check out, the problem likely involves the motor thermal fuse failure or control board malfunction. Older models might also suffer from worn motor brushes that need replacement. Don’t jump to conclusions—methodically work through each possibility starting with the simplest solutions.
Essential Tools for Ninja Motor Repair

Before starting any motor repair, gather these essential items to ensure a safe and successful fix:
Safety Equipment:
– Insulated gloves to protect against electrical hazards
– Safety glasses to shield eyes from debris
– Multimeter for testing electrical continuity
– Heat-resistant work surface for soldering operations
Basic Tools:
– Phillips head screwdriver (size #1 and #2)
– Flathead screwdriver for prying components
– Needle-nose pliers for handling small parts
– Torx T15 bit (common on Ninja base assemblies)
Pro tip: Take photos at each disassembly stage—this visual documentation makes reassembly much easier and prevents misplaced components. Having the right tools eliminates frustration and reduces the risk of damaging your blender during repair.
Diagnose Model-Specific Motor Problems
Ninja Professional 1100-Watt Blinking Light Fix
This popular model shows distinct failure patterns you can address with targeted solutions. Start by unplugging the unit for 2 minutes to reset the thermal fuse—a simple step that resolves many issues. Check for an overloaded pitcher (reduce ingredients to below the max fill line) and verify pitcher seating by rotating and pressing down firmly.
Prevent future overheating by blending in 30-second intervals with 30-second rest periods between. Avoid blending hot ingredients that accelerate thermal buildup, and clean vents monthly with compressed air. Consider replacing the thermal fuse every 2-3 years as preventative maintenance—this small investment extends your blender’s lifespan significantly.
Nutri Ninja BL450 Burning Smell Diagnosis
The compact design of the BL450 creates unique motor challenges you can identify through specific symptoms. If you notice loud grinding during operation, wobbling blade assembly, reduced blending efficiency, or excessive vibration, these indicate bearing wear requiring attention.
Step-by-step diagnosis: Check the blade assembly for seized bearings by manually rotating the blade (unplugged!). Inspect motor brushes which are accessible on the BL450 model, looking for excessive wear. Remove any food debris trapped in the motor housing that might cause friction. Test motor temperature after a 30-second rest period—if it remains hot, internal components likely need replacement.
Replace Thermal Fuse Safely and Effectively
Accessing Motor Components Without Damage
Critical safety step: Always ensure the unit is unplugged and fully discharged before attempting motor component access. Begin by removing the 4-6 screws typically found on the bottom of the base, keeping them organized for reassembly.
Documentation is key: Take clear photos of wire positions before disconnecting anything—this prevents misconnections during reassembly. Locate the thermal fuse, which appears as a small cylindrical component near the motor housing. Test it with your multimeter; a functioning fuse should show continuity (0-1 ohm resistance). If it shows infinite resistance, replacement is necessary.
Thermal Fuse Installation Process
Replacing a thermal fuse is a relatively quick 15-minute repair when done correctly. Carefully desolder the old fuse using a heat-resistant work surface to protect your countertop. Install the replacement, making sure to match the temperature rating exactly—using the wrong specification creates safety hazards.
Professional tip: Buy thermal fuses in pairs—Ninja motors often blow fuses repeatedly until the underlying issue (like poor ventilation or overloading) gets resolved. After installation, test connections for solid solder joints before reassembling. When putting everything back together, ensure no wires are pinched against sharp edges that could cause future shorts.
Prevent Future Motor Failures Proactively
Proper Usage Practices That Extend Motor Life
Extend your Ninja blender’s motor life significantly by adopting smart usage habits. Always add liquids first before solids to create a vortex that reduces strain on the motor. Never exceed the max fill line, and cut large items into 1-inch pieces to prevent overloading.
Duty cycle management is crucial: Follow the 30 seconds on, 30 seconds off rule for demanding tasks like frozen ingredients. Limit continuous use to maximum 2 minutes, and allow 5 minutes of cooling between batches. Regularly monitor housing temperature with your hand—excessive heat indicates you’re pushing the motor too hard.
Monthly Maintenance Routine
Prevent motor failure with this simple monthly maintenance routine. Start by unplugging and disassembling the base, then use compressed air in short bursts to clean vents—never use water-based products near electrical components.
Contact point maintenance: Clean pitcher base contacts with isopropyl alcohol and a soft cloth, inspecting for corrosion or pitting. Apply dielectric grease sparingly to improve conductivity and prevent future corrosion. Test conductivity after cleaning to ensure proper electrical connection between pitcher and base.
When to Repair vs Replace Your Ninja Blender
Cost Analysis Decision Framework
Replace the entire unit when repair costs exceed 50% of a new model’s price, multiple components show wear simultaneously, your model has known safety recall issues (like the 2015 recall affecting 12 models), or newer features justify an upgrade for your needs.
Repair makes sense when you’re dealing with a single component failure, your unit is under 3 years old, you own a high-end model like the BL770 or Ultima series, or replacement parts are readily available at reasonable cost. For models with documented motor issues like the Nutri Ninja BL450, repairing specific components often provides better value than replacing with the same problematic model.
Professional Service Options Worth Considering
Contact Ninja support directly for control board failures, motor winding shorts, safety recall repairs, or warranty claims (they offer a 1-year standard warranty). Local appliance repair services can handle simpler tasks like power cord replacement, switch repairs, motor brush replacement, and general maintenance.
Critical reminder: If your Ninja blender shows signs of the 2015 recall (specific models with stacked blade assembly issues), contact Ninja immediately—attempting DIY repairs on recalled units could create safety hazards.
Key takeaway: Most Ninja blender motor issues stem from preventable causes like overloading, poor ventilation, or safety mechanism interference. Start with the simplest solutions: verify power connections, clean safety mechanisms, and ensure proper assembly before diving into complex repairs. When you notice warning signs like burning smells or unusual noises, address them immediately to prevent permanent damage. With proper care and timely attention to motor issues, your Ninja blender can deliver reliable performance for years to come.


