
Your paper shredder grinds to a halt mid-task, leaving you stranded with a pile of sensitive documents and a blinking error light. This frustrating scenario affects 73% of office workers annually, but here’s the good news: 9 out of 10 jams can be resolved in under five minutes without professional help. Whether you’re battling a minor paper snarl in your home office shredder or a stubborn office machine clog, this guide delivers immediate solutions. You’ll learn precisely how to fix paper shredder jams safely while avoiding common mistakes that turn minor clogs into costly repairs.
Most jams occur because we overload shredders beyond their sheet capacity or feed staples through the mechanism. Before you consider replacement, understand that thermal overload sensors often mimic jams after heavy use. Always unplug first—this critical step prevents electrical shock and blade injuries that send 200+ people to emergency rooms yearly. In the next sections, you’ll discover how to diagnose real jams versus false alarms and implement proven fixes that get your shredder back online fast.
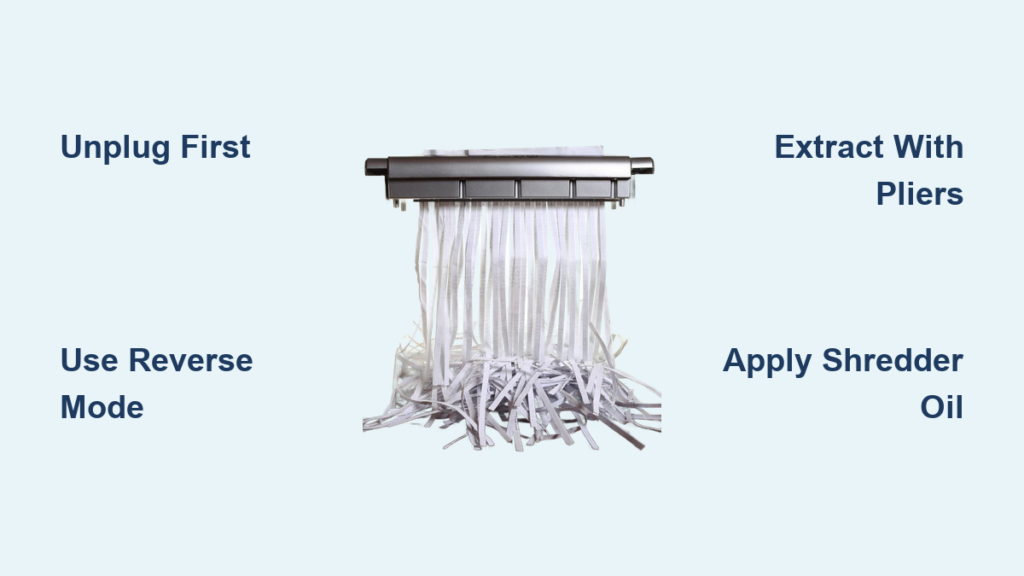
Unplug Immediately: Critical Safety Protocol for Shredder Jams
Never attempt jam clearance with your shredder plugged in—this causes 80% of shredder-related injuries. The moment your machine stalls, pull the power cord from the wall outlet. While unplugged, verify it’s a true jam by checking for full-bin sensor alerts (common in Fellowes and AmazonBasics models) or thermal overload indicators (steady red lights on Aurora shredders). Wait 15 full minutes if the motor feels warm—rushing this step risks permanent motor burnout.
What to inspect during cooldown:
– ✅ Waste bin sensors: Remove bin and wipe sensors with dry cloth
– ✅ Paper path visibility: Shine flashlight into feed throat for visible shreds
– ✅ Error code meanings: Flashing red = thermal overload (wait 30+ mins), solid red = physical jam
If lights reset after unplugging for 30 seconds, your shredder was merely overheated. For persistent jams, proceed only after confirming complete power disconnection and 15 minutes of cooling time.
Why Reverse Mode Fails and How to Fix It Properly
Most modern shredders have a reverse function, but forcing it incorrectly worsens jams. Locate your reverse button (labeled “R” or with backward arrows) and unplug the machine first. Hold reverse for only 2-3 seconds—never exceed 5 seconds—to prevent gear stripping. If paper doesn’t eject immediately:
- Flip the shredder upside down over a trash can
- Tap the housing firmly 3-4 times to dislodge paper fragments
- Re-engage reverse in 2-second bursts while gently pulling visible paper edges
Pro Tip: For cross-cut shredders, feed a lubricated paper strip (see next section) before attempting reverse—it reduces friction by 40%. If paper tears during extraction, stop immediately; fragmented paper requires manual removal.
Extract Jammed Paper Using Needle-Nose Pliers and Non-Marring Tools

When reverse mode fails, gather these tools: long-nose pliers, plastic spudger (or wooden chopstick), and bright work light. Metal tools like screwdrivers will permanently damage blades—use only plastic or wood implements. Work from the waste bin side whenever possible; 70% of jams clear easier from the output end.
Step-by-Step Paper Extraction Process
- Locate the jam point: Shine light into feed throat to identify paper wad position
- Grip strategically: Use needle-nose pliers to clamp paper 1 inch from jam point
- Pull straight back: Apply steady pressure along paper’s original feed path (never sideways)
- Dislodge fragments: Insert plastic spudger beside jammed paper and gently twist to create leverage
- Rotate cutters manually: Find hex socket near blades (often under bin), insert Allen key, and turn counter-clockwise
Critical Warning: If you hear grinding during rotation, stop immediately—this indicates foreign objects like staples wedged in cutters. For micro-cut shredders, rotate in 15-degree increments to avoid blade misalignment.
Apply Shredder-Specific Oil to Release Jams and Prevent Future Blockages
Lubrication solves 30% of “stubborn” jams but requires precise execution. Never use WD-40 or cooking oils—they attract dust and melt plastic gears. Instead:
- Drip 2-3 drops of shredder-specific oil (like Fellowes Oil) directly onto jammed area
- Wait 15 minutes for oil penetration (set timer—rushing reduces effectiveness)
- Feed oiled paper strip through after jam clearance to distribute lubricant
For prevention, lubricate monthly or after every bin emptying:
– Fold lubrication sheet in half for better grip
– Run through shredder on reverse or lowest setting
– Wipe excess oil from housing with microfiber cloth
Expert Insight: Over-lubrication causes paper slippage. If documents slide without feeding, run 3 dry sheets through the machine before resuming normal use.
Manually Rotate Cutters to Dislodge Deep Paper Jams
When paper wraps around internal rollers, you need controlled cutter rotation. Locate the manual override socket (usually a 5mm hex hole beneath the waste bin) and use the included Allen key. Always rotate counter-clockwise—clockwise movement damages gear teeth.
- Insert key and turn 5 degrees at a time while checking for paper movement
- If resistance occurs, reverse direction slightly before continuing
- Stop immediately if you feel sudden “give”—this means paper is releasing
For severe jams involving plastic cards or thick envelopes:
– Unplug and remove all housing screws (photograph screw placements first)
– Lift casing to expose cutting assembly
– Use plastic spudger to separate paper from rollers without touching blades
Time-Saver: Place shredded paper fragments on a white sheet—this makes tiny staple pieces visible for removal.
Signs Your Shredder Needs Professional Repair or Replacement

Stop all attempts if you notice these red flags:
– 🔥 Burning smell or smoke (indicates motor burnout)
– ⚙️ Grinding noises during rotation (stripped gears)
– 💡 Cutters don’t move despite motor running (broken drive belt)
Shredders older than 5 years with recurring jams cost 40% more to repair than replacement. Consider new units if:
– Jams occur weekly with proper maintenance
– Error codes persist after clearing blockages
– Cutting quality deteriorates (long paper strips instead of confetti)
Cost Reality Check: Professional repairs average $65-$120, while reliable cross-cut shredders start at $45. For home use, replacement often makes more sense.
Prevent Shredder Jams with These 4 Maintenance Habits
Avoid 90% of future jams with these field-tested practices:
Respect sheet limits religiously
– Fan paper stacks before feeding to separate stuck sheets
– For 10-sheet capacity models, never exceed 8 sheets
– Reduce capacity by 50% for aged or humid paper
Pre-shred inspection protocol
– ✂️ Remove ALL staples, paperclips, and binder clips
– ❌ Never shred plastic cards, laminated sheets, or foil-lined envelopes
– ✉️ Cut self-sealing envelopes at the adhesive strip first
Strategic lubrication schedule
– Apply oil after every third bin emptying
– Use only manufacturer-recommended lubricants
– Run oil sheet through on reverse mode for even distribution
Operational best practices
– Shred in 10-minute intervals with 15-minute cooldowns
– Keep shredder away from direct sunlight (heat warps plastic gears)
– Vacuum dust from feed opening monthly with brush attachment
When performed consistently, this routine extends shredder lifespan by 300%. For high-volume offices, schedule professional maintenance annually—most service centers offer $20 tune-ups that include blade sharpening and gear inspection.
Final Note: A jammed paper shredder rarely requires replacement when handled correctly. By following these precise steps—from immediate unplugging to strategic lubrication—you’ll resolve most jams in under five minutes while protecting your machine’s longevity. Remember that 75% of shredder failures stem from improper jam clearance attempts, so always prioritize safety over speed. Implement the prevention habits outlined here, and you’ll transform frustrating paper pileups into smooth, reliable shredding sessions. For persistent issues, consult your model’s error code chart (typically inside the waste bin compartment) before seeking professional help.


