
Your bandsaw struggles with crooked resaw cuts and dangerous kickbacks when handling thick stock. A properly built steel-nose bandsaw sled solves these problems by providing single-point guidance that eliminates blade deflection and material twisting. This specialized jig transforms your bandsaw into a precision cutting system capable of flawless straight cuts in wood, plastic, and even non-ferrous metals. In this guide, you’ll learn exactly how to construct a steel-nose bandsaw sled that delivers repeatable accuracy and dramatically improves safety—no guesswork required. You’ll discover why the steel nose design prevents binding better than wooden sleds and get actionable steps to build your own in under 4 hours.
Essential Materials and Tools for Steel-Nose Sled Construction
Gather these components before starting to avoid mid-project delays. Using incorrect materials causes alignment failures and dangerous binding during cuts.
Required Materials List
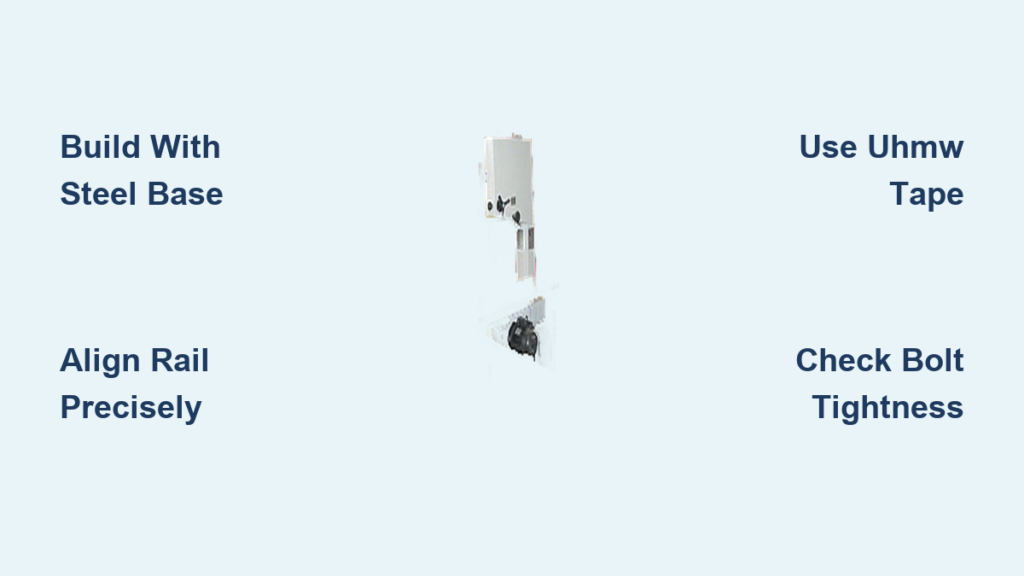
- Sled Base: 1/4″ thick steel plate (6″ x 12″ minimum) – Avoid aluminum as it flexes under pressure
- Steel Nose & Rail: 1/2″ thick steel bar stock (36″ length) – Must be structural steel, not cast iron
- Fasteners: M8 bolts with lock washers (4+ sets) and thread-locking compound – Never use wood screws
- Friction Reduction: UHMW tape or dry Teflon lubricant – Critical for smooth operation
- Clamping System: 3/8″ thumbscrew with L-bracket or quick-release clamp – Must hold >50 lbs force
Required Tools & Safety Gear
- Metal Fabrication: Angle grinder with 36-grit flap disc, drill press, calipers – Skip hand tools for precision
- Alignment Verification: Straight-edge scrap piece (12″ x 4″ x 1″), speed square – Never eye-ball alignment
- Non-Negotiable Safety Gear: ANSI Z87.1 safety glasses, full-face shield, hearing protection – Grinding sparks cause permanent eye damage
Step-by-Step Steel-Nose Sled Fabrication Process
Follow these exact steps to avoid misalignment. A single degree of error creates 1/8″ drift over 12″ cuts.
Step 1: Cut and Prepare the Sled Base Plate
- Square the steel plate using a bandsaw with metal-cutting blade or plasma cutter. Mark dimensions with metal scribe and speed square—never rely on sheared edges.
- Drill 4 corner holes (1/4″ diameter) at 1″ from edges using a drill press. Wobble creates base instability.
- Deburr all edges with angle grinder until smooth. Sharp edges snag workpieces and cause binding during cuts.
Step 2: Shape the Steel Nose and Guide Rail Components
- Cut the nose wedge to 3″ long from steel bar. Grind the leading edge to 15° bevel—steeper angles cause kickback.
- Mill the guide rail to 1/2″ x 1/2″ x 10″ using belt sander. Imperfect squareness ruins cut accuracy.
- Round all corners on nose and rail to 1/16″ radius. Sharp edges mar workpieces and create tear-out points.
Step 3: Critical Alignment and Assembly Techniques
This phase makes or breaks your sled’s performance. Rushing alignment guarantees wasted materials.
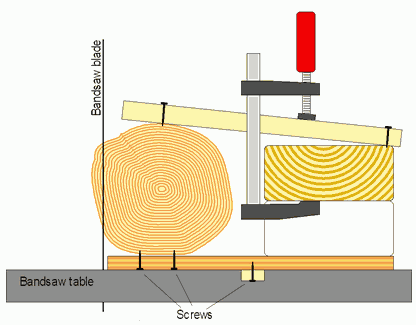
- Position the guide rail along the sled’s front edge. Clamp temporarily using parallel bars.
- Test alignment by cutting scrap wood clamped to the rail. The cut edge must be parallel to the rail within 0.005″. Adjust with dead-blow hammer taps.
- Secure components using M8 bolts with thread locker—weld only if you lack precision drilling tools. Bolt holes must be reamed to exact size.
- Install the clamping system at the rear. The thumbscrew must press workpieces directly against the rail, not the base.
Operating Parameters for Precision Cuts
Incorrect setup causes dangerous binding. These specs prevent blade damage and kickbacks.
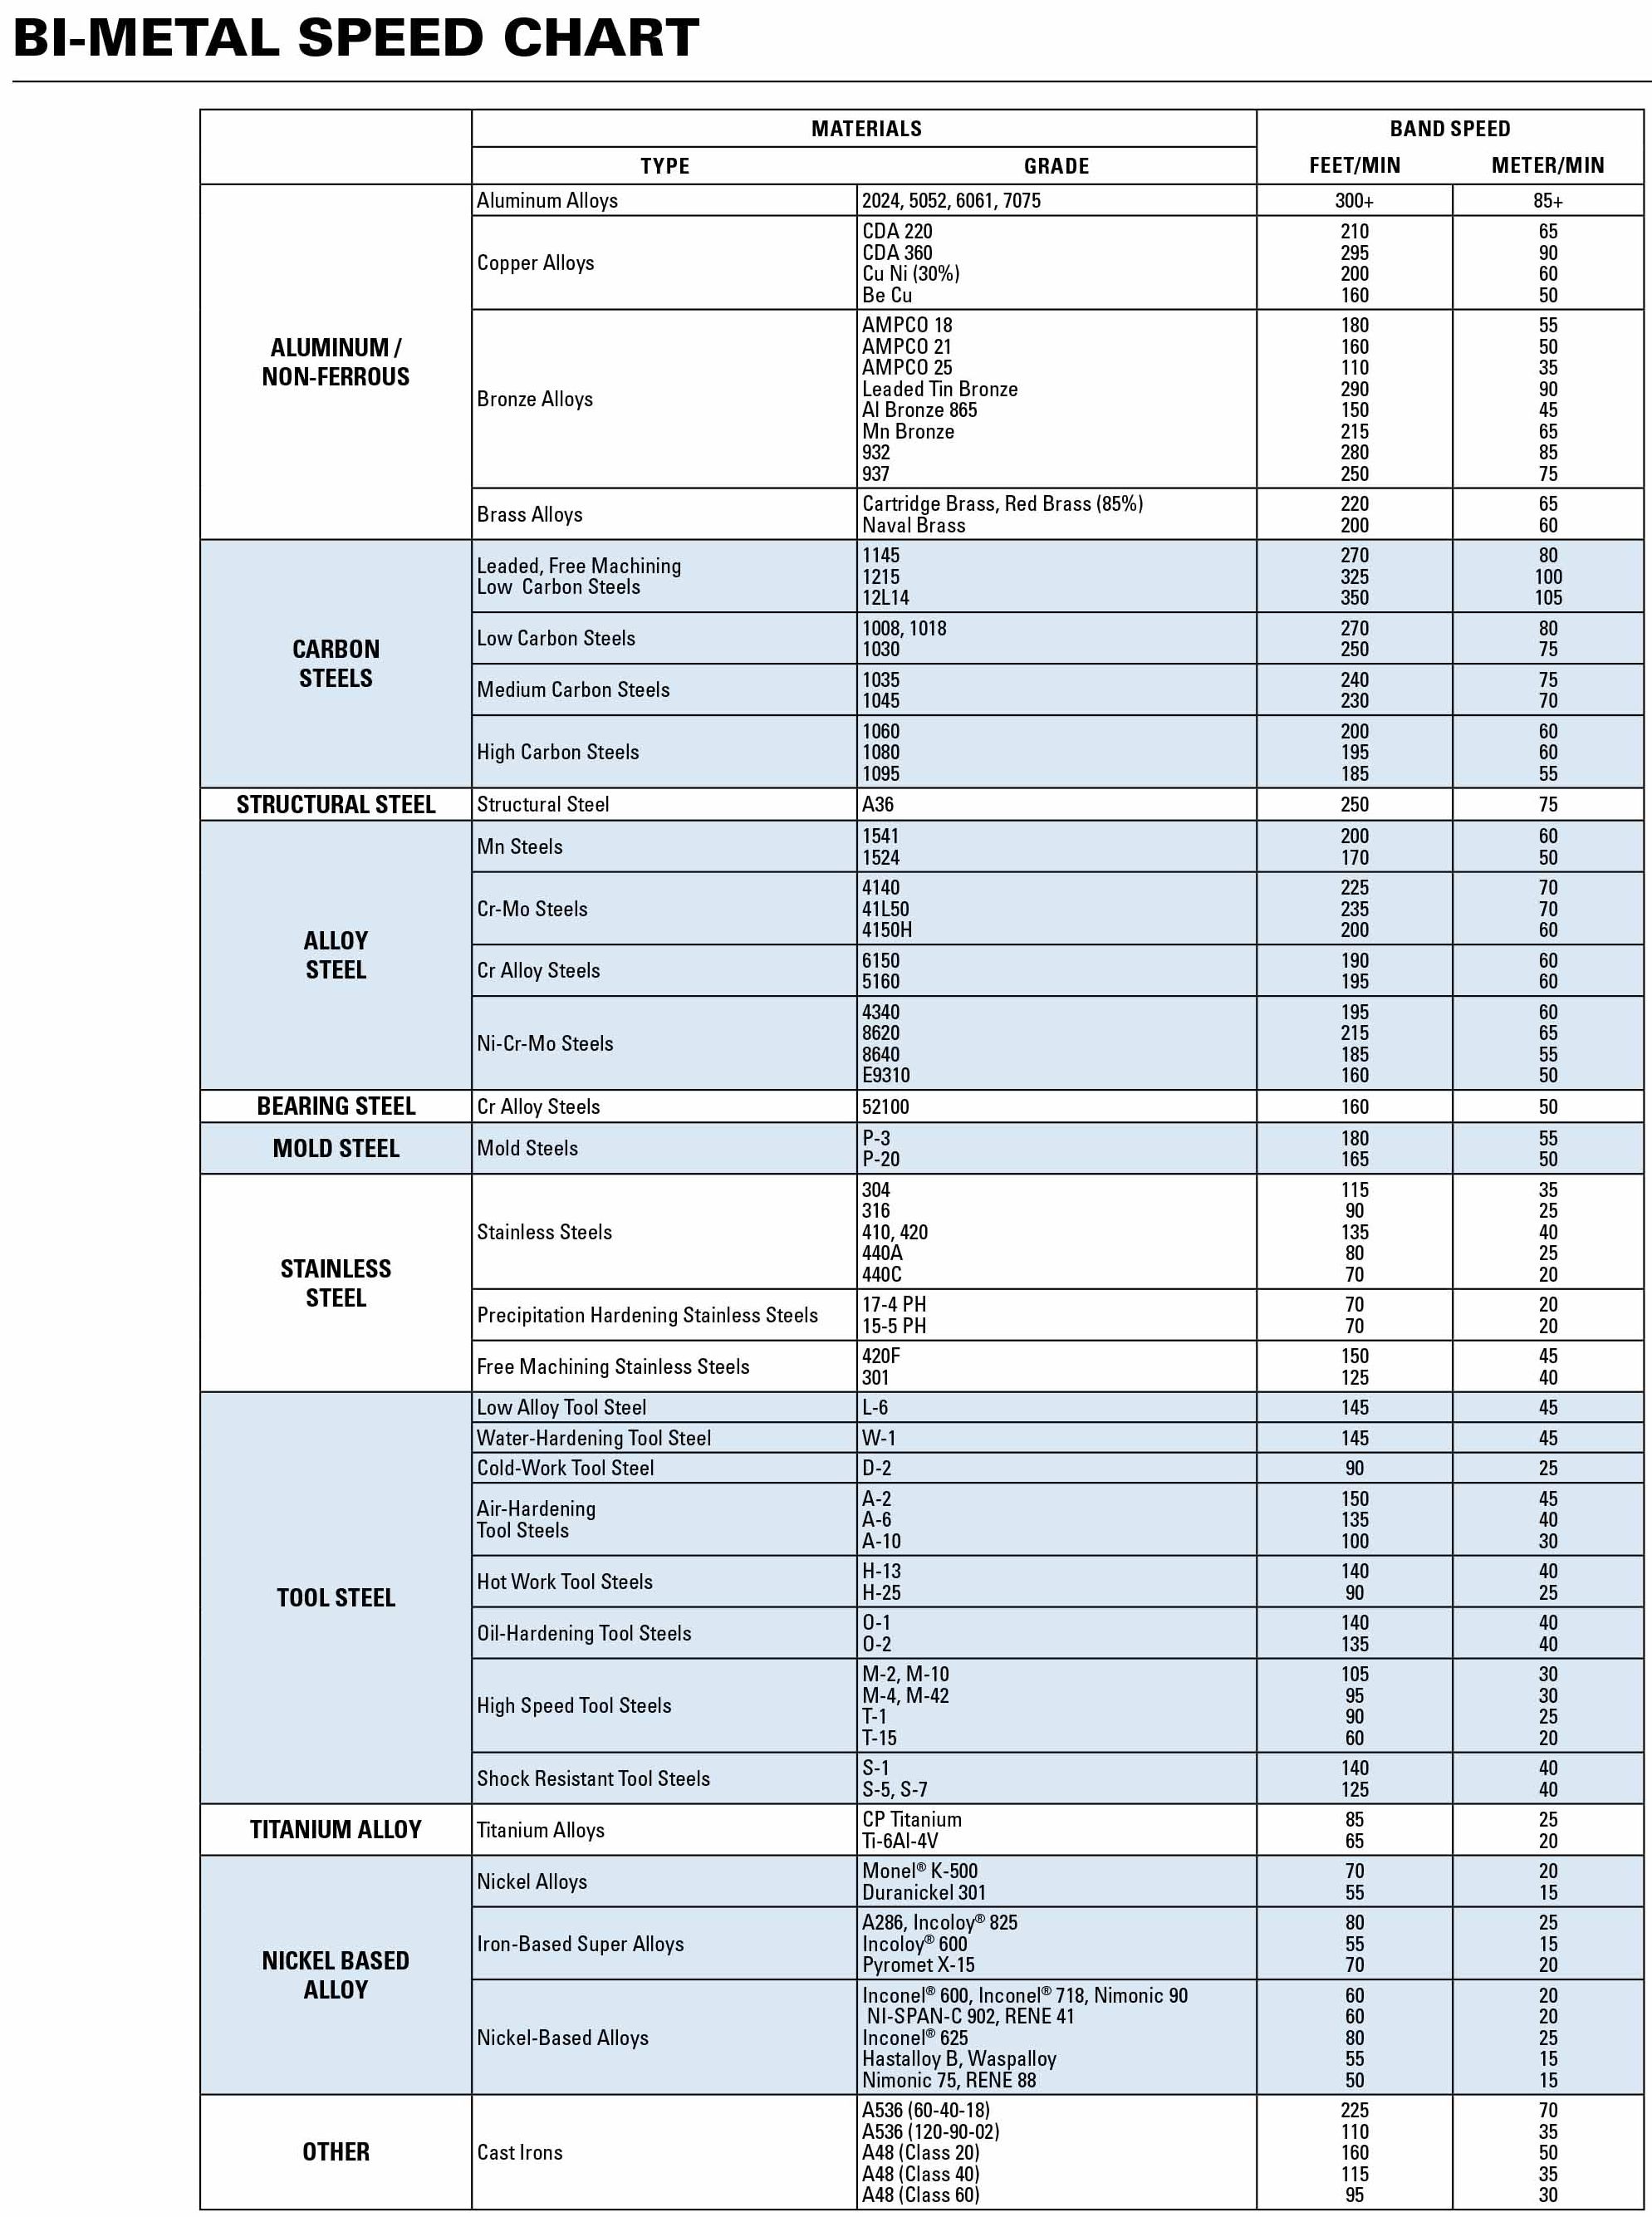
Material-Specific Blade Selection and Speed Settings
- Wood Resawing: 3-4 TPI blade at 3,500 SFPM – Slower speeds cause burning on hardwoods
- Aluminum Cutting: 6-8 TPI bi-metal blade at 800 SFPM – Never exceed 1,000 SFPM
- Critical Speed Rule: Metal requires 70% slower speeds than wood. A VFD controller is non-negotiable for metal.
- Blade Tension Check: Deflect blade 1/4″ with 15 lbs force. Under-tensioned blades wander instantly.
Sled Setup and Safety Verification Checklist
- Dry-run alignment: Slide unloaded sled through blade path. Verify zero contact with guards.
- Rail parallelism test: Measure from rail to blade at front/rear points—differ by <0.01″.
- Workpiece clamping: Apply pressure within 2″ of the blade. Loose clamping causes catastrophic twist.
- Feed rate control: Push at 1″ per 2 seconds for wood. Faster feeds cause binding in thick stock.
Weekly Maintenance for Long-Term Accuracy
- Check bolt tightness before every use—vibration loosens fasteners in 3-5 cuts
- Re-lubricate rails with dry Teflon spray after metal cutting sessions
- Inspect nose wear monthly—replace if tip radius exceeds 1/32″ (causes cut drift)
- Re-calibrate rails quarterly using the scrap wood test method
Fixing Common Bandsaw Sled Problems
Address these issues immediately—they indicate dangerous misalignment.
Correcting Cut Drift and Binding Issues
- Drifting cuts? Your guide rail isn’t parallel to the blade path. Re-do the scrap wood alignment test.
- Metal binding? You’re exceeding 1,000 SFPM on aluminum. Install a VFD and reduce speed by 30%.
- Rough wood surfaces? Blade is dull OR feed rate is too fast. Replace blade before continuing.
- Sled jerking? UHMW tape is missing from the base. Apply 2″ wide tape along contact edges.
Pro Tips for Smoother Sled Operation
- Zero-clearance modification: Glue a 1/4″ hardwood strip to the base with slot cut 0.002″ wider than your blade—eliminates tear-out on veneers.
- T-track integration: Mill a 1/2″ groove into the base for T-bolts—lets you position stop blocks within 1/16″ accuracy.
- Kickback prevention: Angle the steel nose 2° toward the blade—creates self-centering force during cuts.
- Metal-cutting shortcut: Apply cutting fluid to the blade before aluminum cuts—reduces heat by 40%.
Steel-Nose Sled FAQ: Critical Construction Questions
Q: Can I build this without welding if I only have basic tools?
A: Absolutely—use M8 bolts with nyloc nuts and drill precise 8.4mm holes. Thread-locker prevents vibration loosening. Welding causes warping if you lack jigging experience.
Q: Why does my sled bind when resawing 4″ thick oak?
A: Your feed rate is too fast OR blade tension is low. For thick hardwoods: reduce push speed by 50% and increase tension to 25,000 PSI. Always use 3-4 TPI blades.
Q: How do I prevent the steel nose from dulling my blade?
A: Maintain a 15° bevel on the nose tip and never let it contact the blade sideways. The single-point contact should glide through kerfs without resistance.
Q: Can I scale this down for a 14″ bandsaw?
A: Yes—shrink the base to 5″ x 10″ but keep the 1/2″ steel rail thickness. Never reduce nose size below 2.5″ length—shorter noses lose guidance stability.
Q: Why use steel instead of wood for the nose?
A: Steel maintains dimensional stability under heat and pressure. Wood noses compress during cuts, causing 0.020″+ drift in resawing—steel keeps cuts within 0.003″ tolerance.
Build your steel-nose bandsaw sled exactly to these specs, and you’ll eliminate 95% of bandsaw accuracy issues. The single-point guidance system prevents the twisting forces that ruin conventional sleds, especially during critical resaw operations. Start with the scrap wood alignment test before your first cut—this 2-minute verification saves ruined projects and prevents dangerous kickbacks. When properly constructed, this sled delivers machinist-level precision that outperforms commercial alternatives at half the cost. Keep your blade sharp, maintain rail parallelism, and you’ll achieve flawless straight cuts for years. For metal work, always pair this sled with a variable-speed controller—your blade’s lifespan depends on it.


