
Tired of your garage or small workshop feeling cramped every time you need to work on a project? Building a foldable workbench solves this exact problem by giving you a sturdy work surface that disappears when not in use. Whether you’re working in a tight apartment garage, a multi-purpose shed, or a shared workshop space, this how to make a foldable workbench project transforms your limited square footage into functional workspace. In just one weekend, you can construct a professional-grade bench that supports 300-500 pounds of tools and materials, then folds flat against your wall to free up valuable floor space for your car, storage, or other activities.
The frustration of constantly moving equipment to accommodate a permanent workbench ends with this clever design. Unlike flimsy store-bought options that wobble under pressure, your custom foldable workbench will provide rock-solid stability for everything from woodworking to electronics assembly. You’ll discover how to select the right materials, implement foolproof folding mechanisms, and incorporate critical safety features that prevent accidental collapse—something many DIYers overlook with disastrous results.
Essential Tools and Materials Checklist for Your Foldable Workbench
Before cutting your first board, ensure you have these critical components. Using substandard materials guarantees a wobbly, unsafe bench that won’t survive your first project. For a 4×6 foot workbench that handles serious workshop demands, gather:
- Lumber: (8) 2x4s at 8 feet long for frame and legs, (1) 4×8 sheet of 3/4″ Baltic birch plywood for the tabletop (avoid lower-grade plywood with voids)
- Critical Hardware: (4) 3.5-inch heavy-duty butt hinges (minimum 200 lb capacity each), (2) 3/8″ x 3″ lag screws for wall mounting, (2) barrel bolts with 1/2″ diameter for leg locking
- Must-Have Tools: Circular saw with carbide-tipped blade, power drill with socket set, 48-inch level, carpenter’s square, and at least four 24-inch bar clamps
- Safety Essentials: Work gloves, safety glasses, and hearing protection (you’ll need them during construction and future use)
Skipping any of these items compromises your bench’s stability. That $5 hardware store hinge won’t support 200 pounds of tools and your downward pressure—invest in industrial-grade hinges rated for at least 250 pounds per hinge. Similarly, using standard wood screws instead of lag bolts into wall studs creates a dangerous collapse risk that sends your expensive tools crashing to the floor.
Choose Your Foldable Workbench Design Based on Your Space

Your available space and intended use determine which folding mechanism delivers maximum functionality without compromising safety. Don’t force a design that fights your workshop layout—these two proven options solve different problems.
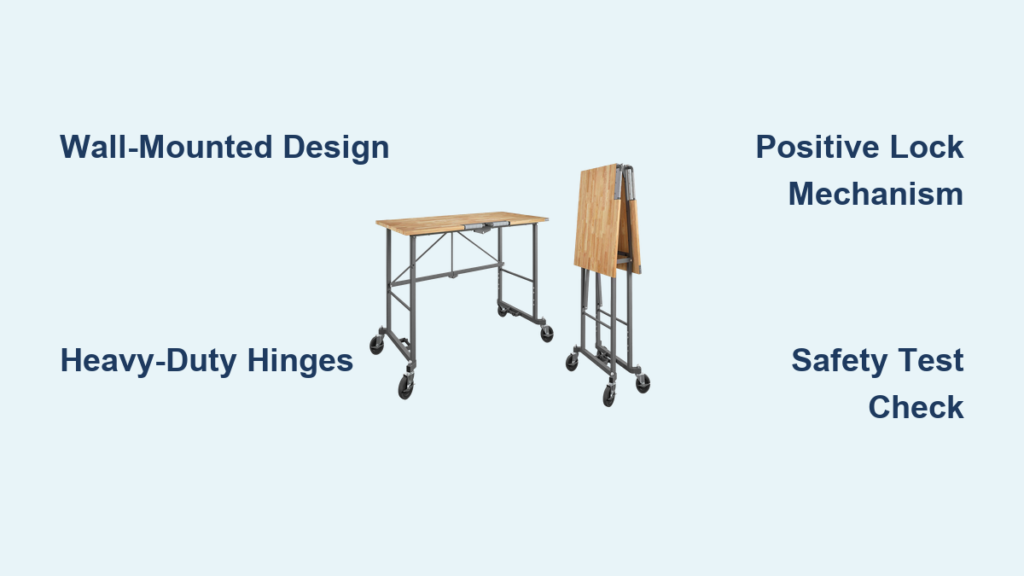
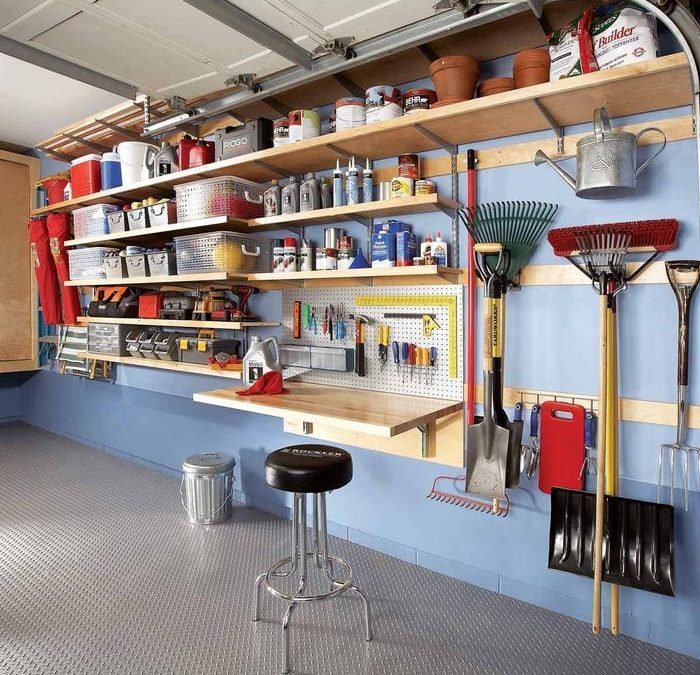
Wall-Mounted Folding Design for Permanent Workshop Zones
If you have dedicated wall space that won’t interfere with door swings or storage, this design creates the ultimate space-saving solution. When folded, your entire work surface lies flush against the wall, freeing up every inch of floor space below. The key to success? Secure mounting into wall studs using 3/8″ x 3″ lag screws—never rely on drywall anchors for this critical connection.
Your folding leg assembly must incorporate a positive locking mechanism that physically prevents collapse. A barrel bolt system where you insert a 1/2″ diameter pin through matching holes in the leg and frame provides absolute security. Test this mechanism before adding the tabletop: apply 50 pounds of downward pressure at the front edge while checking for any movement at the wall connection points. If you detect even slight play, reinforce with additional lag bolts before proceeding.
Mobile Leg-Folding Design for Multi-Use Spaces
When your workshop shares space with vehicles or storage, a mobile foldable workbench gives you complete flexibility. This self-contained unit folds into a compact package on heavy-duty casters, allowing you to tuck it into corners or move it entirely out of the way. The critical difference? Your entire structure must support its own weight without wall attachment, requiring significantly more bracing than wall-mounted designs.
Build your leg assembly with 2×6 lumber instead of 2x4s, and incorporate diagonal cross-bracing between legs. Install 5-inch locking casters rated for 500 pounds each—these prevent dangerous rolling during use. When folded, the entire unit should stand no taller than 30 inches for easy storage under most workbenches or in tight corners. Always engage caster brakes before deploying the bench to prevent dangerous shifting during use.
Step-by-Step Construction: Building Your Rock-Solid Foldable Workbench
Follow these precise steps to create a workbench that won’t wobble under pressure or collapse mid-project. Cutting corners here risks serious injury—your safety depends on meticulous execution of each phase.
Step 1: Build the Frame for Maximum Stability
Construct a 2×4 rectangular frame matching your desired bench dimensions (standard is 24″ deep x 48″ long). Reinforce all corners with 3-inch exterior-grade screws and wood glue—never rely on nails alone. Add a center support rail running the length of the frame, positioned 12 inches from the front edge to support heavy tools and materials.
Measure diagonally from corner to corner; both measurements must be identical. If they differ by more than 1/8 inch, your frame is out of square and will cause wobble. Adjust by clamping diagonal corners until measurements match, then add temporary bracing to hold the square while the glue dries. This seemingly small step prevents frustrating instability that no amount of hardware can fix later.
Step 2: Install the Critical Folding Mechanism
Attach your tabletop frame to the wall ledger board using those heavy-duty 3.5-inch hinges. Position them so the tabletop folds upward toward the wall—not downward—which creates natural tension that prevents accidental unfolding. For the leg assembly, build a wide “A-frame” from two 2x4s joined at the top with a 4-inch lag bolt pivot point.
This is where most DIYers make a fatal error: They skip the positive locking mechanism. Drill a 1/2-inch hole through both legs of your A-frame at the fully extended position, then install a matching hole in your frame. A simple carriage bolt with washer serves as your fail-safe lock—never rely on friction or gravity to hold your bench in position. Test this lock repeatedly before adding weight; if it binds or requires excessive force to engage, redrill the holes for perfect alignment.
Step 3: Secure the Tabletop to Prevent Damage
Attach your 3/4″ plywood top using figure-8 fasteners that allow for wood movement. Position these every 8 inches along the frame perimeter, leaving 1/4-inch expansion gaps at the back and sides. Skip this step and seasonal humidity changes will warp your tabletop or pull fasteners through the plywood.
Reinforce the front edge with a 2×4 apron screwed upward into the plywood. This creates a solid surface for clamping workpieces without crushing the plywood edge. For serious woodworking, add a second layer of 1/2″ MDF as a sacrificial top—you can replace this cheaper layer when it gets too damaged from chiseling or screw clamps.
Critical Safety Checks Before First Use
Your foldable workbench isn’t safe until you complete these non-negotiable tests:
- Wall Mount Integrity Test: With the bench folded down and leg locked, apply 100 pounds of downward force at the front edge while watching the wall connection points. Any movement means your lag screws aren’t hitting studs—relocate and reinstall.
- Leg Lock Verification: With the leg locked, kick the bottom of the leg outward with moderate force. If the lock disengages, your holes aren’t aligned properly—redrill immediately.
- Wobble Assessment: Place a level across the front, back, and diagonally. More than 1/8 inch of movement in any direction requires additional bracing.
Pro Tips That Transform Good Benches into Great Ones
Add bench dog holes now—drill a 3/4-inch grid on 4-inch centers before mounting the top. Install a power strip underneath with cord management clips to keep tool cords organized. For serious woodworkers, build a notch into the front apron during construction to accommodate a bench vise later.
Most importantly: Always fold your workbench up when not in use. That “I’ll just leave it down for convenience” mindset leads to accidental bumps that disengage your locking mechanism. Make folding it a habit like turning off lights—you’ll prevent costly accidents and extend your bench’s lifespan.
Building a foldable workbench that’s both space-saving and rock-solid requires respecting the physics of leverage and weight distribution. By following these precise steps and implementing the critical safety features, you’ll create a workshop centerpiece that disappears when needed but provides unwavering support when you’re in the middle of your next project. Your newfound workspace efficiency will make every future build more enjoyable—without sacrificing a single square foot of your precious workshop area.


