
You’ve got overripe bananas staring at you from the counter, and that ice cream craving won’t quit. What if you could transform those spotty bananas into a creamy, dreamy dessert using just your Ninja blender? This isn’t just healthy—it’s indulgent. In under five minutes, you’ll have velvety banana ice cream that rivals premium gelato, with zero added sugar and no fancy equipment. The secret? Your Ninja blender’s 1000+ watt motor pulverizes frozen bananas into silky perfection while preserving every bit of natural sweetness.
Banana ice cream (affectionately called “nice cream”) solves the eternal dessert dilemma: satisfying cravings without guilt. With your Ninja blender, you bypass store-bought additives and expensive machines. This guide delivers foolproof techniques for achieving soft-serve texture every time—no ice cream maker required. Whether you’re using a Nutri Ninja Pro or Foodi Power Blender, you’ll master the exact ratios, blending sequences, and troubleshooting tricks that turn humble frozen bananas into a showstopper treat.
Freeze Perfect Bananas for Creamy Results
Pick Peak-Ripeness Bananas
Grab bananas covered in brown spots—they’re packed with natural sugars for maximum sweetness. Avoid green-tipped bananas (they’ll taste bitter) or completely brown mushy ones. The sweet spot? Bananas that yield slightly when gently squeezed but hold their shape. These deliver restaurant-quality flavor without added sweeteners.
Slice and Flash-Freeze Properly
Peel bananas and slice into uniform 1-inch coins with a sharp knife. Spread them in a single layer on a parchment-lined baking sheet—this prevents clumping. Freeze for at least 2 hours, but overnight produces the smoothest texture. Never skip this step: room-temperature bananas create soup, not ice cream.
Smart Freezer Storage
Transfer solidly frozen coins to labeled freezer bags, pressing out excess air. Pre-portion 2-banana servings for single treats or 4-banana batches for family desserts. They’ll stay fresh for 3 months, but quality peaks within the first week. Pro tip: Freeze bananas in silicone muffin cups for instant grab-and-go portions.
Exact Ingredients for Perfect Banana Ice Cream
Core Components Only
- Frozen bananas: 2-4 coins (start with 2 for beginners)
- Liquid base: 2-4 tbsp milk (almond, oat, or coconut for creaminess)
- Vanilla extract: ½ tsp to boost banana flavor (optional)
Liquid Choices That Transform Texture
Almond milk creates light, neutral ice cream. Coconut milk delivers tropical richness. Oat milk provides body without dairy. Start with 2 tablespoons—add more only if blades struggle. Warm liquid prevents motor strain during blending. Never use water; it dilutes flavor and creates icy crystals.
Flavor Boosters Worth Adding
For chocolate banana: 2 tbsp cocoa powder + mini chocolate chips. Peanut butter cup version needs 2 tbsp nut butter. Avoid honey with properly ripe bananas—they’re naturally sweet enough. Greek yogurt (2 tbsp) adds protein while making it silkier. Add extras during the final 15 seconds of blending.
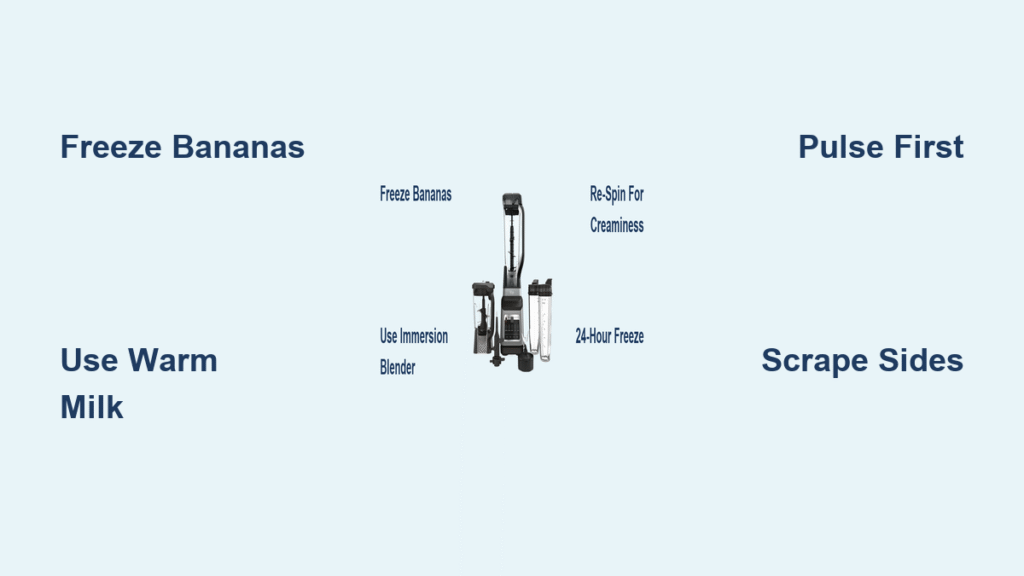
Ninja Blender Setup for Ice Cream Success

Model-Specific Power Settings
Professional Series: Use “frozen drink” preset. Nutri Ninja Pro: Perfect for single servings in the cup attachment. Foodi Power Blender: Start on speed 5, ramp to 10. Mega Kitchen System: Ideal for 4-banana batches. Always place your blender on a dry, stable surface before starting.
Critical Pre-Blend Checklist
Confirm the blade assembly is locked tight—frozen bananas demand maximum torque. Run the empty blender for 5 seconds to check for vibrations. Never exceed the ¾ fill line with frozen ingredients. If using single-serve cups, load ingredients through the lid opening to prevent overflow.
Master the Blending Process Step by Step
Initial Pulse Technique
Add frozen banana coins to the pitcher, starting with 2 bananas. Pour 2 tbsp milk directly over the fruit. Pulse 3-5 times in 1-second bursts—this breaks large chunks without overheating the motor. Stop immediately if you hear straining; let the motor rest 30 seconds.
Creamy Transformation Phase
Switch to continuous blend for 30 seconds. The mixture will look crumbly at first—this is normal. Stop every 15 seconds to scrape down sides with a spatula. If blades stall, add warm milk 1 tbsp at a time. Never force the motor; patience prevents burnt smells and damaged blades.
Final Smooth Finish
Ramp to highest speed for 15-30 seconds. Watch for the texture shift from grainy to glossy soft-serve. For chocolate versions, add cocoa powder now. The perfect consistency coats the spatula thickly but drips slowly. Over-blending creates soup—stop when it resembles soft-serve from an ice cream truck.
Fix Common Texture Problems Immediately
When Ice Cream’s Too Thick
Symptoms: Motor groans, mixture resembles frozen concrete. Fix: Let bananas sit 5 minutes at room temperature. Add warm milk 1 tbsp at a time while pulsing. Prevention: Always use the “warm liquid” trick—cold liquid solidifies bananas further.
When Mixture Becomes Runny
Causes: Too much liquid or insufficiently frozen bananas. Solution: Add ¼ cup extra frozen banana coins or ice cubes. Spread thin layer on parchment, freeze 30 minutes, then re-blend in 10-second bursts. Pro tip: Bananas must feel solidly frozen—no give when pressed.
Eliminating Grainy Results
Root cause: Under-ripe bananas or stopping too soon. Fix: Blend 30 seconds longer using the tamper tool (if your model has one). Prevention: Use only spotted bananas—they contain more natural pectin for creaminess. Switch to coconut milk for instant silkiness.
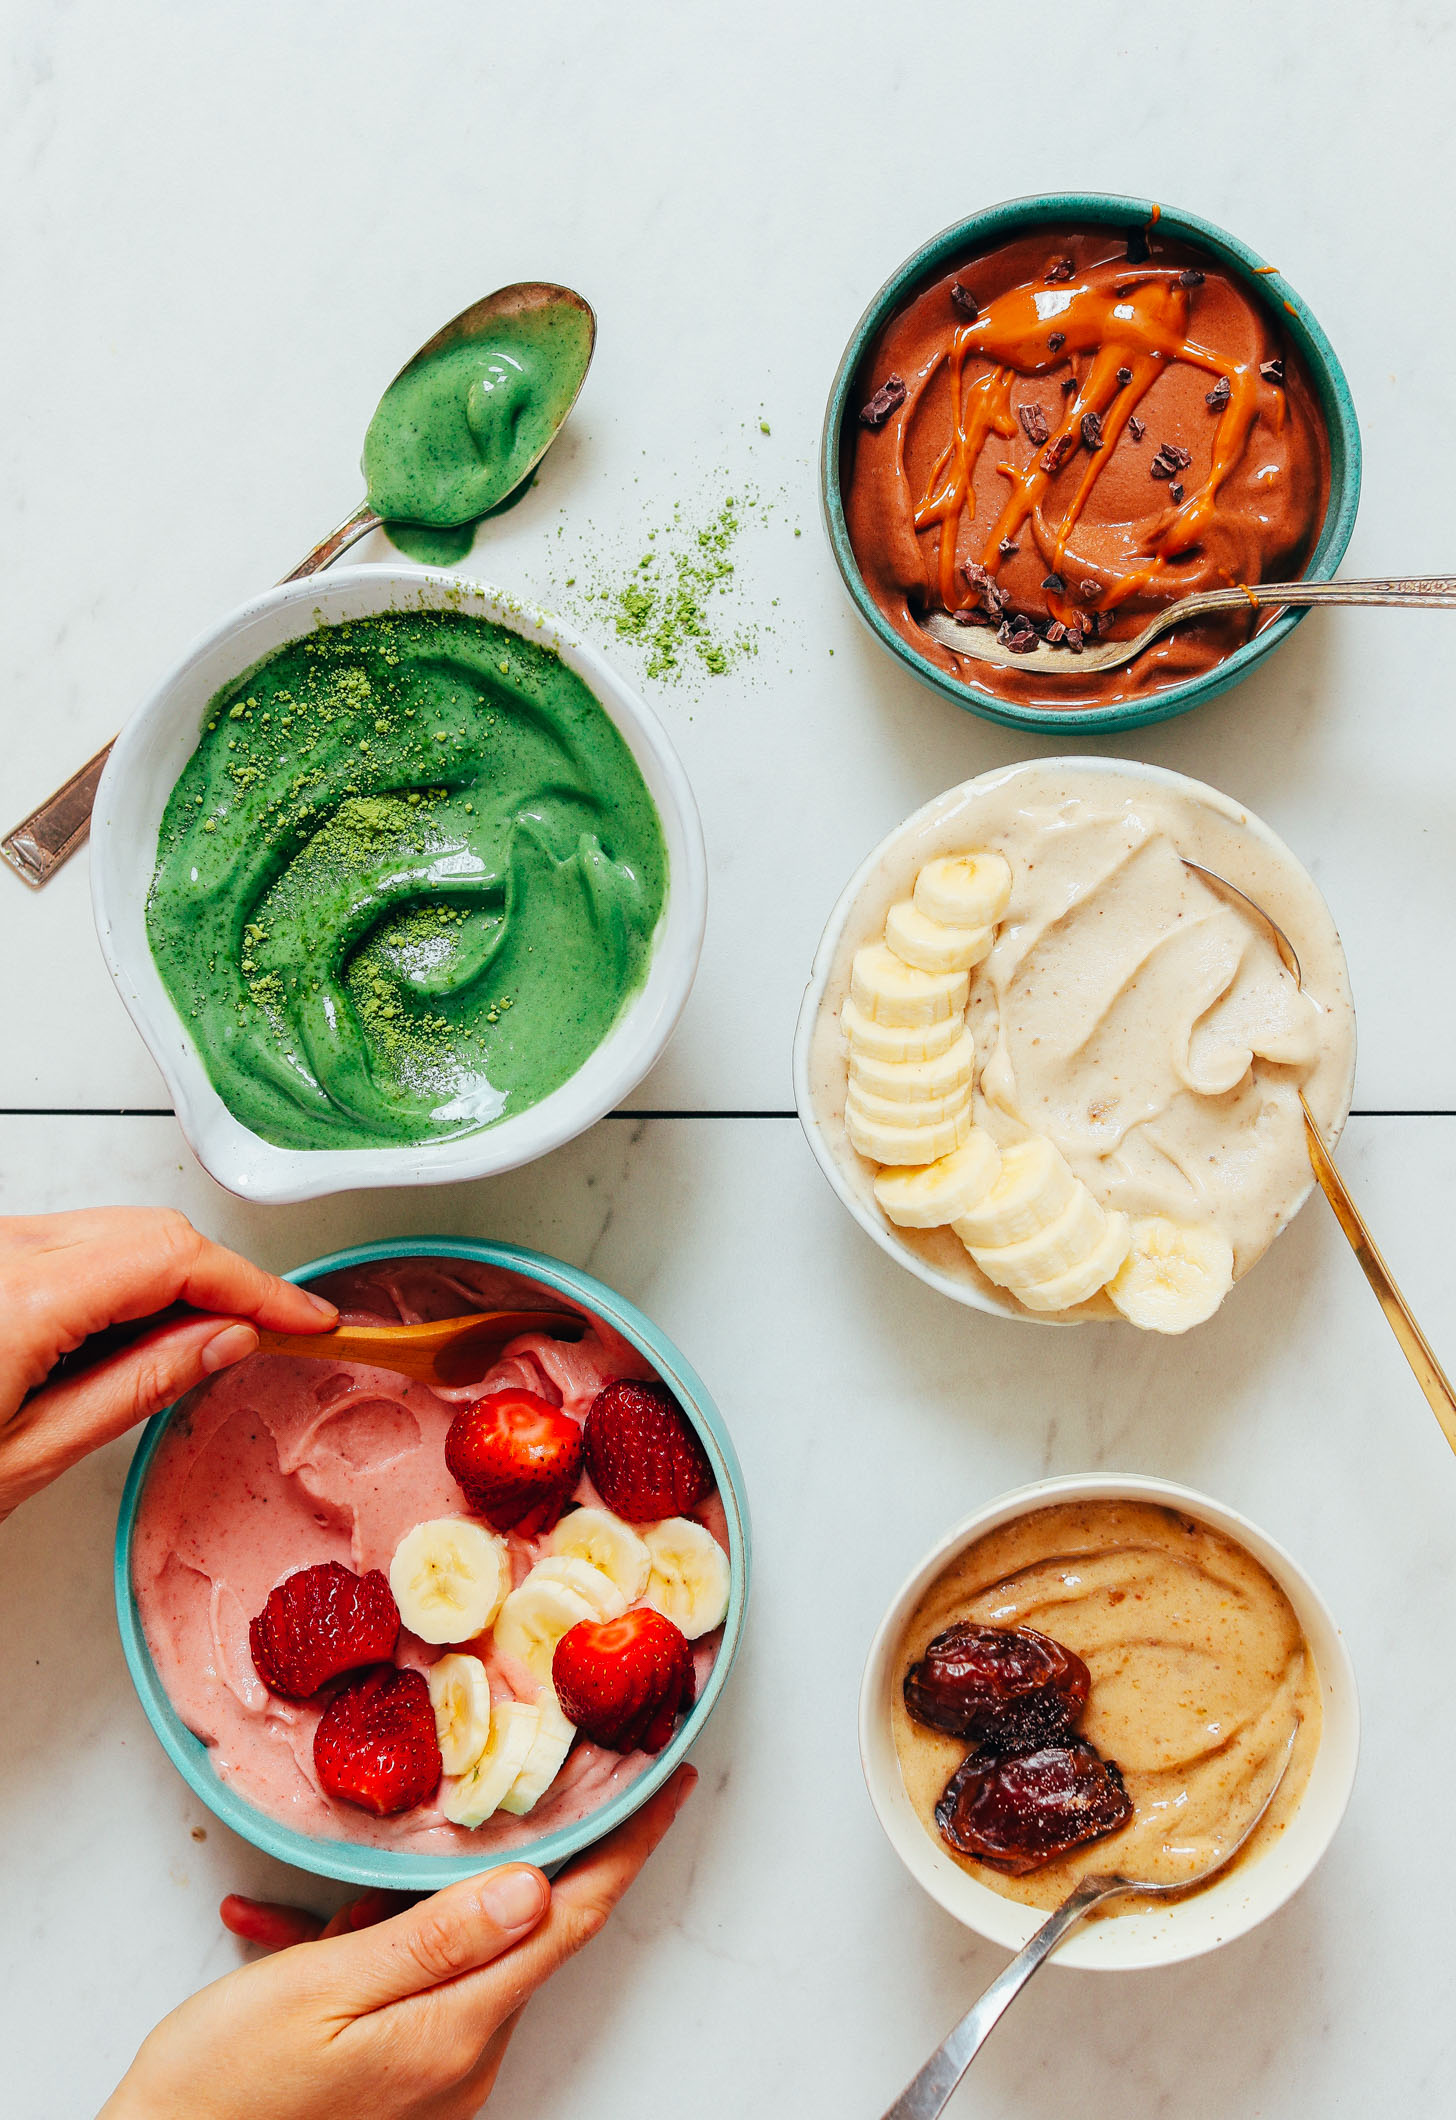
Flavor Variations That Wow Every Time
Foolproof Classic Combos
Chocolate Banana: 2 tbsp cocoa powder + 1 tbsp chocolate chips. Strawberry Swirl: ½ cup frozen strawberries added in final 10 seconds. Peanut Butter Cup: 2 tbsp nut butter swirled in after blending—don’t overmix for ripple effect.
Gourmet Upgrades
Salted Caramel: Drizzle 1 tbsp caramel sauce over finished ice cream (not during blending). Mocha Madness: 1 tsp instant coffee + 1 tbsp cocoa powder. Matcha Magic: 1 tsp matcha powder blended with bananas for vibrant green ice cream. Avoid liquid additions beyond milk—they disrupt texture.
Dietary Adaptations That Work
Vegan: Stick to plant milk and skip honey. Keto: Replace 1 banana with ½ frozen avocado. High-Protein: Add 1 scoop unflavored protein powder during final blend. Never add ice—it creates icy crystals; use extra frozen banana instead.
Serve Like a Pro with Perfect Texture
Soft-Serve Style Success
Scoop immediately into waffle cones using a cold ice cream scoop. Top with fresh raspberries or crushed nuts for contrast. This method delivers maximum creaminess—ideal when bananas are perfectly ripe and not over-frozen.
Firm Ice Cream Texture Hack
Transfer to a freezer-safe container, pressing plastic wrap directly against the surface. Freeze 1-2 hours for scoopable texture. Let sit 5 minutes before serving if rock-hard. For sundaes, add hot fudge after scooping to prevent melting.
Creative Presentations
Ice Cream Sandwiches: Spread between chocolate cookies, freeze 20 minutes. Parfaits: Layer with granola and mango chunks in tall glasses. Milkshakes: Blend with extra ¼ cup milk until pourable. Avoid refreezing melted ice cream—it becomes icy.
Storage Secrets for Creamy Results
Short-Term Solutions
Store leftovers in airtight containers with parchment pressed against the surface. Consume within 3 days for best texture—after that, ice crystals form. Re-blend for 10 seconds with 1 tsp warm milk to restore creaminess. Never store in metal containers—they accelerate freezer burn.
Long-Term Strategies
Freeze individual portions in silicone muffin cups for 2-hour grab-and-go treats. Label freezer bags with dates and flavors—banana ice cream lasts 3 months but loses quality after week 2. Thaw slightly at room temperature for 5 minutes before re-blending.
Advanced Ninja Techniques for Better Ice Cream
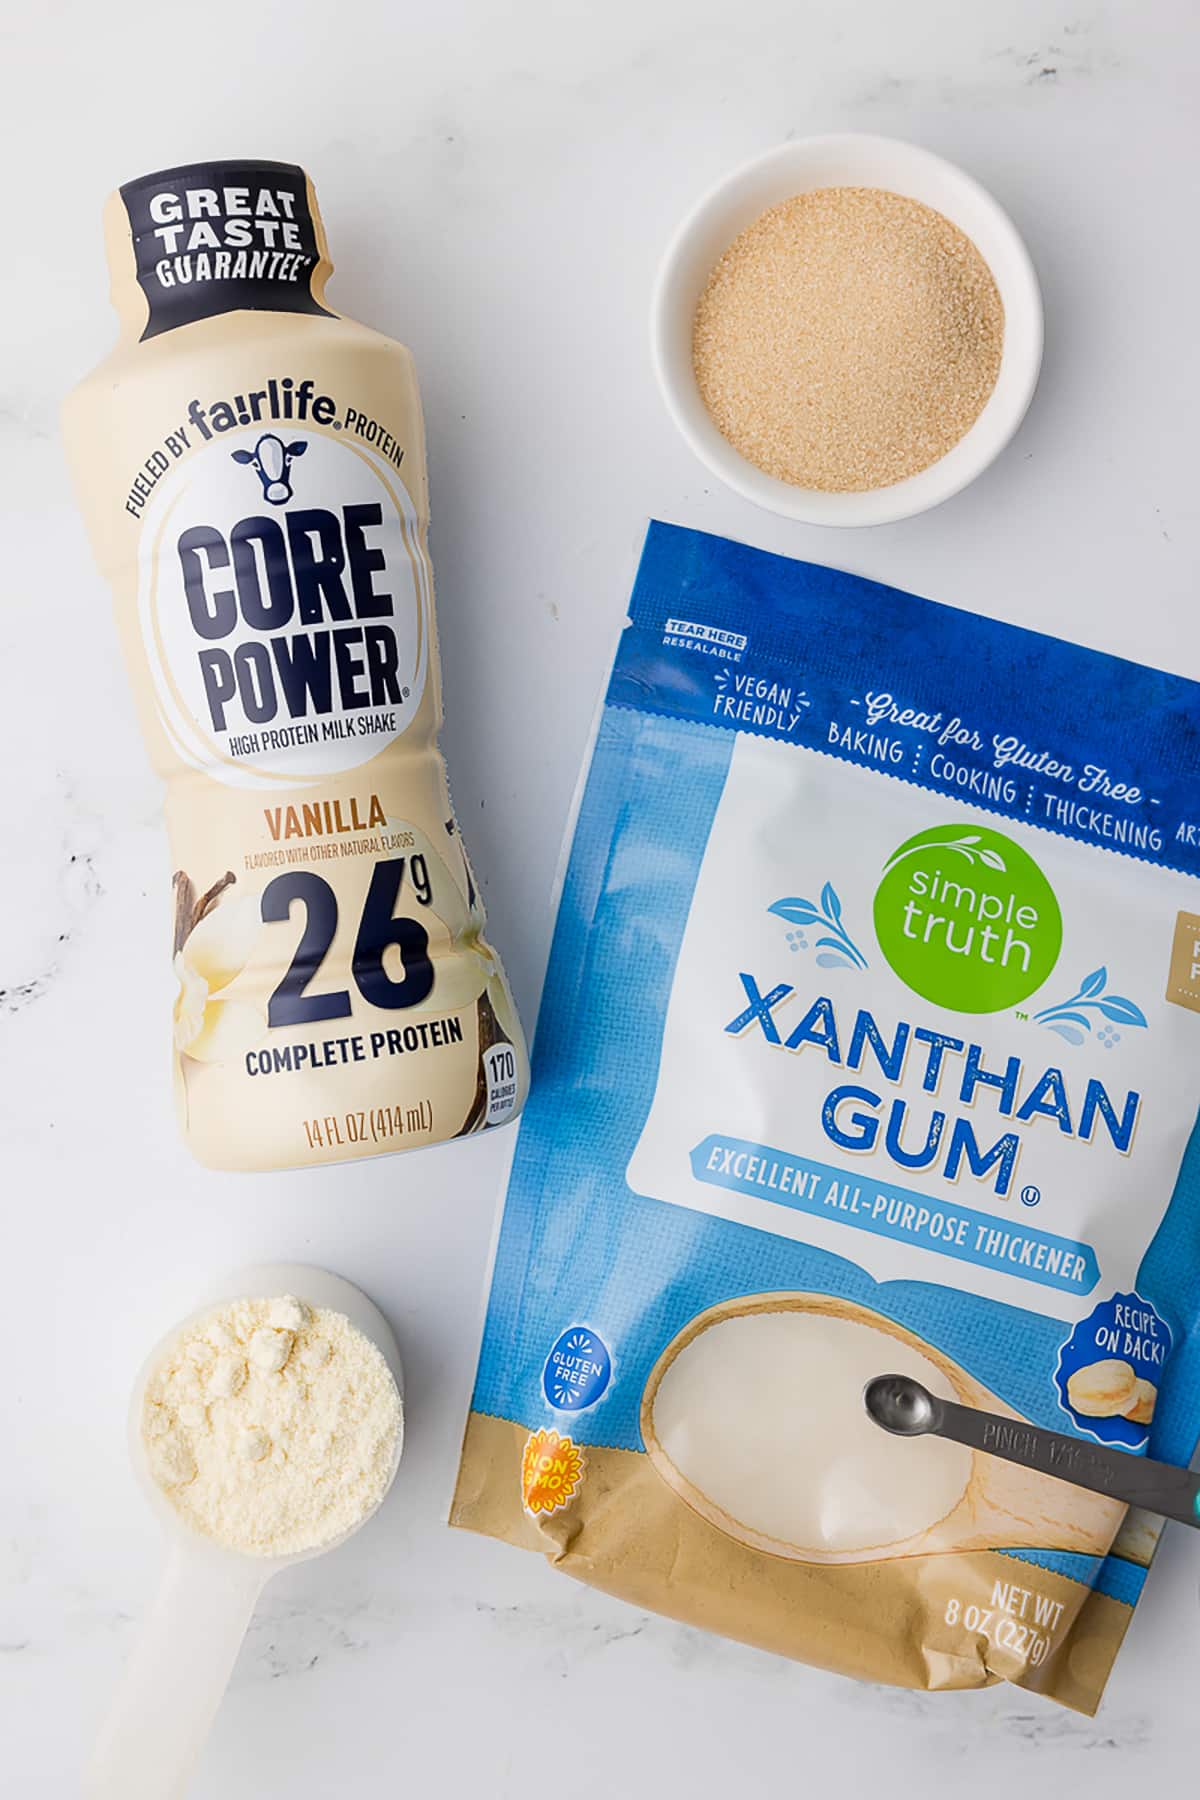
Texture Enhancement Hacks
Add ⅛ tsp xanthan gum to prevent ice crystals. Include 1 tbsp vodka (it won’t make you tipsy) to keep it scoopable. Soak 2 pitted dates in warm milk for 10 minutes before blending for caramel notes. Never add ice—it dilutes flavor.
Batch Preparation Mastery
Freeze 10-12 bananas every Sunday for instant desserts. Pre-portion flavor kits: fill bags with 2 bananas + cocoa powder for chocolate, or bananas + peanut butter powder. Store in freezer—just dump and blend. For parties, make base ice cream first, then swirl in sauces.
Cleaning Made Simple After Blending
Immediate action: Rinse pitcher and blades with warm water within 2 minutes—banana residue hardens fast. Deep clean: Fill halfway with warm soapy water, blend 15 seconds, then hand-wash blades. Pro tip: Clean while the pitcher is still slightly warm from blending; banana slides right off. Never soak blades overnight—they can rust.
Scale Recipes Perfectly for Any Crowd
Single Serving Formula
2 frozen bananas + 2-3 tbsp milk = perfect personal treat. Use ¼ tsp vanilla for single batches. Ideal for Nutri Ninja cups—fill only halfway to prevent overflow. Ready in 3 minutes flat.
Family Batch Guide
6 frozen bananas + ¼-⅓ cup milk serves 4-6 people. Scale flavor additions proportionally (2 tbsp peanut butter becomes 6 tbsp). Blend in two batches for even texture—overfilling causes uneven blending. Total time: 7 minutes including prep.
Your Ninja blender just became a dessert powerhouse. With these techniques, you’ll create healthier, customizable ice cream that satisfies any craving—no added sugar needed. Remember the golden rule: patience during blending and perfectly ripe frozen bananas. Start with classic banana, then experiment with flavors. Within days, you’ll wonder why you ever bought store-bought ice cream. The next time bananas turn spotty, grab your Ninja and make magic—you’ve got everything you need for creamy perfection right in your kitchen.


