
Your floor lamp casts harsh, unflattering light that ruins your cozy reading nook, or maybe you’ve searched endlessly for the perfect shade to match your bohemian bedroom aesthetic. Store-bought options rarely fit your vision or space—and they cost a fortune. Learning how to make floor lamp shade solutions solves both problems. In under two hours with basic supplies, you’ll craft a custom shade that diffuses light beautifully while reflecting your personal style. This guide reveals foolproof techniques used by interior designers to create professional-looking lamp shades from scratch, whether you’re reviving an old frame or building from the ground up. You’ll discover material hacks that prevent fire hazards, achieve wrinkle-free finishes, and transform cheap supplies into bespoke lighting that elevates any room.
Why Your Standard Lamp Shade Fails and How to Fix It
Most mass-produced lamp shades create glaring hotspots or cast unflattering shadows because they use cheap materials and generic sizing. A DIY shade solves this by letting you control light diffusion and proportions. When you make floor lamp shade pieces tailored to your bulb type and room dimensions, you eliminate harsh glare while directing light exactly where needed—like softly illuminating a reading chair without washing out wall art. Crucially, custom shades prevent dangerous overheating by matching material thickness to your bulb’s wattage. Always measure your lamp base’s harp size and fitter type before starting; mismatched shades wobble or block light entirely. If your current shade makes your space feel clinical or dim, skip replacement costs and build one that solves these issues in one afternoon.
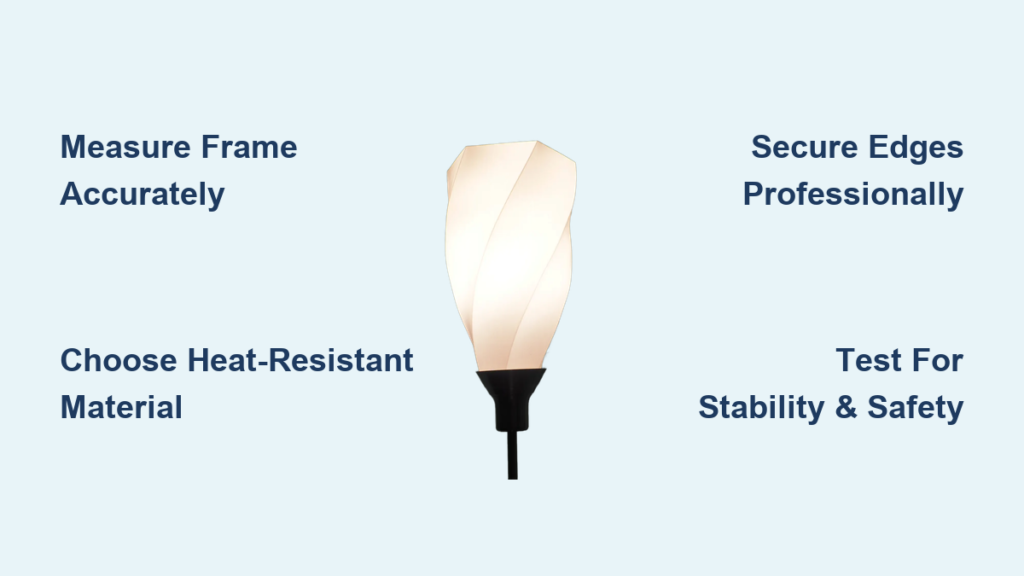
Measuring Your Lamp Frame for Precision Fit
Grab a tape measure and note three critical dimensions: top ring diameter, bottom ring diameter, and slant height (diagonal distance between rings). For drum shades, these will be equal; for empire styles, the bottom ring is larger. Record measurements to the nearest 1/8 inch—skimping here causes puckering or gaps. Place your existing shade on parchment paper, trace its outline, and cut it as a template. This paper pattern becomes your blueprint for cutting fabric or paper, ensuring zero guesswork during assembly. Always add 1/2 inch seam allowance to all sides for clean edge wrapping.
Selecting Heat-Resistant Materials by Bulb Type

Your bulb wattage dictates safe materials. For LED bulbs (under 10W), use lightweight options like cotton fabric, rice paper, or thin cardstock. Halogen or incandescent bulbs (40W+) require heat-resistant choices: fiberglass mesh liners, parchment paper, or flame-retardant synthetic fabrics. Never use plastic, vinyl, or waxed paper—they melt within minutes. Pro tip: Hold materials 6 inches from a lit bulb for 60 seconds; if they scorch or warp, discard them. Safety first prevents fire hazards.
Repurposing Old Lamp Frames: Rust Removal and Reinforcement

Don’t buy new hardware—revive discarded frames with these pro techniques. Start by soaking metal frames in equal parts vinegar and water for 20 minutes to dissolve rust. Scrub gently with a brass brush, then dry thoroughly. For wobbly frames, reinforce joints with jewelry pliers: pinch connection points until snug, then dab with clear nail polish to prevent future loosening. If rings are bent, place the frame on a flat surface and tap misaligned sections with a rubber mallet. Test stability by pressing down on the top ring—zero flex means it’s ready for shade material. This saves $15+ versus new frames while reducing waste.
Creating a Wire Frame from Scratch for Unique Shapes
No frame? Craft one in 15 minutes using 14-gauge aluminum wire. Cut two circles: top ring (8-10 inches diameter), bottom ring (12-14 inches for standard floor lamps). Bend 4-6 vertical support wires into U-shapes, spacing them evenly. Twist ends securely around both rings, ensuring all supports are perpendicular. For drum shapes, make rings identical; for empire, flare the bottom ring outward. Wrap all connection points with floral tape to prevent snagging fabric. This method yields sturdy, custom-sized frames for under $3.
Cutting Shade Material Without Costly Mistakes
Lay your paper template on chosen material, aligning patterns or grain direction first. Pin it firmly, then cut with sharp fabric shears (for textiles) or an X-Acto knife on a cutting mat (for paper). For fabrics, cut against the grain to prevent stretching during assembly. Common error: Cutting too small—measure twice, cut once. If using patterned fabric, center key motifs at the front where they’ll be visible. For curved edges on empire styles, make tiny snips every 1/2 inch along the seam allowance to allow smooth bending without puckering.
Achieving Wrinkle-Free Fabric Application in 4 Steps
- Apply adhesive sparingly: Run a thin bead of hot glue along the top ring’s outer edge—excess glue seeps through fabric.
- Stretch gently from center out: Press fabric midpoint to the ring, then smooth toward edges like applying wallpaper.
- Rotate and repeat: Work in 2-inch increments around the ring, maintaining even tension. Never pull taut—it must drape slightly.
- Seal the bottom: Repeat for the bottom ring, ensuring vertical alignment matches the top. For paper, use spray adhesive 12 inches from the surface to avoid bubbles.
Securing Edges Like a Professional Finisher

Raw edges fray and look amateurish. Hide them with these designer tricks: For fabric shades, glue 1/4-inch-wide grosgrain ribbon along the inner rim using fabric glue—press firmly for 60 seconds per section. Paper shades need sturdier edging: Brush the inner edge with Mod Podge, then attach thin wooden molding strips with hot glue. Always trim excess material flush with the ring using an X-Acto knife before adding trim. This step takes 10 minutes but elevates your shade from crafty to custom furniture quality.
Adding Decorative Trims That Won’t Peel Off
Skip flimsy glued-on fringe. Instead, sandwich trims between fabric and frame: After attaching the main fabric, place beaded trim or lace over the raw edge, then secure the ribbon binding over it. For painted designs, use fabric paint on cotton shades—let dry 24 hours before handling. Metallic accents? Apply transfer foil with a hot iron for scratch-proof shine. Never place decorations within 3 inches of the bulb; heat causes peeling.
Preventing Shade Collapse During Assembly
The #1 DIY failure is sagging fabric between support wires. Combat this by adding horizontal reinforcement: Cut thin elastic cord to match the shade’s circumference. Glue it horizontally midway between top and bottom rings, stretching slightly as you attach. This invisible “belt” provides structural support, especially for tall drum shades. Test by pressing the shade’s center—if it rebounds instantly, your tension is perfect.
Troubleshooting Common Shade Assembly Problems
Problem: Fabric bubbles near ring connections
Fix: Lift the fabric, add a micro-dot of glue to the bubble area, and re-smooth immediately with a credit card edge.
Problem: Shade won’t sit straight on lamp harp
Fix: Bend the harp’s saddle wire slightly with pliers to match your shade’s top ring diameter.
Problem: Light appears yellow or dim
Fix: Replace with a daylight-temperature LED bulb (5000K)—cheap bulbs distort light through handmade shades.
Installing Your Shade Without Damaging the Lamp
Never force a shade onto a harp. First, remove the lamp’s finial (decorative top knob). Slide the shade down until the top ring rests securely on the harp’s saddle. Replace the finial, tightening just until snug—overtightening cracks ceramic bases. For clip-on harps, ensure the shade’s bottom ring clears the bulb by at least 3 inches. Test stability by gently twisting; if it moves, add a pea-sized dab of removable poster putty inside the top ring.
Safety Checks Before First Use
- Bulb clearance: Measure 3+ inches between shade bottom and bulb surface.
- Heat test: Run the lamp for 5 minutes, then feel the shade’s inner surface—it should be warm but not hot.
- Stability check: Bump the lamp base; the shade shouldn’t wobble excessively.
- Electrical inspection: Ensure no glue or trim contacts the socket wiring.
Year-Long Shade Maintenance Secrets
Dust your handmade shade monthly with a microfiber cloth—never water, which warps paper. For stubborn spots on fabric shades, dab with a cotton swab dipped in diluted dish soap. Store shades upside down in a cardboard box when moving to prevent ring deformation. Every six months, reinforce weak glue points with clear-drying craft adhesive. Replace LED bulbs annually; dimming bulbs generate more heat, risking material damage over time.
When to Replace Versus Repair Your Shade
Repair minor issues like loose trims or small tears immediately using the techniques above. Replace the entire shade if you notice yellowing (sign of heat damage), persistent sagging after reinforcement, or frayed wiring near the frame. Pro tip: Keep leftover shade material for future repairs—store scraps in a labeled envelope taped inside your lamp base.
Transforming Basic Shades into Statement Pieces
Elevate your floor lamp shade with designer touches: Layer translucent white linen over patterned cotton for depth. Cut geometric shapes from freezer paper, iron them onto fabric as stencils, then spray paint for modern cutouts. For coastal vibes, glue dried seagrass strands vertically with clear-drying glue. Always seal painted or glued embellishments with 2 coats of matte Mod Podge to prevent flaking. These upgrades cost under $5 but look like high-end boutique finds.
Creating your own floor lamp shade solves lighting flaws while adding irreplaceable personal flair. By following these precise steps—from heat-safe material selection to professional edge finishing—you’ve built a custom piece that store shelves can’t replicate. Remember to prioritize bulb clearance and use LED options to protect your handmade creation. Now that you know how to make floor lamp shade solutions, reimagine other lighting in your home: Try these same techniques on table lamps or pendant fixtures next. Your perfectly diffused, style-defining floor lamp awaits—plug it in and enjoy the glow you designed yourself.


