
Dragging a stubborn ice fishing sled across frozen lakes can transform what should be a peaceful day of angling into an exhausting battle against friction and physics. Many ice anglers return from their fishing spots completely worn out before they’ve even set their first line, thanks to a sled that fights them with every step. The good news is that with strategic modifications and techniques specifically designed for ice conditions, you can dramatically reduce the effort required to pull your gear. By implementing these proven methods, you’ll conserve energy for what matters most—catching fish—and transform your sled from a burden into a reliable gear-hauling companion.
The secret to effortless sled pulling lies in understanding and minimizing three critical factors: surface friction, weight distribution, and pulling mechanics. Whether you’re hauling a basic plastic sled or a high-end ice fishing rig, these principles apply universally across all ice conditions. This guide delivers actionable, field-tested solutions that address the root causes of difficult sled pulling, so you can maximize your time on the ice and minimize the physical toll of getting there.
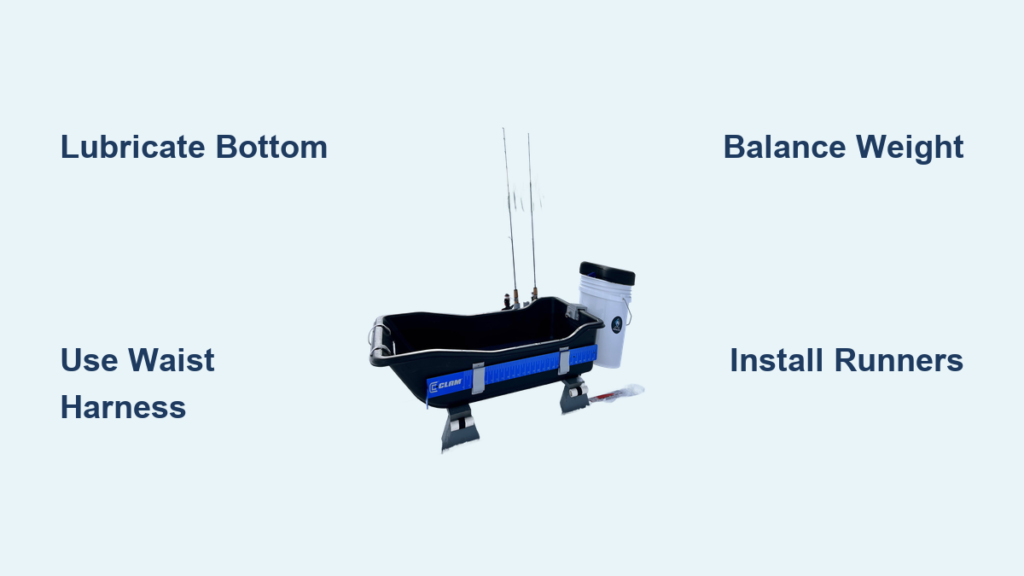
Select a Sled with Ice-Optimized Design Features
Your journey to effortless pulling begins before you even step on the ice—with your sled selection. Not all ice fishing sleds are created equal when it comes to glide efficiency.
Why Polyethylene Outperforms Traditional Materials on Ice
High-density polyethylene (HDPE) sleds offer superior performance over wood or metal alternatives because they naturally repel moisture and create less friction against ice surfaces. Unlike wood, which absorbs moisture and becomes heavier and rougher, HDPE maintains its slick surface even in subzero temperatures. When selecting a new sled, look for models specifically designed with a smooth, non-porous bottom surface that won’t collect ice crystals during your trek.
Curved Hull Design vs. Flat Bottom Sleds
A sled with a gently curved hull—similar to traditional toboggans—will dramatically outperform flat-bottom designs on varied ice conditions. This curvature allows the sled to “plane” over the surface rather than dig in, reducing the contact area between sled and ice. On rough or snow-covered ice, this design prevents the front edge from catching and creating resistance. When evaluating sleds, test how they sit on a flat surface; the slight upward curve at both ends is your indicator of superior glide performance.
Apply Professional-Grade Lubrication to Reduce Friction
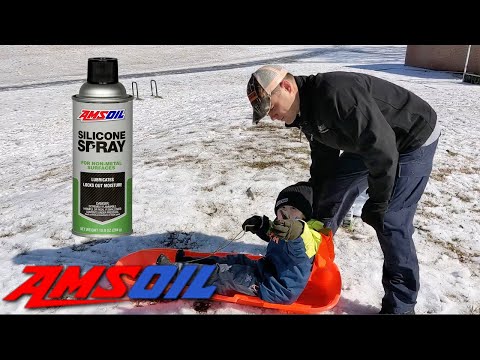
The single most effective modification you can make to any ice fishing sled is proper lubrication of the contact surfaces—this simple step can cut pulling resistance by up to 40%.
Silicone Spray: The Quick Fix for Icy Conditions
Before heading out, thoroughly clean your sled’s bottom surface with a dry cloth to remove any dirt or ice crystals. Then apply a generous coat of silicone-based lubricant (not WD-40, which attracts dirt) along the entire contact surface. Focus extra attention on the front edge where initial resistance occurs. Reapply every few hours when conditions change, especially when transitioning from smooth ice to snow-covered areas. This creates a temporary hydrophobic barrier that allows the sled to glide rather than stick.
Waxing Technique for Maximum Glide Performance
For serious ice anglers making multiple trips, waxing provides longer-lasting results than spray lubricants. Start with a base wax suitable for current temperature conditions (colder temps require harder waxes). Using a waxing iron, melt the wax onto the sled bottom in thin, even layers—don’t overapply. Allow it to cool completely, then scrape off excess with a plastic scraper and finish with a nylon brush. This process fills microscopic imperfections in the sled surface, creating a smoother glide path. Re-wax your sled at the end of each season for optimal performance the following winter.
Install an Ergonomic Harness System for Efficient Power Transfer
Your pulling technique makes or breaks your energy conservation strategy—using the wrong method wastes up to 60% of your pulling power.
Why Rope Pulling Damages Your Body and Wastes Energy
Standard rope setups force you to hunch over and pull with your upper body, engaging weaker muscles while straining your back. The constant tugging motion creates inefficient power transfer and leads to rapid fatigue. On uneven ice, rope setups cause dangerous jerking motions that can throw you off balance.
Waist Harness: The Game-Changing Upgrade
Invest in a padded waist harness designed specifically for sled pulling—it should sit securely on your hips, not your waist. Properly fitted, it transfers pulling force to your strongest muscle groups (glutes, quads, and core) rather than your back and shoulders. Look for models with quick-release buckles and reflective elements for safety. When properly adjusted, you should be able to maintain an upright posture with a slight forward lean, allowing powerful leg drive with each step.
Rigid Pole Connection for Smooth, Controlled Pulling
Replace rope connections with rigid poles or a gangline system that maintains consistent tension between you and the sled. This prevents the sled from bumping into your heels on downhill sections and allows you to apply steady forward pressure. The poles should be adjustable to your height and connect to your harness with swivel attachments that prevent twisting. This setup mimics professional dog sled configurations, providing maximum control and efficiency.
Optimize Weight Distribution for Minimal Drag

How you load your sled determines whether it glides or plows through the snow—improper loading can increase pulling effort by 30% or more.
Position Heavy Gear Over the Front Axle Line
Place your heaviest items (shelter, ice auger, battery) directly over or slightly ahead of the front axle line. This prevents the sled nose from lifting and creating drag. The front should carry about 60% of the total weight to maintain optimal tracking. Avoid loading heavy items toward the rear, which causes the front to lift and dig into snow.
Balance Side-to-Side for Straight-Line Pulling
An imbalanced load forces you to constantly correct direction, wasting energy with every adjustment. Use a simple test before heading out: lift the sled by the handle and see if it tilts to one side. Adjust gear placement until the sled hangs level. Pay special attention to asymmetrical items like battery-powered shelters that might have uneven weight distribution.
Master Ice-Specific Pulling Techniques
Your physical approach to pulling makes a dramatic difference in energy expenditure across long distances.
Follow Existing Trails to Avoid Breaking New Path
Breaking trail through fresh snow requires up to five times more energy than following packed paths. When multiple anglers are on the ice, stick to established routes even if they take slightly longer. On solo trips, consider making your outbound journey along a slightly different path than your return, creating your own packed trail for the trip back.
Maintain a Consistent, Rhythmic Pulling Pace
Start with short, powerful strides to get the sled moving, then settle into a smooth, consistent pace. Jerky movements waste energy through repeated acceleration and deceleration. Find a rhythm that matches your natural gait—most efficient pullers take 2-3 steps per second with steady pressure on the poles. On uphill sections, shorten your stride and increase step frequency while maintaining consistent pressure.
Install UHMW Runners for Permanent Friction Reduction
For anglers who fish regularly, upgrading your sled’s contact points provides lasting benefits with minimal maintenance.
DIY UHMW Runner Installation Process
High-density polyethylene (UHMW) runners dramatically reduce friction on all ice conditions. Measure and cut UHMW strips to fit along the entire bottom edge of your sled, focusing on high-wear areas. Drill pilot holes and secure with stainless steel screws and fender washers to prevent pull-through. The runners should extend slightly beyond the sled edges to prevent snow buildup along the sides. This modification pays for itself in saved energy after just a few trips.
Smitty Sled Conversion for Deep Snow Conditions
For areas with frequent snow cover, convert your sled into a “Smitty Sled” by mounting it atop cross-country skis. Remove ski bindings, position your sled centered on the skis, and secure with heavy-duty brackets. The long, narrow ski bases distribute weight efficiently, preventing your sled from sinking into powder snow. This setup works surprisingly well even on bare ice, providing significantly smoother travel than standard sleds.
Final Energy-Saving Tips Before You Hit the Ice
Implement these last-minute checks to ensure optimal pulling performance on your next trip.
Pre-Departure Sled Inspection Checklist
Before leaving shore, verify these critical points: runners are properly lubricated, harness connections are secure and swiveling freely, weight is balanced side-to-side, and all gear is tightly secured. Give your sled a test pull on level ice to identify any handling issues before committing to a long trek.
Temperature-Specific Adjustments
Cold temperatures require different approaches—below 0°F, use harder waxes and check for ice buildup more frequently; above 20°F, focus on silicone lubricants that won’t melt off. As conditions change throughout the day, be prepared to reapply lubricants or adjust your harness tension.
By implementing these targeted modifications and techniques, you’ll transform your ice fishing experience from a physical ordeal into a smooth, efficient operation. Remember that the most immediate improvements come from proper lubrication, ergonomic pulling equipment, and smart weight distribution—start with these three areas for the quickest energy savings. When your sled glides effortlessly across the ice, you’ll arrive at your fishing spot with energy to spare for setting up your gear and focusing on what really matters: putting fish in the bucket. The next time you see fellow anglers struggling with their sleds, you’ll be the one gliding past with a smooth, efficient stride, ready to enjoy the ice fishing adventure you’ve been planning.


