
When summer temperatures climb into the 90s, your backyard pool can transform from a refreshing oasis into an uncomfortably warm bath. Nothing ruins a perfect swimming day faster than stepping into water that feels more like a hot tub than a cool escape. If you’re searching for how to make pool water cooler without spending thousands on commercial equipment, you’re in the right place. This guide reveals proven DIY methods to drop your pool temperature by 5-10 degrees using simple evaporative cooling techniques that work with your existing pool equipment.
Most pool owners don’t realize that cooling your water isn’t just about comfort—it directly impacts chemical efficiency, equipment longevity, and even extends your swimming season. The good news? You don’t need expensive chillers to achieve significant temperature reductions. By harnessing the natural science of evaporation—the same process that cools your skin when you sweat—you can create a refreshing swimming environment that keeps your family happy all summer long.
Essential Pre-Checks Before Cooling Your Pool Water
Before you start modifying your pool’s temperature, complete these critical checks to ensure your system is ready for cooling operations. Skipping these steps could lead to equipment damage or ineffective cooling.
Verify Your Pool Chemistry Is Perfectly Balanced
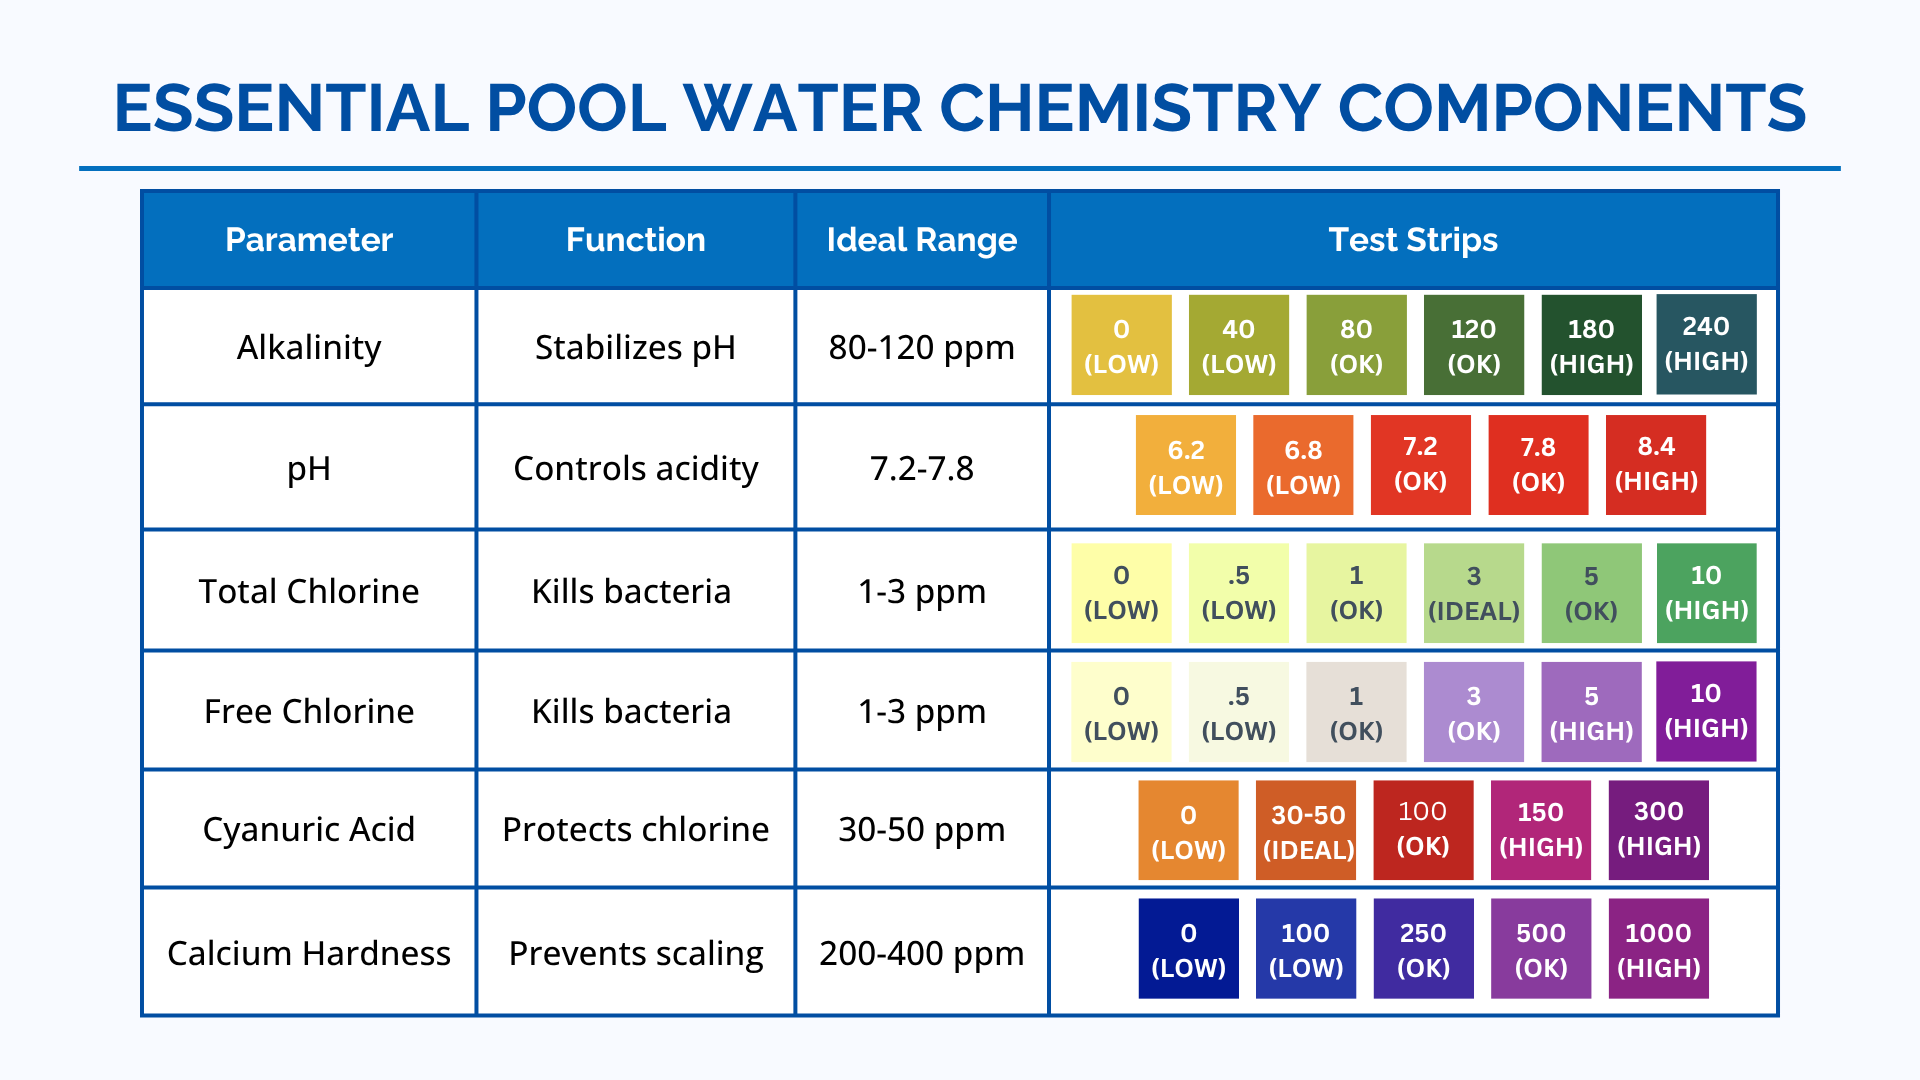
Starting with balanced water chemistry prevents cascading problems when you introduce cooling systems that dramatically increase aeration. Test your pH, alkalinity, and sanitizer levels before beginning any cooling process. Target a pH of 7.4-7.6 and alkalinity of 80-120 ppm—these ranges provide crucial buffer against the pH spikes that inevitably occur during evaporative cooling. If your water isn’t crystal clear and chemically stable, address those issues first. Aeration from cooling systems will amplify any existing chemical imbalances, potentially causing scaling or ineffective sanitation.
Confirm Water Level Is at the Perfect Mid-Skimmer Position
Your pool’s water level directly impacts cooling system efficiency and equipment safety. The ideal level sits at the midpoint of your skimmer’s opening—this ensures proper water flow while protecting your pump from running dry during extended cooling sessions. Too low, and your pump could lose prime; too high, and water might overflow during vigorous spraying. Check your level before starting and adjust as needed by either adding water or performing a partial backwash. This small step prevents major headaches later when your cooling system is running overnight.
Inspect and Clean Your Filtration System Thoroughly
A clean filter is non-negotiable for effective pool cooling. Any restriction in water flow dramatically reduces your cooling system’s efficiency. Backwash sand filters until the sight glass runs clear, rinse cartridge filters with a garden hose, or recharge DE filters with fresh powder. Check your system’s clean pressure baseline—anything more than 5-10 PSI above this indicates it’s time for maintenance. Remember: maximum water flow equals maximum cooling potential, so don’t skip this critical step before starting your cooling process.
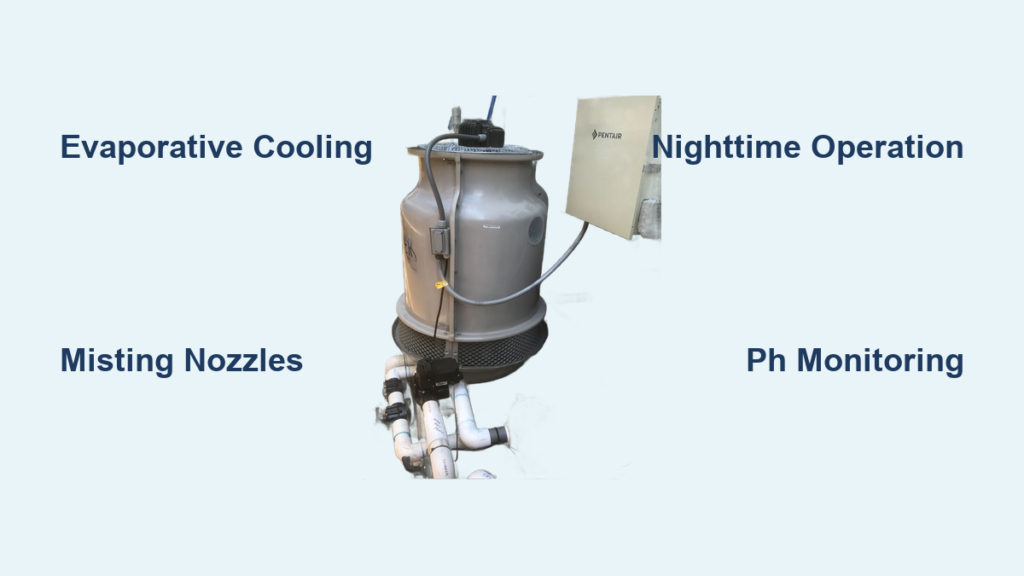
Build Your DIY Evaporative Cooling System That Actually Works
The most effective method for how to make pool water cooler is evaporative cooling, which transforms your pool’s existing circulation into a powerful temperature-reduction tool.
How Evaporative Cooling Works for Pools
When water evaporates, it absorbs significant heat energy from the remaining liquid—a process called phase change energy transfer. By spraying your pool water into a fine mist, you dramatically increase its surface area (up to 10x more per gallon), accelerating evaporation and heat removal. A standard pool return creates minimal surface area, but converting that flow into a fine spray turns each gallon into thousands of tiny droplets that cool rapidly before returning to the pool. This simple physics principle can drop your pool temperature by 5-10°F overnight when implemented correctly.
The Right Components for Maximum Cooling Effect
Skip standard fire hose nozzles—they create large droplets that don’t evaporate efficiently. Instead, invest in:
– A 1 HP submersible utility pump (adequate for pools up to 25,000 gallons)
– 1.5-inch flexible PVC hose for water transport
– Specialized misting nozzles with hundreds of tiny holes (like the Melnor RelaxGrip with 1,004 holes)
– PVC reducers and adapters for proper connection
– A sturdy tripod or modified ladder to elevate your spray 6-8 feet above water
The nozzle makes all the difference—more holes creating finer mist equals faster cooling. Avoid cheap nozzles with just a few large openings; they waste energy and provide minimal temperature reduction.
Step-by-Step Cooling System Assembly
- Place your submersible pump in the deep end, away from the main drain
- Connect the pump outlet to your 1.5-inch hose using appropriate fittings
- At the hose end, attach a 1.5″ to 3/4″ reducer, then a 6-8 foot vertical pipe
- Top the pipe with a 3/4″ to 1/2″ adapter and your specialized misting nozzle
- Secure the entire assembly to a stable base (a bucket filled with sand works perfectly)
- Prime the pump by filling its housing with water before powering on
Critical tip: Position your spray rig 18-24 inches from the pool edge to prevent water loss while maximizing coverage over the water surface. Test your system before full operation to ensure optimal spray pattern and coverage.
When and How Long to Run Your Pool Cooling System
Nighttime Operation for Maximum Temperature Drop
Run your cooling system from 8 PM to 8 AM for the best results. Nighttime provides three critical advantages: cooler air temperatures, lower humidity (especially in the early morning hours), and no direct sunlight heating your water. Start your system when ambient temperature drops below your pool temperature—this temperature differential drives efficient evaporation. For a typical 15,000-20,000 gallon pool, expect a 3-5°F reduction after 6-8 hours of operation. Check your temperature every 2 hours during initial runs to establish your system’s cooling rate.
Weather Conditions That Make or Break Your Cooling Efforts
Don’t waste energy running your system when conditions won’t support effective cooling. Avoid operation when: humidity exceeds 70%, winds are stronger than 15 MPH, or rain is forecast. In high-humidity regions like Florida, focus your efforts between 2-6 AM when humidity naturally dips. In arid climates like Arizona, you might achieve 8-12°F drops even during daytime operation when humidity stays below 40%. Always check the wet-bulb temperature—if it’s not at least 15°F below the dry-bulb temperature, your cooling efforts will be minimal.
Manage Water Chemistry Changes During Cooling
Why pH Skyrockets When You Cool Your Pool
Evaporative cooling is essentially massive-scale aeration, which causes pH to rise 0.3-0.5 units daily. The chemical reaction is unavoidable: as CO₂ escapes during spraying, your water becomes more alkaline. Test pH every 48 hours during cooling operations and be prepared to add muriatic acid more frequently—typically 1-2 quarts per 10,000 gallons weekly. Monitor total alkalinity closely too, as repeated acid additions will eventually lower it, requiring adjustment to maintain proper buffering capacity.
Daily Water Level Monitoring and Adjustments
Expect 0.5-1.5 inches of water loss overnight with active cooling—this means checking and topping off your pool daily. Install an automatic fill valve to maintain proper water levels, especially if you’ll run your system consistently. Remember that frequent water replacement dilutes your chemical levels, so test sanitizer (chlorine/bromine) more often. Saltwater pool owners should watch for accelerated scaling on salt cells due to increased aeration—schedule more frequent cleanings during cooling season.
Advanced Tips for Better Cooling Results
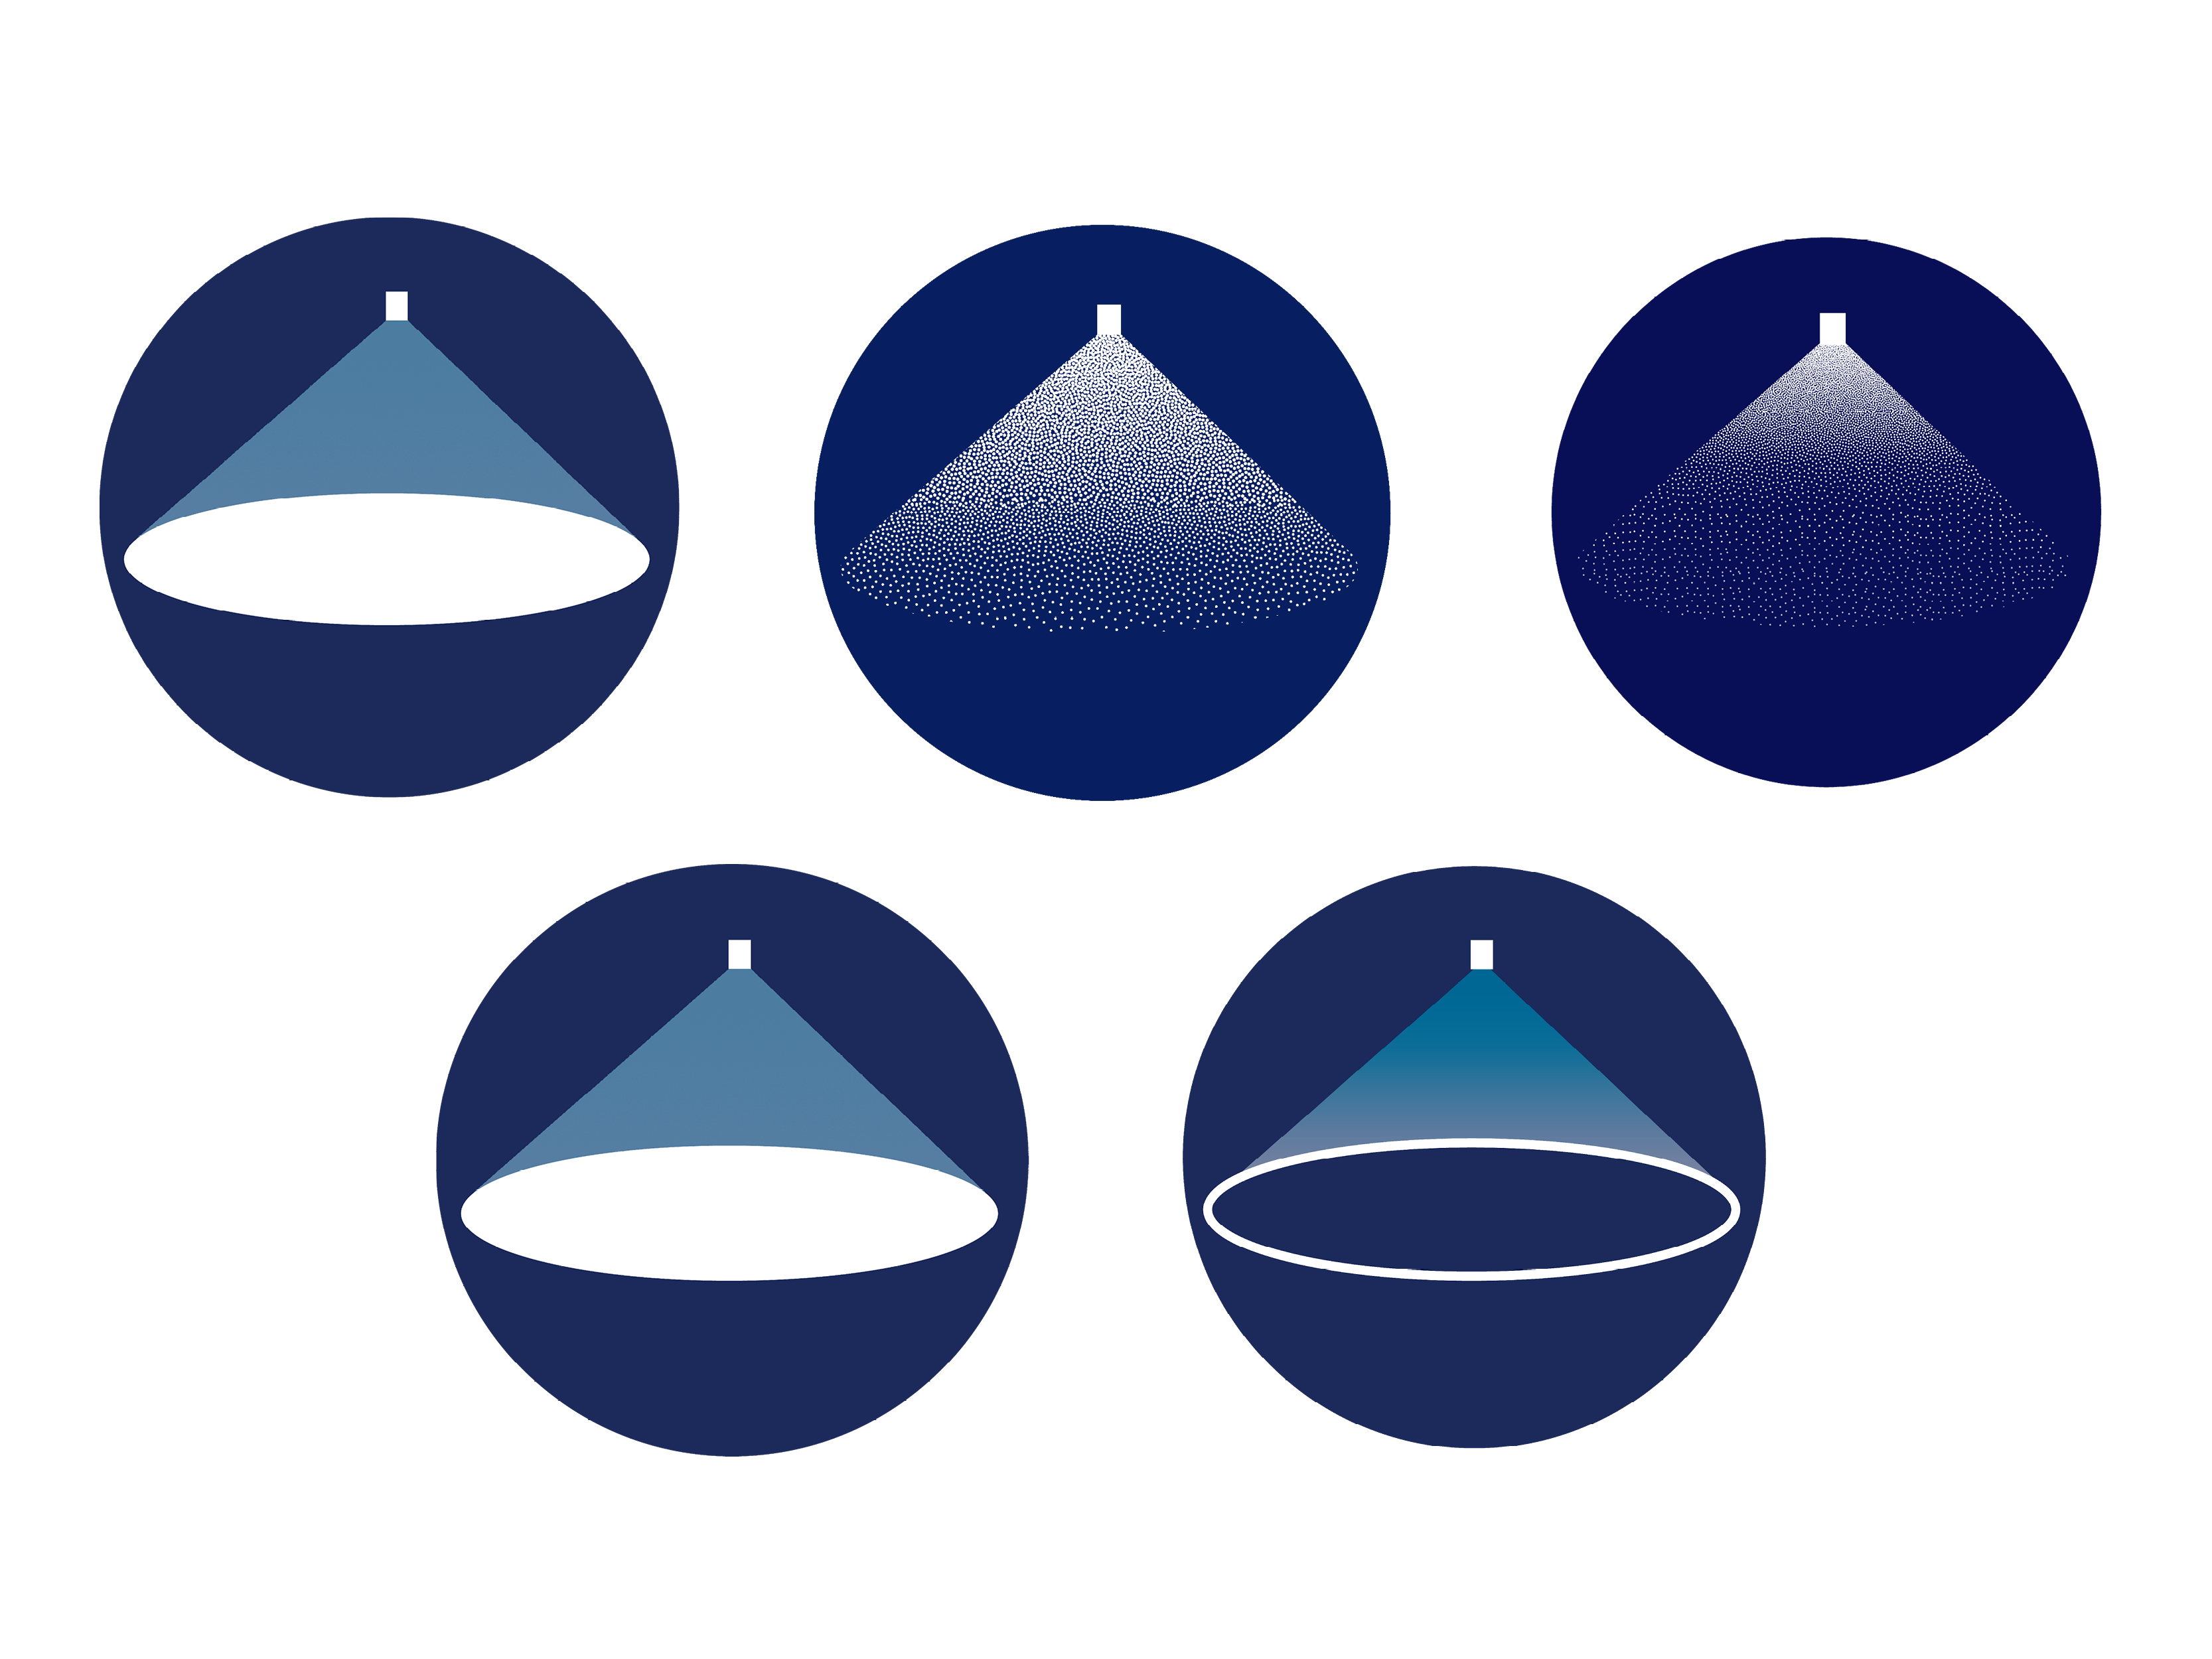
Nozzle Selection Secrets for Maximum Evaporation
Fine mist equals faster cooling—period. Upgrade from basic showerheads to specialized misting nozzles with hundreds of tiny holes. A nozzle with 1,004 holes (like recommended models) creates dramatically more surface area than one with just 50 large openings. For larger pools, consider multiple nozzles spaced 4-6 feet apart to ensure even coverage. Angle your nozzles at 30-45 degrees for optimal droplet dispersion, and maintain water pressure between 30-45 PSI for the finest mist possible.
Regional Climate Adjustments for Optimal Cooling
In humid climates (Houston, Florida): Operate only during the coolest, driest hours (2-6 AM) and combine with shade sails for maximum effect—expect 3-6°F cooling. In arid regions (Arizona, Nevada): You can achieve 10°F+ drops even during daytime when humidity stays below 30%. In temperate zones: Focus on spring and fall when humidity naturally dips, running systems 6-10 hours for 5-8°F reductions. Tailoring your approach to local conditions makes the difference between modest results and dramatic temperature drops.
Troubleshooting Common Pool Cooling Problems
High pH Despite Regular Adjustments
If your pH consistently climbs above 8.0 despite acid additions, you’re likely facing the accelerated aeration effect of your cooling system. Solution: Increase acid frequency rather than quantity—add smaller amounts more often. Consider installing a CO₂ injection system for more stable pH control during extended cooling periods. Alternatively, reduce your cooling system’s runtime if pH becomes unmanageable, focusing on the absolute coolest hours of the night.
Clogged Nozzles Slowing Your System
Hard water minerals quickly accumulate in fine misting nozzles. Prevent clogs by installing an inline filter before your nozzle and soaking nozzles in vinegar solution monthly. For severe clogs, disassemble and soak overnight in a 50/50 vinegar-water solution. Always check spray patterns during operation—uneven or reduced flow indicates nozzle blockage requiring immediate attention.
By implementing these targeted strategies for how to make pool water cooler, you’ll transform your tepid pool into a refreshing summer sanctuary without the $3,000+ price tag of commercial chillers. Properly maintained, your DIY system can deliver 5-10°F temperature reductions nightly while costing less than $2 per day to operate. The key is understanding your local climate conditions, selecting the right components, and staying vigilant about water chemistry changes. Now that your pool stays beautifully cool, you can focus on what really matters—enjoying those perfect summer swims.


