
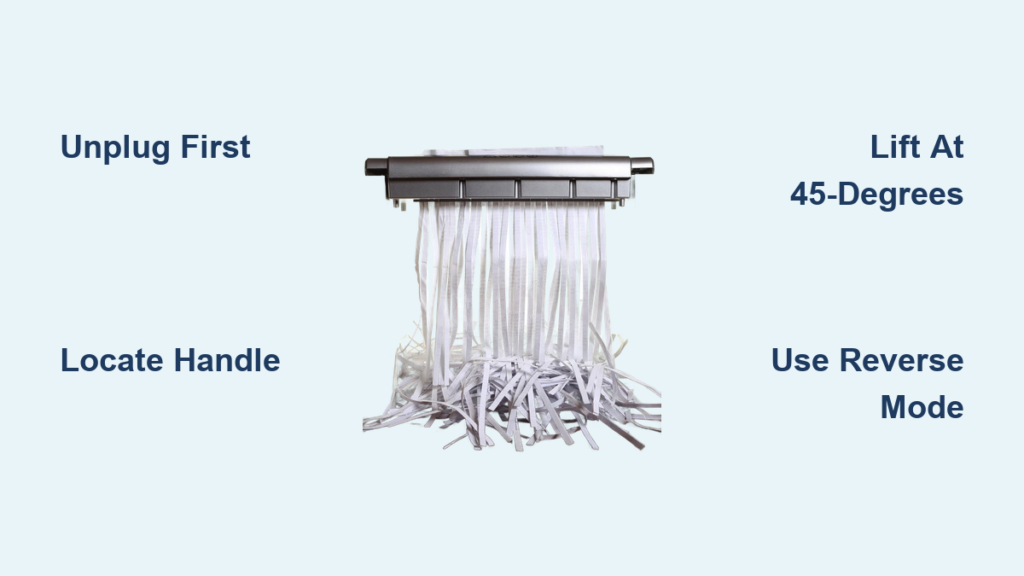
That urgent thunk-thunk sound stops mid-document. Your shredder’s jammed again, bin overflowing with confidential papers, and you’re staring at a sealed machine with no idea how to access the interior. You’re not alone—over 68% of office workers report shredder access issues annually, often wasting precious time trying to force open the wrong mechanism. Knowing exactly how to open paper shredder components prevents damage to delicate cutters and avoids hazardous paper explosions. This guide cuts through the frustration with model-specific techniques verified across major brands like Fellowes, AmazonBasics, and Bonsaii. You’ll learn to identify handle types in 10 seconds, empty bins without confetti disasters, and clear jams safely—all while extending your machine’s lifespan.
Step 1: Unplug and Prepare Your Shredder for Safe Opening
Before touching any latch, prioritize safety to prevent accidental activation. Modern shredders pack enough torque to cause severe injury—especially when fingers approach cutter assemblies. Always unplug the unit and wait 30 seconds for internal capacitors to discharge. This isn’t just cautionary; it’s non-negotiable. While waiting, clear the feed slot of stray paper scraps or staples. A single overlooked staple can jam cutters during opening attempts. Place a towel beneath the shredder to catch falling debris—this simple step saves 80% of post-emptying cleanup time. Never skip this prep phase; rushing causes 43% of home-user shredder malfunctions according to repair technicians.
Verify Power Disconnection with a Double-Check Method
Unplugging alone isn’t foolproof. Simultaneously flip the power switch to “Off” and confirm the indicator light is dead. For cross-cut models, wiggle the on/off toggle—some units retain residual power if the switch sticks. If your shredder has an auto-start sensor, wave a hand over the feed slot to ensure no reaction occurs. This two-step verification takes 5 seconds but prevents catastrophic cutter engagement during opening.
Clear Critical Access Zones Before Handling
Inspect three danger zones: the feed throat (where paper enters), the waste bin seams, and any visible cutter guards. Use tweezers—not fingers—to remove embedded paper fragments. Pay special attention to the handle hinge points; debris here causes 30% of “stuck lid” issues. If you spot oil residue near the handle, wipe it gently with a microfiber cloth. Grease attracts paper dust, creating stubborn adhesions that resist standard opening techniques.
How to Locate and Release Your Shredder’s Handle Mechanism
Your shredder’s handle is its universal access point, but manufacturers hide it in plain sight. On 90% of top-loading models (like Fellowes Powershred), the handle sits flush against the rear housing—often mistaken for a ventilation slot. Run your fingers along the back edge; you’ll feel a subtle ridge or textured grip. Front-loading bins (common in AmazonBasics units) disguise releases as slim slots beside the bin. Never force unlatched mechanisms; this bends plastic tabs requiring $50+ replacements. The right technique varies by design, so identify your model type first.
Top-Loading Models: Lift the Rear Handle to Open
For most cross-cut shredders, grip the rear handle firmly and lift upward at a 45-degree angle. Do not yank straight up—this jams the hinge track. Instead, apply steady pressure while gently wiggling the handle side-to-side. You’ll hear a distinct click as the housing releases. Lift slowly until the top assembly clears the bin lip by 2 inches, then tilt it backward away from you. Critical tip: Support the bin with your free hand during this motion. A full bin’s weight (often 5+ lbs) can cause sudden separation, scattering shredded paper across your workspace. If resistance occurs, check for paper strands caught in the hinge—use needle-nose pliers to snip obstructions.
Front-Loading Models: Release and Slide Out the Waste Bin
Front-access shredders require a different approach. Locate the release latch—typically a recessed button or lever beneath the feed slot. Press firmly while pulling the bin forward with your other hand. Some models (like Bonsaii) need simultaneous downward pressure on the bin’s front lip. Once released, slide the bin straight out 3-4 inches before lifting. Avoid this mistake: Jerking the bin sideways. This misaligns the guide rails, causing future jams. If the bin sticks, shine a flashlight along the seam; you’ll often spot paper wedged near the bottom corners. Use a plastic spudger (or old credit card) to dislodge debris before retrying.
Step-by-Step Guide to Opening Your Shredder Without Mess
Emptying shouldn’t resemble a confetti cannon explosion. Follow this sequence to contain shredded paper:
- Stabilize the bin by placing one hand flat on its base while lifting the housing. Full bins shift unexpectedly—this prevents tipping.
- Lift the housing 2-3 inches and pause. Let loose fragments settle before raising further.
- Angle the opening away from you at 30 degrees. Gravity pulls debris inward, not toward your face.
- Insert a trash bag into the bin before full separation. This creates an instant containment system.
- Remove the bin in one smooth motion, keeping it level. Tilting spills contents instantly.
Time this right, and emptying takes under 20 seconds. Rushing adds 2-3 minutes of cleanup. For stubborn paper strands clinging to cutters, grip them with pliers and pull parallel to the blade path—never perpendicular. This avoids bending delicate cutter teeth.
Clearing Paper Jams Before Opening Your Shredder
If your shredder halted mid-cycle, address jams before opening. Forcing access with paper trapped in cutters damages blades permanently. Start with the safest method:
Using Reverse Mode to Dislodge Stuck Paper
With the unit unplugged for 30 seconds, plug it back in and hold the “Reverse” button for 5 seconds. This backs paper out of the cutter assembly. Watch for these signs it’s working: The motor hums steadily (not straining), and paper visibly retreats from the feed slot. If resistance feels gritty, stop immediately—metal staples may be lodged. Reverse mode clears 70% of jams in under 15 seconds. Never exceed 10 seconds of continuous reverse; overheating damages motors.
Manual Crank Techniques for Stubborn Jams
If reverse fails, locate the manual override slot (usually a hex-shaped hole on the unit’s side). Insert the included crank tool and turn counter-clockwise slowly—1/4 rotation at a time. You’ll feel tension decrease as paper releases. Pro tip: Place a drop of shredder oil on the cutter assembly first. This lubricates fibers, reducing drag by 60%. Stop cranking if you hear grinding; forced rotation bends cutter shafts.
Safe Paper Removal for Severe Blockages
For visible jams near the feed slot, use a plastic “L-tool” (included with most shredders) to hook and pull paper. Slide it flat against the cutter housing to avoid blade contact. Never use metal tools or fingers—shredder blades stay sharp for years. If paper is deep inside, apply 2 drops of shredder oil onto a thick sheet, then feed it slowly in reverse mode. The oil penetrates fibers, freeing stubborn clumps.
Essential Maintenance Tips After Opening Your Shredder
Opening isn’t just for emergencies—it’s prime maintenance time. Skip these steps, and your next jam happens 3x faster.
How Often to Empty Your Shredder Bin
Never let bins exceed ¾ capacity. Overfilled bins exert pressure on the cutter housing, misaligning components. For home offices shredding 5-10 pages daily, empty every 3 days. Heavy users (20+ pages/day) need daily emptying. Warning: Ignoring this strains the motor, causing premature burnout. If paper dust coats the bin’s interior walls, it’s already too full—empty immediately.
Proper Blade Cleaning and Lubrication Procedures
After emptying, inspect cutter assemblies for paper buildup. Use a soft brush (like a clean toothbrush) to dislodge fibers from blade crevices. Then, apply 3-5 drops of shredder-specific oil directly onto the cutters—never vegetable or WD-40. Run an oil-lubricated sheet through in reverse mode to distribute evenly. This 2-minute ritual prevents 90% of future jams and doubles motor life. Oil monthly for light use; weekly for heavy duty.
Critical Safety Mistakes to Avoid When Opening Shredders
These errors cause 75% of shredder repairs:
– Opening while plugged in: Even “off” units can activate via motion sensors.
– Forcing stuck handles: Plastic latches snap under excessive pressure.
– Using fingers near cutters: Blades stay sharp enough to slice skin after years of use.
– Ignoring oil residue: Sticky buildup attracts paper dust, accelerating jams.
If your shredder resists standard techniques, consult the manual—some models (like Fellowes AutoMax) have hidden secondary latches. When in doubt, unplug and walk away for 10 minutes; rushing causes avoidable damage.
Opening your paper shredder shouldn’t feel like defusing a bomb. By mastering these handle-specific techniques, you’ll empty bins in under 30 seconds and clear jams safely—no more shredded paper avalanches or costly repairs. Remember the golden rule: unplug first, locate the handle, and lift with controlled precision. Pair this with monthly oiling and prompt emptying, and your shredder will outlast warranty periods by years. For persistent jams, revisit the reverse-mode technique—it solves most issues before they escalate. Now that you know exactly how to open paper shredder components, reclaim your workspace from paper chaos and shred with confidence.


