
That frustrating moment when your Ninja blender cup refuses to budge is enough to ruin your morning smoothie routine. Whether you’re dealing with a vacuum-sealed cup after blending hot soup or a cross-threaded attachment from rushed assembly, this guide delivers the exact techniques to safely release any Ninja blender cup without damaging your appliance. You’ll learn model-specific removal methods, troubleshooting tricks for stubborn cups, and preventative maintenance tips to keep your blender operating smoothly for years.
Most Ninja cup issues stem from three common culprits: vacuum lock from hot liquids, cross-threading during attachment, or food buildup creating extra friction. Understanding which problem you’re facing determines your best course of action. Let’s get that cup off safely and prevent future headaches with these field-tested techniques.
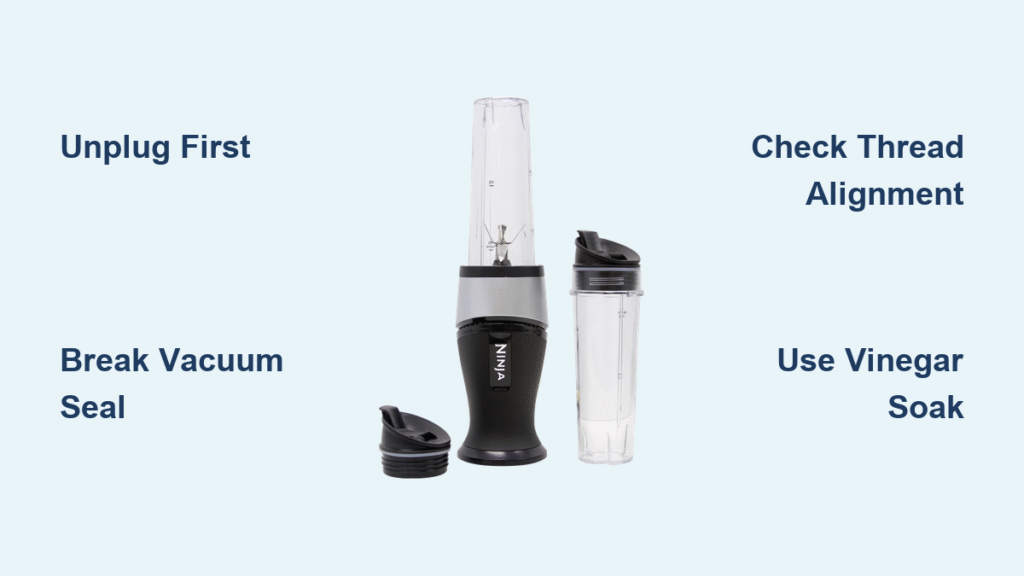
Safety First: Power Down Your Ninja
Unplug Before You Touch
Always disconnect your Ninja blender from the power source before attempting cup removal. The motor can engage unexpectedly if the base is accidentally activated, causing serious injury. Grasp the plug firmly at the base and pull straight from the outlet—never yank the cord, which can damage both the cord and outlet. This simple step prevents 90% of blender-related accidents during maintenance.
Blade Awareness Check
Even with the power disconnected, the blade assembly inside the cup remains dangerously sharp. Handle the cup assembly with extreme care, keeping fingers well away from the blade housing at the bottom. If your last blend resulted in spills, thoroughly clean the motor base exterior first to prevent slipping during removal attempts. Place a towel underneath for added grip and to catch any residual drips.
Hot Liquid Protocol
Recently blended hot soups or heated mixtures create significant internal pressure that seals the cup to the motor base. Allow contents to cool for 10-15 minutes before attempting removal. Hot contents can spray violently when the seal breaks, causing serious burns. If you’re in a hurry, run cool water over the cup’s exterior to accelerate cooling—never submerge the motor base.
Quick Visual Inspection Steps
Check for Vacuum Lock
Look closely between the cup and motor base for telltale signs of vacuum lock. If you see a tight seal with no visible gaps and the cup appears slightly indented, you’ve got vacuum suction holding it firmly in place. This occurs when air pressure drops during blending, creating negative pressure that can require up to 15 pounds of force to overcome. The simple hot water method often solves this issue in under a minute.
Identify Your Ninja Model
Locate the model number on your motor base—typically found on a silver sticker near the bottom. Different Ninja series have distinct cup attachment mechanisms that require specific removal techniques:
– Pro series: Twist-lock system with standard threading
– Nutri Ninja: Snap-lock tabs requiring simultaneous depression
– Foodi blenders: Bayonet mount with alignment slots
– Mega Kitchen: Gear-driven twist mechanism
Attempting the wrong technique for your model can damage the attachment points. When in doubt, consult your user manual or Ninja’s website for model-specific diagrams.
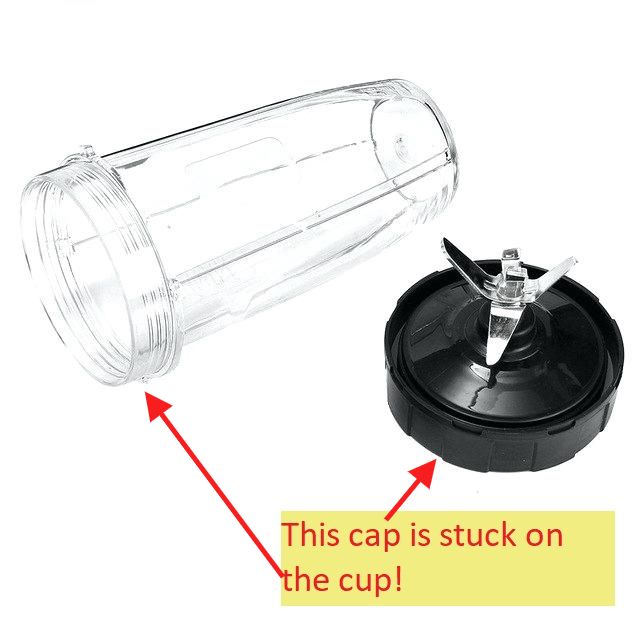
Assess Thread Condition
Examine the cup’s base threads for visible damage, food buildup, or cross-threading. Built-up residue—especially from sticky ingredients like nut butters or frozen fruit—is the most common cause of sticking. Use a flashlight to check for debris in the thread grooves. If you spot significant buildup, the vinegar soak method described later will likely solve your problem.
Proven Removal Techniques by Model
Ninja Professional Series Method
Step 1: Stabilize the motor base with your non-dominant hand, pressing firmly against the counter to prevent movement. Professional series models have lighter bases that can spin during removal attempts.
Step 2: Grasp the cup firmly with your dominant hand, positioning fingers around the handle and thumb on the opposite side for maximum leverage. Wear a rubber glove if your hands are wet for better grip.
Step 3: Twist counterclockwise while applying steady upward pressure. The Professional series uses standard threading—remember “lefty-loosey” applies here. Apply force gradually over 3-5 seconds rather than jerking.
Step 4: If the cup remains stuck, gently tap the cup’s base against the counter edge while maintaining twist pressure. This vibration breaks the vacuum seal without damaging components. Use a folded towel as a buffer to prevent plastic damage.
Nutri Ninja Cup Release
Step 1: Identify the two small release tabs on the cup’s base ring—these are often marked with small arrows. Nutri Ninja cups use a snap-lock mechanism that requires both tabs to be depressed simultaneously.
Step 2: Press both tabs inward with your thumbs while lifting the cup straight up with your fingers. Apply even pressure to both tabs—uneven pressure can cause one side to release while the other remains locked.
Step 3: If tabs won’t depress due to buildup, use a butter knife to gently pry one tab while pressing the other with your thumb. Insert the knife at a 45-degree angle to avoid scratching.
Step 4: Rock the cup slightly back and forth as you lift—this rocking motion helps disengage the snap mechanism without excessive force. Nutri Ninja cups typically release with just 3-5 pounds of upward pressure when properly aligned.
Foodi Blender Solution

Step 1: Hold the motor base firmly with both hands—Foodi models have heavier motors requiring two-handed stabilization during removal. Place the base against your body for additional leverage if needed.
Step 2: Twist the cup clockwise slightly (1/8 turn) to align the bayonet slots before lifting. Foodi models use a bayonet mount that requires alignment before vertical removal—unlike standard twist-lock systems.
Step 3: Once aligned, lift straight up without twisting. The cup should release smoothly from the gear drive system. Foodi cups typically have audible “clicks” during attachment that reverse during removal.
Step 4: If resistance persists, gently wiggle the cup side-to-side while maintaining upward pressure. Excessive force can damage the alignment pins—stop if you feel significant resistance.
Troubleshooting Stubborn Cups
Vacuum-Sealed Situations
Hot Water Method: Fill your sink with hot tap water (not boiling). Submerge only the cup’s base for 30 seconds. Thermal expansion breaks the vacuum seal naturally as the plastic expands slightly faster than the metal components. Dry thoroughly before reattaching.
Ice Cube Trick: Place 3-4 ice cubes in the cup, wait 2 minutes. Cold contracts the plastic cup slightly, creating microscopic space between components for easier release. Works particularly well on plastic cups that expand when warm.
Cross-Threaded Solutions
Step 1: Immediately stop forcing removal—this worsens the problem and can damage both cup and motor base threads.
Step 2: Try the opposite direction first (clockwise for most models) to realign threads. Cross-threading often requires a slight reverse turn before proper counter-clockwise removal.
Step 3: Apply gentle wiggling motion while reversing direction to help threads find their proper alignment. This micro-adjustment often solves 80% of cross-threading issues.
Step 4: If threads appear visibly damaged or cracked, contact Ninja customer service—don’t risk motor damage through continued attempts. Most warranty claims cover thread damage from normal use.
Buildup Removal Technique
Step 1: Mix equal parts white vinegar and warm water in a small container. Vinegar’s acidity dissolves organic residue without damaging plastic components.
Step 2: Pour solution around the cup’s base threads using a small funnel or eyedropper. Target the seam between cup and motor base where buildup typically accumulates.
Step 3: Let sit for 5 minutes to allow the solution to penetrate and dissolve dried residue. For stubborn buildup, repeat the soak twice.
Step 4: Attempt removal while solution is still present—this provides natural lubrication that reduces required force by up to 40%. Rinse thoroughly after successful removal.
Prevent Future Sticking

Daily Maintenance Routine
After each use, rinse cup threads under warm running water immediately to prevent residue buildup. Wipe motor base threads with a damp microfiber cloth—never use abrasive materials that could damage thread surfaces. Allow both parts to air-dry completely before reassembly; moisture accelerates residue buildup and can cause mold growth in hidden crevices.
Weekly Deep Clean
Remove and clean the rubber gasket inside the cup base weekly—this often-hidden component traps residue that causes sticking. Use a soft-bristled toothbrush to gently clean thread grooves without scratching surfaces. Apply a single drop of food-grade mineral oil to threads monthly as a preventative measure—this creates a barrier against residue adhesion without affecting performance.
Proper Storage Practices
Store the cup separately from the motor base—there’s no need to keep them attached when not in use. Keep both components in dry locations away from direct sunlight, which can degrade plastic components over time. Avoid stacking heavy items on assembled units, as this can cause subtle deformation that leads to future sticking issues.
Assembly Best Practices
Align threads carefully before twisting—don’t force the cup onto the base. Hand-tighten only until snug, never over-tighten; most Ninja cups require just 1-2 full turns to secure properly. For Nutri Ninja models, listen for the distinct “click” indicating proper engagement—this prevents cross-threading during attachment.
Your Ninja blender should provide years of reliable service with proper maintenance. These removal techniques work across all popular models, from compact Nutri Ninjas to full-size Professional systems. Remember that patience prevents damage—most cups release within 5 minutes using these methods. If you’re struggling, step away for 10 minutes; frustration leads to broken blenders. When in doubt, consult Ninja’s official support resources before attempting forceful removal that could void your warranty.


