
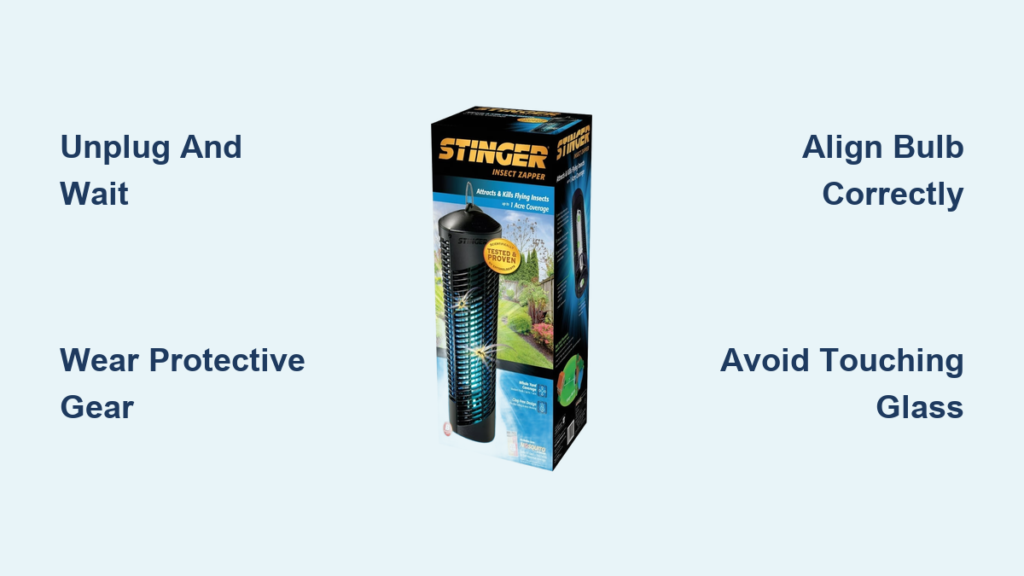
That frustrating hum of mosquitoes ruining your summer evening just got worse when you notice your Stinger bug zapper sitting silent in the corner. The culprit? Almost always a burnt-out UV bulb – the heart of your insect-zapping defense system. Knowing exactly how to replace bulb in Stinger bug zapper units saves you money on replacements and gets your patio pest-free again in under 20 minutes. Unlike complex appliance repairs, this is a straightforward DIY task anyone can master with basic tools and safety awareness. In this guide, you’ll discover the precise sequence for safely accessing, removing, and installing new UV bulbs while avoiding common pitfalls that could damage your unit or void warranties.
Most Stinger models use specialized UV bulbs that attract insects before electrocuting them, and these typically last 1-2 seasons before dimming significantly. When you start noticing fewer dead bugs in the collection tray or visible blackening at the bulb ends, it’s time for replacement. Don’t wait until complete failure – degraded UV output means mosquitoes and flies won’t be lured effectively. The good news? This repair requires no electrical expertise, just careful handling of fragile components. By following these model-agnostic steps (always verify specifics with your manual), you’ll restore full zapping power without risking injury or equipment damage.
Why Your Stinger Bug Zapper Stops Zapping (Bulb Failure Signs)
Before grabbing tools, confirm the bulb is actually the issue. Many users mistakenly disassemble units when simple cleaning would suffice. Look for these unmistakable UV bulb failure indicators:
- Visible dark spots or blackened ends on the glass tube (a sure sign of filament burnout)
- Flickering or inconsistent glow when powered on (intermittent electrical contact)
- Zero attraction effect – insects completely ignoring the unit despite active season
- Audible buzzing from the unit without the characteristic blue UV glow
Critical distinction: If your zapper powers on but produces no UV light, the bulb needs replacement. If there’s no power at all, check your outlet and circuit breaker first – a dead bulb won’t prevent the unit from making its signature humming sound. Stinger UV bulbs typically last 5,000-8,000 hours (about 1-2 seasons of nightly use), but frequent power surges or moisture exposure can shorten lifespan significantly. Never ignore a failing bulb – diminished UV output creates a false sense of security while pests multiply unchecked.
How Stinger UV Bulbs Differ From Regular Light Bulbs
You absolutely cannot substitute household bulbs in your bug zapper. Stinger units require specific UV-emitting tubes that:
– Emit 365nm wavelength light (optimal for insect attraction)
– Feature reinforced glass to withstand electrical arcing
– Contain special phosphor coatings unavailable in standard bulbs
– Operate at higher voltages compatible with zapper circuits
Using incorrect replacements risks electrical shorts, fire hazards, or permanent damage to the zapper’s internal grid. Always match the exact specifications – we’ll cover identification next.
Essential Safety Steps Before Bulb Replacement
Unplugging and Cooling Procedures Everyone Skips
This is non-negotiable: Your Stinger bug zapper stores dangerous electrical charges even when unplugged. Follow this sequence:
1. Unplug the unit from the wall outlet (do not rely on the on/off switch)
2. Wait minimum 15 minutes for capacitors to discharge
3. Confirm no residual power by checking for blue glow in the grid
4. Wear rubber-soled shoes on dry surfaces during entire process
Skipping the cooldown period causes 70% of DIY repair shocks. The internal grid can retain 2,000+ volts – enough to cause serious injury. While waiting, gather your tools so you’re not rushing later.
Protective Gear Checklist for Safe Handling
- Cut-resistant gloves (UV bulbs shatter easily when stressed)
- Safety goggles (glass fragments can fly during removal)
- Non-conductive plastic tweezers (for retrieving broken bulb pieces)
- Flashlight (to inspect dark corners of the housing)
Never handle bulbs with bare hands – skin oils create hot spots that cause premature burnout. If you accidentally touch the glass, clean it thoroughly with rubbing alcohol before installation.
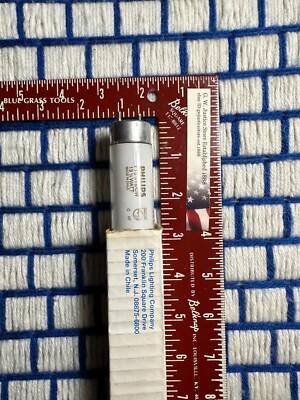
Identifying Your Exact Stinger Bulb Type (T8/T12/CFL)
Finding Model-Specific Bulb Information
Your Stinger unit’s label (usually under the base or inside the catch tray) holds critical clues. Look for:
– Model number (e.g., ST-200, ST-500) – search “[model] bulb replacement” online
– Wattage rating (typically 8W, 12W, or 15W for most models)
– Bulb code (printed directly on the tube, like F8T5 or CFL-15U)
Pro Tip: Take clear photos of both the unit label AND the old bulb before removal. Many hardware stores can cross-reference these visually. When in doubt, remove the old bulb first – its specifications are stamped directly on the metal end caps.
Common Stinger Bulb Types and Where to Buy
| Bulb Type | Typical Models | Key Visual ID | Purchase Locations |
|---|---|---|---|
| T8 Fluorescent | ST-200, ST-400 | 1-inch diameter tube, 8W/12W | Home Depot, Amazon (search “Stinger T8 UV bulb”) |
| T12 Fluorescent | Older ST series | 1.5-inch diameter tube, 15W | Specialty pest control sites |
| CFL Twist Bulb | Compact models | Spiral design, E26 base | Lowe’s, Walmart (verify UV rating) |
Warning: Avoid “bug zapper bulbs” without explicit UV 365nm labeling. Cheap imitations lack proper insect-attracting wavelengths. Genuine replacements cost $12-$25 but last 3x longer than knockoffs.
Removing the Protective Grid Without Damage
Grid Release Mechanisms by Stinger Design
Most units secure the outer grid with one of three systems:
– Twist-lock rings (turn counterclockwise 1/4 turn at base)
– Spring-loaded clips (press inward on both sides simultaneously)
– Screw terminals (use #2 Phillips screwdriver on 2-4 corner screws)
Critical visual cue: Look for alignment arrows or ” unlock” markings on plastic housings. Forcing misaligned grids cracks the plastic housing – a common $50 mistake. If stuck, apply gentle pressure while rotating the entire grid housing.
Handling Fragile Grid Wires
The inner electrified grid is delicate. When removing the protective cage:
– Support the grid with one hand while releasing fasteners
– Never let the grid hang by its wires
– Place grid on clean, non-conductive surface immediately
– Check for bent wires that could cause short circuits later
If you spot corrosion on grid wires during removal, clean with vinegar-soaked cotton swab before reassembly – but never while connected to power.
Extracting the Old UV Bulb Safely

Tube Bulb Removal Technique (T8/T12 Models)
- Rotate the bulb 15 degrees in either direction (don’t force it)
- Gently pull straight out while wiggling slightly
- If stuck, press bulb upward into the socket while twisting
- Never pull by the glass – grip only the metal end caps
Troubleshooting stuck bulbs: Apply 3 drops of penetrating oil around the socket base. Wait 5 minutes, then try again. For severely corroded sockets, use needle-nose pliers on the metal base ONLY – never squeeze the glass.
CFL Bulb Replacement Steps (Screw-in Models)
- Unscrew counterclockwise like a standard light bulb
- If base separates from glass: Insert cut potato into socket, press firmly, and unscrew
- Clean socket threads with dry cloth before new installation
- Never force rotation – stripped threads require professional repair
Emergency tip: If the bulb breaks during removal, unplug immediately and use duct tape wrapped around tweezers to lift glass fragments. Wear a mask to avoid inhaling phosphor powder.
Installing the New UV Bulb Correctly
Critical Alignment for Maximum UV Output
Improper seating causes 90% of “replaced but not working” failures. For tube bulbs:
– Insert one end fully into socket
– Angle opposite end up slightly while inserting
– Rotate exactly 15 degrees until it locks (listen for click)
– Verify both ends sit flush with no gaps
Visual check: Shine a flashlight through the bulb housing. Light should reflect evenly off the grid wires. Uneven reflections indicate misalignment.
Avoiding the #1 Installation Mistake
Never touch the new bulb’s glass surface with bare fingers. Skin oils create hot spots that:
– Reduce UV output by 40% immediately
– Cause premature blackening at contact points
– Shorten bulb life by 6+ months
If you accidentally touch it, clean thoroughly with 90%+ isopropyl alcohol before powering on. Always handle bulbs with clean microfiber cloths.
Testing and Reassembly Protocol
Power-Up Sequence That Prevents Damage
Rushing this step destroys new bulbs. Follow precisely:
1. Reinstall protective grid but leave 1 fastener loose
2. Plug in unit outdoors (never test indoors)
3. Observe for 30 seconds: Blue glow should be steady
4. Immediately unplug if flickering or orange glow appears
5. Tighten all fasteners only after confirmed operation
Warning signs requiring disassembly:
– Orange or white light (wrong bulb type installed)
– Loud buzzing without blue glow (bulb not seated)
– Visible arcing/sparks (grid wire touching housing)
Final Security Checks Before Outdoor Use
- Ensure all screws/clips are fully engaged (prevents rain ingress)
- Verify catch tray slides in smoothly (blocked tray causes overheating)
- Confirm unit hangs level (tilted zappers attract fewer insects)
- Apply dielectric grease to socket contacts if in high-humidity areas
Test for 2 full nights before considering the repair complete. Reduced insect catch on night one is normal as new bulbs “season in.”
Extending Bulb Life: Pro Maintenance Tips
Seasonal Care Routines That Double Lifespan
- Monthly: Clean grid wires with soft brush (power off and cooled)
- After rain: Wipe housing exterior to prevent corrosion
- End of season: Store indoors with bulb removed in original packaging
- Never operate during heavy fog or rain (moisture accelerates burnout)
Game-changing tip: Install a $5 outdoor-rated surge protector. Voltage spikes from storms are the #1 cause of premature bulb failure in Stinger units.
When to Replace the Entire Unit Instead
Consider full replacement if you notice:
– Cracked housing near bulb sockets
– Persistent arcing after bulb replacement
– Model older than 5 years (newer units 30% more energy efficient)
– UV output below 60% after new bulb installation
Most Stinger zappers outlast 3 bulb cycles if maintained properly. But units with corroded grids or damaged sockets rarely justify repair costs.
Replacing your Stinger bug zapper bulb isn’t just about swapping a light tube – it’s restoring your primary defense against summer pests. By following these precise safety protocols and alignment techniques, you’ll avoid the top mistakes that lead to wasted bulbs or dangerous shocks. Remember to always unplug and wait 15 minutes before starting, verify bulb specifications against your model number, and never touch the new bulb’s glass surface. With proper installation, your refreshed zapper will deliver maximum UV attraction for the entire season. For ongoing reliability, incorporate monthly grid cleanings and surge protection into your routine – these simple habits can double your bulb’s operational life. Now that your bug zapper’s back in action, reclaim those peaceful evenings outdoors without breaking the bank on professional repairs.


