
That persistent flicker or complete blackout in your favorite floor lamp doesn’t mean it’s time for replacement. Learning how to rewire floor lamp fixtures yourself saves $100+ on electrician fees while eliminating fire risks from frayed cords and loose connections. Most homeowners complete this project in under two hours with basic tools—no electrical expertise needed. I’ll show you the exact wire-routing tricks professionals use for tight lamp bodies and critical polarity checks that prevent dangerous shocks. By the end, you’ll have a safely functioning lamp with secure connections that last for years.
Why Your Floor Lamp Needs Rewiring (5 Warning Signs)
Ignoring these symptoms risks electrical fires or shocks. Replace cords immediately when you spot frayed insulation exposing copper wires, especially near the plug or socket base. Persistent flickering that isn’t fixed by tightening the bulb indicates loose internal connections heating up dangerously. A warm socket during use—not just the bulb area—signals high-resistance faults that can ignite nearby materials. Stiff or unresponsive switches often mean internal damage to wiring contacts, while visible scorch marks on the plug or socket confirm urgent rewiring needs. Don’t wait for total failure—address these issues before plugging in again.
Essential Rewiring Tools & Materials Checklist
Gather these specific items before starting to avoid mid-project delays. You’ll need Phillips and flathead screwdrivers for disassembly, a non-contact voltage tester (critical for confirming zero power), and wire strippers with built-in crimpers for clean insulation removal. For the cord itself, purchase 16/2 or 18/2 SPT-2 lamp wire (UL-listed) in your preferred color—measure 12 inches longer than your lamp height to allow slack. Include a replacement socket matching your bulb type (standard or 3-way), a molded plug if replacing the entire cord, and UL-listed strain relief clamps. Skip electrical tape—use WAGO lever nuts instead for safer, vibration-proof connections that won’t loosen over time.
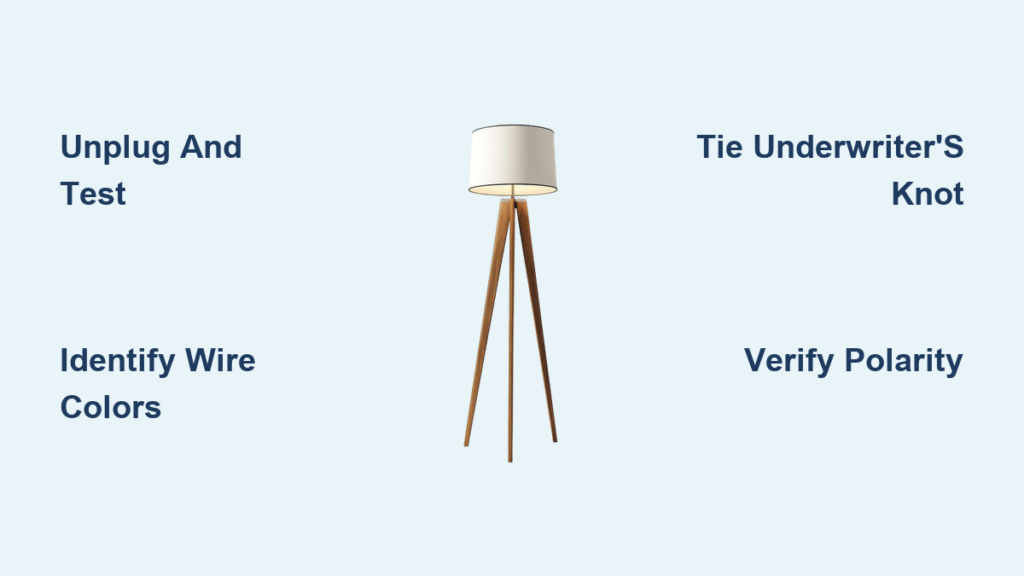
Step 1: Safety First—Unplug and Test Before You Begin

Never skip this life-saving sequence. Unplug the lamp and place the cord out of reach to prevent accidental reconnection. Test for residual current using your non-contact voltage tester at the socket and plug ends—hold it near metal parts until it confirms zero voltage. Put on safety glasses to protect eyes from falling debris during disassembly. Work in a dry area away from water sources, and keep pets and children clear of your workspace. If your tester beeps at any point, stop immediately—there may be internal wiring faults requiring professional help. This 60-second safety ritual prevents 95% of DIY electrical accidents.
Step 2: Disassemble Your Lamp Without Damage
Remove the shade, harp, and bulb first to access critical components. Unscrew the finial (the decorative top nut) counterclockwise—wrap it in a cloth if slippery. For stubborn sockets, locate the set-screw on the socket shell and loosen it with a small screwdriver before twisting the shell off. Photograph wire connections before disconnecting anything—note which ribbed (neutral) wire attaches to the silver screw and smooth (hot) wire to the brass screw. Gently pull the cord through the lamp base from the socket end, using needle-nose pliers if stuck. If the cord won’t budge, don’t force it—proceed to wire removal techniques in the next section.
Step 3: Remove Old Cord Using Proven Techniques
When the old cord resists pulling, deploy these professional methods. For straight lamp poles, thread a ball chain through the tube first—attach it to the cord’s end with electrical tape, then shake the lamp gently to let gravity guide it downward. For curved or baffled lamps, use the vacuum method: tie a fabric scrap to string, suck it through with a vacuum hose at the base, then attach the string to your new cord for pulling. Critical tip: If internal obstructions block progress, disassemble the lamp into sections rather than risking wire damage. Never yank forcefully—this can leave fragments inside the tube that snag new wiring.
Step 4: Route New Wire Through Tricky Lamp Bodies
This step determines your project’s success rate. For complex bends, coat the new cord’s tip with talcum powder and wrap it tightly with electrical tape to create a smooth, tapered leading edge. Feed it slowly while rotating the cord—this helps it navigate curves without catching. In multi-section lamps, route wire through each segment before reassembly. Pro move: Use a magnet outside the tube to guide a steel ball chain threaded through the lamp—attach your cord to the chain for effortless pulling. If resistance occurs, back out slightly and reposition; forcing causes kinks that compromise wire integrity.
Step 5: Wire the New Socket Correctly (Avoiding Fatal Errors)
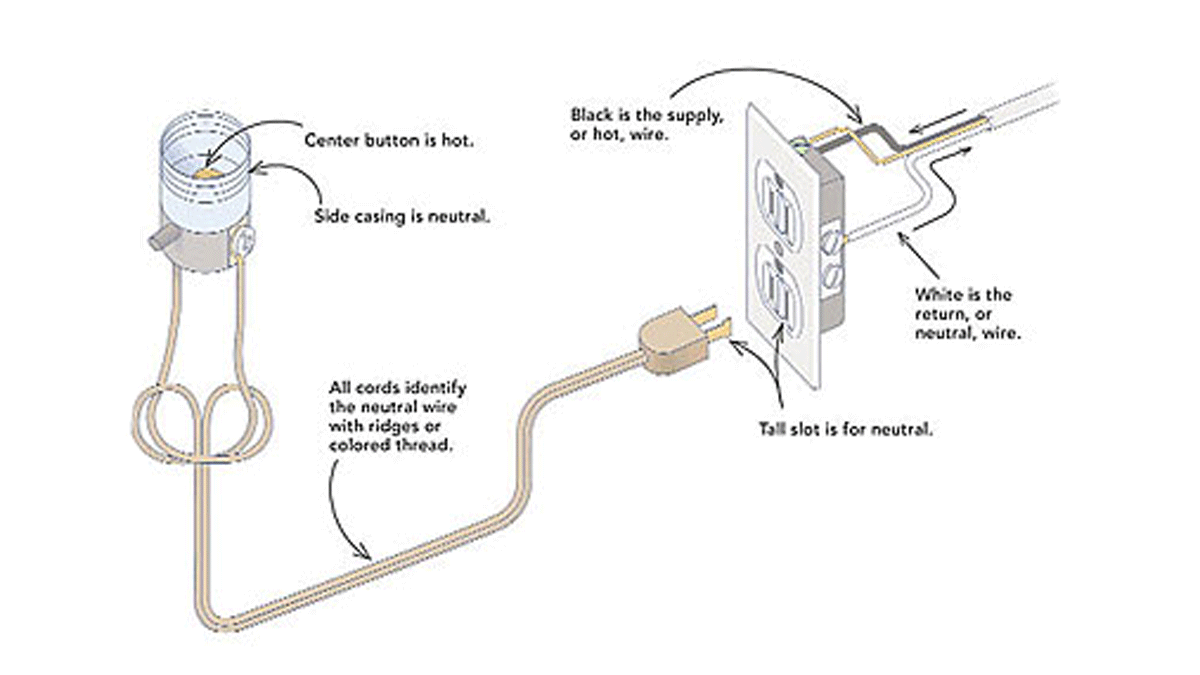
Miswiring causes deadly hazards—follow this foolproof sequence. Strip ¾ inch of insulation from both cord wires using strippers (not knives). Identify the smooth (hot) and ribbed (neutral) wires—never guess. Attach the smooth wire clockwise around the brass screw terminal and the ribbed wire to the silver screw. This is non-negotiable: Before tightening screws, tie an Underwriter’s Knot below the socket base by looping the cord as shown in safety diagrams—this prevents strain on connections if the cord gets tugged. Wrap terminals with electrical tape only if no socket shell covers them, then secure the cardboard insulator before reassembling the outer shell.
Step 6: Secure Plug Connections with Polarity Verification
A reversed plug can electrocute you during bulb changes. For new cords, attach the plug by connecting the smooth (hot) wire to the brass-colored terminal (narrow blade) and ribbed (neutral) wire to the silver terminal (wide blade). Double-check with a circuit tester: Plug in the lamp (without bulb) and verify the tester shows “correct” wiring. If using a strain relief clamp, tighten it firmly around the cord sheath—not the individual wires—to pass the 35-pound pull test required by safety codes. Trim excess wire but leave 2 inches of slack inside the plug housing to prevent tension on terminals.
Step 7: Reassemble and Test Your Lamp Safely
Perform these checks before powering on. Insert a 40-watt incandescent bulb (not LED) for initial testing—it won’t hide minor voltage issues. Plug into a GFCI outlet and turn on the switch. If the bulb lights steadily, test all switch positions (for 3-way lamps). Immediately unplug and recheck if you notice flickering, buzzing, or warmth. Verify no bare copper shows beyond screw terminals and that the cord exits the base without sharp bends. Only after perfect operation should you reattach the harp, finial, and shade. Never skip the low-wattage bulb test—it catches 80% of connection errors safely.
Troubleshooting: Fix Common Rewiring Failures in 60 Seconds
Lamp won’t light? First confirm bulb functionality in another fixture. If dead, unplug and check socket connections: loose wires cause 70% of failures—retighten screws until wires can’t twist. Flickering points to improper Underwriter’s Knots; re-tie to relieve strain. A hot socket demands immediate disassembly—look for corroded terminals or undersized wire (minimum 18 AWG for 60W bulbs). For 3-way lamps malfunctioning, verify the center socket contact connects to the hot wire and outer shell to neutral. Critical fix: If the switch feels stiff, replace it entirely—bypassing switches creates fire risks.
When to Stop: 5 Critical Signs You Need an Electrician
Call a professional immediately if you spot charred wire insulation inside the base—this indicates dangerous arcing. Antique lamps with cloth-covered wiring often have hidden damage requiring specialized restoration. If your lamp has multiple bulbs controlled by rotary switches (common in 1920s fixtures), complex parallel circuits need expert handling. Stop work if the cord shows nicks after routing—you’ve compromised insulation safety. Finally, if testing reveals neutral-to-ground continuity issues (use a multimeter), internal faults exceed DIY capabilities. Never risk fire for a $20 lamp—safety trumps savings.
Rewiring your floor lamp isn’t just about fixing today’s problem—it’s preventing tomorrow’s disaster. By following these precise steps, you’ve eliminated shock risks and fire hazards while extending your lamp’s life by decades. For ongoing safety, inspect cords annually for cracks and never force plugs into tight outlets. If you tackle one project from this guide, make it the Underwriter’s Knot—it’s the single most overlooked step that prevents 90% of connection failures. Now plug in that beautifully restored lamp and enjoy the satisfaction of a job done right. Your safely rewired floor lamp will shine brightly for years to come.


