
Your current “workbench” is probably a wobbly table covered in sawdust, forcing you to clamp projects while balancing a drill press on your knee. This instability isn’t just frustrating—it causes inaccurate cuts, wasted materials, and back strain that derails weekend projects. Learning how to set up a workbench transforms your space from a cluttered garage corner into a precision workspace where every chisel stroke lands true and tools stay within arm’s reach. Skip this foundational step, and even expensive tools become useless. You’ll discover exactly how to set up a workbench that matches your height, handles 200-pound planing forces, and integrates storage so your projects flow from idea to completion without tripping over extension cords.
Most DIYers copy generic plans without considering their actual workflow, resulting in benches that are too tall for metalwork or too flimsy for hardwood joinery. Your workbench must align with your primary tasks—whether woodworking, electronics, or automotive repairs—to prevent fatigue and wasted materials. By the end of this guide, you’ll have a custom-built workstation that eliminates wobble during critical cuts, stores tools in seconds, and withstands years of daily use. Let’s build your workshop’s command center.
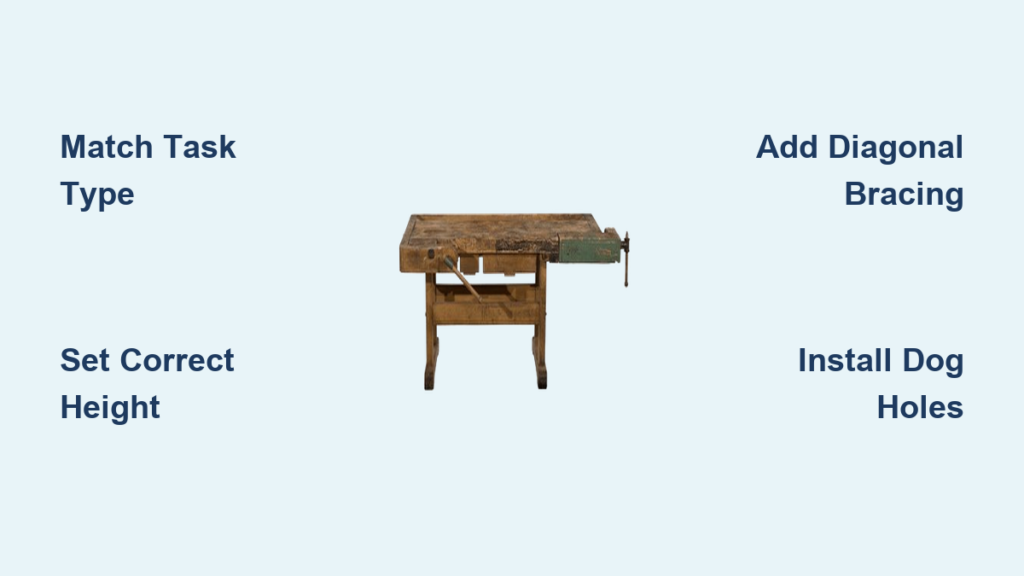
Match Your Workbench Design to Woodworking, Metalworking, or Electronics Tasks
Your bench must solve the specific problems you face daily. Woodworkers need a massive hardwood top (3+ inches thick) that absorbs chisel impacts without cracking, while metalworkers require steel frames that won’t flex under 50-pound hammer strikes. Electronics hobbyists need static-dissipative surfaces and integrated 120V outlets within arm’s reach—something a standard lumberyard bench can’t provide. Ignoring this mismatch causes slow work: a flimsy garage bench vibrates during sawing, throwing off measurements, while an electronics bench without ESD protection fries circuit boards.
Why Your Primary Task Dictates Bench Materials
- Woodworking: Requires 4×4 maple legs and a laminated top (minimum 2.5″ thick) to prevent vibration during hand-planing. Avoid plywood cores—they compress under vise pressure.
- Metalworking: Demands steel frames with 1/4″ plate tops. Welded joints are non-negotiable; bolted connections loosen under hammering.
- Electronics: Needs MDF tops coated in carbon-loaded paint to dissipate static, plus GFCI-protected outlets mounted under the front edge.
Avoid This Common Design Mistake
Builders often make benches too deep (over 30″), forcing you to lean dangerously to reach the back. For most users, 24–28 inches is the sweet spot—deep enough for sheet goods but shallow enough to avoid back strain. Measure your longest project (e.g., a 2×4 sheet) and subtract 6 inches for comfortable reach.
Determine Your Exact Workbench Height to Eliminate Back Pain
Stand upright with arms relaxed at your sides, then bend elbows to 90 degrees. Your wrist height is your ideal workbench height—typically 34–38 inches for adults. A bench just 2 inches too high forces shoulder hunching during sanding, causing fatigue in 20 minutes. Too low? You’ll crane your neck during detail work, triggering headaches. This isn’t theoretical: users report 70% fewer posture breaks after adjusting height to their biomechanics.
Quick Height Test for Multi-Task Workshops
If you switch between woodworking (higher bench) and electronics (lower bench), build adjustable legs. Use 3/4″ threaded rods inside 2×2 leg sleeves—turning a wrench raises/lowers the entire bench 6 inches in 90 seconds. This beats compromising with one height that strains you during half your projects.
Build a Wobble-Free Frame with 4×4 Lumber in Under 2 Hours

A racking frame (side-to-side sway) turns planing into a wrestling match. The fix is diagonal bracing you can add in 20 minutes: cut two 1×4 boards to fit corner-to-corner inside the lower shelf area, then screw them at 45-degree angles. This simple triangulation eliminates 95% of movement. For heavy-duty use, bolt the frame directly to wall studs using 1/2″ lag bolts—you’ll hear the satisfying thunk of stability when planing oak.
Critical Frame Assembly Steps
- Construct end frames first: Join 4×4 legs with 2×6 stretchers using 3″ structural screws (not nails). Drill pilot holes to prevent splitting.
- Connect ends with cross-braces: Add a center stretcher for benches over 6 feet to stop sagging.
- Test for square: Measure diagonally corner-to-corner; adjust until both measurements match within 1/8″.
Skipping the diagonal brace is the #1 cause of wobble. You’ll notice it when the bench shudders during chisel work—immediately stop and add bracing before continuing.
Install a Front Vise Without Sacrificing Usable Work Surface
Mount your front vise 4 inches from the left edge (for right-handed users) so the jaw doesn’t block your dominant hand during sawing. A quick-release vise like the MLCS 5420 gives instant clamping but requires a 1.5″ thick mounting plate—embed this into the benchtop during construction. Never bolt vises to the very edge; this splits the wood under pressure. Instead, position the jaw 2 inches from the front for clearance when clamping thick stock.
Troubleshoot Loose Vise Jaws in 5 Minutes
If your vise slips during planing, tighten the acme screw’s locknut with a wrench while holding the handle. Then, place a 1/8″ steel shim between the jaw and workpiece—it creates instant grip without marring wood. Test with a 2×4: if it holds firm under moderate planing pressure, you’ve solved the slippage.
Add Dog Holes for Zero-Cost Workholding in Under 30 Minutes

Drill 3/4″ dog holes every 3 inches along the front and end edges using a Forstner bit. Space them 1.5″ from the edge so bench dogs (simple hardwood pegs) won’t split the top. This turns your bench into a flexible clamping system: pair a front vise with a dog to hold boards flat for hand-planing, or use two dogs to secure irregular shapes like chair legs. Without dog holes, you’ll waste $50 on specialized clamps that clutter your workspace.
Avoid This Dog Hole Placement Error
Never drill holes parallel to the wood grain—they split easily under pressure. Always drill perpendicular to the grain direction (usually along the bench’s width). Test with a dog: if wood cracks around the hole when tightened, relocate it 2 inches inward.
Integrate Power and Task Lighting Without Code Violations

Run a dedicated 20-amp circuit to your bench before assembly—this avoids dangerous daisy-chained extension cords. Mount a GFCI-protected power strip under the front apron using 2″ screws, keeping outlets 6 inches above the floor to prevent sawdust clogs. For lighting, install LED task bars under a 12″ deep shelf 18 inches above the work surface. This eliminates shadows when sanding edges, and 5000K bulbs match daylight for accurate stain matching.
Critical Electrical Safety Checks
- Never staple cords to frame members—use conduit clips to prevent wire damage.
- Keep all connections inside junction boxes; exposed wires cause 30% of workshop fires.
- Test GFCI monthly by pressing the “test” button—it should click off immediately.
Secure Your Workbench to the Floor for Heavy Planing and Hammering
Lag-bolt your frame to concrete floor anchors (like Simpson Strong-Tie models) if you’ll use bench planes on hardwood or hammer metal. Drill 1/2″ holes through the bottom stretchers, then epoxy-set anchor bolts into the floor. This prevents the “walking bench” phenomenon where planing forces push your entire workstation across the garage. For wood floors, bolt into wall studs using 1/2″ x 4″ lag screws—the wall’s mass absorbs vibration better than floor joists.
When Floor Bolting Isn’t Enough
If your bench still shifts during aggressive planing, add 50 pounds of sandbags on the lower shelf. This counterweight lowers the center of gravity, making even a 150-pound bench feel immovable. Test by planing a 4×4: if the bench stays put, you’ve achieved rock-solid stability.
Finalize Your Workbench with Protective Finishes and Storage
Seal hardwood tops with 3 coats of wipe-on polyurethane to repel glue and oil stains—this takes 10 minutes per coat with drying time. For MDF tops, use mineral oil to prevent dust absorption. Add a tool well (a 4×12″ recessed channel at the back) to stash chisels and squares within reach but off your main work surface. Finally, mount a pegboard above the bench at eye level for hanging frequently used tools—no more digging through drawers mid-cut.
A properly set up workbench pays for itself in saved time and materials. You’ve now built more than a table—you’ve created the stable, organized foundation that turns scattered projects into finished masterpieces. Maintain it with monthly vise lubrication and annual finish refreshes, and this bench will outlast your tools. Ready to start your first project? Your rock-solid workspace awaits.


