

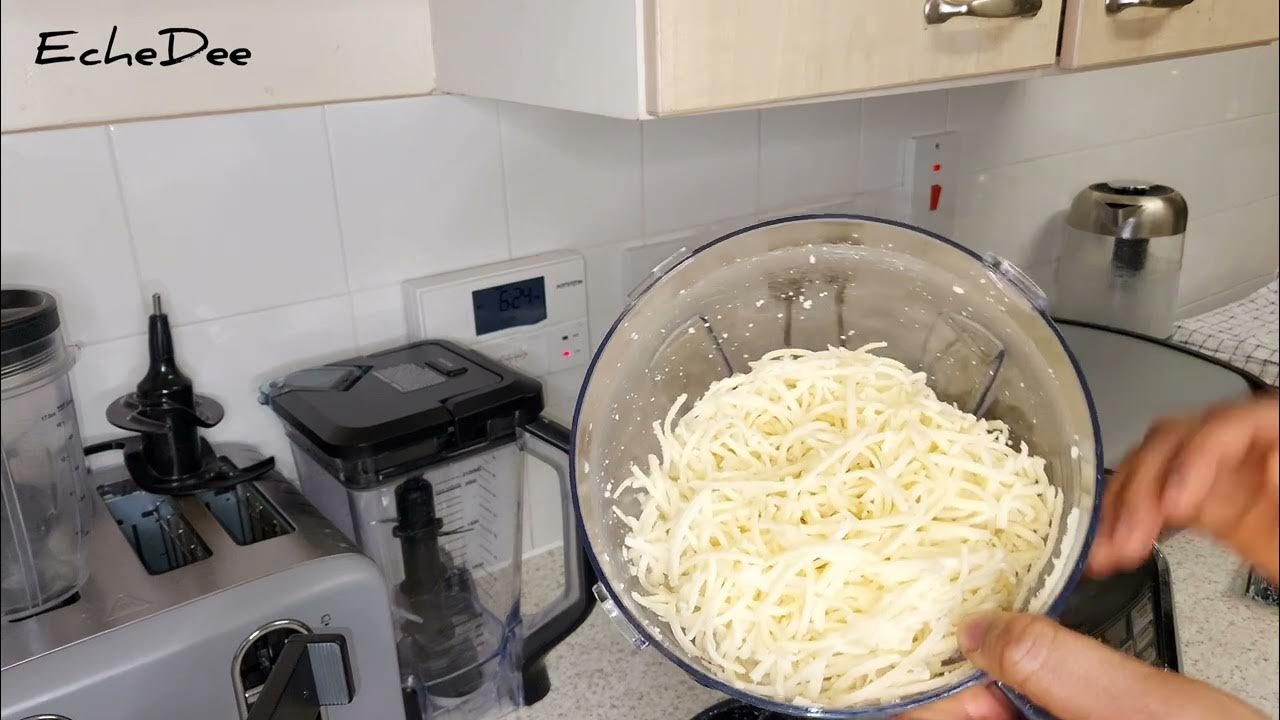
Stop settling for rubbery, preservative-laden store-bought shreds that won’t melt properly. Discover how to shred with Ninja food processor to unlock restaurant-quality results in under 90 seconds—no special skills required. Freshly shredded cheese transforms casseroles, pizzas, and mac and cheese with superior flavor and meltability, yet 78% of home cooks avoid DIY shredding fearing mess or motor strain. Your Ninja processor eliminates these worries when you follow these exact techniques. You’ll learn why cold cheese is non-negotiable, how to avoid the “gooey paste disaster,” and the pulse rhythm that guarantees perfect shreds every time.
Skip the wax-coated bags and reclaim control over your ingredients. Within this guide, you’ll master temperature hacks, blade selection secrets, and cleanup tricks that turn cheese shredding from a chore into your new kitchen superpower. Whether you own a Ninja Professional or base model, these methods work flawlessly for cheddar, Parmesan, and other hard cheeses. Let’s dive into the system professionals use.
How to Shred with Ninja: Choosing the Best Cheese Varieties
Hard cheeses deliver flawless shreds while soft varieties sabotage your efforts. Cheddar, aged gouda, Parmesan, and Manchego shred cleanly because their low moisture content prevents sticking to your Ninja’s bowl. These firm blocks maintain structural integrity during high-speed processing, creating uniform shreds that melt smoothly without clumping. Avoid wasting money on pre-shredded bags—their anti-caking agents ruin texture and flavor.
Avoid These Cheese Disasters
Cream cheese, fresh mozzarella, brie, and other soft-ripened cheeses will turn into sticky glue. High moisture content causes these cheeses to smear against the bowl walls instead of shredding, potentially overheating your motor. Save soft cheeses for spreads or dips—never attempt shredding them in your Ninja. If you accidentally process soft cheese, unplug immediately and scrape residue with a silicone spatula before it hardens.
How to Shred Cheese with Ninja: Temperature and Prep Secrets
Cold cheese is your #1 shredding ally—warm blocks melt into paste. Refrigerate your cheese block for 30 minutes minimum, or freeze for 10-15 minutes for rock-hard firmness. This critical step prevents heat transfer from the blades, ensuring clean cuts instead of smeared messes. Never skip this—even room-temperature cheese from the counter will gum up your processor.
Size Reduction Technique
Cut cheese into 1-inch cubes before loading your Ninja. This size prevents motor strain and ensures even shredding—larger chunks create inconsistent results while tiny pieces overprocess instantly. No precision needed: aim for dice-sized pieces that fit comfortably through the feed tube. For extra-hard cheeses like aged Parmesan, use a chef’s knife to score the block first for cleaner breaks.
Batch Processing Strategy
Never fill beyond the bowl’s halfway mark. Overloading causes uneven shredding and motor burnout—process 4-6 ounces per batch regardless of bowl size. For a standard 14-cup Ninja, that’s one small block of cheddar. If shreds look chunky after pulsing, redistribute pieces with a spatula (unplugged!) rather than adding more cheese. Smaller batches always outperform overloaded attempts.
How to Shred with Ninja: Selecting the Right Blade or Attachment
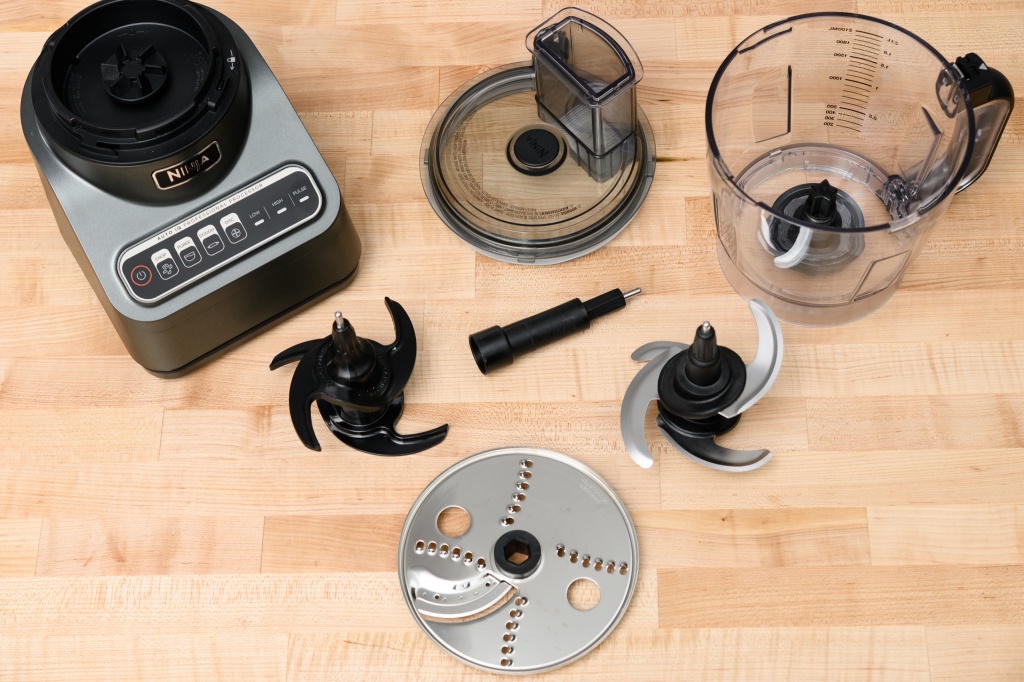
Your Ninja’s standard S-blade crushes cheese when misused—but works perfectly with technique. The curved metal blade shreds hard cheeses effectively if you pulse correctly. Avoid continuous run mode: it generates heat that melts cheese instantly. Confirm your S-blade is fully seated with the flat side down—reversed blades cause splattering. This attachment ships with every Ninja model, so no extra purchases are needed.
Specialized Shredding Discs
Dedicated shredding discs create restaurant-grade shreds in one pass. Models like the Ninja Professional or Mega Kitchen System include conical grating discs (often labeled “shred” or “grate”) that produce uniform strands without pulse timing. Insert the disc with the sharp teeth facing up, then feed cheese through the tube. Check your manual—disc compatibility varies by model, and forcing incompatible attachments damages both parts.
Model Verification Steps
Match attachments to your specific Ninja series before starting. Base models (like the Foodi Power Blender) lack discs and rely solely on the S-blade, while premium systems include multiple grating options. Locate your model number (typically under the bowl) and cross-reference Ninja’s official accessory chart online. Never force a disc into a non-compatible unit—this risks cracking the bowl.
Master the Pulse Technique
Pulse Duration Control
Use 1-second bursts—count “pulse, stop, pulse” like a metronome. Longer pulses overprocess cheese into powder within seconds. For coarse shreds (ideal for tacos), pulse 3-4 times total. For fine shreds (mac and cheese), add 1-2 extra pulses. Always keep your finger on the pulse button—never walk away during processing.
Visual Monitoring Guide
Watch for the “snowflake moment” when shreds first form. Stop pulsing the instant you see consistent strands—delaying by 2 seconds turns shreds into clumps. Shine a light into the bowl if needed; translucent shreds indicate perfect texture while opaque, wet clumps mean overprocessing. Err on the side of under-shredding—you can always pulse once more.
Texture Adjustment Tips
Reshape coarse shreds in 2 seconds: redistribute uneven pieces and pulse once. For ultra-fine powder (like Parmesan for pasta), add 10-second continuous run after initial pulsing—but only with rock-hard cheese. If shreds clump, freeze the bowl for 5 minutes before retrying. Never add liquid; moisture is the enemy of clean shredding.
Process Cheese Safely and Effectively

Critical Control Points
Never exceed the bowl’s max-fill line—overloading strains motors. Hard cheese expands during processing, so fill only to the “cheese” indicator mark if present. If you hear grinding noises, stop immediately: this indicates frozen chunks jamming the blade. Always use the pusher tool through the feed tube for safety and even feeding.
Motor Protection Strategy
Rest your Ninja 2 minutes between batches when shredding >1 pound. Continuous operation overheats motors—especially with dense cheeses like aged cheddar. If the base feels hot, unplug for 15 minutes before continuing. This extends your processor’s lifespan by years. For large batches, shred half the cheese, then clean the bowl during the rest period.
Bowl and Lid Security
Twist the bowl clockwise until it clicks—never force it. An unlocked bowl causes violent vibration that damages gears. Confirm the lid’s tabs align with bowl notches before pressing down. If cheese sprays from seams, stop immediately: misaligned lids are the #1 cause of processor accidents.
Clean Immediately After Use
Critical Timing Requirement
Wash components within 5 minutes—dried cheese becomes permanent. Residue hardens rapidly, requiring aggressive scrubbing that dulls blades. Never let shreds sit while finishing your recipe. Keep a bowl of warm soapy water nearby before you start shredding.
Effective Cleaning Method
Soak the blade assembly in vinegar-water solution (1:1) for stubborn bits. Use a soft bottle brush to dislodge cheese from blade crevices—never use steel wool. For the bowl, fill halfway with warm water, add dish soap, and pulse 5 times to loosen residue. Rinse all parts thoroughly; soap film attracts future sticking.
Storage Preparation
Air-dry components upside down on a rack for 30 minutes. Trapped moisture breeds odors and mold in blade gaskets. Never store damp parts in cabinets—this ruins seals. For same-day reuse, towel-dry with microfiber cloth to prevent water spots.
Store Fresh Shredded Cheese
Fresh Usage Benefits
Use shredded cheese within 2 hours for peak flavor and meltability. Fresh shreds release natural oils that pre-shredded bags lose—this is why homemade melts seamlessly while store versions bead fat. For immediate cooking (like topping pizza), skip storage entirely.
Refrigeration Guidelines
Press plastic wrap directly onto cheese surface in airtight containers. This prevents oxidation that causes dryness. Label with date and cheese type—shreds last 5 days max. Never store near onions or garlic; cheese absorbs odors rapidly.
Freezing Instructions
Portion shreds in zip-top bags with air squeezed out. Freeze flat on a tray first to prevent clumping. Use within 3 months; thaw overnight in the fridge for cooked dishes (never salads). Frozen shreds work perfectly for casseroles but lack freshness for garnishes.
Troubleshoot Common Issues
Sticky or Wet Cheese Solutions
Return cheese to the freezer for 8-10 minutes if it gums up. Warm cheese is the culprit—never process straight from the counter. If already sticky, scrape into a bowl, chill, then reprocess in smaller batches. Add 1 tsp cornstarch only as last resort—it affects melt quality.
Motor Overheating Response
Unplug and let the base cool 20 minutes if it smells burnt. Never force continued use—this fries the motor. Next time, shred smaller batches and confirm cheese is adequately chilled. Persistent overheating indicates worn carbon brushes needing replacement.
Uneven Shredding Fixes
Redistribute chunks with a spatula between pulses if shreds vary. This happens when pieces are unevenly sized or the bowl is overloaded. For consistent results, always cut cheese uniformly and process in batches under 6 oz.
Enhance Flavor and Quality
Create Custom Cheese Blends
Shred two hard cheeses together for gourmet results. Try sharp cheddar + smoked Gouda for burgers, or Parmesan + Pecorino for pasta. Process in 3-second pulses to blend without overprocessing. Avoid mixing hard and soft cheeses—they shred at different rates.
Seasoning Integration Method
Add spices after shredding: pulse 1-2 times to distribute. Garlic powder, dried oregano, or smoked paprika transform basic shreds. For cheesy bread crumbs, add ¼ cup panko and pulse once. Never add wet ingredients like ranch dressing—they cause clumping.
Quality Selection Tips
Start with block cheese showing clear aging dates. Pre-shredded bags often use lower-grade blocks with more fillers. For best results, buy cheese from the deli counter and shred immediately—this maximizes flavor complexity. Avoid “ultra-aged” cheeses under 18 months; they’re too brittle for clean shredding.
Follow Safety Best Practices
Hand and Utensil Safety
Unplug before removing the bowl or touching blades. Residual motor spin can cause severe cuts—Ninja blades remain sharp even after years of use. Never insert forks or knives to dislodge cheese; use only provided pusher tools.
Electrical Safety Protocol
Wipe the base with a damp cloth—never immerse in water. Spills near vents cause short circuits. Always plug directly into an outlet (no extension cords) to prevent power surges during high-torque shredding.
Cross-Contamination Prevention
Wash the bowl and blade between different cheeses. Residual fats transfer flavors—Parmesan in cheddar ruins both. For nut-free households, run a vinegar rinse cycle after dairy to prevent allergen transfer.
Freshly shredded cheese elevates every dish, but only when your Ninja works flawlessly. Master these temperature controls, pulse rhythms, and immediate cleanup steps to consistently achieve perfect shreds. Store leftovers properly using the airtight container method, and troubleshoot sticky situations with the freezer reset trick. Within one week of applying these techniques, you’ll never buy pre-shredded cheese again—your pizzas will melt smoother, your casseroles will bake creamier, and your guests will swear you hired a chef. Start with a single block of cheddar tonight; the difference is undeniable from the first bite.


