
You’ve scoured your base, completed every quest, and still can’t figure out how to upgrade your Workbench in Arc Raiders. That frustrating “Level 1” display mocks you while high-tier blueprints demand higher levels you can’t reach. Here’s the hard truth: you can’t upgrade the Workbench at all. This misleading static station traps countless players in a loop of wasted resources and confusion. The real crafting progression happens through specialized stations you build from scratch. In this guide, you’ll discover exactly which stations to prioritize, where to find the hidden “Level Up” button, and how to bypass the #1 mistake that stalls 90% of new players. Stop chasing ghosts—let’s unlock your true crafting potential.
Why Your Workbench Won’t Upgrade (And What That “Level 1” Really Means)
That “Level 1” indicator on your Workbench isn’t a progression step—it’s a permanent fixture. Unlike every other crafting interface in Arc Raiders, the Workbench is hardcoded as a non-upgradable station. Players waste hours searching for upgrade paths after seeing blueprints that claim to require “Workbench Level 3,” only to hit a dead end. This isn’t a bug; it’s intentional design. The Workbench serves solely as your emergency respawn crafting point for basic gear, with zero capacity for advancement.
The Static Workbench Myth Debunked
New players universally assume the Workbench is the foundation for all crafting upgrades. Reality check: it’s a decoy. When you interact with it, you’ll notice no “Level Up” button appears, no resource costs display for advancement, and the interface remains unchanged regardless of your progress. Community forums overflow with identical reports of players completing endgame raids, expecting the Workbench to unlock, only to find it still stuck at “Level 1.” This isn’t oversight—it’s deliberate. The game uses this static station to force you toward specialized crafting paths.
Why Blueprints Show False Workbench Level Requirements
Here’s where confusion peaks: high-tier weapon blueprints often list “Workbench Level 3” in their requirements. Don’t fall for it. This is a UI misdirection. Those blueprints actually require specific specialized stations, not the Workbench. For example, a sniper rifle needing “Workbench Level 3” really means you must have an Armory station at Level 3. The tooltip fails to clarify this, sending players on wild goose chases. Always check which station type the blueprint belongs to—Armory for weapons, Fabricator for components—before gathering resources.
Your Real Crafting Progression Path: Specialized Stations
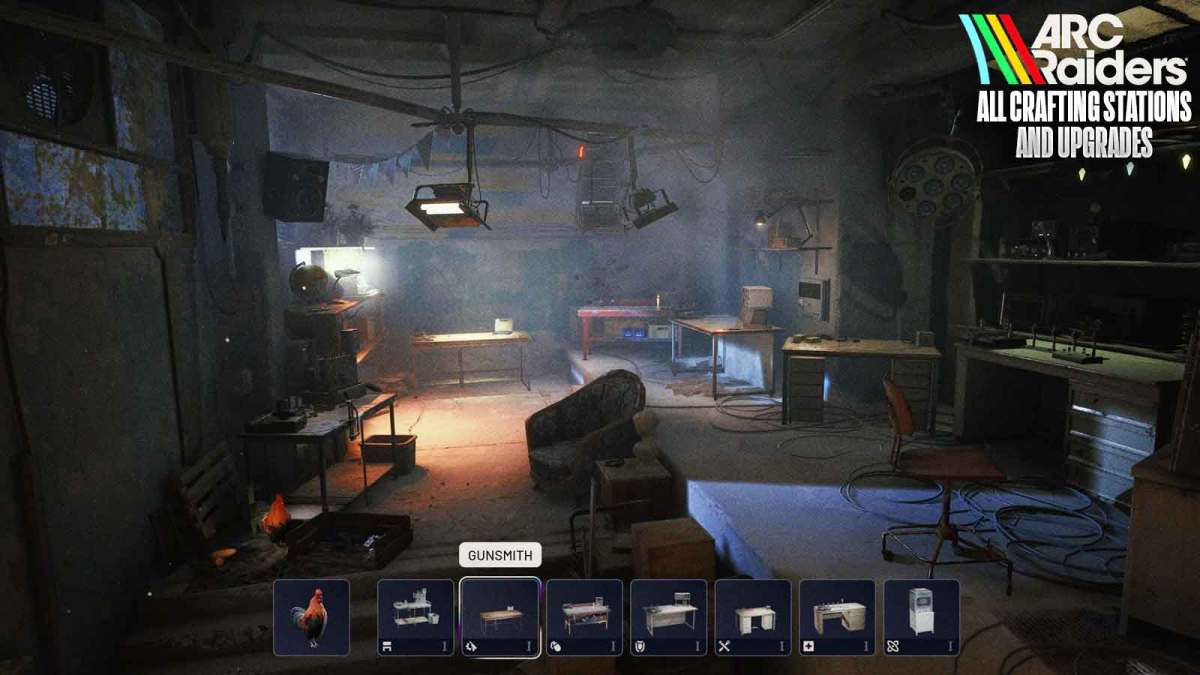
True crafting power comes from building and leveling five dedicated stations. Each operates independently with unique upgrade trees. Forget the Workbench—these are your progression engines. The Armory crafts weapons, the Fabricator processes raw materials into advanced components, and the Engineering Station builds gadgets. Crucially, you must construct each station separately before leveling them. No station auto-unlocks; you’ll hunt for blueprints through missions or world exploration.
How Each Upgradable Station Powers Your Gameplay
- Armory: Your combat lifeline. Level 1 crafts basic rifles; Level 3 unlocks plasma weapons. Requires scrap metal and circuit boards.
- Fabricator: The unsung hero. Processes ores into polymer composites for high-tier gear. Ignoring this stalls all other stations.
- Medical Bay: Critical for survival builds. Level 2 creates med-kits that revive teammates; Level 4 crafts nanite healers.
- Munitions Bench: Ammo scarcity kills runs. Level 1 makes standard rounds; Level 3 crafts armor-piercing shells.
- Engineering Station: For trap-focused players. Level 2 builds proximity mines; Level 5 creates drone swarms.
Which Station Matches Your Playstyle?
Don’t spread resources thin. If you main assault roles, prioritize Armory → Munitions Bench → Fabricator. Support players should go Medical Bay → Fabricator → Armory. Engineering-heavy builds (like engineers or tech specialists) need Engineering Station → Fabricator → Medical Bay. This alignment prevents the most common early mistake: building stations that don’t serve your loadout.
Step-by-Step: Building Your First Upgradable Crafting Station
Your journey starts with acquiring blueprints—not through the Workbench, but via mission rewards or world exploration. Early Armory blueprints drop from “Supply Depot” missions, while Fabricator schematics hide in crashed drone wreckage. Once secured, construction takes 2 minutes of real-time (no AFK waiting). Here’s the exact sequence:
Finding Blueprints for Armory, Fabricator, and More
- Complete “Scrap Salvage” missions (available at Level 5) for Armory blueprints.
- Loot crashed drones in the Dust Bowl zone for Fabricator schematics—look for smoke trails.
- Check vendor stalls in safe zones weekly; they rotate rare station blueprints.
Pro Tip: Farm the “Outpost Rescue” mission on repeat. Its 3-star reward guarantees one specialized station blueprint.
Gathering Resources Without Wasting Time
Initial construction requires 50 Common Scrap and 10 Iron Ingots. Skip inefficient scavenging:
– Common Scrap: Farm weak enemies like Scavenger Drones (3x yield vs. regular mobs).
– Iron Ingots: Mine ore nodes near base entrances—no need to venture deep early.
Critical Warning: Never spend rare resources (like Quantum Cores) on initial builds. Save those for Level 3+ upgrades.
Leveling Up Stations: The Exact Button You’re Missing
This is where 95% of players fail. After building your Armory, interact with it and scan the top-right interface corner. You’ll see a glowing “Level Up” button (looks like an upward arrow) only when:
– You’ve built the station (not the Workbench)
– You have sufficient resources
– No active crafting is in progress
Where to Find the “Level Up” Button (It’s Not on the Workbench)
The button appears below the station nameplate, not in the main menu. If it’s missing:
1. Check resource requirements (displayed when hovering over the station icon).
2. Ensure no items are mid-craft (cancel via the “X” button).
3. Verify you’re not interacting with the Workbench by mistake—specialized stations have unique icons (e.g., an anvil for Armory).
What to Do When the Level Up Button Doesn’t Appear
Resource shortages are the #1 culprit. If you have the materials but no button:
– Exit and re-enter your base—a known UI glitch hides the button.
– Check blueprint dependencies: Some stations require Level 2 Fabricator to unlock Level 3 Armory.
– Avoid multiplayer desync: In co-op, one player must own the station to see the button.
Avoid These 3 Workbench Upgrade Mistakes That Waste Hours
New players repeat these errors, stalling progress for days. Sidestep them with these fixes:
Ignoring Fabricator Until It’s Too Late
Players rush to build Armories, then hit a wall when blueprints demand “Polymer Frame (Fabricator Lv2).” The Fabricator is your bottleneck—it provides components for 80% of high-tier gear. Build it second (after Armory) and level it to 2 before advancing other stations. Skipping this forces you to abandon crafted weapons mid-upgrade.
Pouring All Resources Into One Station
That Level 5 Armory looks impressive until you run out of ammo or med-kits. Balance is non-negotiable. After Level 2 Armory, split resources: 40% to Fabricator, 30% to Munitions, 30% to Medical Bay. Unbalanced builds fail in endgame raids where gear synergy matters most.
Confusing Blueprint Requirements (Workbench vs. Station)
When a blueprint says “Workbench Level 3,” it’s lying to you. Cross-reference the item type:
– Weapons → Armory level
– Ammo → Munitions Bench level
– Healing items → Medical Bay level
Bookmark the community’s “Requirement Decoder” spreadsheet—it translates every false “Workbench” demand.
Optimal Upgrade Order: What to Build First for Survival
Follow this sequence to avoid early-game frustration:
- Armory Level 2: Craft reliable weapons (takes 90 minutes real-time).
- Fabricator Level 2: Unlock component crafting (45 minutes).
- Munitions Bench Level 1: Never run dry on ammo (30 minutes).
- Medical Bay Level 1: Basic med-kits for respawns (20 minutes).
Time-Saver: While stations build, farm resources for the next level. You’ll shave 2+ hours off progression.
Advanced Strategy: Coordinating Stations for Endgame Gear

Endgame items like the “Nexus Rifle” require three stations simultaneously:
– Armory Lv4 (for chassis)
– Engineering Lv3 (for targeting module)
– Fabricator Lv5 (for quantum core)
Pre-plan your build:
1. Identify the station with the longest upgrade path (usually Fabricator).
2. Level it to 3 first while others stay at 1.
3. Synchronize station levels to unlock multi-station blueprints.
Pro Tip: In co-op, assign teammates to specialize. One focuses on Medical Bay, another on Engineering—this cuts resource competition by 70%.
Troubleshooting: Why You Can’t Craft High-Level Items
Stuck on “Missing Level” errors? Nine times out of ten, it’s because:
– You’ve upgraded the wrong station (e.g., leveling Medical Bay for a weapon).
– Fabricator isn’t high enough to supply components (check component tooltips).
– You misread the requirement—revisit the blueprint’s station icon.
Fix instantly: Interact with the blueprint, note its icon color (blue = Armory, green = Fabricator), then level that specific station.
Stop wrestling with the unupgradable Workbench. Your crafting breakthrough starts by building the Armory and Fabricator, then relentlessly leveling them using the hidden “Level Up” button. Prioritize balanced progression—never let one station lag more than two levels behind others. When blueprints demand “Workbench Level,” instantly translate that to the correct station type. Within 2 hours, you’ll craft gear that shatters early-game limitations. Now head to those Supply Depot missions; your first Armory blueprint awaits. Share your upgraded station screenshots in the comments—let’s see who hits Level 5 first!


