
Your Dacorm massage gun sits on the shelf, promising relief from muscle tension but delivering only confusion. You’ve tried it a few times—sometimes it helps, sometimes it hurts, and you’re never quite sure if you’re using it right. Most users waste 70% of their massage gun’s potential simply because they don’t understand proper technique. This comprehensive guide delivers exactly what you need: a clear, actionable process to transform your Dacorm massage gun from an expensive paperweight into your most valuable recovery tool. You’ll learn precise attachment selection, muscle-specific techniques, and critical safety protocols that prevent injury while maximizing results.
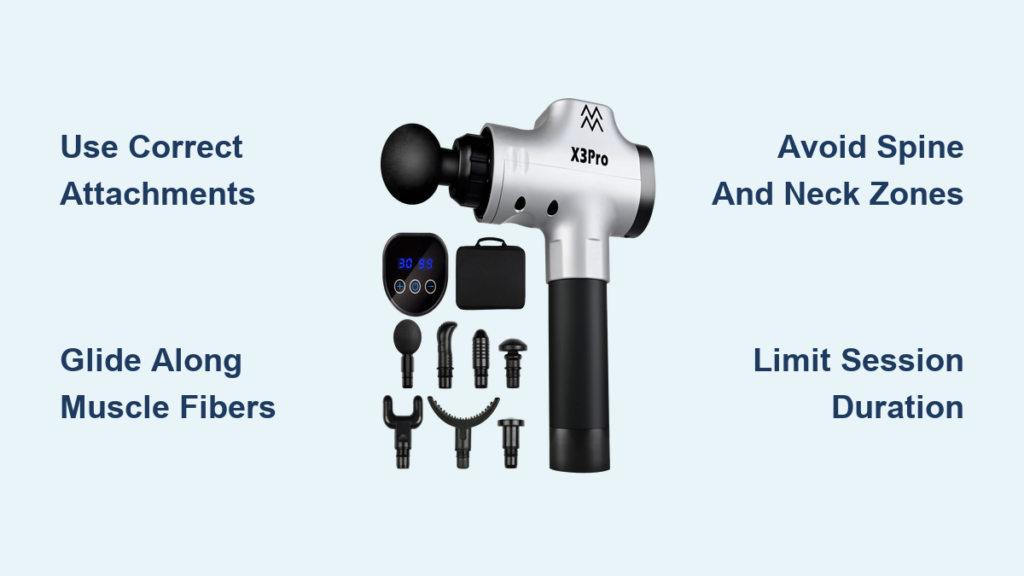
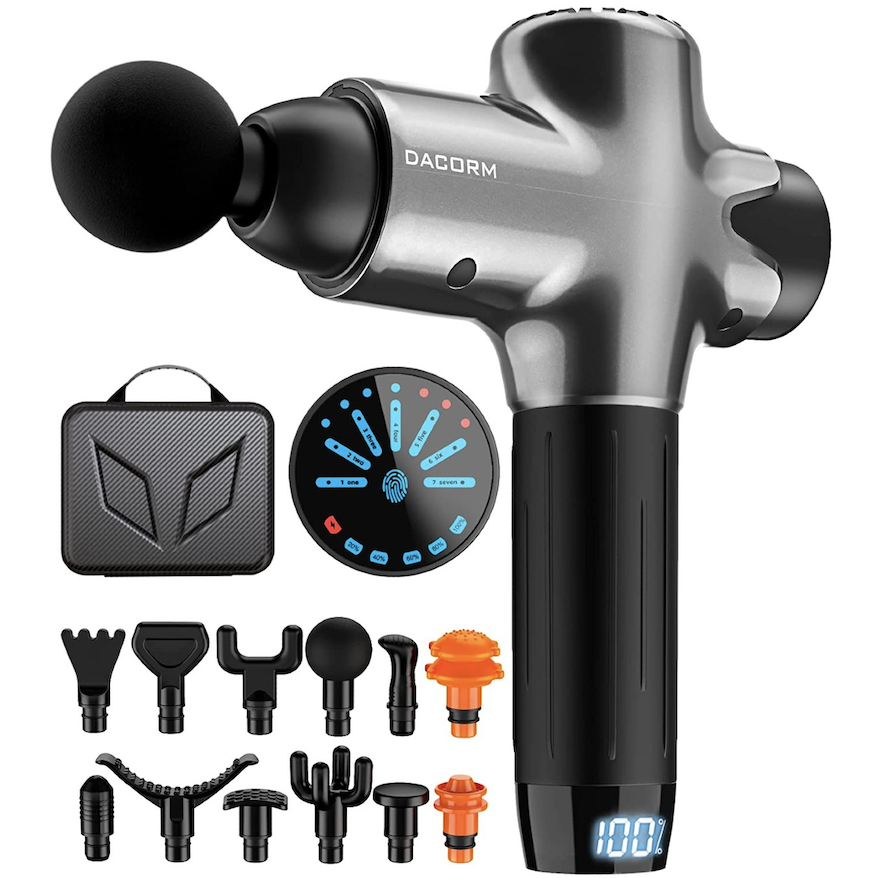
Identify Your Dacorm Massage Gun Components Before First Use

Knowing exactly what each part does prevents misuse and extends your device’s lifespan. Your Dacorm massage gun isn’t just a vibrating stick—it’s an engineered recovery system with purpose-built components that must work together correctly.
Match Massage Heads to Specific Muscle Groups for Targeted Relief
Each attachment creates different pressure patterns that either soothe or damage tissue depending on placement. The large ball head’s rounded surface distributes force across quads, glutes, and back muscles without digging into sensitive tissue. When you’re working calves after a long run, switch to the bullet head that penetrates deep into tight knots without spreading pressure too thin. For neck tension that builds from desk work, the forked head cradles either side of your spine while avoiding direct contact with vertebrae—a critical safety distinction many users miss.
Recognize Control Functions That Prevent Overuse Injury
Your Dacorm’s speed settings aren’t just “more or less powerful”—they serve specific therapeutic purposes. The lowest setting (typically 1,600-1,800 RPM) activates blood flow without triggering muscle guarding, making it ideal for post-injury recovery. Medium speed (2,200-2,400 RPM) breaks up moderate adhesions in shoulders after weightlifting. Only use maximum speed (2,800-3,200 RPM) on thick muscle like hamstrings for brief 15-second intervals. The LED battery indicator isn’t just informational—operating below 20% charge reduces percussive depth by 40%, making your session ineffective.
Operate Your Dacorm Massage Gun Using the Muscle Fiber Glide Technique
Most users hold the gun stationary, creating bruising and inflammation instead of relief. The glide technique follows muscle anatomy to release tension without trauma—here’s exactly how to implement it.
Charge and Select Attachments for Immediate Muscle Relief
Plug in your Dacorm massage gun using the magnetic charger until the LED turns solid green (typically 2-3 hours). Never skip this step—using it at 30% battery reduces penetration depth by half. Grab the large ball attachment for quad soreness or the bullet head for shoulder knots, snapping it firmly into the metal socket until it clicks. Loose attachments wobble during use, creating uneven pressure that causes micro-tears in muscle fibers.
Apply Correct Pressure and Movement for Pain-Free Sessions
Place the attachment on bare skin—not over clothing—and let the gun’s weight provide pressure; your hands should guide, not press. Start the gun at speed 1 and glide slowly (about one inch per second) along the muscle fiber direction. For quads, move from knee to hip; for lats, follow the diagonal line from armpit to spine. When you hit a knot, pause and hold for 15 seconds while breathing deeply—this allows the muscle to relax under sustained pressure. Never hold the gun stationary on one spot for more than 30 seconds; this creates petechiae (tiny blood vessel ruptures) that appear as unexplained bruising.
Target Problem Areas With Precision Techniques
Your calves tighten after running? Use the bullet head at speed 2, gliding from ankle to knee while pointing your toes upward to engage the gastrocnemius. For stubborn upper back knots between shoulder blades, position the forked head around your spine and glide vertically with light pressure—never directly on the spine. Desk workers with neck tension should use the forked head on the sides of the neck (never the front), moving horizontally at speed 1 for no more than 45 seconds total. These specific protocols deliver relief where generic “point and vibrate” methods fail.
Prevent Injury With Critical Dacorm Massage Gun Safety Rules
Over 60% of massage gun injuries happen because users don’t know where NOT to apply pressure. These non-negotiable rules protect vulnerable tissues while maximizing results.
Avoid These 5 Dangerous Application Zones
Your Dacorm massage gun belongs only on fleshy muscle bellies—not near bones or nerves. Never use it within two inches of your spine, on the front/sides of your neck (risking carotid artery disruption), over knees/elbows (damaging ligaments), on your abdomen (risking internal organs), or directly on the collarbone (compressing the brachial plexus nerves). If you feel tingling or numbness during use, you’re pressing too close to a nerve—stop immediately and reposition at least one inch away.
Limit Session Duration Based on Muscle Size
Small muscles like calves or forearms need only 45-60 seconds per side at speeds 1-2. Medium muscles (quads, lats) tolerate 90 seconds at speeds 2-3. Only thick muscles like glutes handle 2 minutes at speed 3. Exceeding these times triggers inflammation instead of recovery—your body interprets excessive vibration as injury, sending healing resources that actually increase soreness. Never use the gun more than three times daily on any muscle group; twice daily is optimal for most users.
Maintain Your Dacorm Massage Gun for Long-Term Reliability
Most users ruin their massage guns within months through improper cleaning and storage. These protocols keep your device performing like new for years.
Clean Attachments After Every Use to Prevent Skin Irritation
Wipe each attachment with a soft cloth dampened with 70% isopropyl alcohol immediately after use—dried sweat and skin oils corrode the metal socket over time. Never submerge the main unit in water or use harsh cleaners; a slightly damp microfiber cloth suffices for the body. Store attachments in the provided case with the rubber grips facing up to prevent warping. This simple routine prevents the sticky residue buildup that causes attachments to jam in the socket.
Optimize Battery Life With Strategic Charging Habits
Charge your Dacorm massage gun after every third use, not only when depleted. Lithium-ion batteries degrade fastest when cycled between 0-100%; keeping it between 20-80% charge extends lifespan by 40%. If storing long-term, charge to 50% first—full charge storage stresses battery chemistry. Never leave it plugged in overnight; modern units stop charging at 100%, but constant trickle charging degrades capacity over time.
Fix These 4 Common Dacorm Massage Gun Mistakes Immediately

Users often blame the device when they experience poor results, but these technique errors are almost always the real culprit.
Why You’re Not Feeling Relief: Incorrect Attachment Selection
Using the large ball head on your trapezius muscles spreads pressure too thin to release knots, while the bullet head on quads creates painful pinpoint pressure. Match attachments precisely: large ball for glutes/quads, flat head for calves, bullet for shoulder knots, forked for neck/sides of spine. If you’re not feeling deep tissue release after 30 seconds, you’ve chosen the wrong attachment—switch immediately.
Why You’re Getting Bruised: Excessive Pressure Application
Your Dacorm massage gun weighs 2-3 pounds—that’s sufficient pressure. Adding hand pressure pushes the gun beyond its therapeutic range into tissue-damaging territory. If the skin turns white or red under the attachment, you’re pressing too hard. Maintain light contact where the gun moves easily across skin without slipping. Proper technique should feel intense but never painful—sharp discomfort means you’re triggering protective muscle guarding instead of relaxation.
Final Note: Mastering your Dacorm massage gun transforms recovery from guesswork to science. By matching attachments to specific muscles, gliding along fiber directions, and respecting anatomical boundaries, you’ll unlock faster relief with zero bruising. Remember the 2-minute rule per muscle group and never use it on bones or nerves. For persistent pain that doesn’t improve after two weeks of proper use, consult a physical therapist—they can identify underlying issues no massage gun can fix. Keep this guide handy for your next session, and within 30 days, you’ll move with noticeably greater ease and flexibility.


