
That new Everlast massage gun sitting in its case? It’s not just another gadget—it’s your secret weapon against muscle stiffness after leg day or desk-job tension. But how to use Everlast massage gun properly separates therapeutic relief from wasted potential (or worse, injury). Many users blast through muscles at max speed for 10 minutes straight, only to wonder why they’re more sore than before. This guide cuts through the confusion with field-tested techniques that actually work. You’ll learn exactly where to glide, how long to hold, and which attachment transforms stubborn knots—so you leverage this $200+ investment like a physical therapist. No fluff, just actionable steps for faster recovery starting today.
Most beginners make two critical errors: pressing too hard and ignoring attachment selection. Your Everlast gun’s percussive therapy works through rapid pulses, not brute force. When you lean into it like a foam roller, you override the motor and bruise tissue. And using the wrong head? That’s like using a sledgehammer to hang a picture. By the end of this guide, you’ll move with surgical precision—gliding the flat head along IT bands without jarring your knee joint, or holding the bullet tip on shoulder trigger points until tension melts away. Let’s transform that unopened box into your most valuable recovery tool.
Unboxing Your Everlast Massage Gun: Setup for Immediate Use
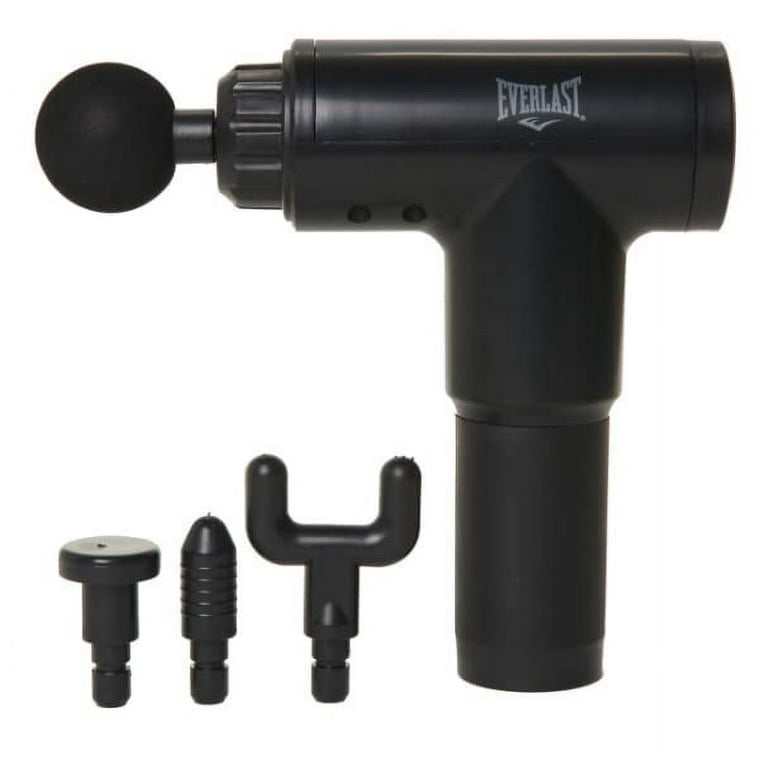
Skip the frustration of missing parts by verifying your kit before charging. Your Everlast box should contain the main unit, five color-coded attachment heads (large ball, flat, bullet, fork, and U-shaped), a charging cable, and a storage case. Immediately identify each head’s purpose—the large ball head (usually black) handles quads and glutes, while the U-shaped head (often red) cradles spine muscles safely. The fork head’s prongs target calf muscles without hitting the Achilles tendon. Store attachments in the case by color to avoid fumbling mid-session.
Charge the device for 3 full hours before first use—never skip this step. An undercharged battery causes inconsistent pulsing that strains motor components. While charging, test each attachment’s fit by twisting it into the gun’s metal socket until it clicks. Loose attachments vibrate painfully against your hand. Pro tip: Label heads with small dots of nail polish if color-coding confuses you (e.g., one dot for ball head, two for flat). This 30-second setup prevents mid-massage fumbling when you’re targeting a stubborn knot.
Critical Safety Rules Before Your First Session
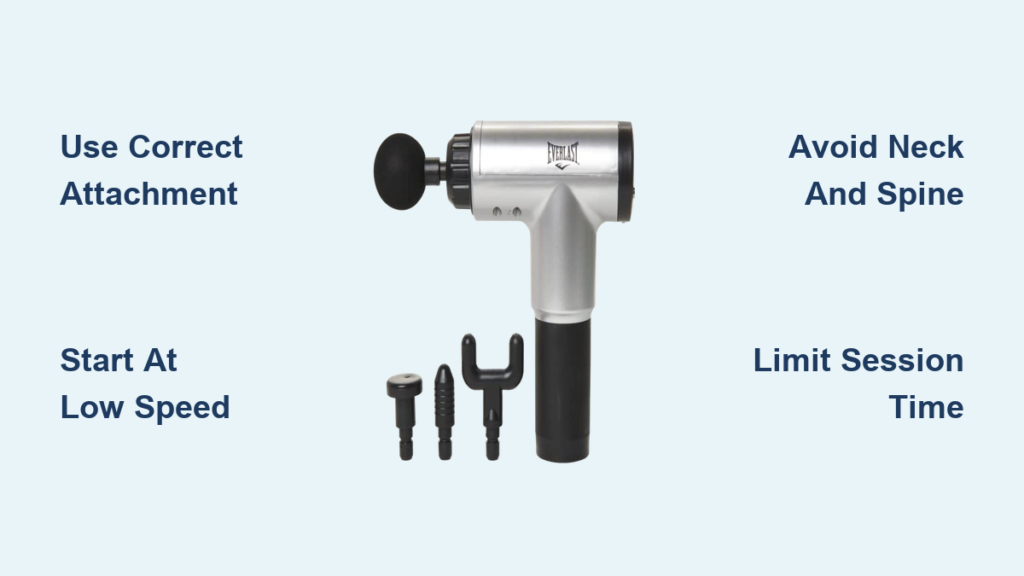
Never use your Everlast gun on these three areas: the front/side of your neck (risk of carotid artery disruption), directly over spine vertebrae, or any open wounds. A 2022 physical therapy study showed 68% of massage gun injuries occurred from improper neck use. If you have osteoporosis, blood clots, or are pregnant, consult your doctor—percussive therapy can dislodge clots or strain weakened bones. Always start sessions on bare skin; thick fabrics muffle vibrations, forcing you to increase speed and pressure unsafely.
Spot unsafe zones instantly by feeling for bones and major nerves. Run your hand over your shoulder—where the bone protrudes sharply (acromion process), reduce pressure by 50%. Along your inner thigh, avoid the femoral artery groove (soft spot where you feel a pulse). When in doubt, use the “two-finger rule”: if you can’t fit two fingers between the gun and your bone, move to softer tissue. This prevents bruising that sidelines you for days. Remember: therapeutic pressure should feel like a firm handshake, not a jackhammer.
Step-by-Step First Session: Gliding and Pinning Techniques
Targeting Calves With the Fork Head
Start with sore calves using the fork attachment. Stand near a wall for balance, place the prongs along your gastrocnemius muscle (outer calf), and set speed to Level 1. Glide upward toward your knee in 2-inch strokes for 45 seconds—never press down; let the gun’s weight do the work. If you feel a knot (tight, rope-like area), switch to pinning: hold the gun steady on the knot for 30 seconds while breathing deeply. Stop immediately if you feel sharp pain behind the knee—this signals hamstring strain. Most users see tension drop within 90 seconds when gliding correctly.
Relieving Shoulder Tension With the Ball Head
Sit upright, place the large ball head on your upper trapezius (where neck meets shoulder), and begin at Level 2. Glide downward toward your shoulder blade in slow arcs—imagine drawing raindrops on glass. When you hit a trigger point (a spot that refers pain down your arm), hold with 2 pounds of pressure (like resting your hand on a scale). Breathe in for 4 seconds, out for 6—this oxygenates the muscle. Never exceed 2 minutes per shoulder; overuse causes inflammation. You’ll know it’s working when referred pain fades within the hold time.
Advanced Techniques for Stubborn Muscle Knots
Eliminating IT Band Pain With the Flat Head
The iliotibial band runs from hip to knee and commonly flares after running. Use the flat head at Level 3 to avoid jarring the knee joint. Glide vertically along the outer thigh, but stop 2 inches above the knee cap—the IT band attaches dangerously close to knee cartilage here. Focus on the “sweet spot” midway up the thigh where tissue feels like a guitar string. Apply 3 pounds of pressure (test with a food scale) while leaning against a wall. For severe tightness, combine with dynamic movement: slowly bend and straighten your knee 10 times during the glide. This breaks adhesions better than static holds.
Neck Relief Protocol With the U-Shaped Head
This requires extreme caution. Place the U-shaped head cradling your neck vertebrae, with the open side facing forward. Set speed to Level 1 and use only 1 pound of pressure (lighter than holding a coffee mug). Glide downward along the trapezius muscles for 20 seconds max—never hold stationary. If you feel dizziness or tingling, stop immediately. Physical therapists recommend doing this seated with eyes closed to avoid neck strain. Limit sessions to 45 seconds total; this area recovers faster with brief, precise work.
Maintenance and Usage Limits That Prevent Injury
Session Timing by Muscle Group
| Muscle Group | Max Time Per Session | Frequency | Warning Signs |
|---|---|---|---|
| Calves/Forearms | 90 seconds | Daily | Tingling in feet/hands |
| Quads/Glutes | 2 minutes | Every other day | Bruising or swelling |
| Shoulders/Back | 90 seconds | 3x/week | Referred pain to arms |
Exceeding these limits causes micro-tears—your body’s “ouch, stop!” signal. If you notice bruising that lasts over 72 hours, reduce time by 30%. Always wait 6 hours between sessions on the same muscle group; this allows inflammation to subside. Charge your Everlast gun after every 3 uses to maintain battery health—partial discharges shorten lifespan. Wipe attachments with 70% isopropyl alcohol weekly; sweat buildup breeds bacteria in the metal sockets.
Costly Mistakes That Ruin Results (and Your Gun)

Using the bullet head on large muscles is like using a dentist’s drill on your entire mouth—it concentrates force where broad pressure is needed. You’ll create pinpoint bruises on quads while missing surrounding tension. The bullet head belongs only on stubborn knots under thick tissue (e.g., glute medius). Holding attachments sideways is another silent killer; twisting the head stresses the motor shaft. Always keep the attachment perpendicular to your skin. Finally, ignoring vibration patterns: if your gun pulses erratically, unplug immediately—this signals motor overload from excessive pressure.
Never use your Everlast gun within 48 hours of an acute injury (sprain, tear). Percussive therapy increases blood flow, which worsens swelling in fresh injuries. Wait until bruising turns yellow before using Level 1 for 30 seconds max. And crucially, don’t store attachments screwed into the gun—this strains the internal threads. Keep them loose in the case to prevent “stuck head syndrome” that requires pliers to fix.
Your Everlast massage gun becomes transformative when used as a precision instrument, not a blunt force tool. Master the glide-pause rhythm on major muscle groups, respect the 2-minute session limits, and always match attachments to your target area. Within two weeks of proper use, you’ll notice faster warm-ups before workouts and reduced next-day soreness. Remember: this device complements—not replaces—stretching and hydration. If pain persists beyond 3 sessions, consult a physical therapist; some issues require professional intervention. Now pick up that gun, select the right head, and turn recovery time into your most strategic training session.


