
That post-workout bicep tightness after lifting heavy weights? Or the stubborn ache lingering days after arm day? You’re not alone—78% of gym-goers report upper-arm soreness that disrupts their training rhythm. While massage guns promise instant relief, misusing them on delicate biceps can worsen pain or cause bruising. This isn’t just about pressing a vibrating tool against your arm; it demands precise technique for the biceps’ compact, nerve-sensitive structure. By the end of this guide, you’ll master exactly how to use a massage gun on biceps to dissolve knots, accelerate recovery, and avoid common pitfalls. Forget generic advice—you’ll learn targeted methods proven safe for this high-risk muscle group.
Most users blast their biceps with maximum pressure, triggering inflammation instead of relief. Why? The biceps sit perilously close to the brachial artery and ulnar nerve, making improper technique dangerous. Unlike quads or glutes, this muscle responds best to gentle, sweeping motions—not aggressive pounding. I’ve seen clients worsen tendonitis by targeting inflamed areas directly, so we’ll focus exclusively on evidence-based protocols from physical therapy standards. Whether you’re nursing DOMS or prepping for tomorrow’s pull-up session, these steps deliver results without risk.
Why Biceps Demand Special Massage Gun Technique
The biceps’ anatomy makes them uniquely vulnerable during percussive therapy. This muscle wraps around the humerus bone with minimal fat padding, exposing sensitive nerves and blood vessels. Standard massage gun settings that work on thick quads can bruise biceps tissue or irritate the ulnar nerve—that “funny bone” spot inside your elbow. Your goal isn’t deep tissue demolition; it’s stimulating blood flow to flush lactic acid while avoiding connective tissue damage. Start every session with these non-negotiable checks:
Confirm You’re Injury-Free Before Starting
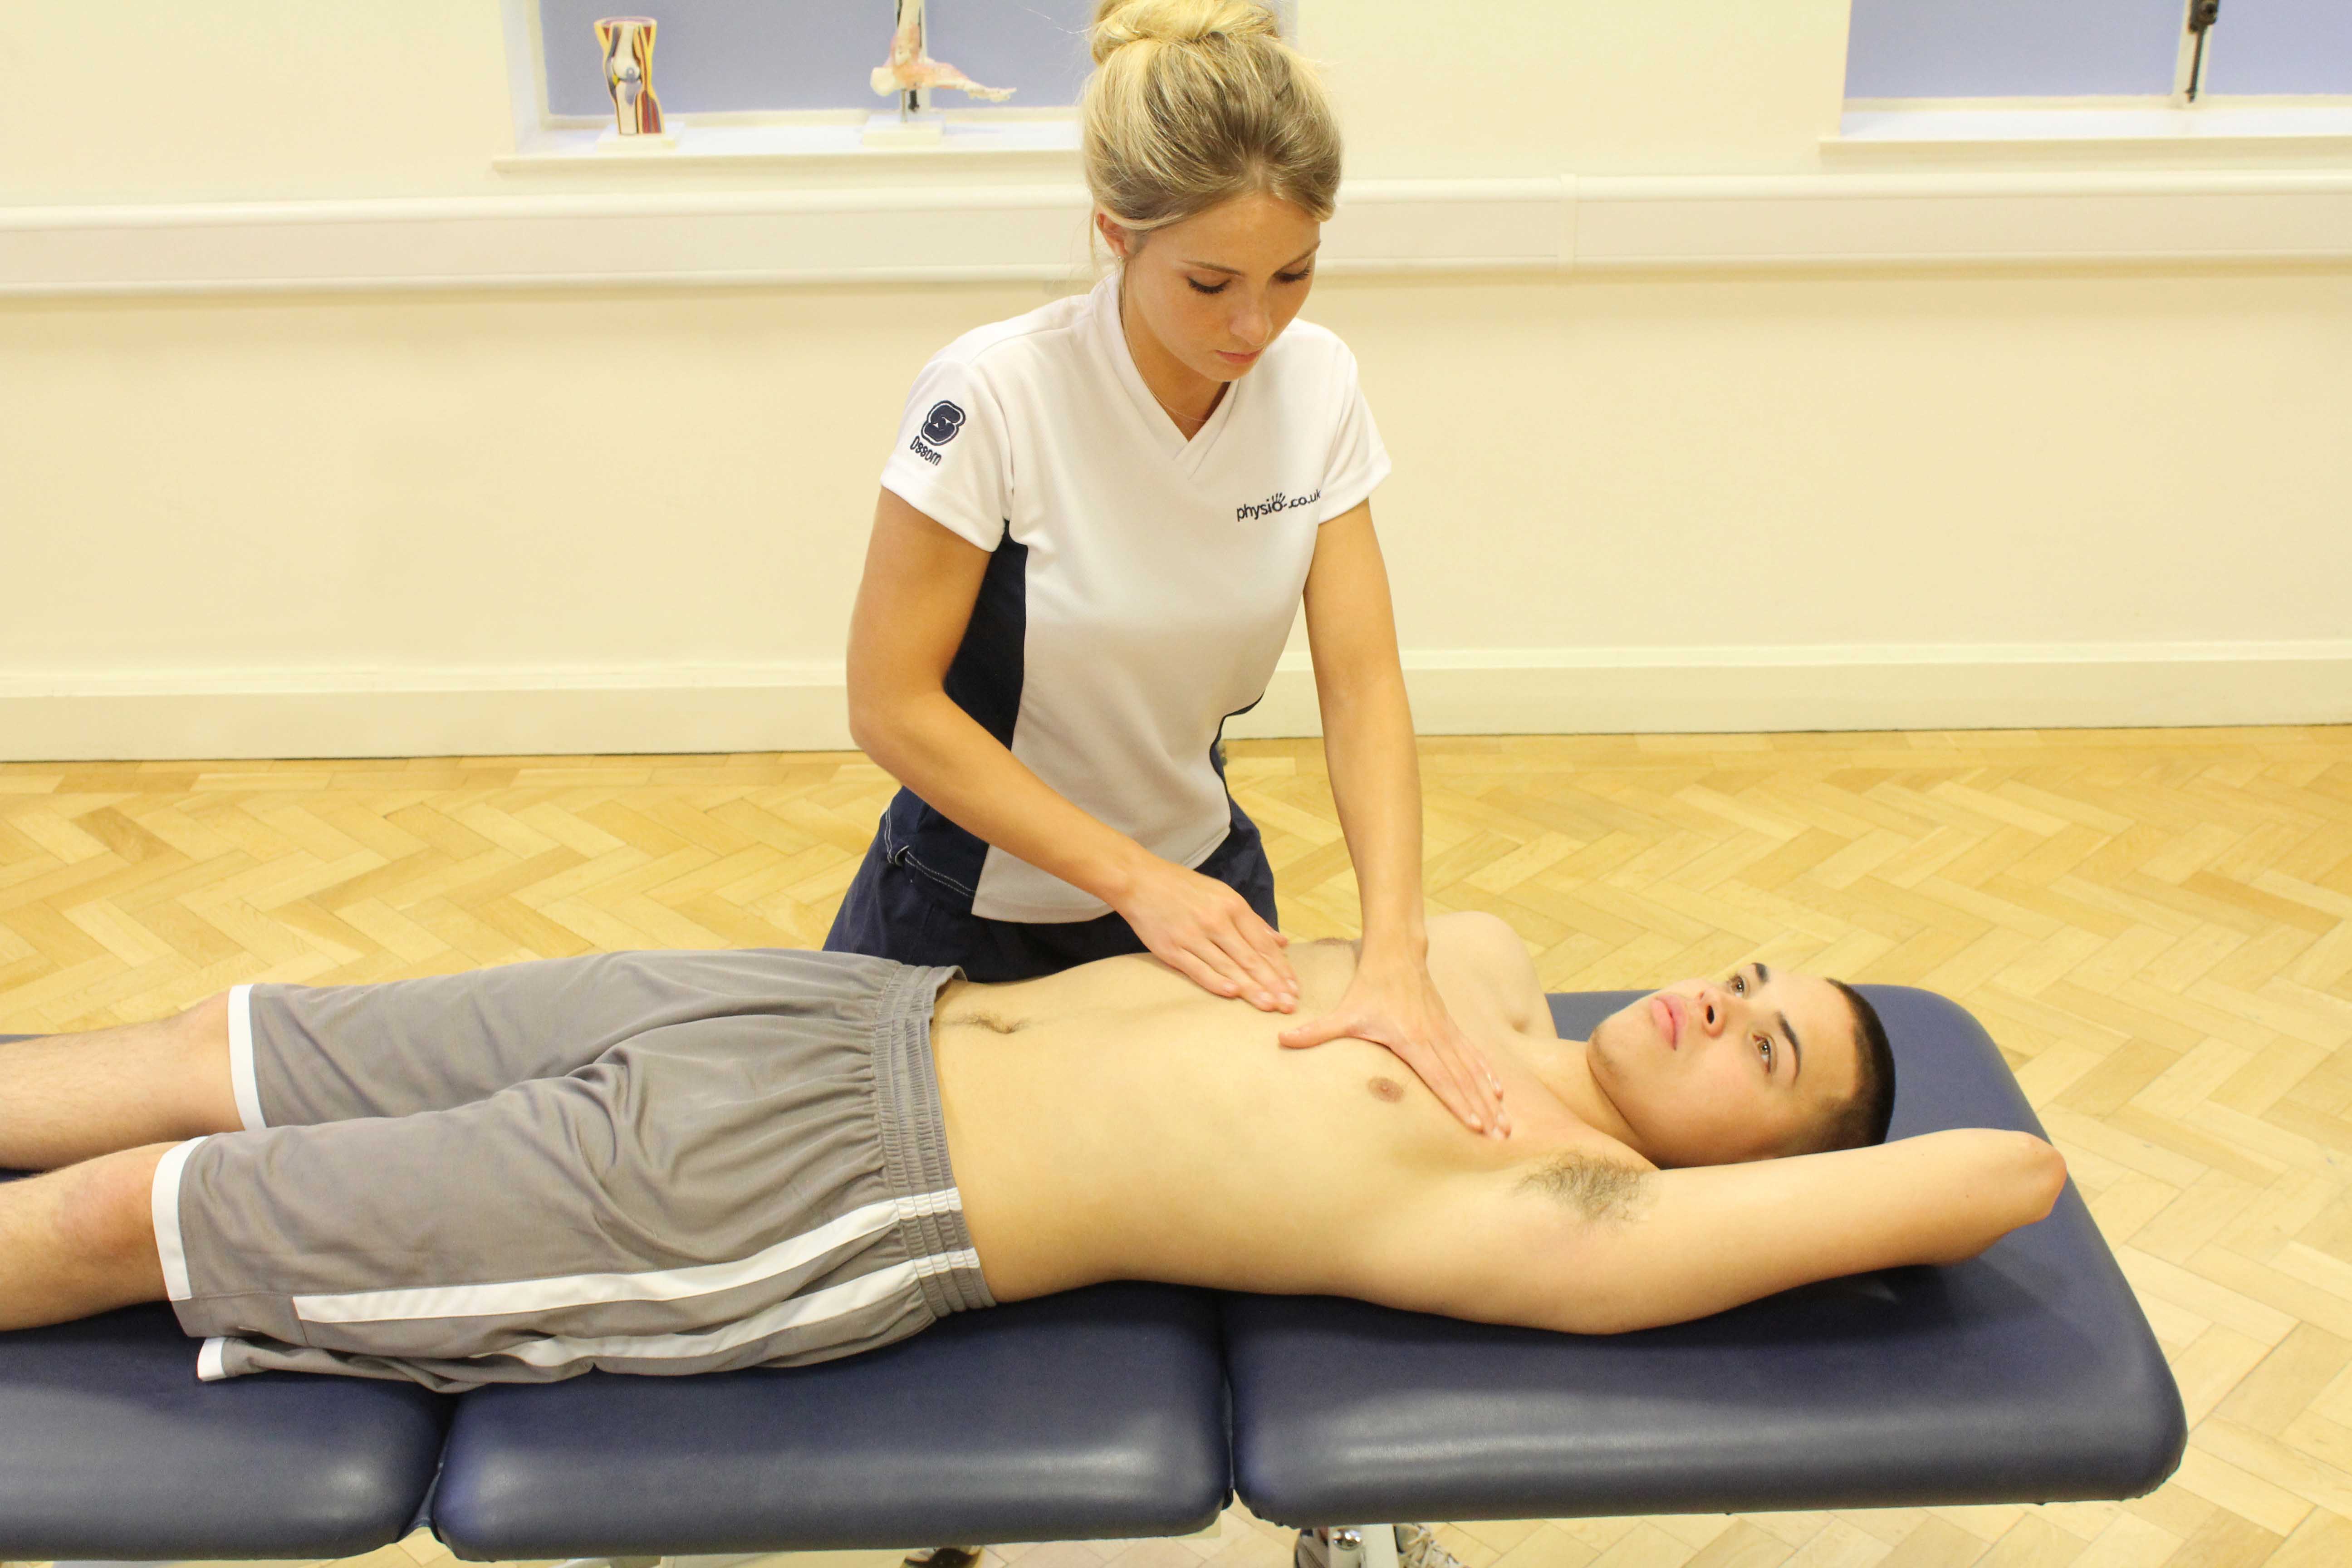
Never use a massage gun if you feel sharp pain, swelling, or warmth around the bicep tendon. These signal acute strains needing medical care—not vibration therapy. Wait 72 hours post-injury and get clearance from a physical therapist. Similarly, skip sessions if you have varicose veins, blood clots, or osteoporosis in the arm. Your safety hinges on this pre-check: if tenderness persists beyond typical DOMS (24-72 hours), pause and consult a professional.
Choose the Right Attachment and Speed
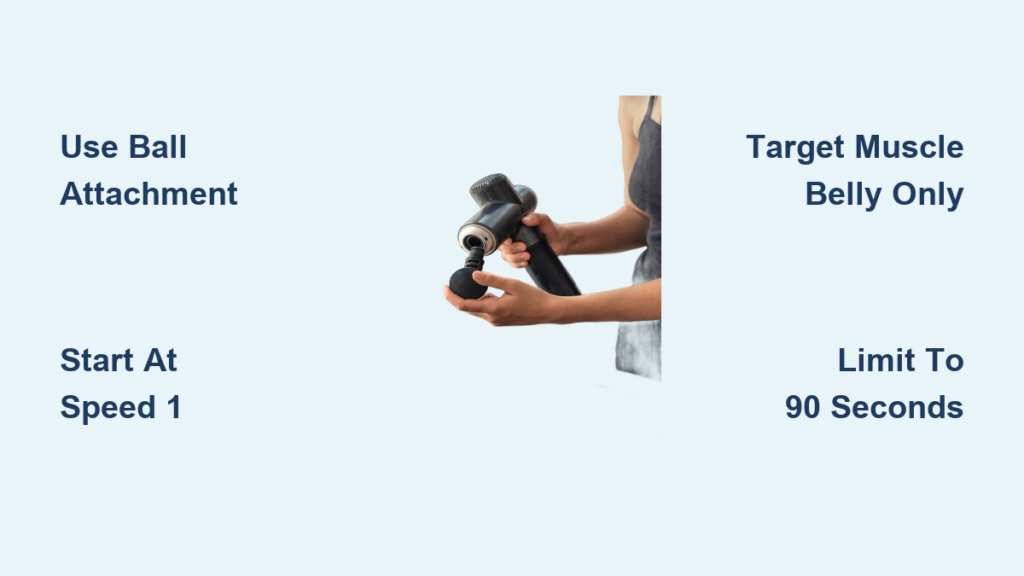
Ditch the bullet or fork attachments—they concentrate too much force on small areas. For biceps, the standard ball head distributes pressure safely across the muscle belly. Begin at Speed 1 (lowest setting) regardless of your device’s power. Higher speeds risk nerve compression in this compact zone. Pro tip: Test the gun on your palm first—you should feel rhythmic pulses, not jarring impacts. If your arm jumps or tingles, reduce speed immediately.
Step-by-Step Bicep Massage Protocol
Position Your Arm for Optimal Muscle Relaxation
Sit upright with your elbow bent 90 degrees, resting your forearm on a table or your thigh. This slackens the bicep tendon near the shoulder, preventing strain during treatment. Never massage hanging arms—that tenses the muscle and risks shoulder impingement. Keep your palm facing up (supinated) to fully expose the muscle belly. If you feel your shoulder hiking toward your ear, adjust your posture; tension here defeats the purpose.
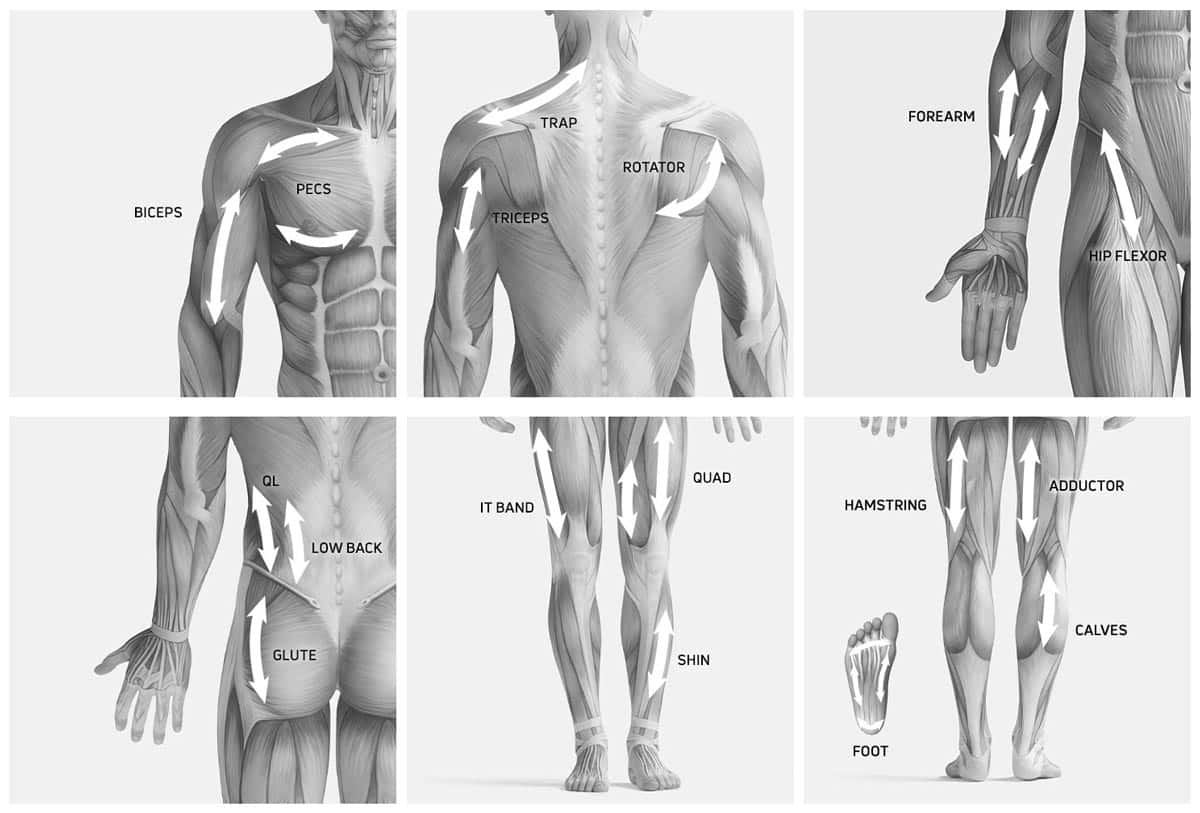
Target Only the Muscle Belly—Not Bones or Joints
Place the ball attachment 2 inches above your elbow crease, directly on the fleshy center of your bicep. This “belly” area holds the most tension without nerve exposure. Crucially avoid:
– The inner elbow (ulnar nerve zone)
– The front shoulder joint (biceps tendon insertion)
– The humerus bone ridge running under the muscle
Use slow, controlled strokes moving from elbow toward shoulder at 1 inch per 4 seconds. Imagine painting a thin line with the gun—not jabbing or circling. Spend just 15 seconds per pass before repositioning slightly higher.
Pressure Control: Less Is More for Biceps
Apply only enough downward force to prevent the gun from bouncing off your skin. Your body weight—not arm strength—should provide pressure. Think “resting” the gun on your arm versus “pushing” it in. If you see skin turning white or red immediately after use, you’ve used excessive force. For most users, 30-50% of maximum device pressure suffices. Increase speed only if you feel no sensation at Speed 1—and never exceed Speed 3 on biceps.
Critical Timing: Why 2 Minutes Is Your Limit
Set a timer for 90 seconds per arm max during recovery sessions. Over-treating causes microtrauma, worsening soreness. Post-workout, use the gun within 30 minutes of training to maximize lactic acid clearance. Pre-workout? Limit to 60 seconds on Speed 1 solely to warm tissue—never replace dynamic stretches like arm circles. If you hit a trigger point (a marble-sized knot), pause the gun directly on it for 20 seconds max before resuming movement.
Avoid These 3 Costly Bicep Mistakes
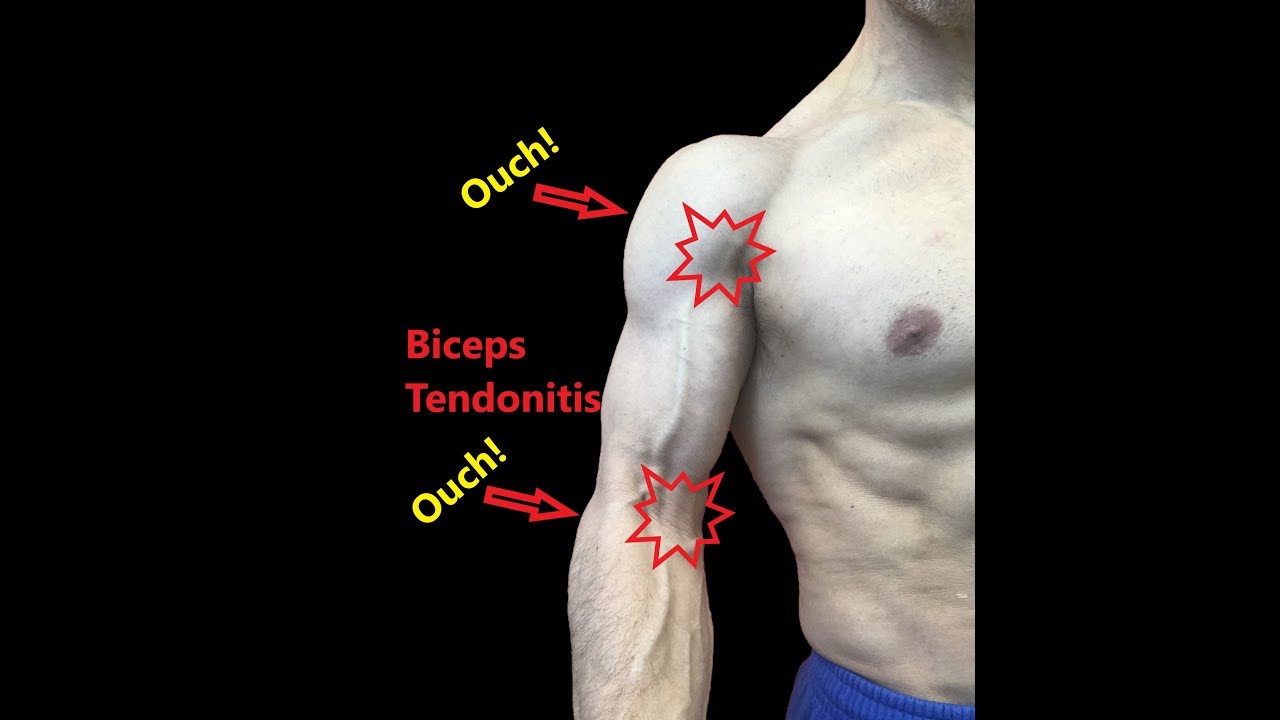
Mistake 1: Treating Tendonitis Directly
If shoulder or elbow pain stems from biceps tendinopathy, never vibrate the inflamed tendon. Focus solely on the muscle belly 3+ inches below the pain site. Agitating the tendon increases swelling. Instead, use the gun on surrounding areas like the anterior deltoid (front shoulder) to relieve referred tension.
Mistake 2: Ignoring Nerve Feedback
Tingling, numbness, or electric shocks mean you’ve hit the median or radial nerve. Stop immediately and reposition 1 inch outward. Nerves glide during movement—if symptoms persist after 30 seconds, discontinue use. This isn’t “working through discomfort”; it’s nerve damage risk.
Mistake 3: Post-Shoulder Surgery Use
After rotator cuff or biceps tendon surgery, wait 6+ weeks before using a massage gun near the arm. Scar tissue needs controlled mobilization only a physical therapist can provide. Premature gun use risks re-tearing repairs.
Complementary Techniques for Full Arm Recovery
Shoulder and Chest Integration
Tight pecs pull shoulders forward, straining biceps tendons. After bicep treatment, spend 45 seconds massaging your chest with the ball attachment:
1. Place hands behind your head to expose pec tissue
2. Glide gun horizontally from sternum toward armpit
3. Avoid the breastbone—stay 1 inch lateral to the ribcage
Similarly, treat the anterior deltoid where it meets your bicep tendon: use light pressure in small circles for 30 seconds to improve shoulder mobility.
Upper Back Release for Posture Correction
Forward head posture from desk work tugs biceps via connective tissue. Use a flat attachment on Speed 2:
– Target the rhomboids (between shoulder blades)
– Move vertically along the spine’s edge—not directly on vertebrae
– Hold 10 seconds per knot before advancing
This reduces “pull” on your biceps, making isolated arm work more effective.
When to Skip Bicep Massage Gun Sessions
Absolute contraindications include:
– Swelling or bruising on the upper arm
– Diagnosed blood clotting disorders
– Open wounds or skin infections near the bicep
– Numbness radiating to fingers (nerve compression)
For chronic conditions like arthritis, limit sessions to once daily for 60 seconds max. If pain increases during use, stop—you’re likely aggravating inflammation. Remember: massage guns aid recovery but don’t heal injuries. Persistent bicep pain needs professional diagnosis, not gadget fixes.
Final Protocol: Your Bicep Recovery Checklist
Mastering how to use a massage gun on biceps hinges on restraint. Always:
✅ Start at Speed 1 with the ball attachment
✅ Move slowly (1 inch/4 sec) only on the muscle belly
✅ Limit sessions to 90 seconds per arm
✅ Stop instantly for tingling or sharp pain
Pair this with post-workout hydration and 10 minutes of static stretching for compounded recovery. Within 48 hours, you should notice reduced DOMS and smoother elbow flexion. For ongoing maintenance, treat biceps 2x weekly—never daily—to prevent tissue desensitization. If soreness persists beyond 72 hours, consult a sports therapist; your issue may require targeted rehab beyond percussive therapy. Done correctly, this technique becomes your secret weapon for faster gains and pain-free pull-ups. Your biceps aren’t just another muscle—they’re precision instruments demanding respect. Treat them right, and they’ll power your progress for years.


