
Sore legs after a tough workout or long day can leave you limping, but a massage gun offers powerful relief—if you know how to use massage gun on legs correctly. Many people grab their device and randomly jab at muscles, risking bruising or nerve damage instead of finding relief. The truth is your legs contain complex muscle groups that demand precise technique, not brute force. This guide cuts through the confusion with step-by-step protocols used by physical therapists. You’ll discover exactly where to glide the gun, which attachments prevent injury, and how to transform post-workout agony into rapid recovery—all while avoiding dangerous areas that could cause lasting harm.
Leg muscles bear the brunt of daily movement, making them prime targets for percussive therapy. When applied properly, a massage gun boosts blood flow to clear lactic acid, breaks up stubborn knots in quads and hamstrings, and restores mobility faster than passive rest. But misuse turns this recovery tool into a hazard—especially around delicate nerves behind the knee or the femoral artery in your groin. Following the exact techniques in this guide ensures you harness the full benefits while keeping your legs safe and functional. Let’s get your recovery on track.
Essential Safety Steps Before You Start
Skipping safety checks turns your massage gun into a potential injury risk, especially on legs with critical nerves and blood vessels. These non-negotiable steps protect you from preventable harm.
Confirm Medical Clearance First
Consult your doctor or physical therapist before using a massage gun if you have varicose veins, blood clot history, unexplained swelling, or recent injuries. Never apply percussive therapy over open wounds, acute inflammation, or suspected muscle tears. If you feel sharp pain during use—not the dull ache of muscle release—stop immediately and seek professional advice. This is crucial for leg safety since areas like the popliteal fossa (behind the knee) contain nerves and arteries vulnerable to excessive pressure.
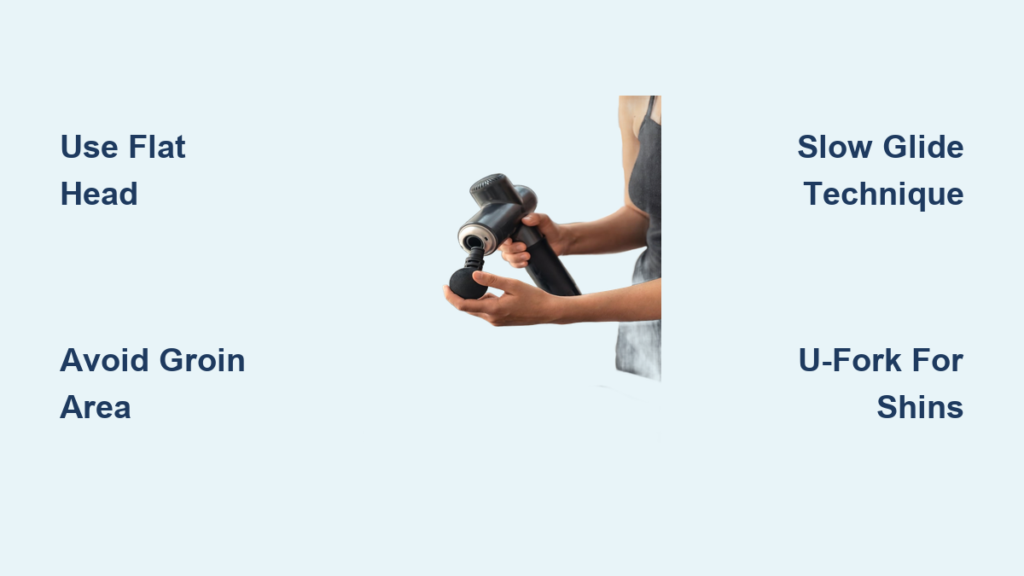
Select Correct Attachments for Leg Muscles
Your massage gun’s attachments aren’t interchangeable toys—they’re precision tools for specific leg zones. For broad quads or hamstrings, use a large round ball or flat head to distribute pressure evenly. Switch to a U-shaped fork attachment for shins to straddle the tibia bone safely. Reserve the bullet tip only for deep glute knots, applying feather-light pressure. Using the wrong attachment—like a bullet head on your IT band—causes bruising and delays recovery.
Prep Skin and Device Properly
Apply a thin layer of non-greasy lotion (like arnica oil) to reduce skin friction before starting. Ensure your device is fully charged and begin on the lowest speed setting—even if you’re experienced. Position yourself seated with legs extended on a stable surface. Never use the gun on legs while standing unassisted; losing balance could jam the device against a bony area like your kneecap.
Target Leg Muscles Without Risking Injury

Knowing exactly where to aim—and where to avoid—is the difference between relief and injury. Your legs contain high-risk zones that demand strict avoidance.
Focus on Quads, Hamstrings, and Calves
For quads: Sit with legs straight, placing the gun just below the hip bone. Glide slowly downward toward the knee, stopping 2 inches above the kneecap. For hamstrings: Lie face-down and move from the glute crease toward the knee, halting 3 inches short of the joint. Calves respond best when seated—target the gastrocnemius muscle bulge while avoiding the Achilles tendon. Spend 60 seconds per muscle section, moving at a snail’s pace (1-2 inches per second).
Prioritize Glutes While Protecting Nerves
Stand sideways against a wall and position the gun on your gluteus maximus—the fleshy “cheek” muscle. Never press directly over the tailbone or hip bone. Move in small circles over tight spots, but stop instantly if you feel tingling down your leg (a sign of sciatic nerve irritation). Limit glute sessions to 90 seconds per side; overuse here risks nerve compression.
Critical Danger Zones to Avoid
These areas demand zero contact with your massage gun:
– Behind the knee: Contains the popliteal artery and tibial nerve
– Inner thigh groin crease: Houses the femoral artery and nerve bundle
– Shin bone (tibia): Only massage surrounding muscles with a fork attachment
– Kneecap and hip bones: Direct pressure causes bruising and inflammation
– Varicose veins or swollen areas: Risk of dislodging blood clots
Step-by-Step Leg Massage Protocol
Follow this exact sequence to maximize recovery while minimizing session time. Each step is designed for self-application without assistance.
Warm Up Legs Before Percussion
March in place for 2 minutes to increase blood flow—cold muscles bruise easily under percussion. Then apply light lotion to your quads, hamstrings, and calves. Start the gun on lowest speed, holding it perpendicular to your skin. Never press the head into the muscle; let the device’s weight provide pressure.
Master the Slow-Glide Technique
Move the gun at a deliberate 1-2 inches per second along muscle fibers—not across them. For example, on hamstrings, glide parallel to the floor from hip to knee. If you find a tender knot, pause for 20-30 seconds while taking deep breaths to encourage release. Critical rule: Never hold the gun stationary for more than 30 seconds on any spot—this causes microtrauma.
Muscle-Specific Application Guide
- Quads: Sit on a chair, extend one leg. Start gun below hip bone, glide down toward knee (avoiding kneecap) for 60 seconds. Repeat on inner/outer quad sections.
- IT Band: Lie on your side. Use flat head with light pressure, moving from hip bone to just above knee in 30 seconds. Never press hard—this tissue is dense but sensitive.
- Shins: Attach U-fork head. Straddle the tibia bone, gliding along the tibialis anterior muscle for 30 seconds per shin. Stop if you feel bone contact.
Choose Attachments Like a Physical Therapist

Your attachment choice directly impacts safety and effectiveness—especially on legs with bony prominences.
Flat Head for Quads and Hamstrings
This wide, smooth attachment covers maximum surface area without digging into muscle. Ideal for post-run quad recovery, it distributes force evenly to prevent bruising. Use on medium speed for 60 seconds per quad section, moving in slow vertical lines from hip to knee.
U-Fork Head for Shin Splint Relief
This is non-negotiable for tibialis anterior work. The fork’s grooves cradle the shin bone while massaging surrounding muscles. Apply light pressure at lowest speed, gliding upward from ankle to knee for 30 seconds. Warning: Using any other attachment here risks stress fractures.
Ball Head for Calves and Glutes
The large round ball provides deep-but-safe penetration for thick calf muscles. Position yourself seated, placing the ball on the gastrocnemius bulge. Move in small circles for 45 seconds per calf, avoiding the Achilles tendon. For glutes, use this head on low speed only—high settings here can irritate the sciatic nerve.
8-Minute Post-Workout Leg Recovery Routine
Perform this sequence 2-3 times weekly after intense activity or when legs feel tight:
- Glutes (90 seconds/side): Stand against wall, target cheek muscle with ball head on low speed.
- Quads (60 seconds/side): Sit, use flat head from hip to knee (avoid kneecap).
- Hamstrings (60 seconds/side): Lie face-down, glide from glutes toward knee.
- Calves (45 seconds/side): Seated, ball head on muscle bulge (avoid Achilles).
- Shins (30 seconds/side): U-fork head straddling tibia bone.
- IT Band (20 seconds/side): Lie sideways, flat head with light pressure.
Non-Negotiable Safety Rules for Leg Use
Break these rules and you risk nerve damage or blood vessel injury:
- Never exceed 2 minutes per muscle group—overuse causes inflammation.
- Avoid the inner thigh groin area completely—femoral artery damage is life-threatening.
- Stop immediately for nerve pain (shooting, tingling, or numbness).
- Never use high speed on shins or behind knees—bone and nerve proximity demands low settings.
- Skip sessions if you have swelling or unexplained bruising—could indicate DVT.
Using a massage gun on legs correctly transforms recovery time—but improper technique creates new problems. By targeting quads with slow downward glides, protecting the IT band with light pressure, and always using the U-fork for shins, you’ll unlock faster mobility without risking injury. Remember: percussion therapy should feel like a deep, rhythmic throb—not sharp pain. If your legs still ache after consistent proper use, consult a physical therapist; persistent soreness may signal underlying issues needing professional care. Stick to these protocols, and your legs will thank you with renewed power and resilience.


